Device Links
Is your PC working slower than usual? This might be a sign it’s overheating. It’s a common issue that will make you less productive as you try to figure out a solution.
Unless you fix the heat issue, your computer will start to shut down unexpectedly, and its components may even become permanently damaged. Also, your fan can get noisy over time, ruining your Windows user experience. However, knowing how to control your fan properly will help you bypass these problems.
This article will go over the ways you can control the fan speed on a Windows 10 and Windows 11 PC so that you can keep your device up and running.
How to Control Fan Speed on a Windows 10 PC
There are several ways you can control the fan’s speed on a Windows 10 PC. But it’s also important that you learn more information about your fan.
How to Identify the Fan Type
Before you start adjusting your fan controls, you’ll need to understand the type of fan you have inside your PC. Here’s how to do it:
- Power down the computer and unplug the power cable.

- Remove the left-side panel.

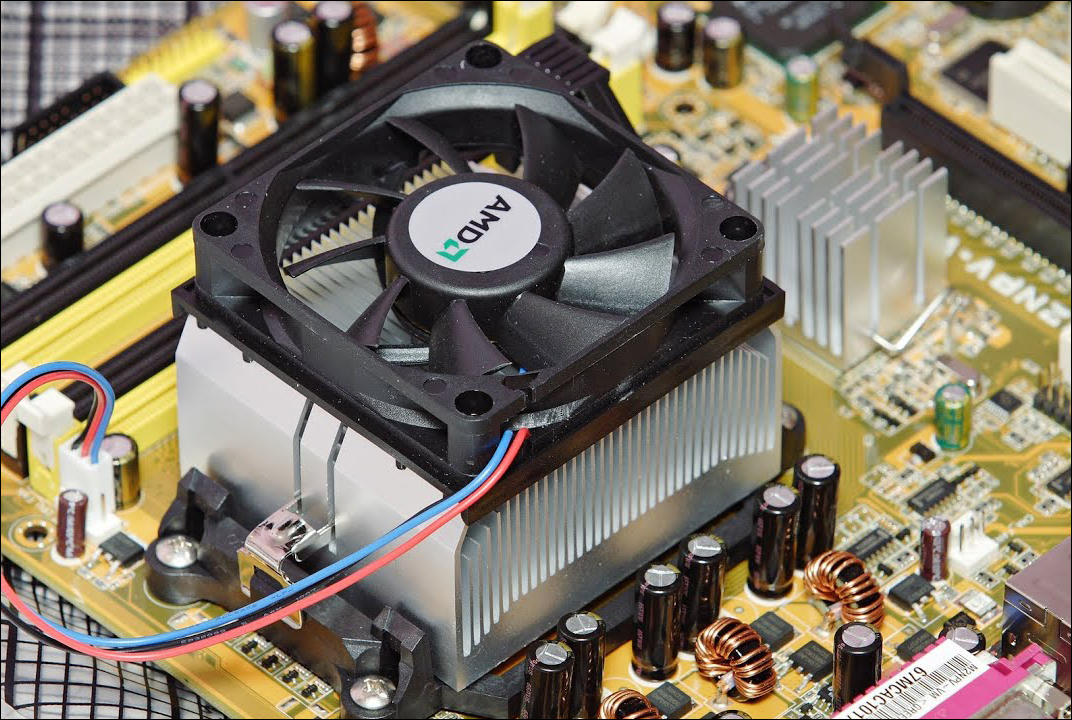
- Locate the CPU cooler. Usually, it’s at the top of the motherboard.
- Inspect the cooler’s fan and find the cable connected to it.
- Check if the cable uses a 3-pin DC or 4-pin PMW connector.

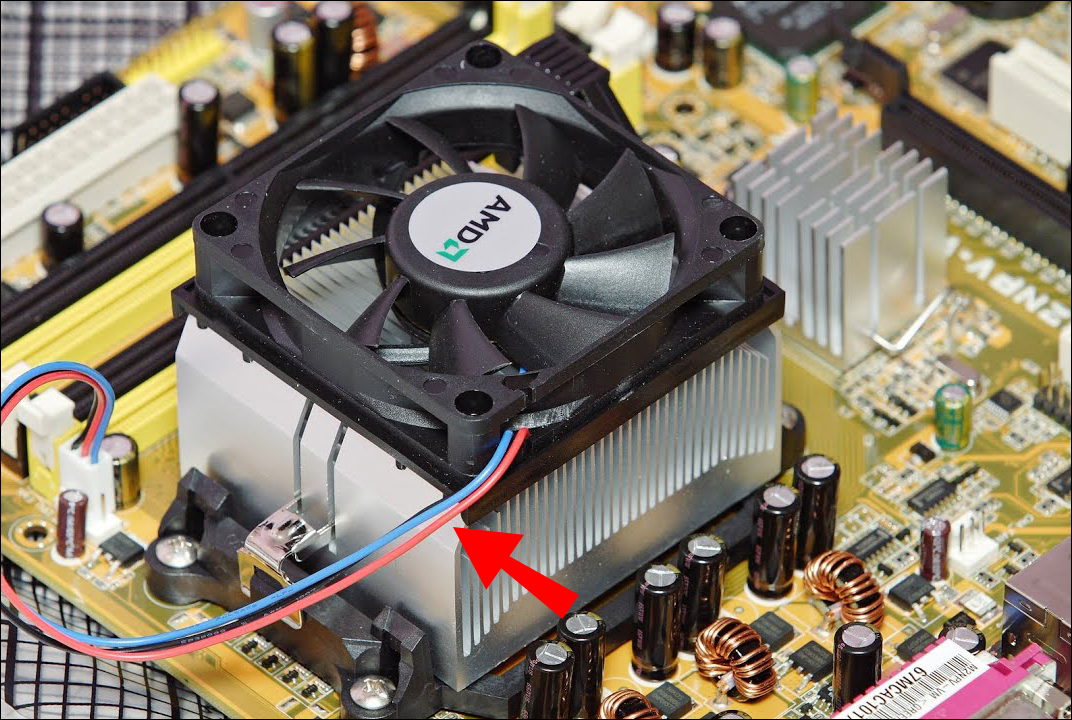
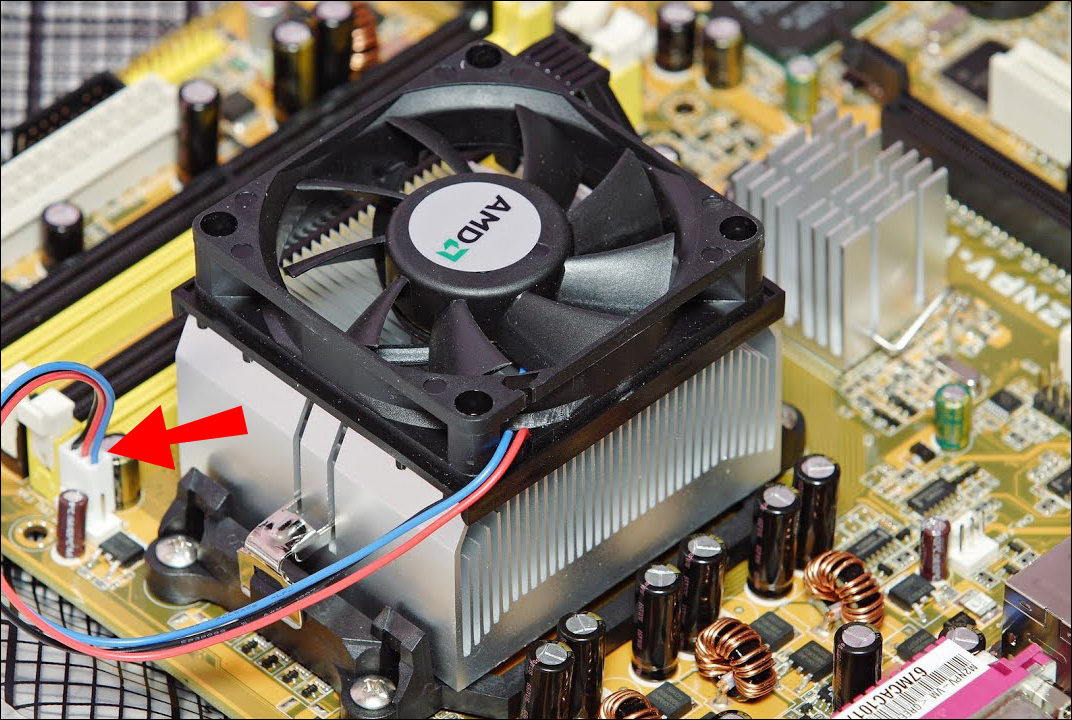
If you’re not familiar with computer wiring, you’ll still be able to determine if you have a DC or PMW connector. A DC connector has 3 points that go into the hardware, while a PMW connector has an additional fourth wire to send signals to the PC.
These two connectors can be controlled through the motherboard, software, or hardware. If you find any of the two attached to your fan, it’s possible to adjust your fan speed.
How to Control Fan Speed With BIOS
The quickest way to control your fan’s speed is through the Basic Input/Output System (BIOS). Since it’s built into the motherboard, you can’t access it directly from Windows.
To enter the BIOS, follow these steps:
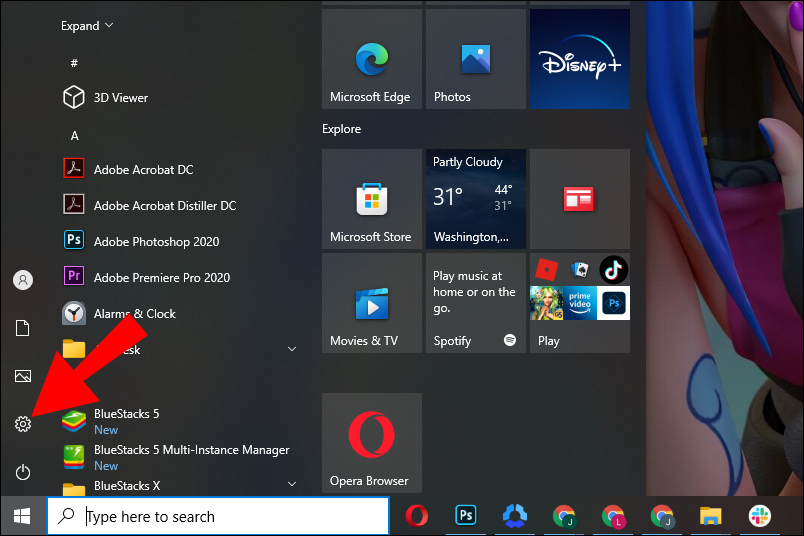
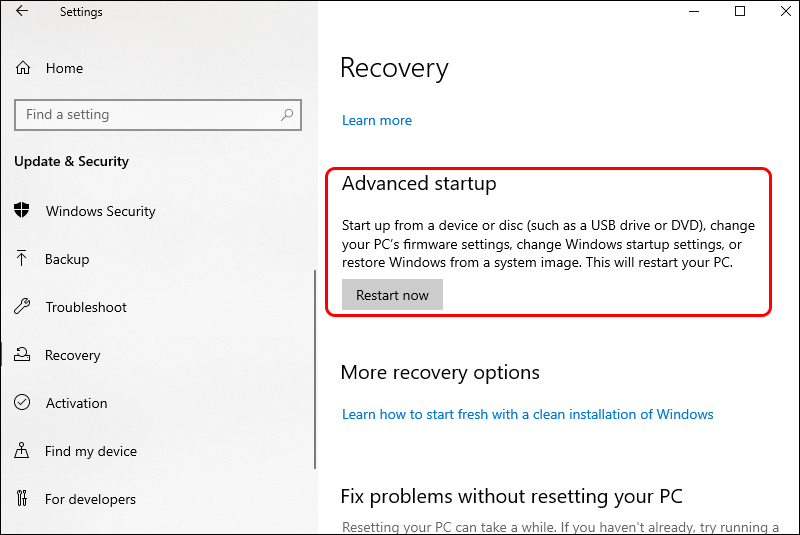
- Click the gear icon in the Start menu to open your PC’s Settings.
- Tap Update & Security.
- From the menu on the left, choose Recovery.
- Go to Advanced Startup, then select Restart Now. Your PC will reboot, and you’ll see a new menu.
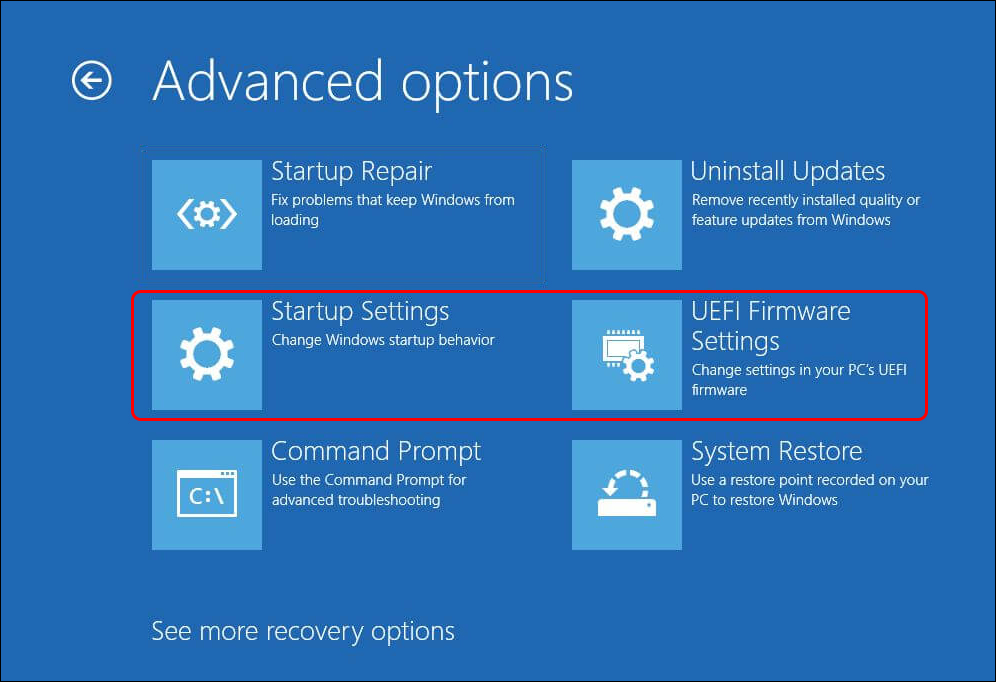
- Find Troubleshoot in the pop-up menu and click Advanced options.
- Choose UEFI Firmware Settings. If this option isn’t available, go with Startup Settings.
- While your PC is restarting, press the F1 or F2 key to enter the BIOS.
- Press Restart.


Your computer will restart again and take you directly to the BIOS.
While every BIOS is different, the steps you need to take to control your fan are generally the same.
Here are the instructions:
- Look for the Hardware Monitoring section. It sometimes appears as PC Health Status.
- Enter the CPU Fan tab.

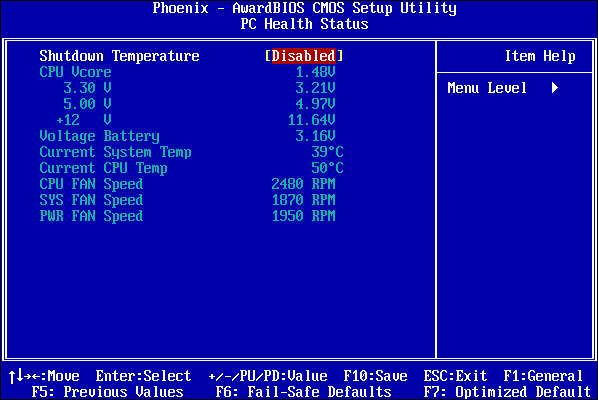
Once you’re in the fan settings, you’ll be able to adjust the following elements:
- Selecting the fan type (DC or PMW)
- Choosing the fan mode. The most common options are Full speed, Performance, and Silent.
- Picking the temperature threshold point
If you want your PC to run smoothly, the CPU shouldn’t exceed 70 degrees.
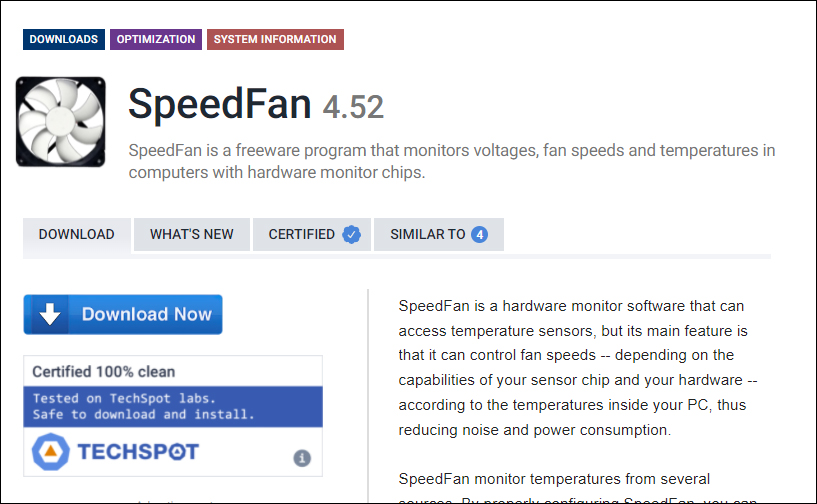
How to Control Fan Speed With Speedfan
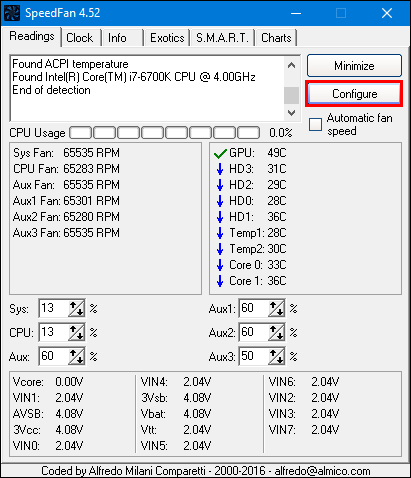
Another helpful way to modify your fan speed is by using Speedfan. The app allows users to have even more control over CPU settings. To use the tool:
- Download and install Speedfan.
- You’ll have two options:
- If you want to allow Speedfan to control your settings, choose “Automatic fan speed.”
- When you want to make changes manually, go with Configure. Then, tap Advanced.


- Go through the drop-down menu until you find your CPU type.
- Choose your fan type based on its connector (DC or PMW).
- Select Manual.
- Click OK and return to the Speedfan homepage.

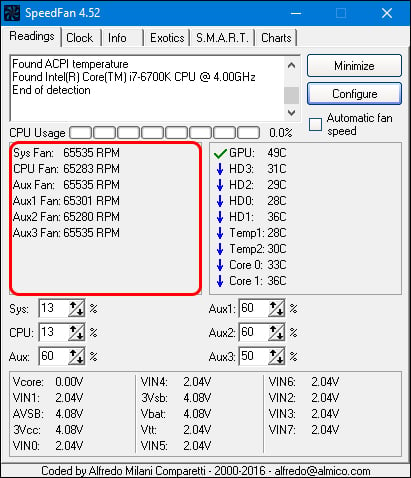

You should now be able to control the fan’s speed by pressing the arrow icons on the app’s homepage. To help you adjust the speed, you’ll also see an RPM tracker indicating when the fan’s working slower or quicker. If it’s not making as much noise and working properly, then you’ve found the optimal fan speed.
How to Control Fan Speed on a Windows 11 PC
Using a new version of an operating system can be a steep learning curve. However, it doesn’t always have to be complicated. If you’ve got Windows 11 installed on your PC, there are three ways you can control your fan. You can use PC manufacturer software, BIOS, or third-party apps.
How to Control Fan Speed on PC With PC Manufacturer Software
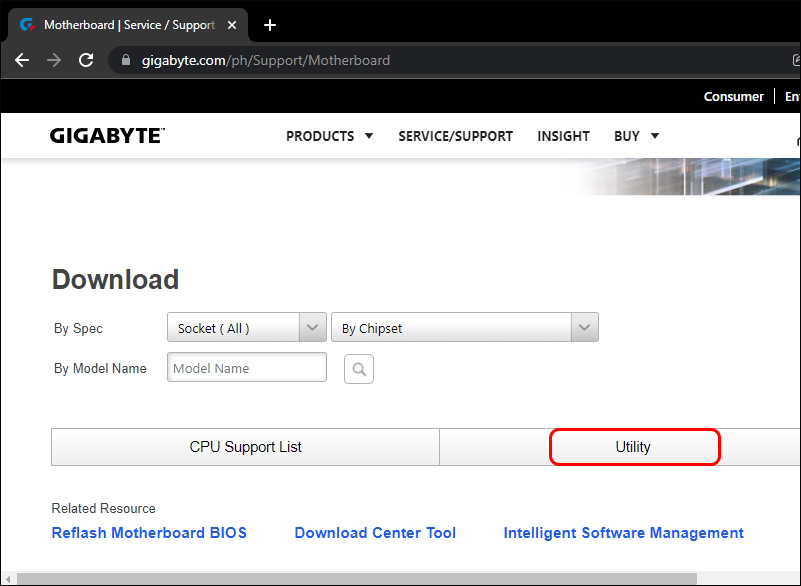
Your computer’s manufacturer creates software that is entirely compatible with your device. It’s simple to navigate and works quickly. To learn which software is the best fit for your PC, do this:
- Identify your computer model and its manufacturer. Look into the motherboard’s model and manufacturer if you’ve got a custom PC. There’s usually a label with this information on the back part of the PC.
- Go to the manufacturer’s customer support site and select your model.
- Enter the Downloads tab, then open the System Utility tab.
- Download the utility pack.
- Install and launch the pack.
- Select the fan speed settings.


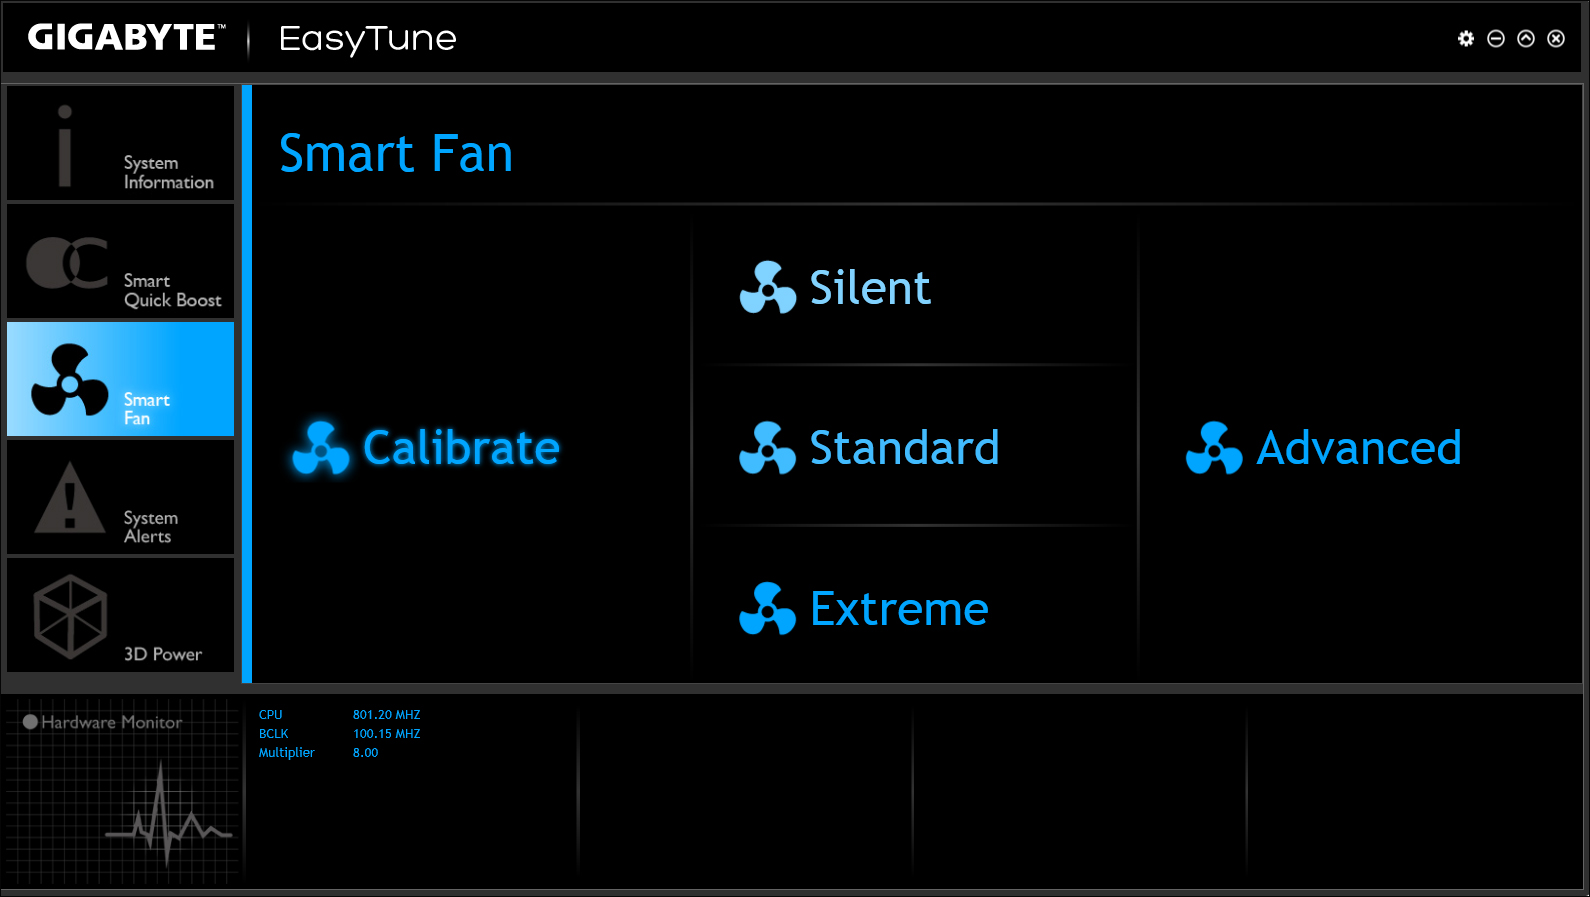
Fan settings often use a percentage system, with 100 as the maximum and 0 as the minimum. The higher your setpoint, the cooler your PC will become. Lower setpoints trigger the fan to stop cooling and create less noise.
How to Control Fan Speed on PC With BIOS
It’s relatively easy to enter the BIOS on Windows 11 and adjust fan controls that way.
- Power down the PC.
- Turn on the PC again and quickly press the BIOS shortcut key. It can be the F1, F12, or “Delete” key, depending on your PC.
- Find the fan settings section in the pop-up menu. It’s usually under PC Health, Advanced, or Overclocking.


BIOS also uses the percentage system for fan speed settings. Again, 100 is the highest setpoint, while 0 is the lowest. Once you’ve made your changes, click Save. Then, press Exit to leave the BIOS.
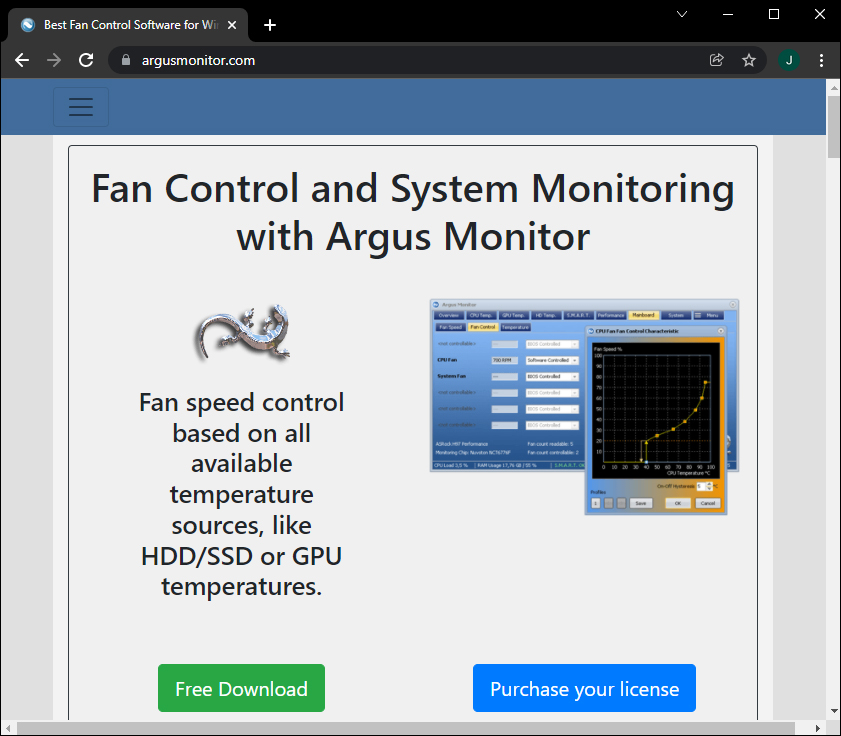
How to Control Fan Speed on PC With Third-Party Apps
Many different third-party apps will help you control your fan. SpeedFan and Argus Monitor are among the most popular ones. They all operate on the same principle, so you’ll need to follow the same instructions regardless of your app choice.
Here’s how to use Argus Monitor:
- Download and install Argus Monitor.
- Launch Argus Monitor.
- Select Fan Control in the top part of the program.

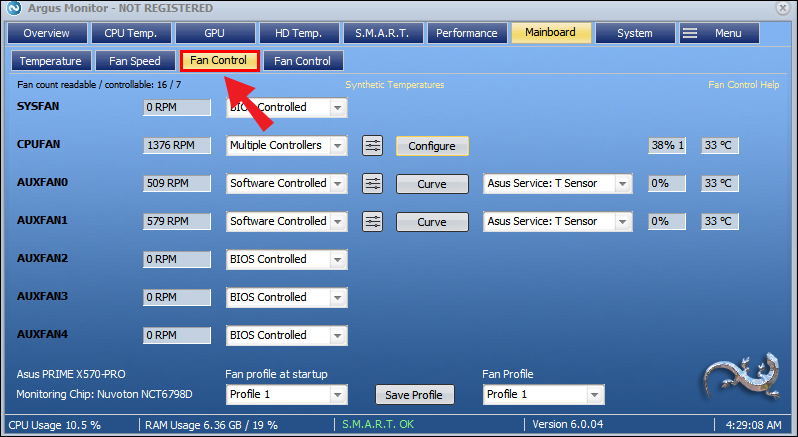
Argus Monitor’s system marks the fan’s top speed as 100 and the lowest as 0. Tweak the settings as desired, then save your changes.
It’s important to note that your speed setpoint should never be set to 0, as most coolers aren’t designed to shut down permanently. Setting fans at zero can cause them to overheat.
Take Control of Your Fan
Knowing how to adjust your fan speed is essential. It allows you to find the best temperature range for your PC and ensure its durability. Also, it will help you create a less noisy environment, so you’ll improve your concentration and become more productive.
Regardless of whether you’re using Windows 10 or Windows 11 on your computer, this article has hopefully shown you how to take control of your fan settings. All you have to do is set the right speed for you and your PC.
Does your fan’s noisiness disrupt your workflow? What are your preferred temperature settings? Let us know in the comment section.
Disclaimer: Some pages on this site may include an affiliate link. This does not effect our editorial in any way.


