These days, workflow management tools are an integral part of successful team collaboration, and Asana is the perfect representative. This cloud-based software offers countless excellent features that allow users to keep track of tasks and organize assignments.
While Asana offers a free version of the software, paid subscribers have the option of creating custom forms. This functionality is incredibly useful for requesting work projects or submitting valuable feedback. Even though Asana forms have been available since 2019, perhaps you still haven’t made the most of it.
Here is what you need to know about creating an Asana form and sharing it with other team members and outside collaborators.
Creating a Form
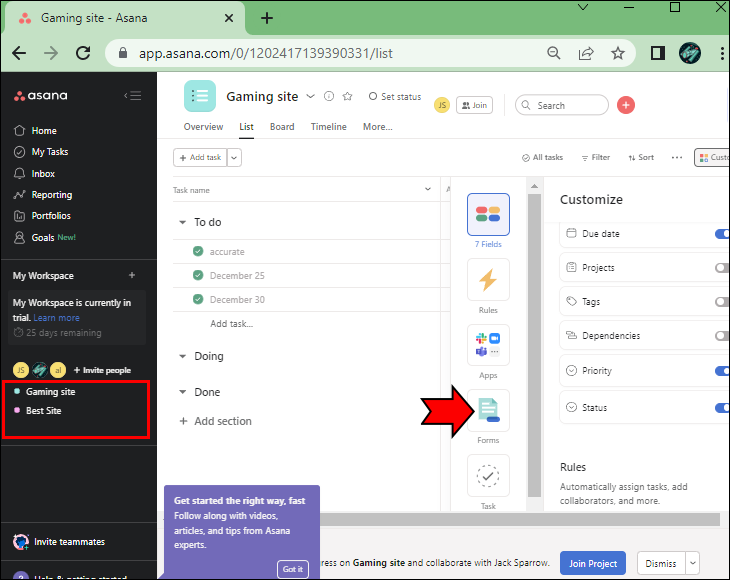
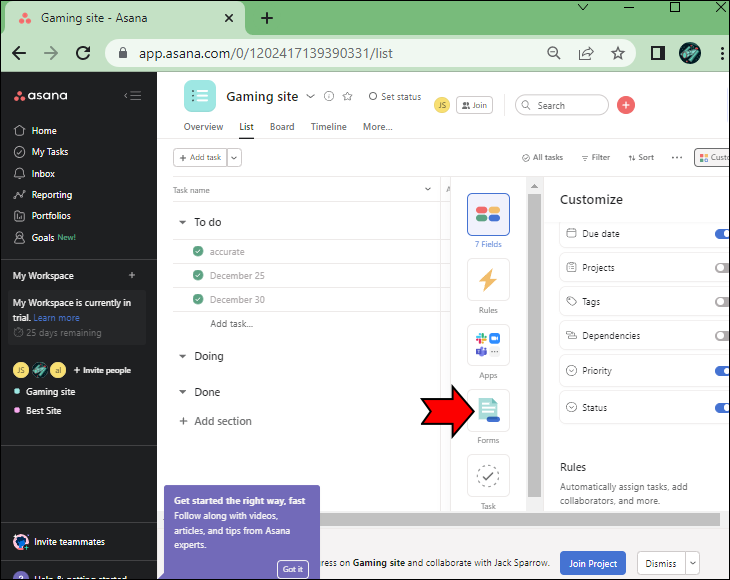
Every project in Asana has a designated Forms tab, allowing you to quickly create an intake form related to a specific work project.
For example, you may need to get every team member on board for a brainstorming session. By creating a form, you can get all the ideas in one place and keep them organized. So, how does that work?
To create an Asana form, here are the steps you need to take.
- Go to Asana and log into your account.
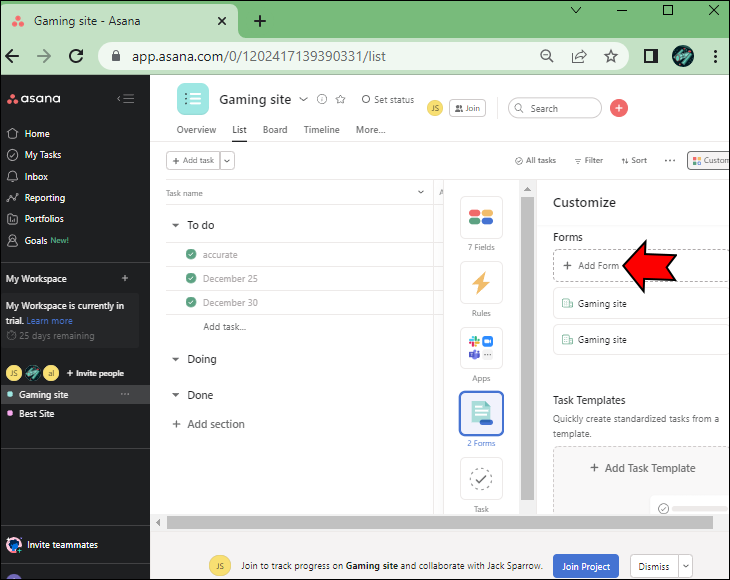
- Go to the “Project” section and navigate to the “Forms” tab.

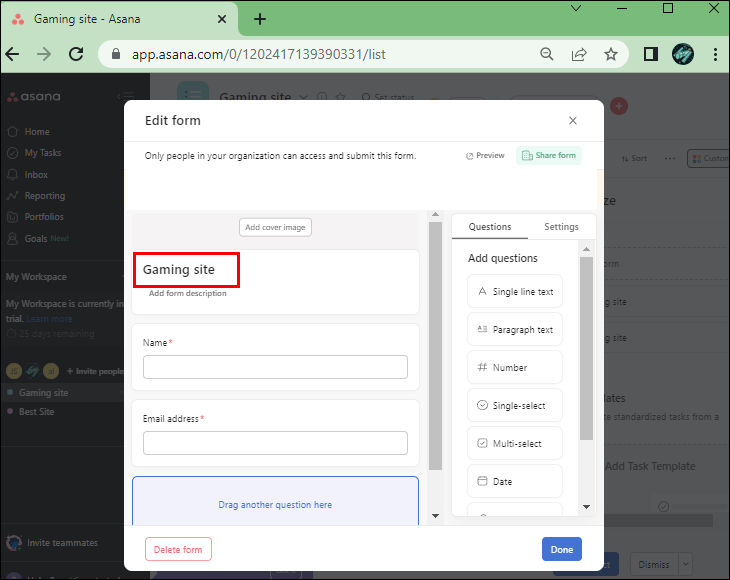
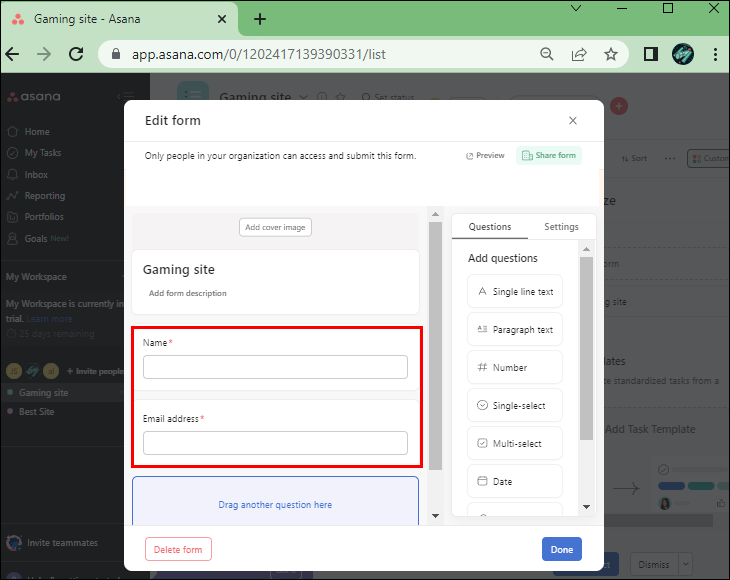
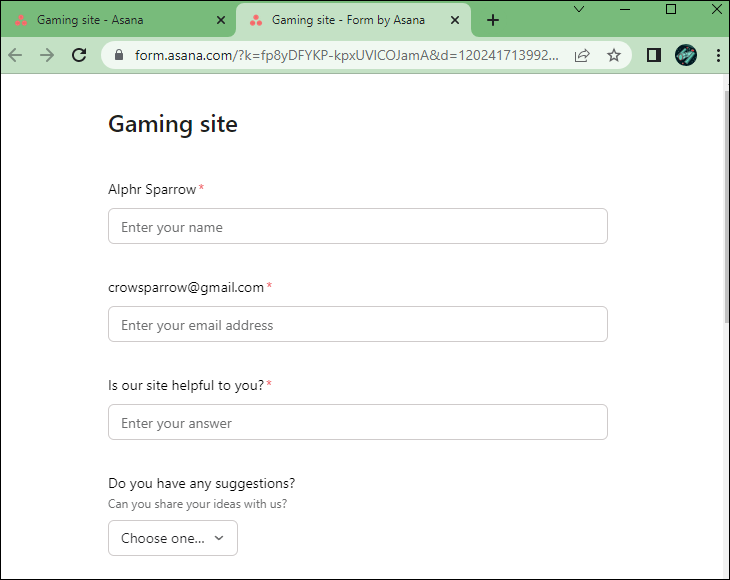
- Select the “Create a form” or “Add form” option. You’ll notice that the project’s name is the name of the form by default. But you can click to change it.
- Enter the name and email address of the team member or collaborator.
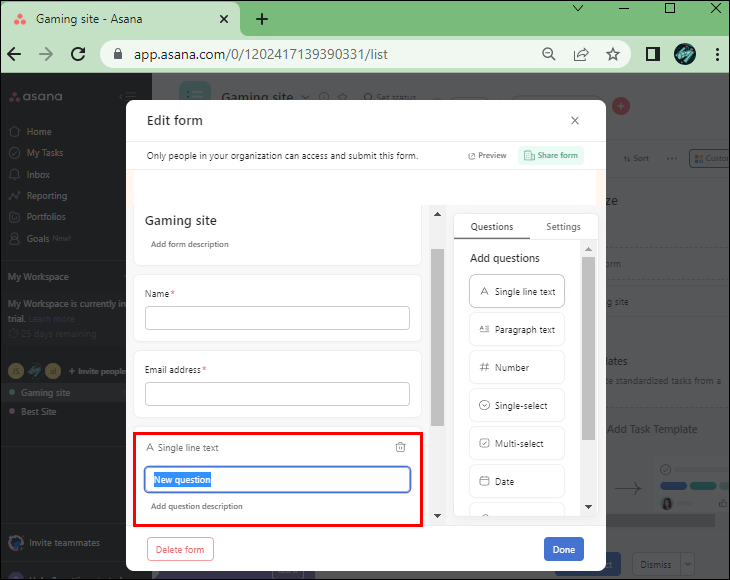
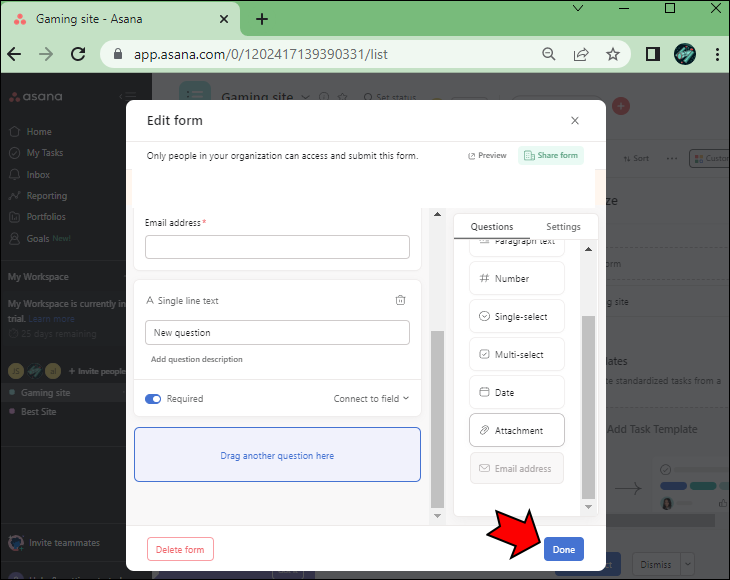
- On the right-side pane, select the “Questions” tab. Enter all the questions you want to see in the form.
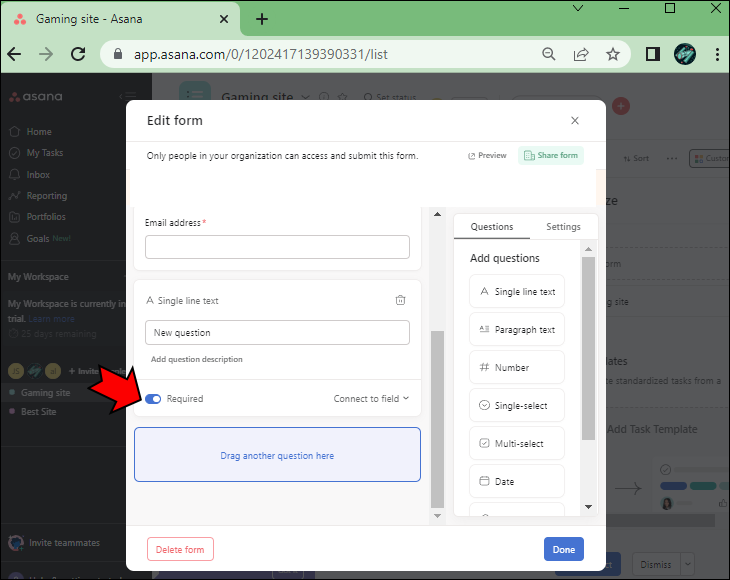
- To ensure the person receiving the form answers every question, select the “Required” field next to each question.
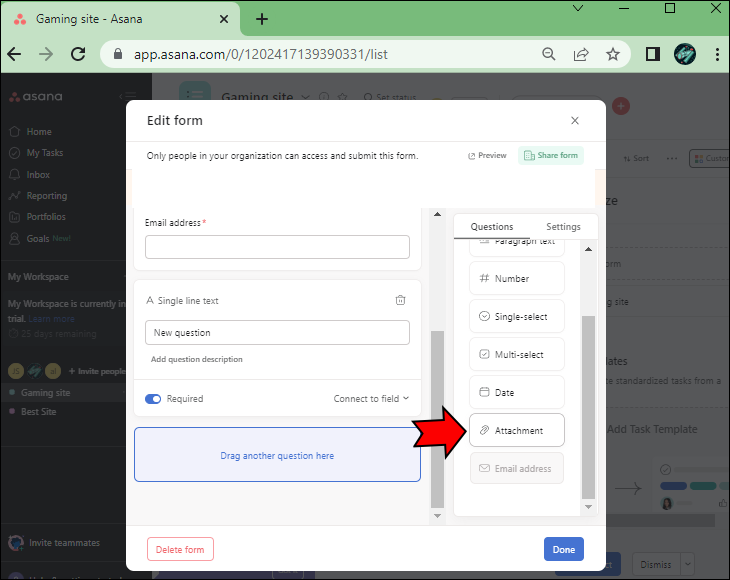
- If the form recipient needs to attach a PDF, image, or Word file, select the “Attachment” option from the “Questions” tab.
- Click “Done.”
That’s all there is to it. You have successfully created an Asana form.
How to Add a Follow-Up Question in Asana Form
Your Asana form can be as simple or comprehensive as you need it to be. When requesting information from other people on the team, you may need to add follow-up questions, which are referred to as “Form Branching.”
This way, you can get more accurate and detailed information regarding a specific topic or project. The steps are pretty straightforward, as everything you need to do is in the “Questions” tab.
Here’s what to do.
- Go to your Asana account and click go to a specific project, and select the “Forms” tab.
- Choose “Create a form” or “Add Form” and open the “Questions” tab.
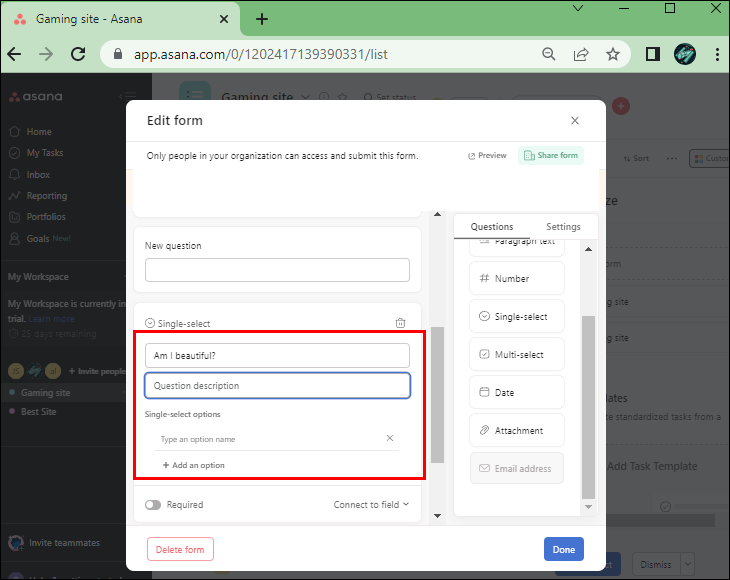
- From the same tab, select the “Drop-down” option.
- Enter all the questions in the drop-down set.
- Select “Add a branch” next to each question if you need to ask more follow-up questions.
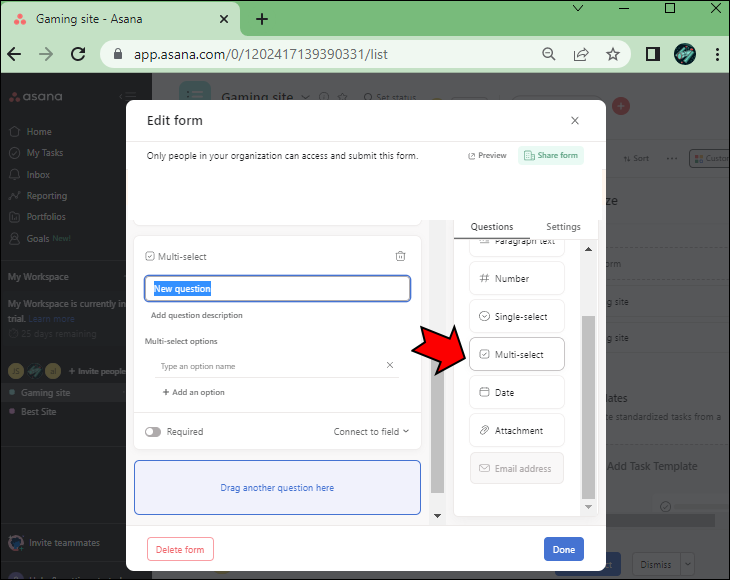
- If you want teammates to have the opportunity to select more than one option from the drop-down, click the “Multi-select” option in the “Questions” tab.


Also worth noting is that the people you’re sending the form to don’t need to have an active Asana account to have the option of filling out the form.
How to Preview an Asana Form
When building your Asana form, it’s vital to keep track of what it will look like once you’ve finished it. But you don’t have to wait until it’s done to make last-minute changes.
Instead, you can check the form preview as you go along and make adjustments to ensure it looks professional and easy to read.
Asana has a built-in button called “View form” in the “Forms” section that gives you a quick overview of what you’ve done up to that point.
Here’s how to find it.
- Open Asana and go to the “Forms” section.
- Select the “Create a form” option and start customizing the form.
- At any point in the process, navigate to the “Preview” button located in the window’s top-right corner.
Instantly, you will be able to see exactly what the form submitters will see when they start entering the requested information.
How to Share an Asana Form
Creating an Asana form is a pretty straightforward process, as the platform has a very user-friendly interface. Now that you’ve made the perfect form, it’s time to share it with others.
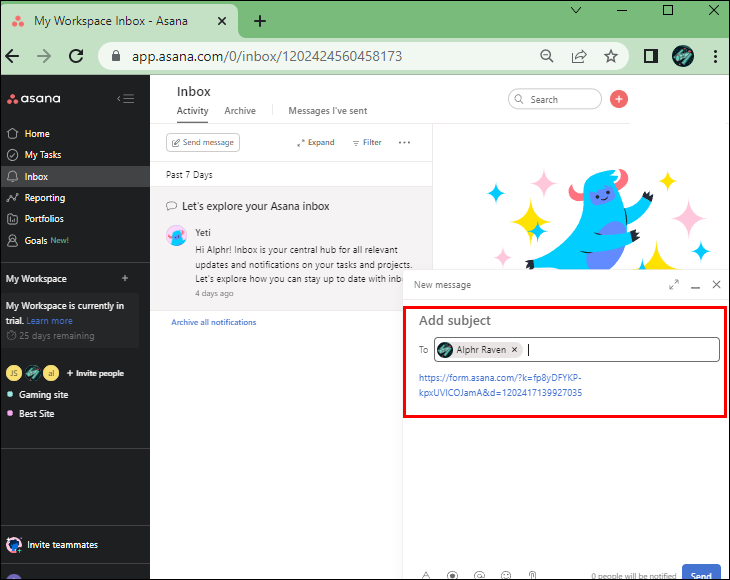
As soon as you click the Done button after finishing the form, a “Copy form link” button will appear in the top-right corner of the window. All you need to do is take two steps to share it.
- Click on the “Copy form link” button and copy it to your clipboard.
- Paste the link to an email or all Asana teammates.

When a submitter fills out the form, they will see a confirmation message on the screen letting them know the form has been successfully submitted.
FAQ
Is Asana free?
A free version of Asana is available and offers several of the most prominent features, like portfolios, start dates, task assigning, and others. However, this version of Asana doesn’t offer “Forms” as a feature.
To get access to building custom forms, you’ll need to sign up for a paid subscription plan. The Premium plan is $13.49 per person, per month, and the Business plan is $30.49 per person, per month. For the Enterprise plan, you’ll need to contact Asana directly and request a quote.
Can you have multiple forms per project in Asana?
Yes, you can create more than one form for a single project in Asana, although you’ll need to have either a Business or Enterprise plan to have access to this feature.
This functionality allows you to consolidate different input types for one project and generate the most valuable information.
What are the most common uses for Asana forms?
Asana forms can be used in various ways, but requesting feedback on a specific matter is probably the most common.
The form’s purpose may vary depending on the type of business. Asana forms are helpful for issuing creative requests, submitting bug reports, getting customer feedback, or keeping track of IT bugs.
Can you add a custom form cover in Asana?
Yes, you can. Your Asana form can look the part by adding a custom cover. The process is super simple, as you will see the “Add cover image” at the top of the form as soon as you click on the “Create a form” button.
You can upload an image from your device, perhaps a company logo or an image that relates to a specific project, allowing submitters to get an instant clue about the form.
Navigating Asana Forms Like a Pro
Creating forms might not seem like the most fun one can have, but with Asana, it’s a relatively enjoyable task. The many customization options and form branches allow you to get creative with the forms and get precisely the information you need to advance the project.
Bear in mind that Asana forms are only available for those with a paid subscription, so if you want to create valuable forms, you’ll need to choose a plan.
You will be able to share your Asana forms quickly and they can even be duplicated, so you don’t have to start from scratch every time you need to ask your teammates a specific question.
How would you use Asana forms? Let us know in the comments section below.
Disclaimer: Some pages on this site may include an affiliate link. This does not effect our editorial in any way.


