Have you ever wanted to go beyond basic text formatting options in Word? Perhaps, you want to create an enticing title using curved text, but you don’t know how.
In this article, we’ll show you different ways to curve text in all versions of Microsoft Word. Also, you’ll learn a useful workaround for adding curved text into Google Docs.
How to Curve Text in Microsoft Word?
The process of curving text is almost the same in all versions of Microsoft Word. You can do this by using the Text Box and Text Effects features.
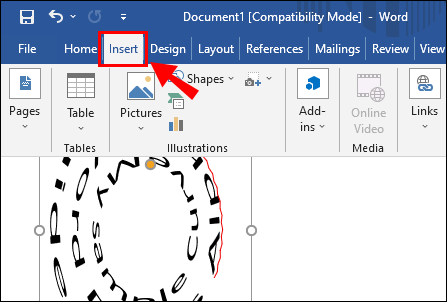
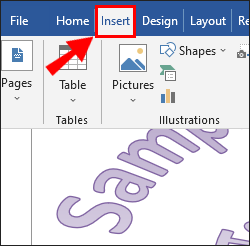
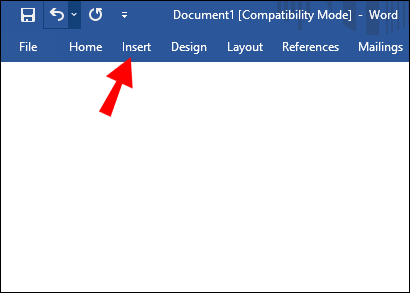
- Go to the “Insert” tab on the Ribbon.
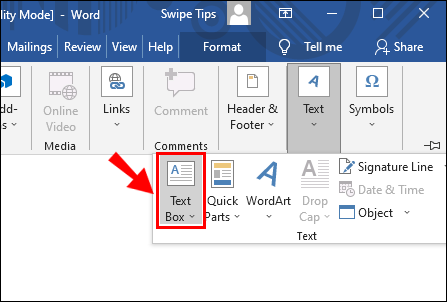
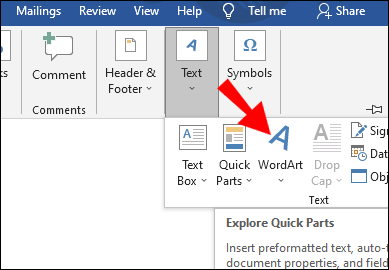
- Click the “Text Box” button in the “Text” section.

- Highlight and delete the existing text.
- Type in the text you want to curve.
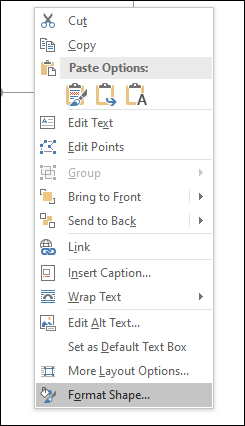
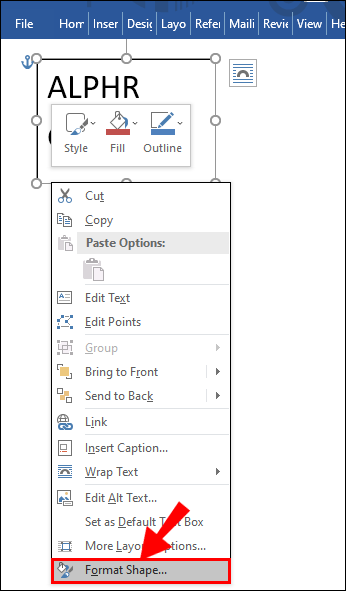
- Right-click on the text box border.
- In the pop-up menu, click “Format Shape.”
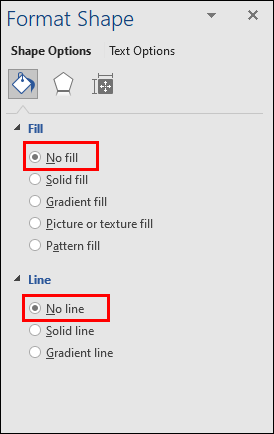
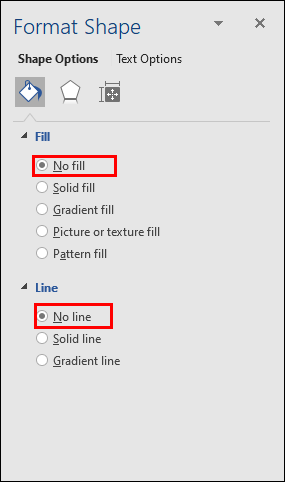
- Check “No fill” and “No line” in the “Format Shape” sidebar.
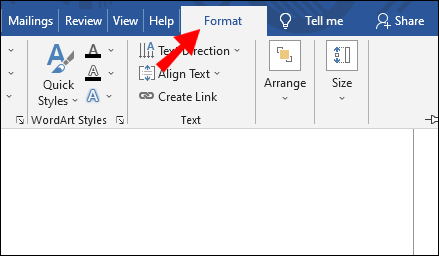
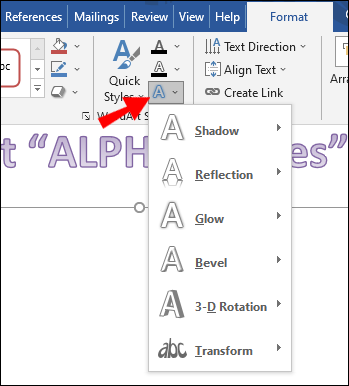
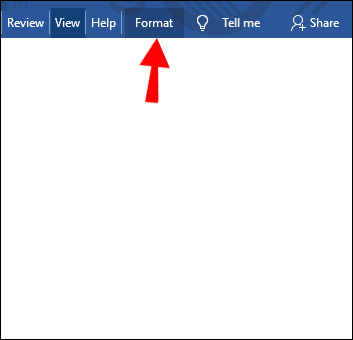
- Click on the “Format” tab in the toolbar.
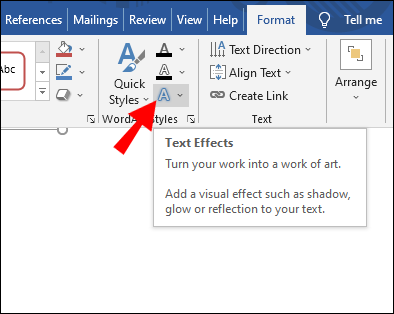
- Select the “Text Effects” button.
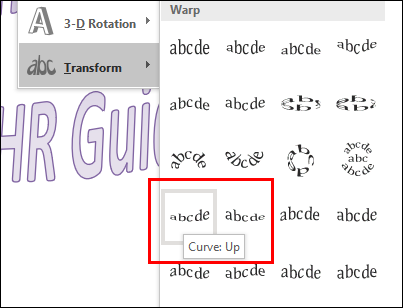
- Hover your cursor over “Transform.”
- In the fourth row of the “Warp” section, choose between “Curve: Up” or “Curve: Down.”
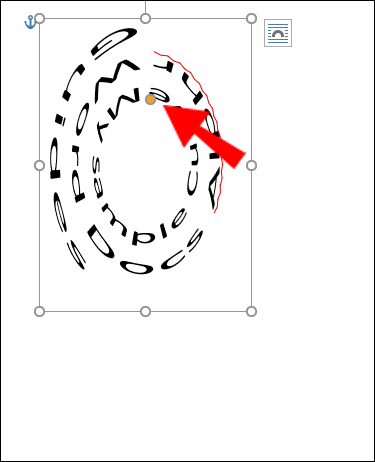
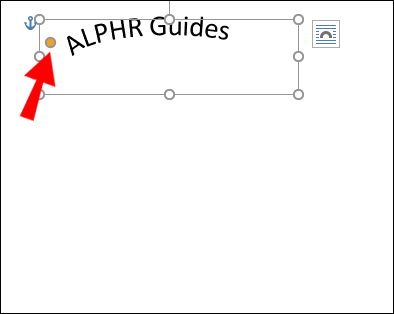
- Click and drag the “yellow circle” to adjust the curve of your text.


Note: If you want to undo curved text, go to “Text Effects > Transform” and select “No Transform.”
How to Curve Text With WordArt
Another way to curve text in Microsoft Word is using the WordArt feature. With this, you can highlight and add a curve to your typed text.
- Highlight the text you want to curve.
- Go to the “Insert” tab on the Ribbon.
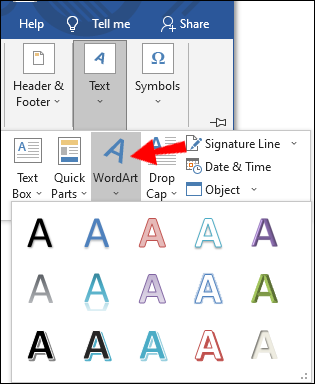
- In the “Text” section, click the “WordArt” button.
- Select the style of letters you want.
- With your text highlighted, click the “Format” tab on the Ribbon.
- Click the “Text Effects” button.
- Place your cursor over “Transform.”
- In the fourth row of the “Warp” section, choose between the “Curve: Up” or the “Curve: Down” option.
- Click and drag the “yellow circle” to adjust the curve of your text.


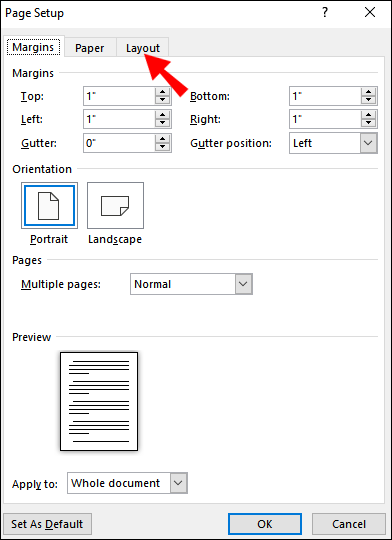
How to Center Text Vertically in Microsoft Word?
Vertical alignment lets you place your text perfectly between the upper and lower margins. To enable this option, do the following:
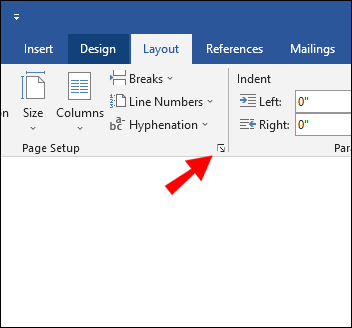
- Go to the “Layout” tab on the Ribbon.
- In the bottom-right corner of the “Page Setup” section, click on the small “arrow” button.
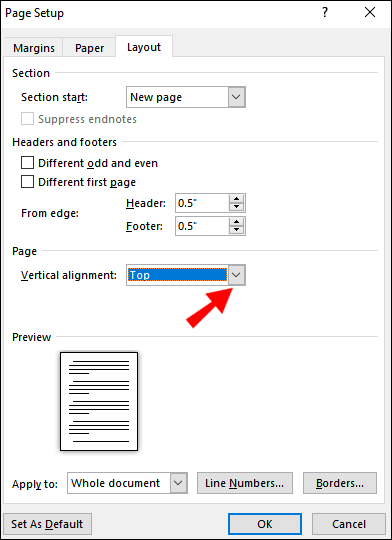
- Select the “Layout” tab.
- In the “Page” section, click the small “arrow” button next to “Vertical alignment.”
- In the drop-down menu, choose “Center.”


Note: If you want to undo centering text vertically, go back to step 5 and select “Top.” Alternatively, you can press “Ctrl + Z” immediately after vertically aligning your text.
How to Arch Text in Word 2016/2019?
Arching text in Word 2016 is very similar to creating curved text. You can do this with or without using the WordArt feature.
Arch Text in Word 2016/2019 without WordArt
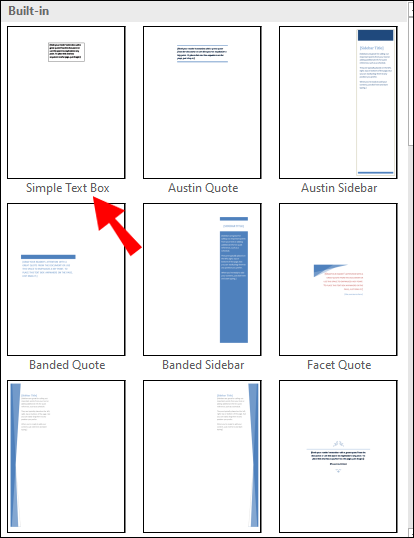
- Go to the “Insert” tab on the Ribbon.
- Click on the “Text Box” button in the “Text” section,
- Choose “Simple Text Box.”
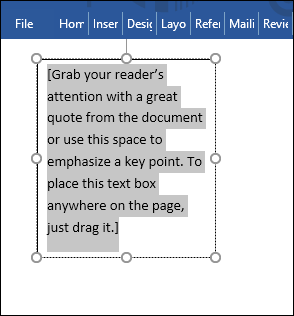
- Highlight and delete the existing text.
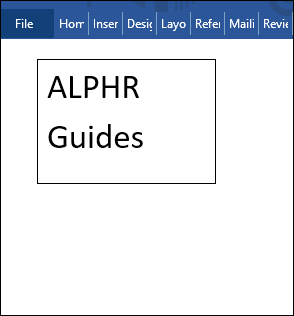
- Type in the text you want to arch.
- Right-click on the “text box border.”
- In the pop-up menu, choose “Format Shape.”
- In the “Format Shape” sidebar, select “No fill” and “No line.”
- Click on the “Format” tab in the toolbar.
- Select the “Text Effects” button.
- Place your cursor over “Transform.”
- In the “Follow Path” section, choose the “Arch: Up” or the “Arch: Down” option.
- Click and drag the “yellow circle” in the text box to adjust the arch of your text.


Arch Text in Word 2016/2019 with WordArt
- Select the text you want to arch.
- Go to the “Insert” tab on the Ribbon. This is important!
- In the “Text” section of the “Insert” (not “Home”) tab, click the “WordArt” button. Note: This is NOT the “Text Effect” icon in the Font section of “Home,” which is easily confusing.
- Select the style of letters you want.
- Choose the “Text Effects” button.
- Select “Transform,” then go to the “Follow Path” section and choose “Arch” or “Arch: Down.”
- Click and drag the “yellow circle” to adjust the arch of your text.


Microsoft Word Curved Text FAQs
Can I enhance the curved text with shadows, glow, and 3D effects?
Yes, you can edit the text once you have it in place, such as adding a shadow in custom directions, enhancing the text with glow effects, making the text 3-D, changing inside/outline colors, rotating the text, and much more.
Select the text you want to edit, navigate to “Format -> Text Effects,” and choose your enhancement options.
How do I recurve my curved text in Word?
Highlight the curved text, use the “Shape Format” tab, click on the “yellow” dot, and move it to adjust your curve. You can also change other elements such as shadow reflection, glow, 3-D, etc.
Creating a Curved Text in Microsoft Word
Customizing text beyond primary font type, color, and size in Microsoft Word may seem confusing. However, you’ve seen that creating curved text is not difficult at all. You can create a curved text anew or select existing text and add the Curve or Arch text effect. With vertical alignment, you can tweak the layout of your document to meet your specific needs.
Apart from this, you now know how to create a curved line. This can also add to the unique design of your document in just a few clicks.
How do you curve text in Microsoft Word? Do you use WordArt as well or some other feature? Let us know in the comments section below.
Disclaimer: Some pages on this site may include an affiliate link. This does not effect our editorial in any way.