Steve Larner
Steve Larner carries over eleven years of content management, editing, and writing experience in a wide variety of industries. As a tech enthusiast, Steve also enjoys exploring new products and devices and helping others solve their technological problems. Read more
April 16, 2021
One of the best things about Windows is that you can customize it almost infinitely to look and feel just how you want. While the default settings are pretty good, there is always room for improvement.
So, how do you configure your computer to make desktop icons smaller? This tutorial walks you through the steps to shrink those icons and explains how to move, change, and delete them.
Make Desktop Icons Smaller (or Larger) in Windows 10
To make desktop icons smaller in Windows 10, there are three predefined defaults available. You can also use your mouse’s scroll wheel to adjust the size.
Choose Icon Size from Three Predefined Options
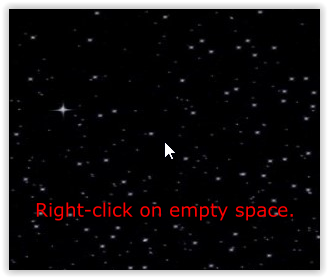
Right-click on an empty area within your Windows 10 desktop.
Select “View.”
Choose one of the preset options: “Small icons,”“Medium icons,” or “Large icons.”
Use Your Mouse’s Scroll Wheel to Adjust Icon Size
To resize desktop icons using your PC mouse, follow these steps:
Hover the mouse on an empty place on the desktop.
Hold “Ctrl” on the keyboard and scroll your “mouse wheel” forward and backward to change the size of the Windows 10 desktop icons. Remember, this does not change the font size or other images.
Use Laptop’s/Netbook’s Touchpad to Adjust Icon Size
To resize desktop icons using your laptop’s touchpad or touchscreen, follow these steps:
From within the desktop (any location), place two fingers (usually your thumb and index) on the touchpad, then move them together or away to adjust the icon size gradually.
If you run out of room on the touchpad, repeat the above process until you achieve the desired icon size.
Resizing Windows 10 icons with the mouse wheel or touchpad offers more control because they aren’t restricted to three presets. You can use these three resizing options to find the perfect fit for your desktop.
Adjust Text Size, Running Apps, and Other Visuals
If you’re into customizing your desktop, you can also change the size of the text and other graphical items along with those icons. This process applies to all apps, windows, and screen views.
Navigate to Settings ->System -> Display.
Change the slider underneath ‘Change the size of text…’
Slide it up to make everything larger or down to make it smaller.
Select Apply once you’re happy.
Your screen resolution will remain the same, but the items displayed will increase or decrease in size based on your chosen setting. It’s primarily designed to make things on the screen easier to see, but it is useful in other applicable ways too!
Text resizing works with most but not all Windows apps. If a program is fully compatible with Windows 10, it will work. If the app is not 100% compatible, Windows may try to rescale it to fit or will leave it alone.
Adjust Icon Size within Windows Explorer
You can also change how files and folders appear within Windows 10 File Explorer.
Open Windows Explorer.
Select View from the top menu.
Select a setting directly underneath in the ribbon menu that appears.
You can also use the Ctrl and mouse scroll wheel trick again if you prefer.
As you can see from the above information, there are infinite sizing options you can make to your system. Whether you just want tiny icons to save some and preserve your beautiful wallpapers or larger ones to see them better, Windows 10 has plenty of ways to do it!