Device Links
Windows is allowing users more and more access to the settings on their computers. This will enable users to set their security levels, including the integrated web camera on their computer. Windows provides a straightforward and quick way to adjust your camera settings to your liking.
Read the article below to learn how to disable the camera on a Windows PC!
How to Disable the Camera on Windows 10
If you want to disable the camera on Windows 10, you can turn the camera off altogether or for a few apps. This is wonderful for letting users have more power over how their cameras interact with their apps. This also helps users to keep better control over their computer security.
Turn Off Camera for All Apps
Windows 10 will allow you to disable the camera altogether. No apps will have access to it and cannot gain access until you enable the camera again. Follow these steps to turn off the camera for all apps:
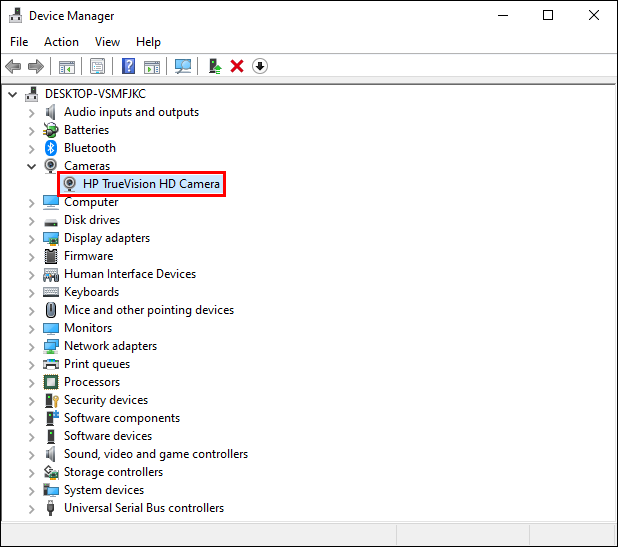
- Right-click on the Windows Start button. In the menu that appears, select “Device Manager.”

- A new window will open. Select the arrow next to “Imaging devices” to expand the menu.

- Right-click the name of your camera and select “Disable device.”
- In the confirmation box, click “Yes.”
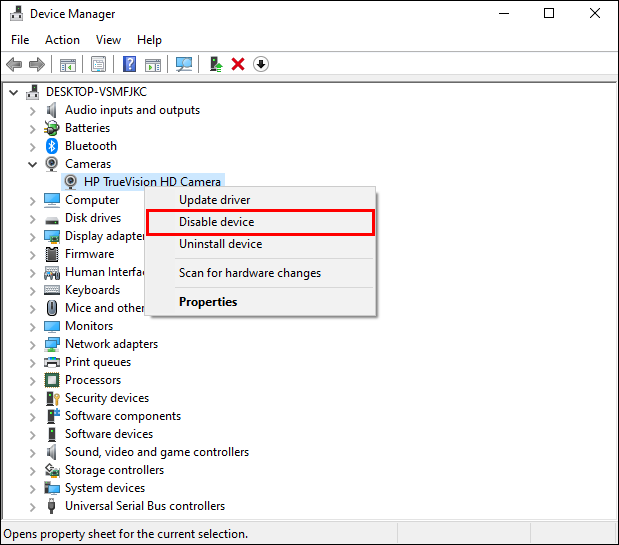

Once you click “Yes,” the camera will be fully disabled. If you’re unsure if the camera is off, restart your computer to ensure the change is in place.
Turn Off Camera for Select Apps
If you need more control over the camera than completely disabling it, follow the steps below. These instructions will help you turn the camera off for specific apps while giving access to others.
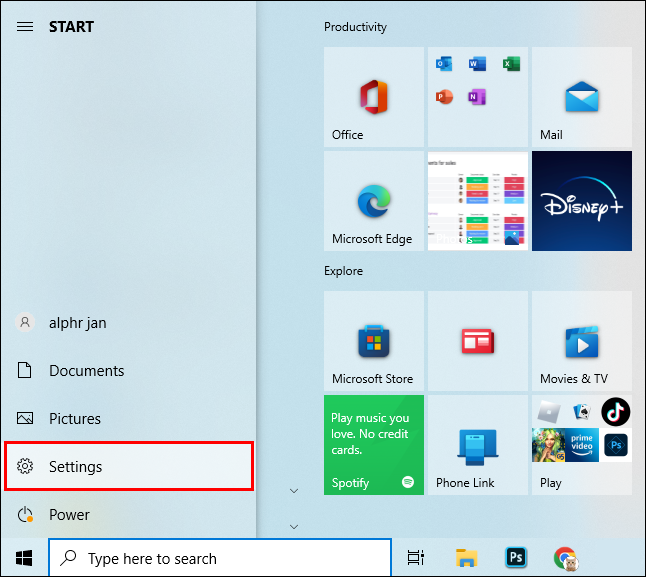
- Click on the Start menu and then choose “Settings.”
- Select “Privacy.” A window will appear. In the left-hand menu, find “Camera” and click on it.
- Find the setting marked “Allow apps to access your camera,” and toggle the switch.
- In the section titled “Choose which Microsoft Store apps can access your camera,” you will see a list of apps. Turn off the app option if you don’t want the app to access your camera.


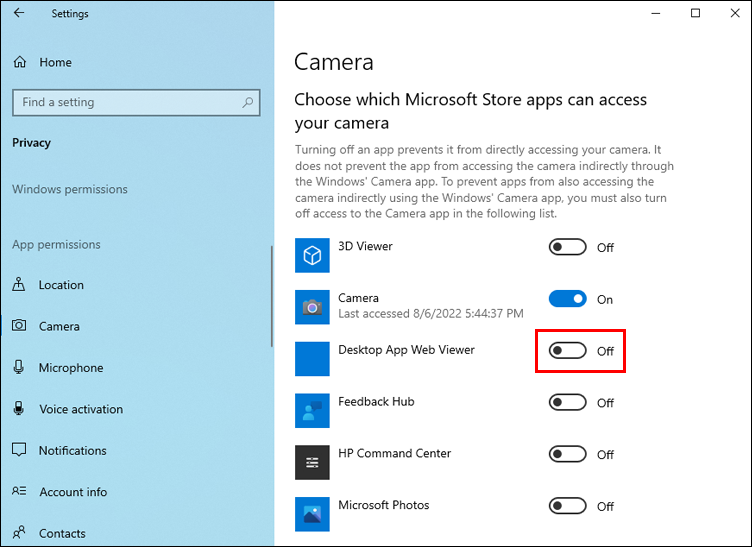
Remember that if you turn off camera access for your web browser, you also turn off access for any website you may use. It’s a good idea to restart your computer to ensure the settings take effect.
How to Disable the Camera on Windows 11
Windows 11 also allows users to turn their cameras off. Users can choose to disable some apps or to disable the camera altogether. With the update to Windows 11, the settings have become even more straightforward than in Windows 10.
Turn Off Camera for All Apps
To turn off the camera for all apps on your computer, follow the instructions below. No app can access the camera until you turn the setting back on.
- Press the Start button and then click “Settings.” If you can’t find “Settings,” press Windows + I.
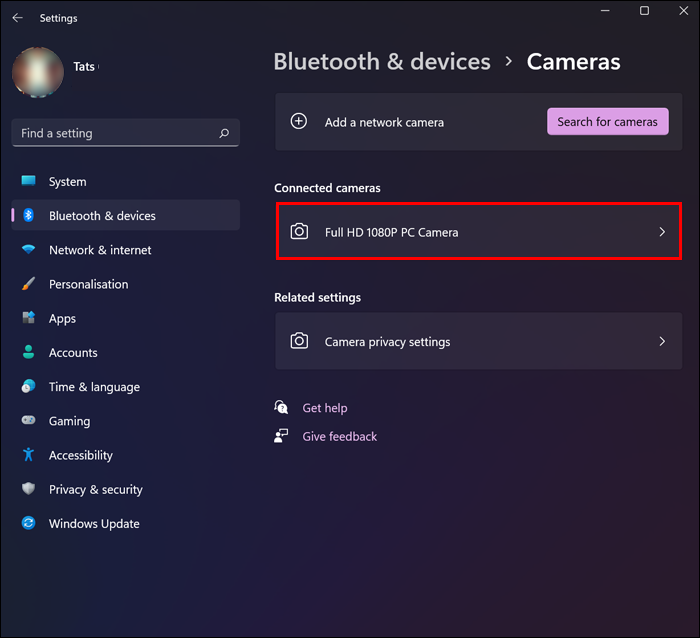
- Click on “Bluetooth & devices” and then “Cameras.”
- Find the “Connected cameras” list and select “Integrated Webcam.”
- Underneath the webcam preview, click on “Disable.”
- A confirmation box will appear. Press “Yes.”


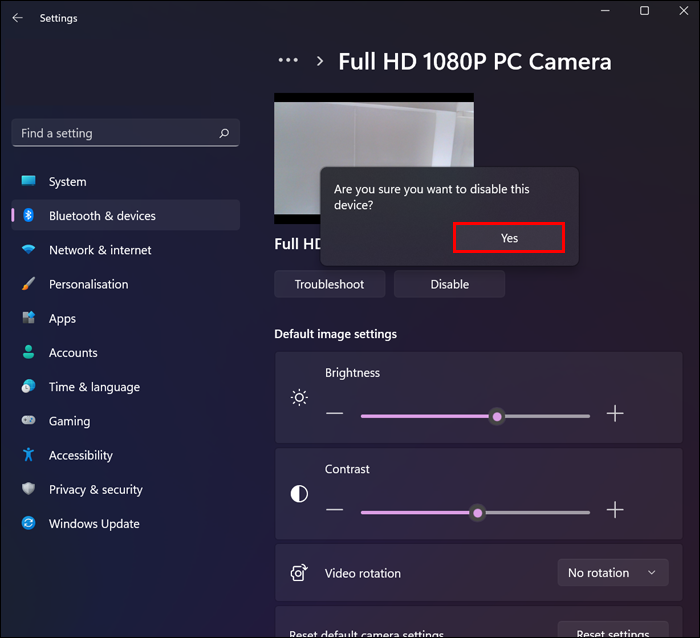
The camera should be disabled. However, you can restart your computer to ensure the settings have been set correctly.
Turn Off Camera for Select Apps
Many users only need to disable the camera for certain apps rather than for everything. In this case, Windows 11 allows you to quickly find and set access to only the required apps. Follow the instructions below to turn off the camera for select apps:
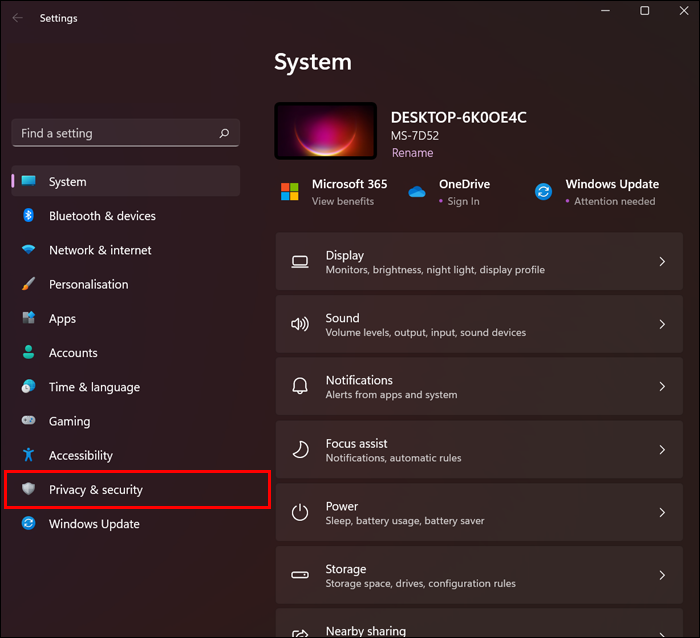
- Press the Start button and then “Settings.” Press Windows + I if you can’t find the app in your pinned apps list.
- Select “Privacy & Security” in the left-hand pane.
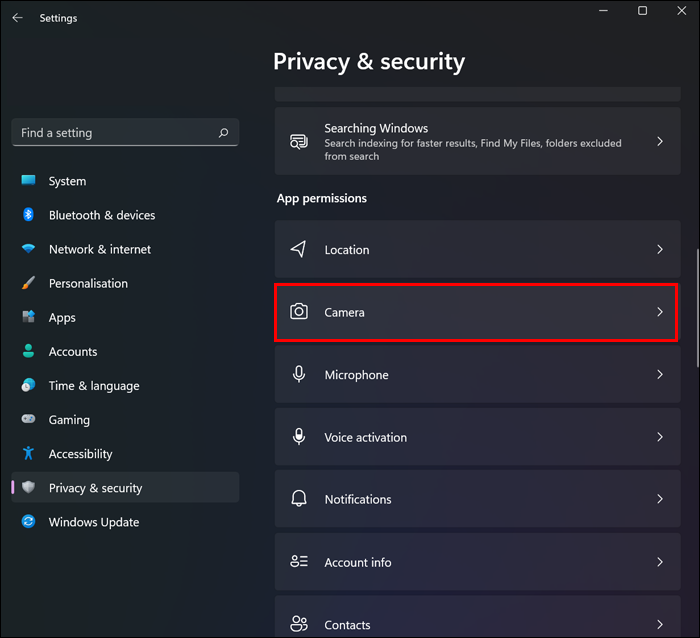
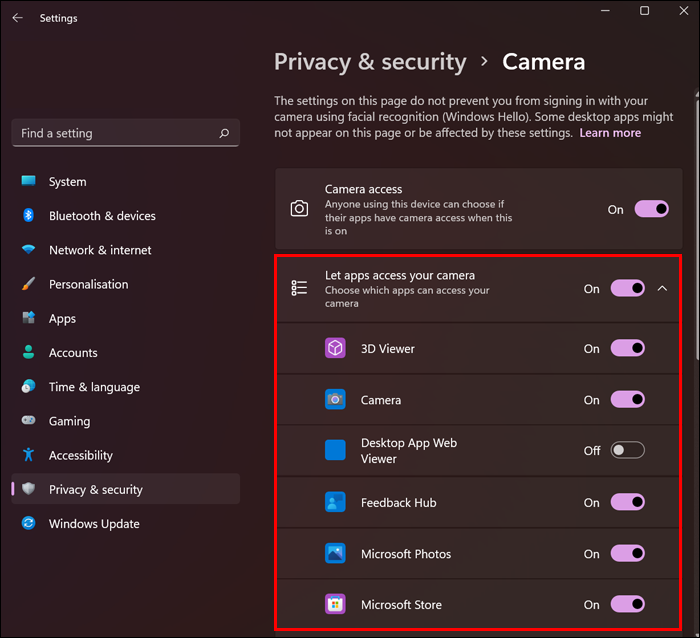
- Scroll down to the “App Permissions” section and then click on “Camera.”
- Look at the “Camera access” option and make sure the toggle is on.
- Then turn on the “Let apps access your camera” setting. Beneath that will be a list of apps. Turn the settings on or off for each app as you see fit.

Remember that turning off your browser’s access to your camera also turns off camera access for all websites. Restart your computer to ensure that the settings are saved correctly.
No Cameras Please
While we may all wish to disable our webcams altogether, this may not always be an option. Windows makes disabling the camera app by app a very easy process. This access to app-level security settings is also a rising trend where users get to be more granular in their security permissions. That applies to our cameras as well.
Have you successfully disabled the camera on a Windows PC? Did you disable the camera for all apps or a select few? Let us know all about it in the comments below!
Disclaimer: Some pages on this site may include an affiliate link. This does not effect our editorial in any way.


