Normally, named ranges are an excellent way to streamline data analysis. They allow you to assign names to various cells for references in functions and formulas. However convenient named ranges can be, they can just as easily get in the way. Fortunately, there are a few methods by which you can delete named range formulas in your spreadsheet.
Here, we’ll review how to delete named ranges in Excel.
Name Manager Method for Deleting Named Ranges
Excel has a handy feature known as the “named manager.” It allows you to assign and delete names conveniently. Here’s how to use it:
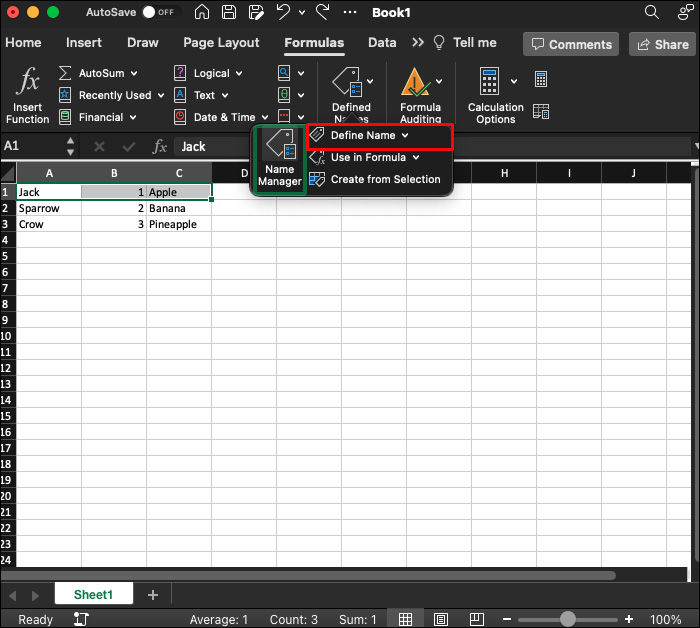
- Go to the upper Excel ribbon and click the “Formulas” tab.

- Select the “Name Manager” option. It has a label tab icon.

- It’ll open up all the named ranges located within the notebook. Select one that you want to delete.
- Select “Delete.”


It’s as simple as that. You can even select more named ranges simultaneously, deleting them if necessary. To do this, hold down the SHIFT key while left-clicking and dragging your mouse to select all the named ranges. If you want to delete multiple named ranges but not all of them, hold down the CTRL key while individually clicking the ones you want to dispose of.
How to Use the Filter in Name Manager
The method above works if you have a relativity small amount of named ranges to do away with. However, it can be hard to scroll or look through them all if you have loads of data. Fortunately, the filter option can save you lots of time and effort. Here are some options available on the Name Manager’s Filter tab:
- Table names – Once you make an Excel table, the program automatically assigns certain names. You can check table names by using this filter setting.
- Names without errors – Sometimes, named ranges can come with errors. Using this filter, you can disregard any names with errors and only deal with valid ones.
- Names with errors – A named range will have an error when it has been deleted, invalid, or moved. This filter will show you all of them. It’s a great way to locate and solve these errors as they can have faulty formulas.
- Defined names – Use this filter to track any names you’ve assigned to a specific cell, a range of cells, or a whole table. Here, you’ll only see your user-assigned names.
- Names scoped to the workbook – With this filter, you can view all the names in the workbook simultaneously. It gives you an extensive view.
- Names scoped to the worksheet – This filter will only show you the named ranges for the worksheet instead of the entire workbook.
Using the filter option in Excel is a great way to sort, organize, delete, and rename named ranges within the workbook. It’s especially helpful when dealing with large amounts of information simultaneously.
Editing Named Ranges in Excel
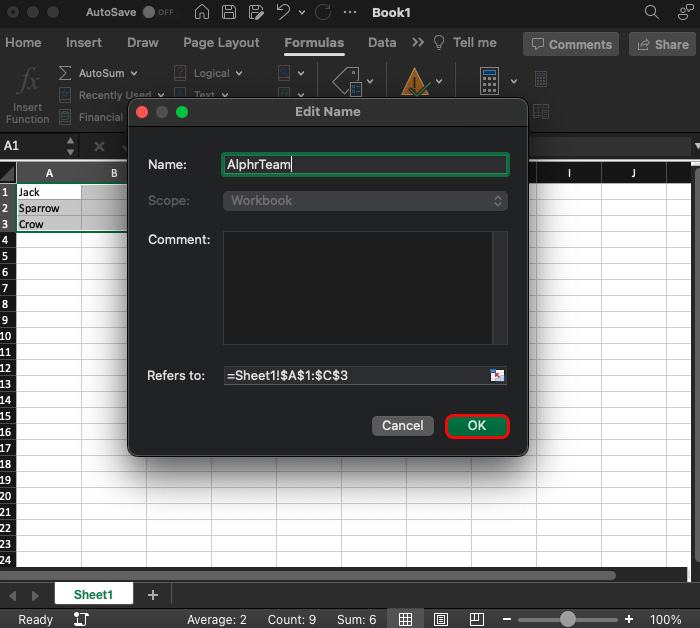
You may want to change or edit some named ranges instead of deleting them. Having the right cell or range name is important, so this option can be useful for updating data in the workbook. Here’s how to quickly do it:
- Navigate to the “Formulas” tab at the top of the screen and then select the “Name Manager” option. You’ll find this under “Defined Names.”
- You’ll have access to the names of different ranges. Find the one you want to change and then select it.
- Click on the “Edit” option.
- Type in your new name and select “Ok.”


With this, you can reassign names to your desired cells and ranges. However, using the filter option here is also beneficial, as it can get complicated with many entries.
How to Create Named Ranges in Excel
So now you know how to delete named ranges in Excel and how to change them. However, creating them is just as important. The method for doing so is straightforward:
- Select the cell or the range you want to name.
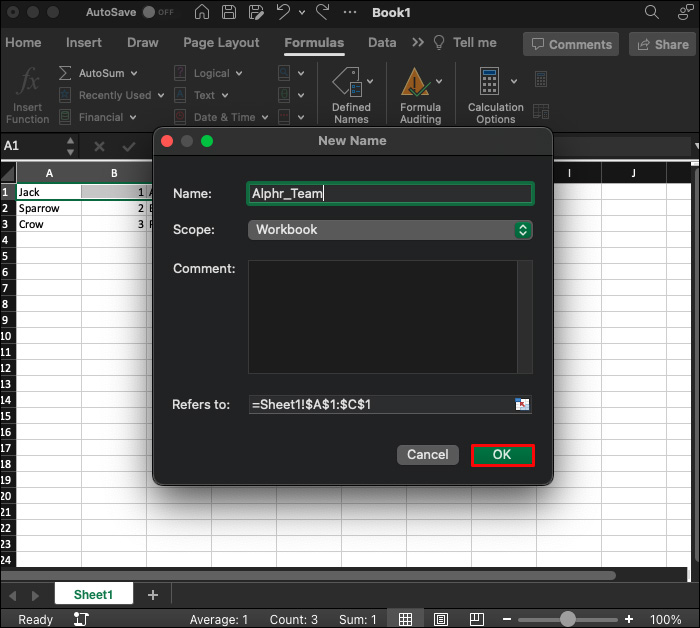
- Head to the upper ribbon, and under the formulas tab, select the “Define name” option.
- A window will open up. Type in the new range named and the scope (if you want it to be scoped to the worksheet or whole workbook), and add any comments or notes you might need.
- Select “Ok.”


Why You’ll Need to Use Named Ranges in Excel
Named ranges are a useful tool. Knowing how to manipulate them can make processing and analyzing data much easier for you and anyone else engaged with your project. Here are just some ways in which named ranges can help:
- Making formulas easier to use – Whenever you use a formula in Excel, it usually has a cell reference comprised of numbers and letters identifying the exact range. However, cell reference formatting isn’t very clear, especially when applying a formula to multiple cells. By giving ranges a distinct name, you can minimize formula errors and simply type in the name instead of going back and forth to check for range and cell references.
- Identifying ranges and selecting them – Instead of looking for ranges and selecting them the old-fashioned way, Excel lets you type in the named range and locates it for you.
- Streamlining dynamic data input – You can make it so named ranges automatically shrink or expand depending on whether you add or subtract data from them. This is especially useful when you’re constantly updating your workbook.
There are also some real-world applications when using named ranges in Excel. Some of them might include:
- Finance and business aspects –When working on projects, using named ranges can help you label certain aspects of your data, making sure everyone understands them. This creates seamless communication between all involved parties especially when you add notes to your named ranges.
- Project management – When working with named ranges, you can customize them to account for budget and project timelines. They’ll help for making better informed decisions that drive results forward.
- Marketing and sales purposes – You can easily add customer data to named ranges, indicating campaign performance and tracking relevant metrics.
FAQS
How long can name ranges be?
You can select as many cells as possible to assign them a single name. Simply use the command CTRL+A to select all cells and then use the methods described above to assign them a name.
How long can the range’s names be?
When assigning a name to any arrangement, you’re limited to 255 characters. However, you should use the comment box option if you need to leave any lengthier notes. It’s useful if other users will enter the workbook or you need to leave a quick reminder.
How come my range name won’t type in?
Other than periods and underscores, you won’t be able to use symbols or spaces for naming ranges. Instead, you can name the range using letters and numbers.
Make Data Easier with Named Ranges
Named ranges are a convenient way to analyze data. However, you’ll frequently need to delete them, reassign them, and create new ones. Generally, you’ll find options to do this in the upper ribbon with the name manager option within the formula tab. The filter option makes the process easier.
Did you find it easy to delete named ranges using the method above? What about renaming and creating them? Let us know in the comment section below.
Disclaimer: Some pages on this site may include an affiliate link. This does not effect our editorial in any way.


