Every designer is always looking for a new skill or technique to help them work more efficiently. Figma connects you with plugins that can make your workflow smoother and faster. Plugins transform Figma into a one-stop shop for all your workflow needs. You can use them to select through an entire range of fonts in seconds or generate full decorative details with extraordinary ease. You could even copy a design and paste it into Figma with all the correct layers preserved.
How to Use Plugins in Figma on a PC
A majority of Figma plugins are developed to work in a PC environment. PCs make it easy to customize keystrokes and commands to build shortcuts for the most commonly used functions, such as “copy and paste” or “save and close.” Both of these are essential shortcuts in design apps like Figma. Windows also supports photo editing software (Paint) and vector illustration software (Inkscape), both of which can be quite useful when crafting images in Figma or making customized icons fonts as part of your project design process.
If you’re running Figma on a PC, you can run a plugin from several places:
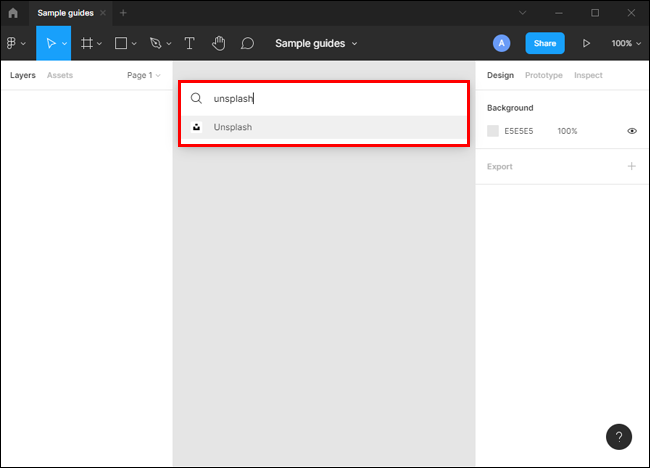
a) The Quick Actions Bar
The Quick Actions search bar helps you to locate items without touching your mouse. All you need is your keyboard.
To launch a plugin from the Quick Actions bar:
- Press Ctrl+/
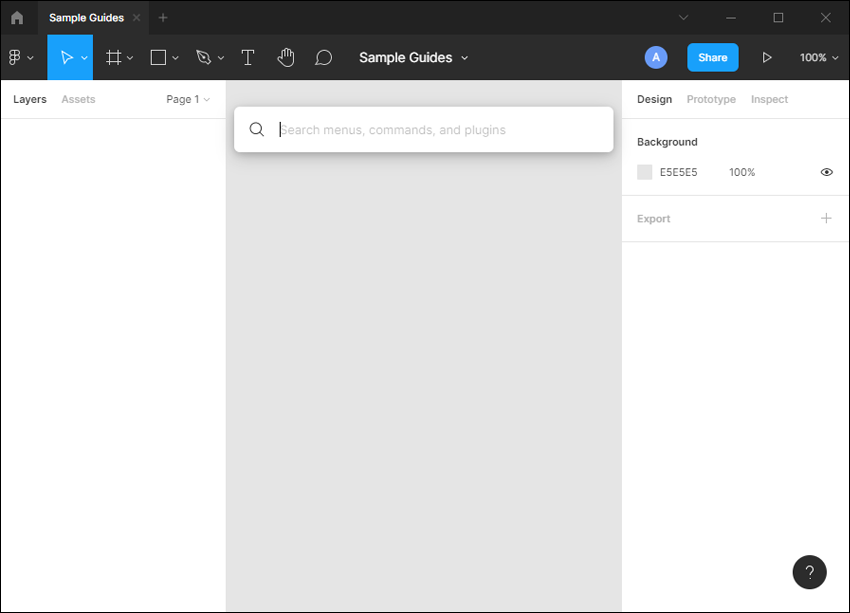
- Type the name of the plugin in the pop-up window. If the plugin is already installed, it will appear on your screen immediately. If there are several plugins with largely similar names, Figma will display all of them to allow you to pick the one you’d like to run. In this case, you can use the up and down arrow keys to navigate through the list.

- Once you find the plugin, press Enter to start running the plugin. At this point, the plugin should be open and ready for use.

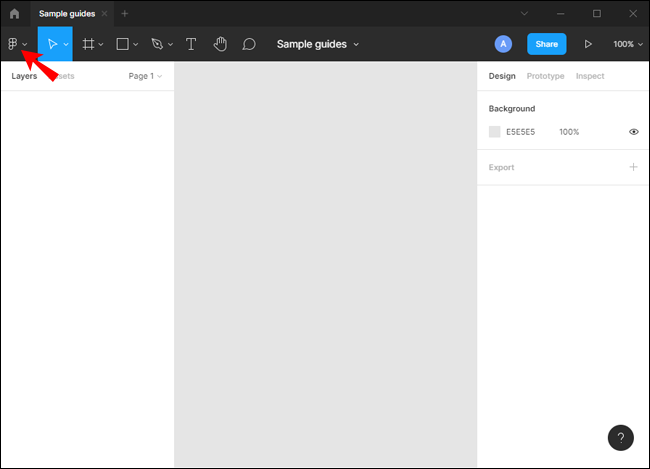
b) The File Menu
The File Menu is located in the top-left corner of the Figma Editor. It allows you to execute a host of commands, including opening new files, editing existing works, drawing vectors, and typing text. You can also run plugins from the File Menu. Here’s how:
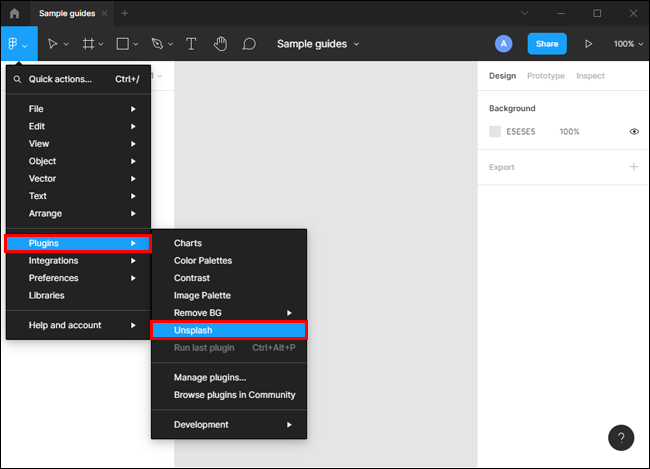
- Click on the 3 horizontal lines in the top-left corner. You should see a list of commands on the pop-up screen.
- Hover your mouse over “plugins.” This should open a list of all the plugins you’ve installed on Figma.
- Click on the plugin you’d like to run.

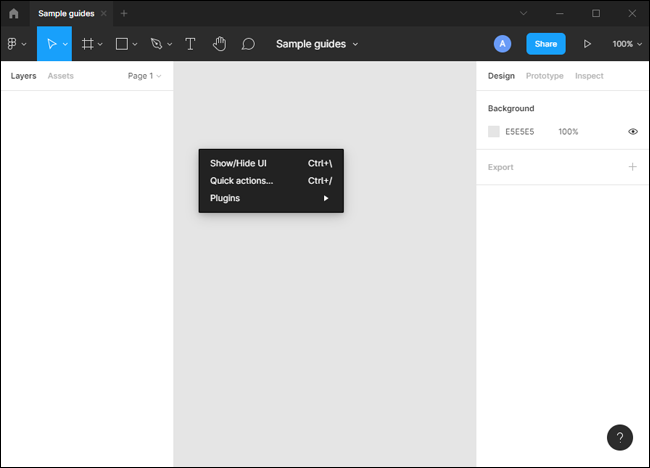
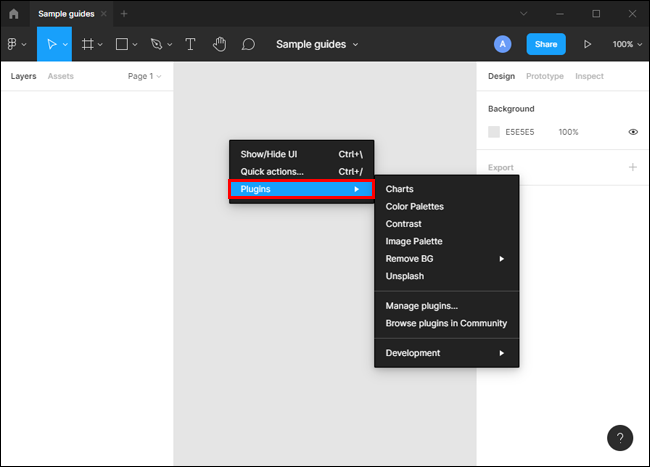
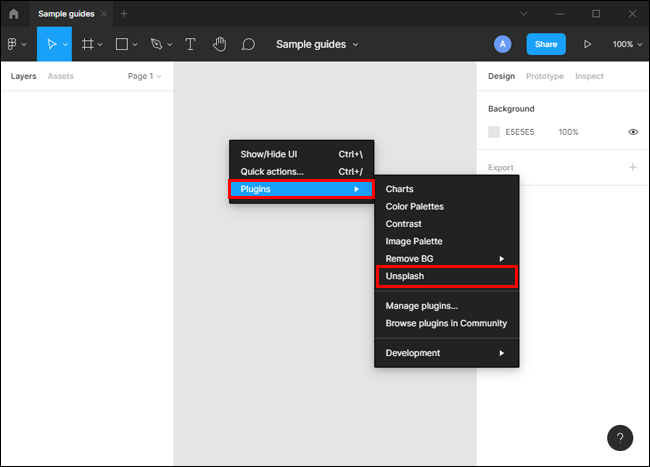
c) The Right-Click Menu
Thanks to the Right-click Menu, the process of launching and running plugins doesn’t have to be complicated:
- With your cursor positioned anywhere on the canvas, press the right button on your mouse.
- Hover your mouse over “plugins” to open a list of all the plugins you’ve installed on Figma.
- Click on the plugin you’d like to use. Some plugins may present you with some on-screen prompts before running.
- At this point, the plugin will execute the intended action in the object, layer, or file currently active.
If you’ve recently used a plugin, you can run it again by pressing the right button on your mouse and then selecting “Run last plugin” from the pop-up menu.
How to Add & Use Plugins in Figma on a Mac
Figma plugins are a popular way to add features that the interface doesn’t offer out-of-the-box. The ability to seamlessly switch between reviewing the codebase and making changes in real-time means that you never waste time switching contexts back and forth as you go through your workflow.
Mac computers are compatible with Figma, which means you can use plugins to help you increase your efficiency while working on your project.
Here’s how you can use plugins in Figma on a Mac:
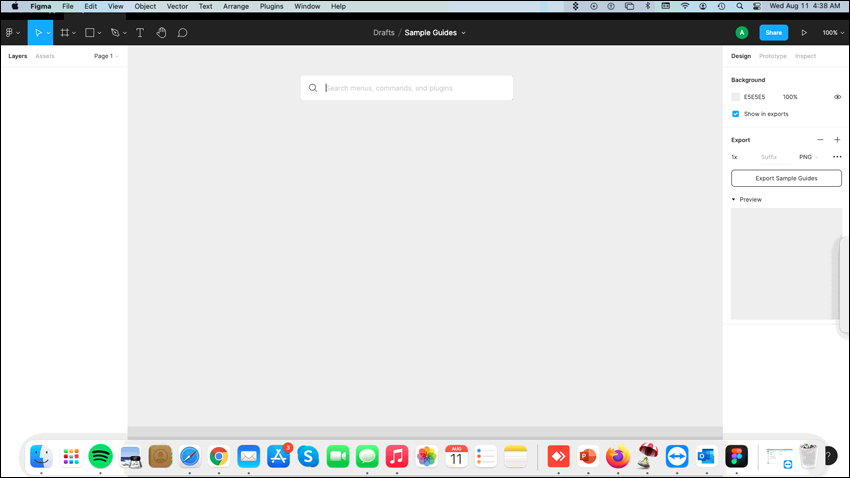
- Press Control + /
- Type the name of the plugin in the pop-up window. Use the up and down arrow keys to navigate through the list.
- Once you find the plugin, press Enter to start running the plugin.

Alternatively, you can launch and execute plugin commands through the right-click menu. All you have to do is right-click on any part of the canvas and then select the plugin you’d like to use under the “plugins” button.
To rerun the last plugin used, press Option + Command + P
Plugins on Figma Mobile Apps
Figma comes with mobile apps for both iOS and Android devices. However, these apps are still in beta and therefore haven’t been optimized for use with plugins. You can only use them to mirror the desktop app and view scaled versions of your designs. Any frame or file selected on the desktop app will also show on the mobile app.
It’s also important to note that you can only use the mobile app if you’re logged in on the web or desktop app simultaneously.
The Most Added Figma Plugins
Although there are tons of Figma plugins, a few handy ones are hugely popular among Figma enthusiasts. Here are the top 5 most added Figma plugins:
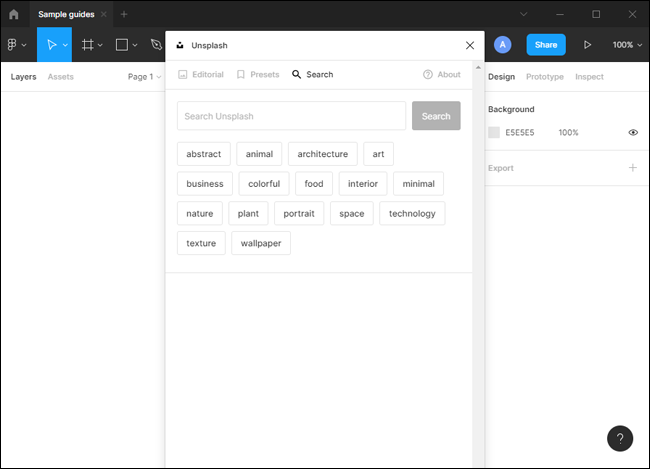
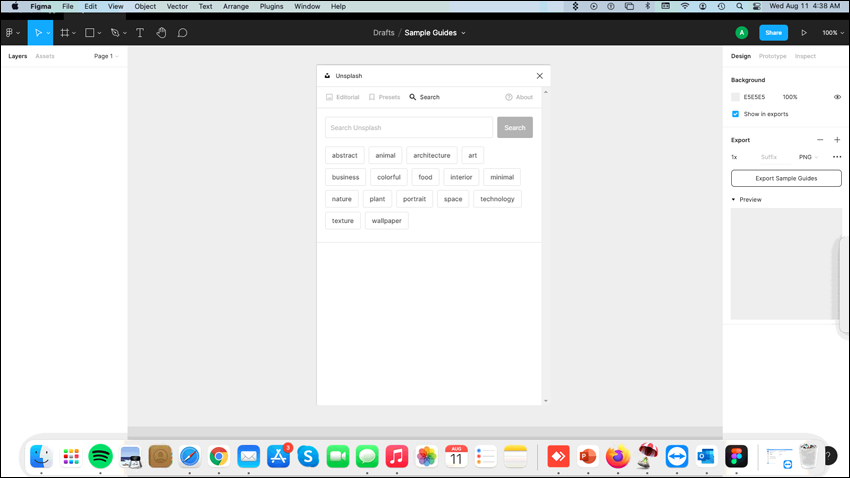
1. Unsplash
As a designer, it’s important to choose a high-quality background to showcase your work. Unsplash can be the perfect solution because it features free and uncopyrighted images that can be downloaded for personal or commercial use. Photos on Unsplash are usually of very high quality, and the site provides free photos for virtually any design needs.
2. Iconify
Isn’t it frustrating to spend hours trying to create multiple icons on the same page only to realize that they don’t scale in their native size and look pixelated? Enter Iconify. This is a plugin used by front-end developers to combine icon sets and create beautiful, rich, and modern user interfaces. Iconify is designed to make it easy to add custom icons or badges straight from your browser without the need for an external editor.
3. Material Design Icons
Material Design Icons has all your icon needs. With more than 27,000 icons available, you’re almost guaranteed to find an icon that’s perfect for your interface.
The Material Design Icon Suite comes with vector graphics and font files used to render different icon styles. Whether you want simple black-and-white shapes or complex compositions in multiple colors with gradients, drop shadows, or inset shadows, this plugin has got you covered. Shapes come in both layered SVG files or layered PNG formats for your convenience.
4. Lorem Ipsum
Lorem Ipsum is a type of dummy text used in design, typography, and printing. Its plugin allows designers to insert sections of dummy content to mimic the look of the real copy. With this tool, you can easily work out details such as proximity and placement, words per line, letter spacing, and kerning. You don’t have to spend time trying to develop blocks of filler content that may not even match your typographical design.
5. Content Reel
This is your go-to plugin when you need to pull icons, avatars, and text strings into your design. It comes with a simple toolbar that allows you to select the layer in your design that needs content and then helps you select the type of content you prefer from the palette menu. The plugin also allows you to organize your text strings in ascending or descending order, depending on the needs of your project.
Save Time With Figma Plugins
By introducing features not included in the original software, Figma plugins have struck a chord among designers keen to work more efficiently. They can help you reduce the amount of time spent recreating the same things repeatedly. They present an opportunity to explore more possibilities without having to switch your primary design tool. However, any given plugin should be carefully considered based on individual requirements.
Which are your favorite Figma plugins? Let us know in the comments section below.
Disclaimer: Some pages on this site may include an affiliate link. This does not effect our editorial in any way.