Google Sheets can be incredibly useful when dealing with large amounts of data you need to store, analyze, and report on. However, when copying and entering lots of data at once, you may find some repeats in your documents.
Getting rid of duplicates manually would take up a lot of time. Is there a faster way to locate and delete repeats in Google Sheets? Read on to find out.
Find Duplicates in Google Sheets
The good news is that you don’t need to go through the whole spreadsheet and look for repeats one by one. Google Sheets has a convenient, time-saving feature that lets you do it automatically. And that’s not all. There are other ways to find repeats in this program, so it’s up to you to choose one and get started.

1. Use the Find in Sheet Feature
This is the simplest way to identify repeats in the spreadsheet. On your keyboard, press the Ctrl key and F simultaneously. A small search bar will pop up in the upper right corner. It will say Find in Sheet, so type in the word or number you’d like to find.

The data will be highlighted, and you’ll see the total number of repeats. You can easily navigate through the page, choosing what you want to delete. You may wish to find repeats using this option if you know there aren’t too many or if you only want to highlight them. To remove them from the document, you’d need to delete them manually.

You can automatically replace all the found duplicates, though. Click or tap the three dots next to the search bar within the Find in Sheet pop-up, and enter the data you’d like to replace the repeats with.

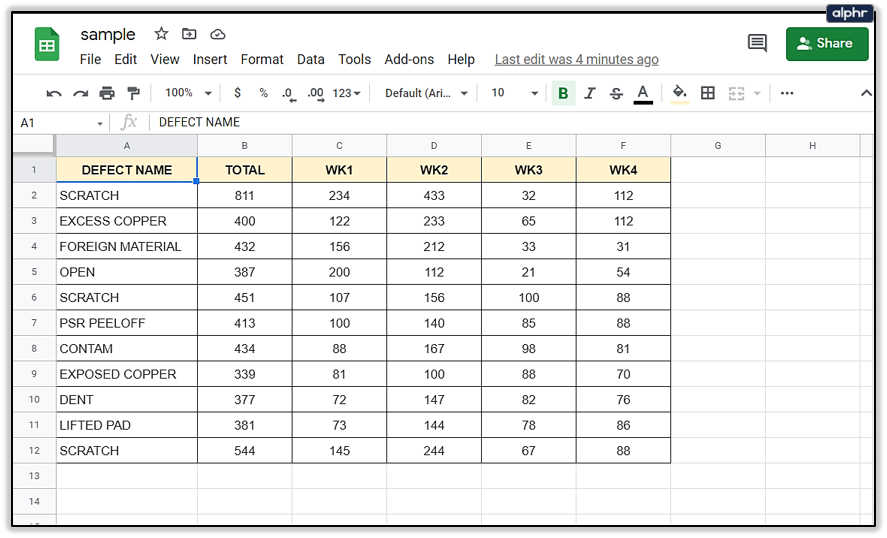
2. Use the Built-In Remove Duplicates Feature
Remove duplicates is a built-in feature in Google Sheets. It allows you to quickly delete excess data by identifying duplicates and deleting them from the spreadsheet.
- Open the desired spreadsheet.

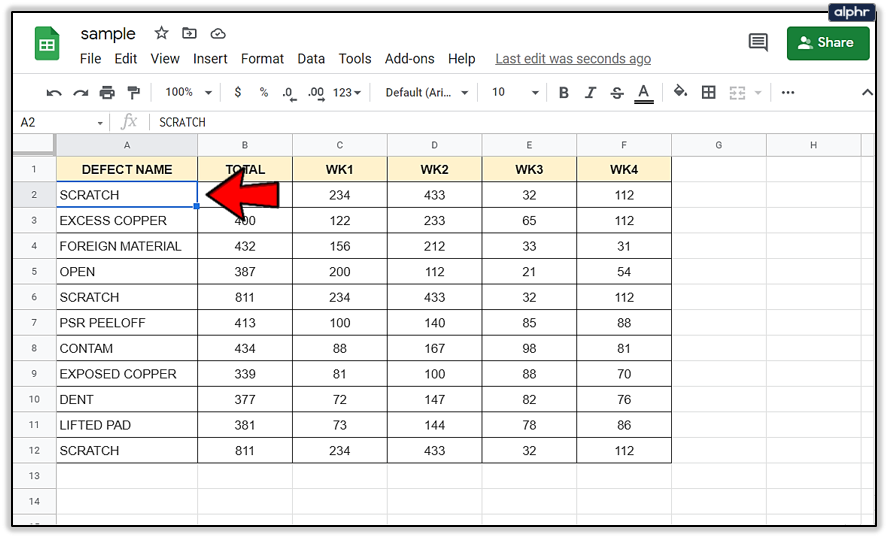
- Select the cell that contains the original word or number.
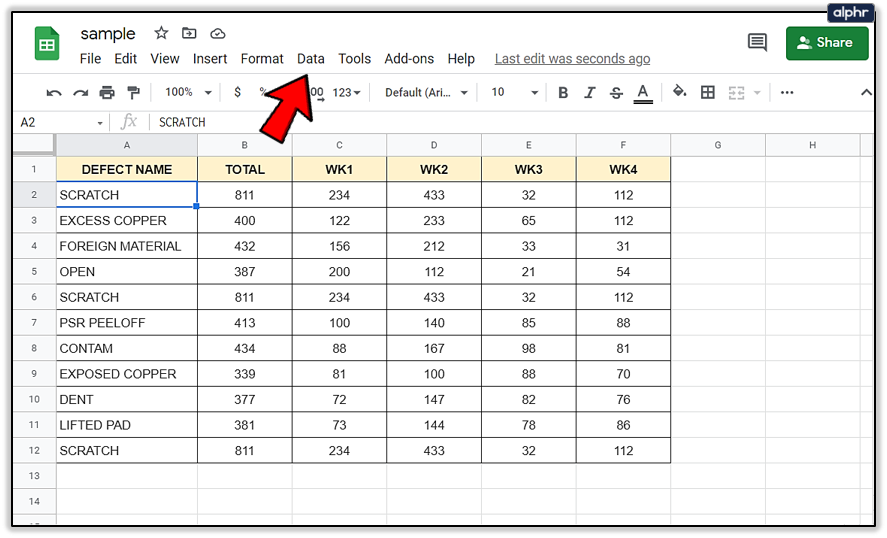
- Click on the Data tab in the taskbar at the top.
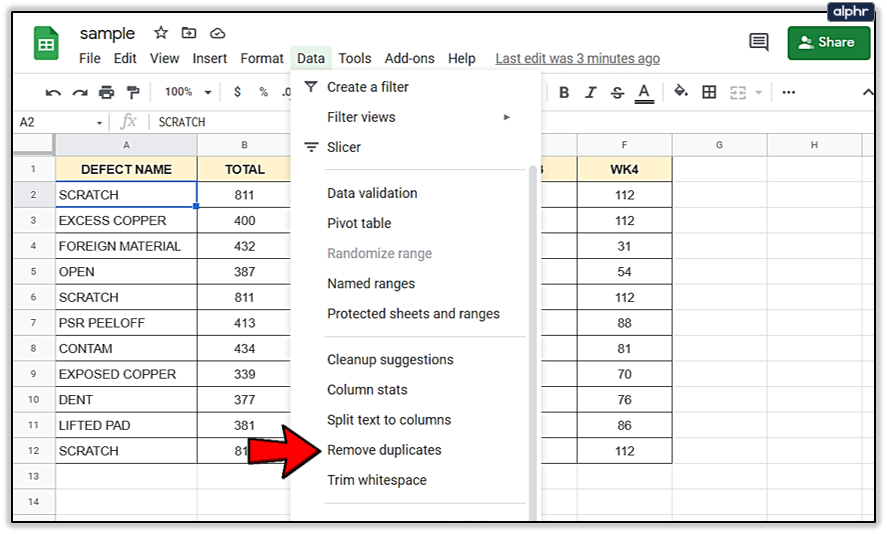
- Scroll down to find Remove duplicates and click or tap on the option.
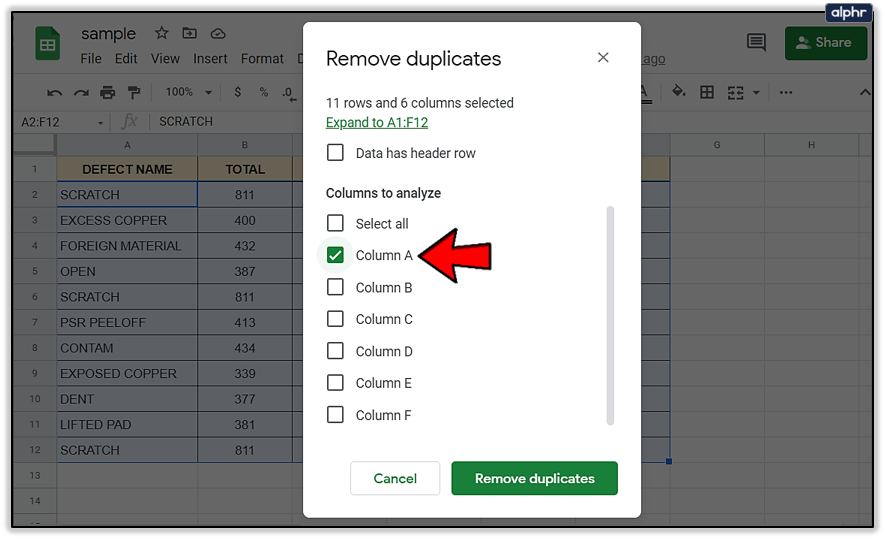
- In the pop-up window, choose the desired columns that you want to analyze. You can select all columns if you’re going to analyze the whole spreadsheet.
- Click the Remove duplicates button to complete the action.
- After you delete the duplicates, Google Sheets will let you know about the number of removed repeats and how many unique rows there are now.


3. Use Extensions
If you’d like to do more with your data, you could try third-party apps and add-ons that offer just that. The G Suite Marketplace has a few excellent add-ons that work well with Google Sheets.
For instance, the Expand9 Remove Duplicates extension is compatible with Google Drive. It’s similar to the Remove duplicates option within the Sheets software. However, this add-on gives you a few more options. You can also search for empty rows, highlight, copy, move, or delete duplicates – or any data in the spreadsheet.

Ablebits.com is another convenient extension that also allows you to move and remove your data as required. You can easily track and delete, or only highlight any duplicate cells, merge them, compare, fill them with color, and more.
4. Use Formulas
UNIQUE and COUNTIF are two formulas that can also help you highlight the duplicate data and remove it from your spreadsheet.
The UNIQUE formula analyzes the whole spreadsheet and removes duplicate rows. It’s quite easy to use: UNIQUE (the range of data you’d like free of duplicates).
For instance: UNIQUE (A2:F12).

When you enter this formula, you’ll see a new table on the right. It will contain fewer entries than the original one because the duplicates will be removed.

You can use the COUNTIF formula if you want to see the duplicates first and then decide which ones you want to remove.
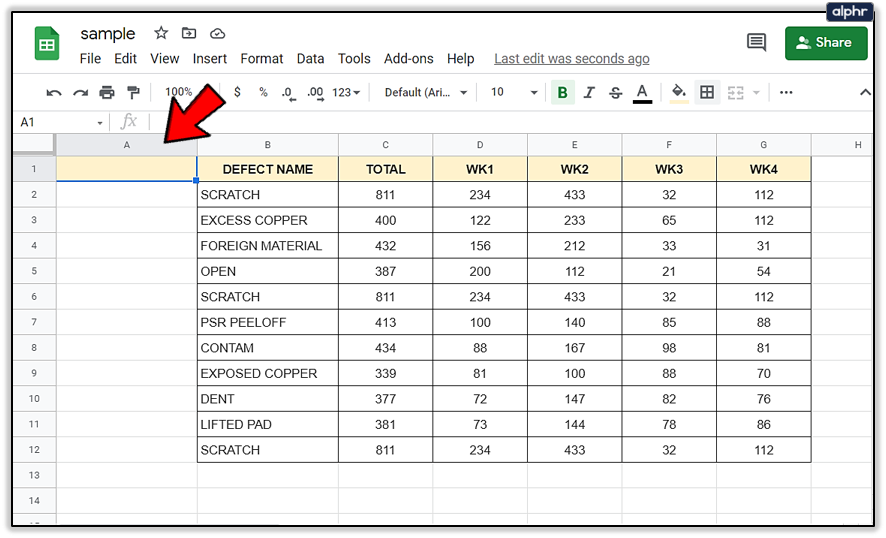
- Create a column. It should be next to the one you want to analyze.
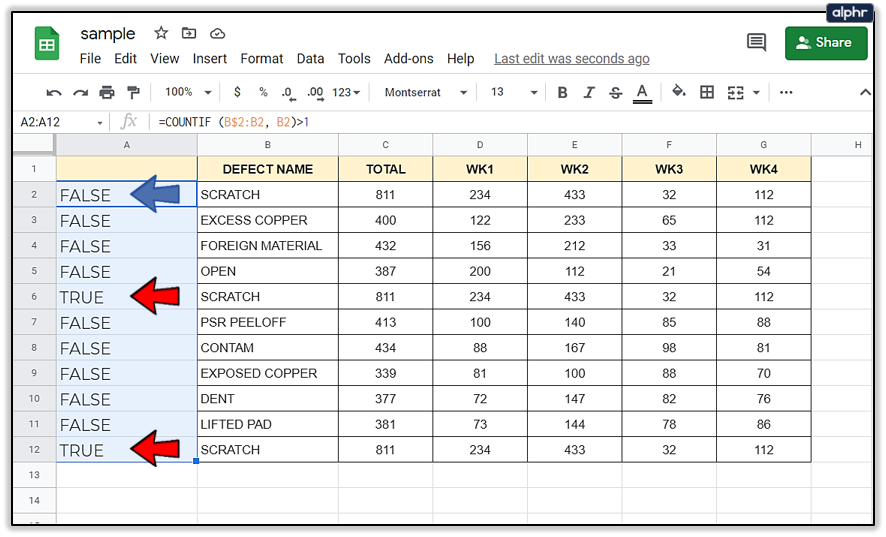
- Use the following formula: COUNTIF (B$2: B2, B2)>1. You’re entering the data range between the brackets. The $ sign makes sure the whole row is included.
- For the original data, the result will be FALSE. When the same data appears for the second time, the result will be TRUE. Those are the duplicates, and now you can choose to remove them.

Keep Your Spreadsheet Neat
As you see, there are many ways to delete unwanted duplicates from your spreadsheet before they create confusion. Data repeats may seem innocent, but depending on your job, they can cause some serious issues in terms of final results. The methods outlined above will keep your spreadsheet neat and duplicate-free – just pick the one that suits you best.
Which method are you most likely to choose? Let us know in the comments section below.
Disclaimer: Some pages on this site may include an affiliate link. This does not effect our editorial in any way.