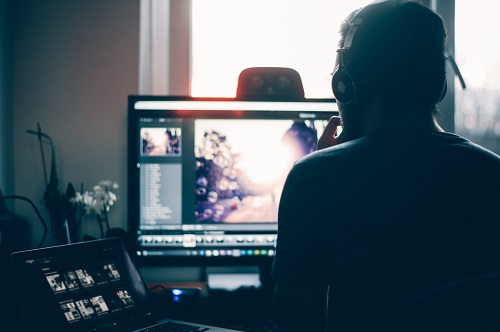
How many times have you edited a photo only to realize that you then need to look up how to apply the effect in question? With many apps, when you exit the app, you can lose all your work. Luckily, ‘PicsArt’ has an option to save your drafts. You can then return to them anytime you like and continue editing the image. In this article, we’ll explain a simple way to find your drafts on ‘PicsArt.’ Plus, we’ll share some exciting editing tips with you.
Finding Drafts on PicsArt
Images you save as drafts appear in ‘Collections’ on ‘PicsArt.’ But how do you find them? Luckily, the steps are pretty simple. Here’s what you need to do:
- Launch the app.
- Navigate to the profile icon on the bottom right corner of the screen.
- Then, look for the flag icon next to three dots on the upper right corner of the screen.
- Once you tap on it, you’ll see ‘Collections.’
- This is where you can find your drafts.
You can now use them to add other effects or apply some interesting features. What are these interesting features that’ll make your images unique? We’ll tell you in the next sections.
PicsArt Cool Effects
We suggest you add some fabulous effects that’ll make your friends envious. No matter what your editing skill level is, with this article, you’ll be able to edit an image like a pro. Without further ado, let’s discuss the ‘PicsArt’ cool effects:
Double Exposure
Remember that mysterious TV show “True Detective?” When it was released, everybody was amazed at the double exposure technique featured in the opening theme. The great thing is that you don’t need to be an expert to add this effect to your image. With our tips, you’ll have fantastic, “True detective”-inspired images.
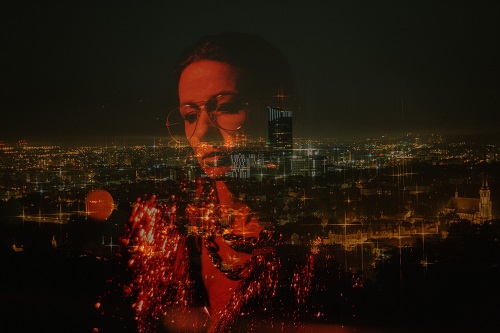
To blend two images, you first need to launch the app. Then, here’s what you must do:
- Load the primary image you want to use. It’s best if it’s in portrait layout and the background is neutral.
- From the menu bar, click on ‘Add Photo.’ Choose the image you want to use as secondary. Ideally, it should be black and white.
- You’ll now see a second image appear on top of the first one.
- Adjust the size of it by dragging the ends to fit the size of the primary image.
- Use the slider to reduce the opacity. This will make the image somewhat transparent.
- Then, on the upper part of the screen, select the eraser icon.
- Use an eraser to remove all parts that aren’t your body.
- Once you finish, click on ‘Apply.’
3D Effect
Did you know that you can add a 3D effect to your image? It looks particularly good when your image included some form of movement. To do this, you first need to upload an image you want to edit. Then, follow these steps:
- From the menu bar, click on ‘Sticker.’
- Type ‘neonspiral into the search bar.
- Select the one you like.
- Adjust it to fit the image by dragging your fingers across it to make it larger. Or, use your fingers to turn the spiral.
- Then, tap on the eraser on the upper part of the screen.
- Delete the parts of the spiral that go over your image to create the 3D effect.
- When you finish, click on the checkmark on the upper right corner of the screen.
Cartoonify Yourself
‘PicsArt’ also has an effect that’ll make you look like you’ve come right out of a comic book. It’s a bit complex but bear with us. This is what you should do:
- Open the app and upload an image you want to use.
- Then, go to ‘Cutout.’
- Click on ‘Person’ for the app to select your face. Alternatively, you can tap on outline to draw a line around your face.
- Once you finish, click on ‘Save.’
Then, go back and upload a white background. To add the image you’ve just cut, click on ‘Sticker,’ and then ‘My sticker.’ You’ll find it there. Adjust the size of the image. Next, click on ‘Effects.’ Tap on ‘HDR’ and make sure ‘Fade’ slider is located on the far left. Then, look for the ‘Magic’ section and find the ‘Rainbow’ effect.
Once you click on it, you’ll see your image becomes colorful. To neutralize it a bit and add a cartoonish effect, click on the three dots below the image. Use your finger to decrease the effect by sliding it to the right. Once you’re satisfied with the result, click ‘Apply.’ That’s it! You’ve created an image of yourself that looks like a Marvel hero.
Become an Editing Pro
As you can see, locating a draft on PicsArt is simple. All the effects described above are saved in ‘Collections’ so you can find them anytime you need to add additional effects. For instance, why don’t you try cartoonyfing yourself? Or, you might like to add double exposure to create an artistic image. Which effects do you usually use? Are there some tips you can share with the community? Let us know in the comments section below.
Disclaimer: Some pages on this site may include an affiliate link. This does not effect our editorial in any way.


