Device Links
You’ve likely lost count of the number of charger cords you’ve damaged over the years. Seemingly designed to be as thin and fragile as possible, these cords have a habit of breaking with extended use. Unfortunately, it also doesn’t seem to matter whether you’re an iPhone and Android user. No matter the brand, the charging cables you receive with your products just don’t seem to last.
Charging cables tend to break so easily because the connection between the charging head and wires is often weak. What’s more, many people absent-mindedly abuse their chargers, leading to cracks and breaks that prevent the cable from charging anymore.
The good news is that you may be able to fix your charger cord. This article examines some of the techniques you may be able to use.
How to Fix a Broken iPhone Charger
Replacing your iPhone’s charging cable with another officially-branded Lightning Cable is an expensive endeavor. By fixing the cable, you have the chance to save yourself a few dollars while extending the life of your product.
Before focusing on fixing the cable, you must first check that the cable itself is the problem. Sometimes, charging issues can arise due to issues that have nothing to do with the cable you’re using. Before implementing a fix, follow these steps:
- Check your wall socket by plugging something else into it. If the new device or charger doesn’t receive power, you may have blown a fuse that affects the plug. Replacing the fuse and resetting your power breaker is the solution in this situation.
- There may be a problem with your Apple device. If you have another Apple device handy, try using the cable on it. If the second device starts charging, your first device has an issue that you will likely need a professional to fix.
- If you’re using an adaptor for the cable, try connecting a different cable to it. If that cable doesn’t work either, the adaptor may be the problem.
- Check that the charger is compatible with your device.
- Examine your device’s charging port for any sign of a blockage, such as fluff from your pocket. Use a pair of tweezers to remove the blockage, if possible.
Assuming that you’ve completed these steps and found no problems with any other device, you can switch your focus to the iPhone’s cable.
There are several ways to try to fix the cable.
The first involves using electrical tape. Examine the cable for any signs of cracks or splits, particularly around the connection point between the cable and its charging port. Once found, you can wrap electrical tape around the split to bind it back together. Sometimes, this is enough to fix the connection, leading to the cable working again.
If you’d prefer a more permanent solution, you have two options:
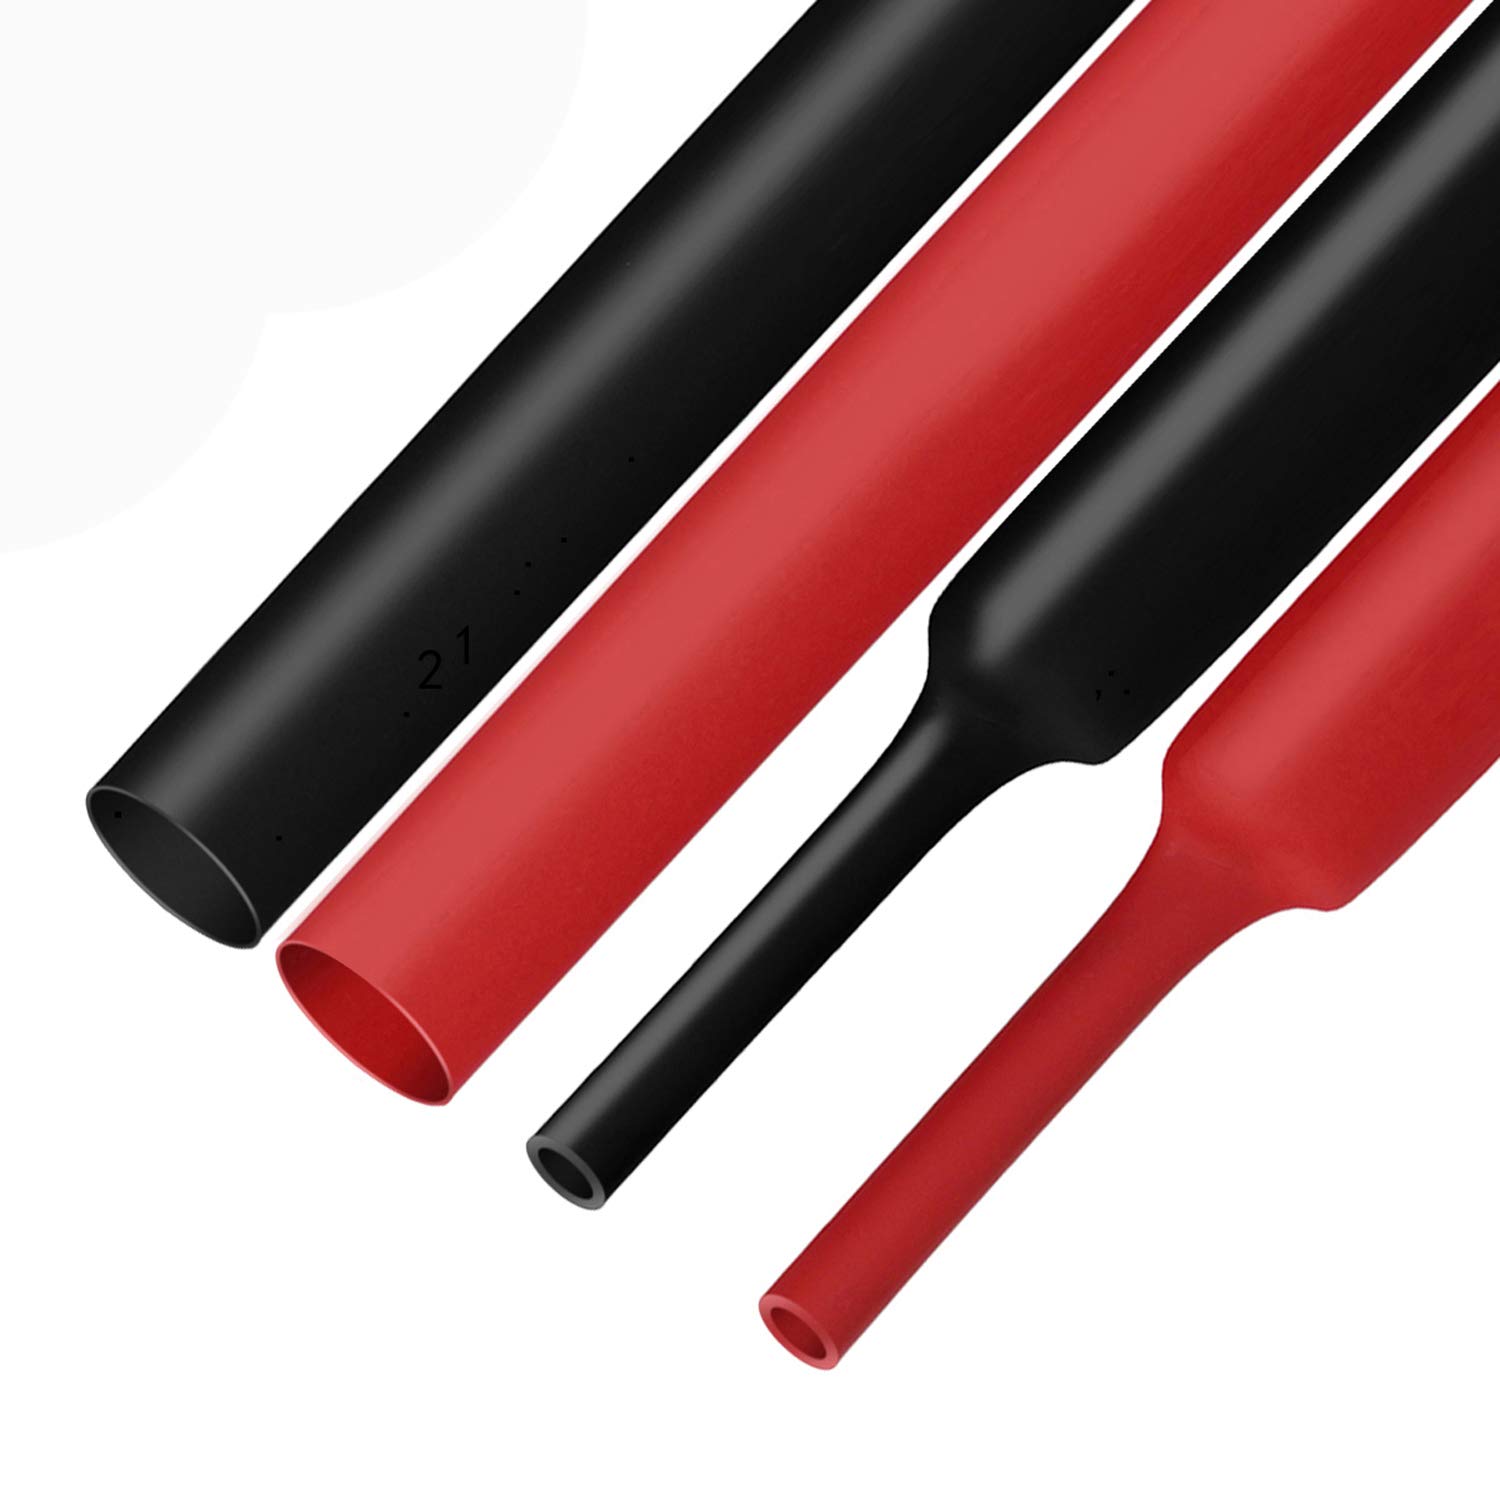
- Use a heat shrink tube and heat gun.
- Repair the wiring using a soldering iron.
Method 1 – Using a Heat Shrink Tube and Heat Gun
This method involves purchasing both heat shrink tubing and a heat gun. The following are the steps for the method:
- Purchase some heat shrink tubes that have a ratio of 3:1. Tubes with a 2:1 ratio are usually cheaper. However, they’re also not strong enough for the typical iPhone charger.
- Buy a heat gun. Aim to choose one that is compact and easy to hold because precision is key when working on an iPhone cable.

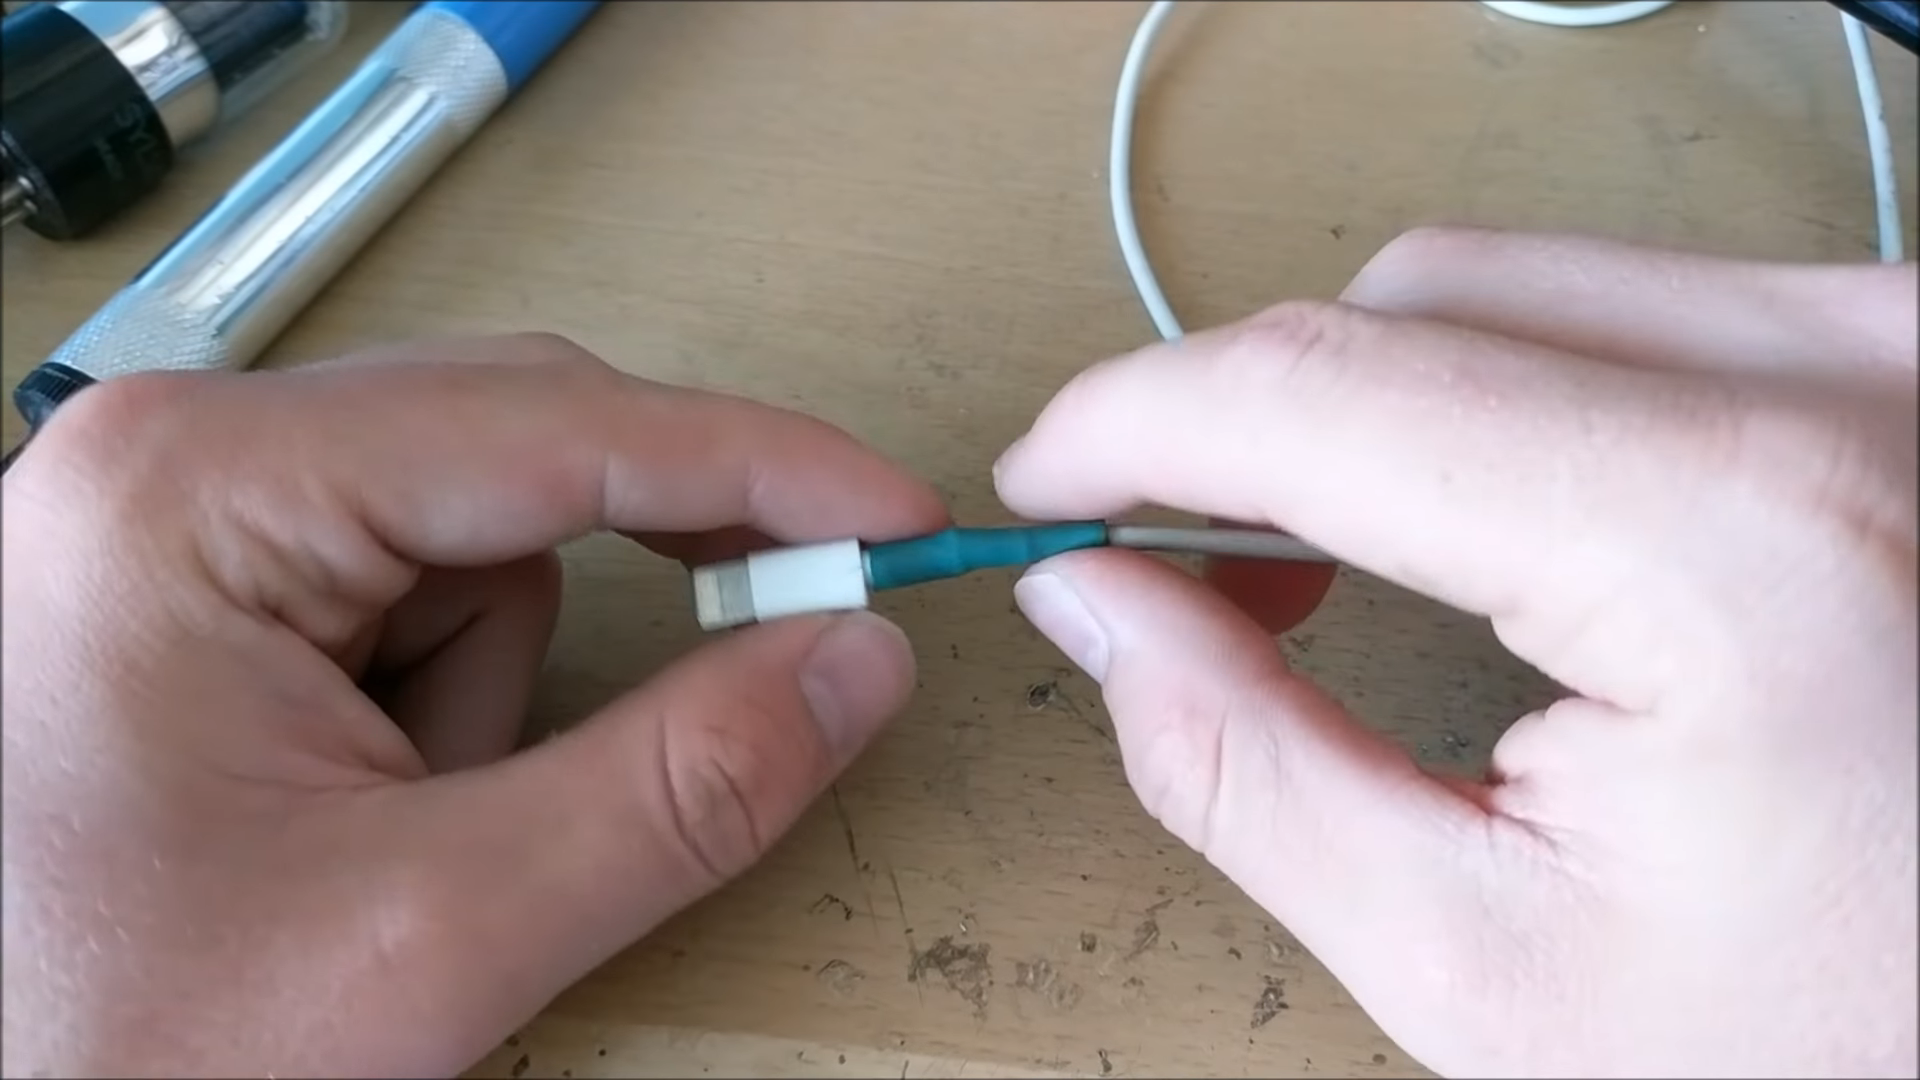
- Use scissors to cut your heat shrink tubing to the appropriate length. The tube must cover a small part of the charging head to ensure a strong connection. However, it should not cover the whole head as this can lead to an insecure fit. The tube must also cover the split in the cable with room to spare.
- Using pliers to hold the heat shrink tubing in place, apply heat using your heat gun. Keep the setting low and rotate the cable so that the tubing shrinks evenly.
- Continue shrinking until you have a uniform, secure fit around both the charging head the cord.
- Allow to cool and set for a few minutes.


In many cases, this method will fix a damaged connection similar to the electric tape solution. However, it also reinforces the point where the cable is weakest, which makes it more durable.
Method 2 – Use a Soldering Iron to Repair the Wiring
If the connection between the charger head and cable is not the issue, you may have a faulty wire inside the cable. Typically, this is an issue that would lead to purchasing a replacement. However, you may be able to fix the problem if you can use a soldering iron.
To follow this method, you will need the following tools:
- A cutting tool
- A soldering iron
- A soldering wire
- A glue gun
Assuming you have the required tools, do the following:
- Gently use your cutting tool to cut the charger head casing in half. Slice horizontally across the middle of the head while ensuring you don’t cut so deeply that you slice the wire inside the charger head casing. Take your time with this process to ensure you don’t cause additional damage to the wires.
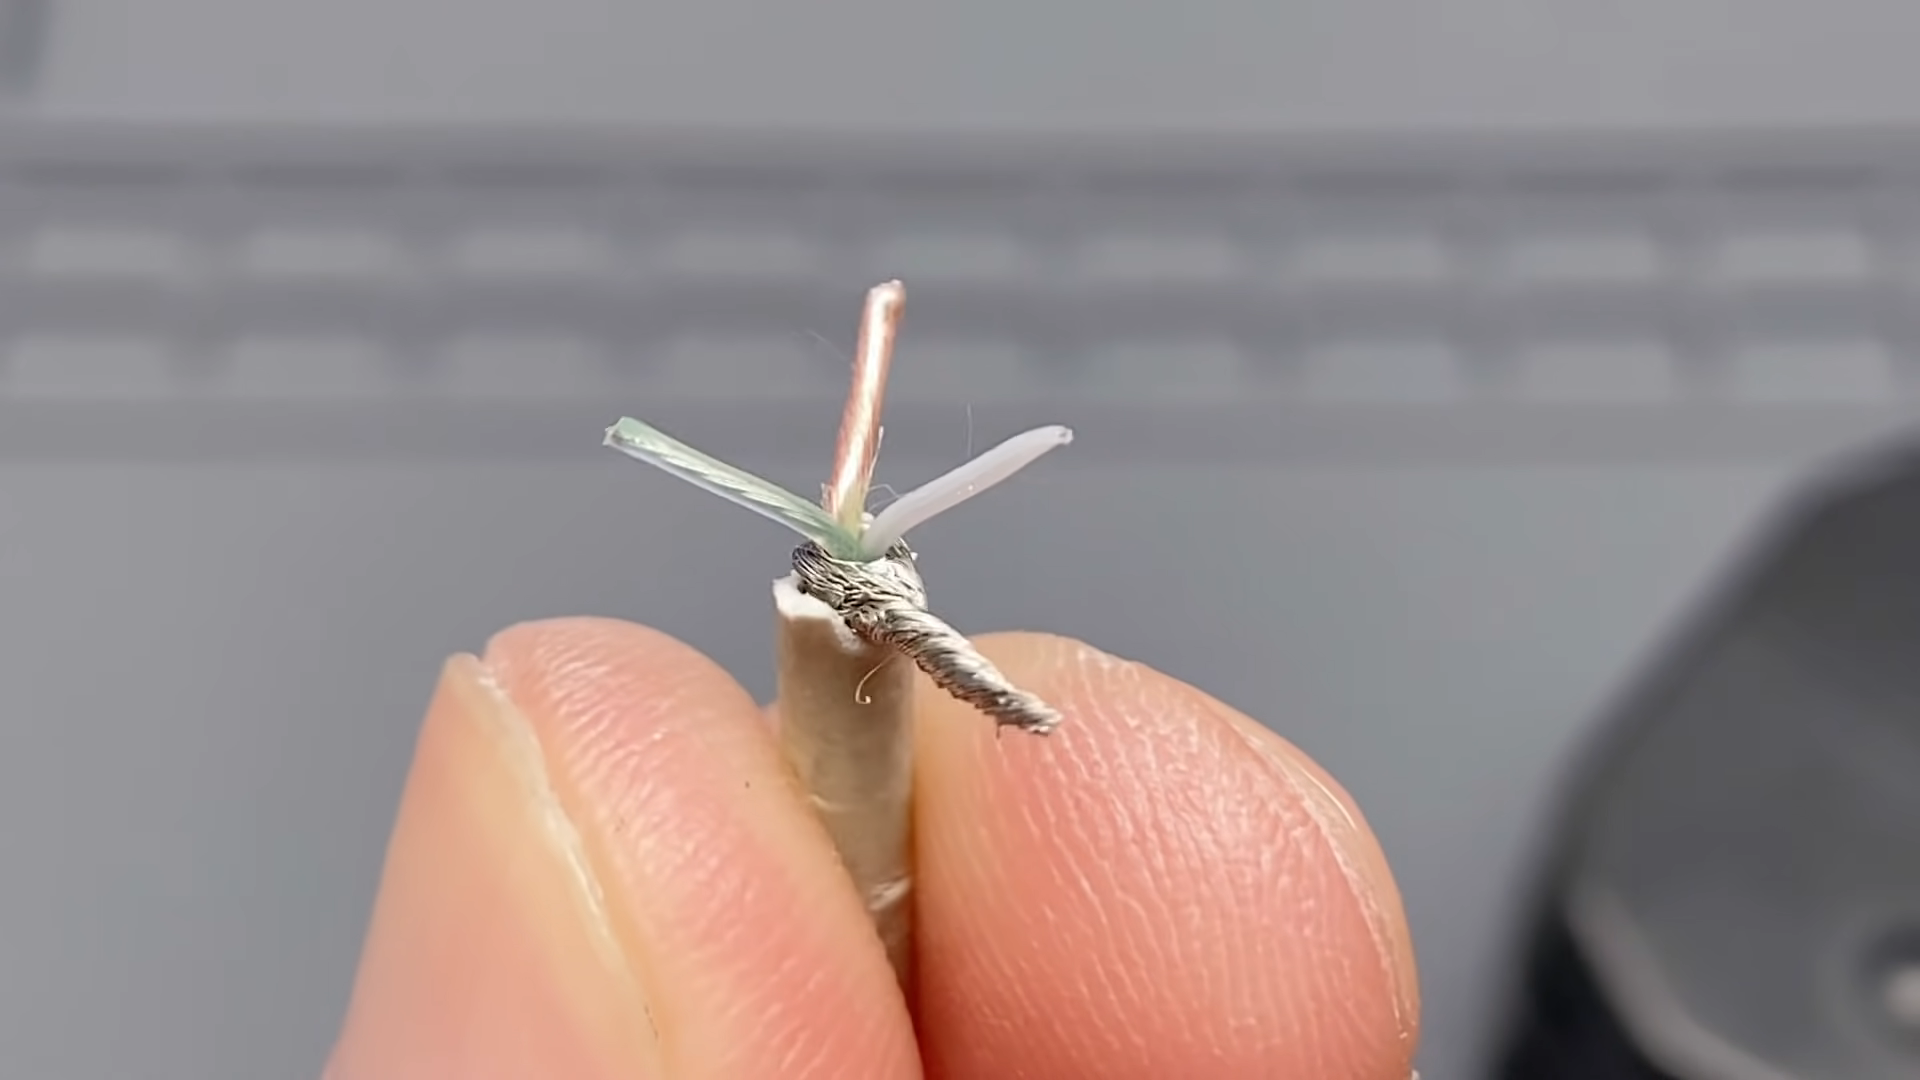
- Pull the two parts of the charger head away from each other to expose the wires inside. Again, do this gently, so you don’t damage the wires or cause further damage to the charger head.
- Take note of the wire sequence. From left to right, the wires should be red, white, green, and black. The red and black wires transmit power, with the white and green being responsible for data.
- If one of these wires is detached or split from the wire bundle inside the charger head, you can use your soldering iron. Heat the iron and use it, along with your soldering wire, to fix the connection between the broken wires.
- Use a glue gun to insulate the wires, so they do not touch one another.
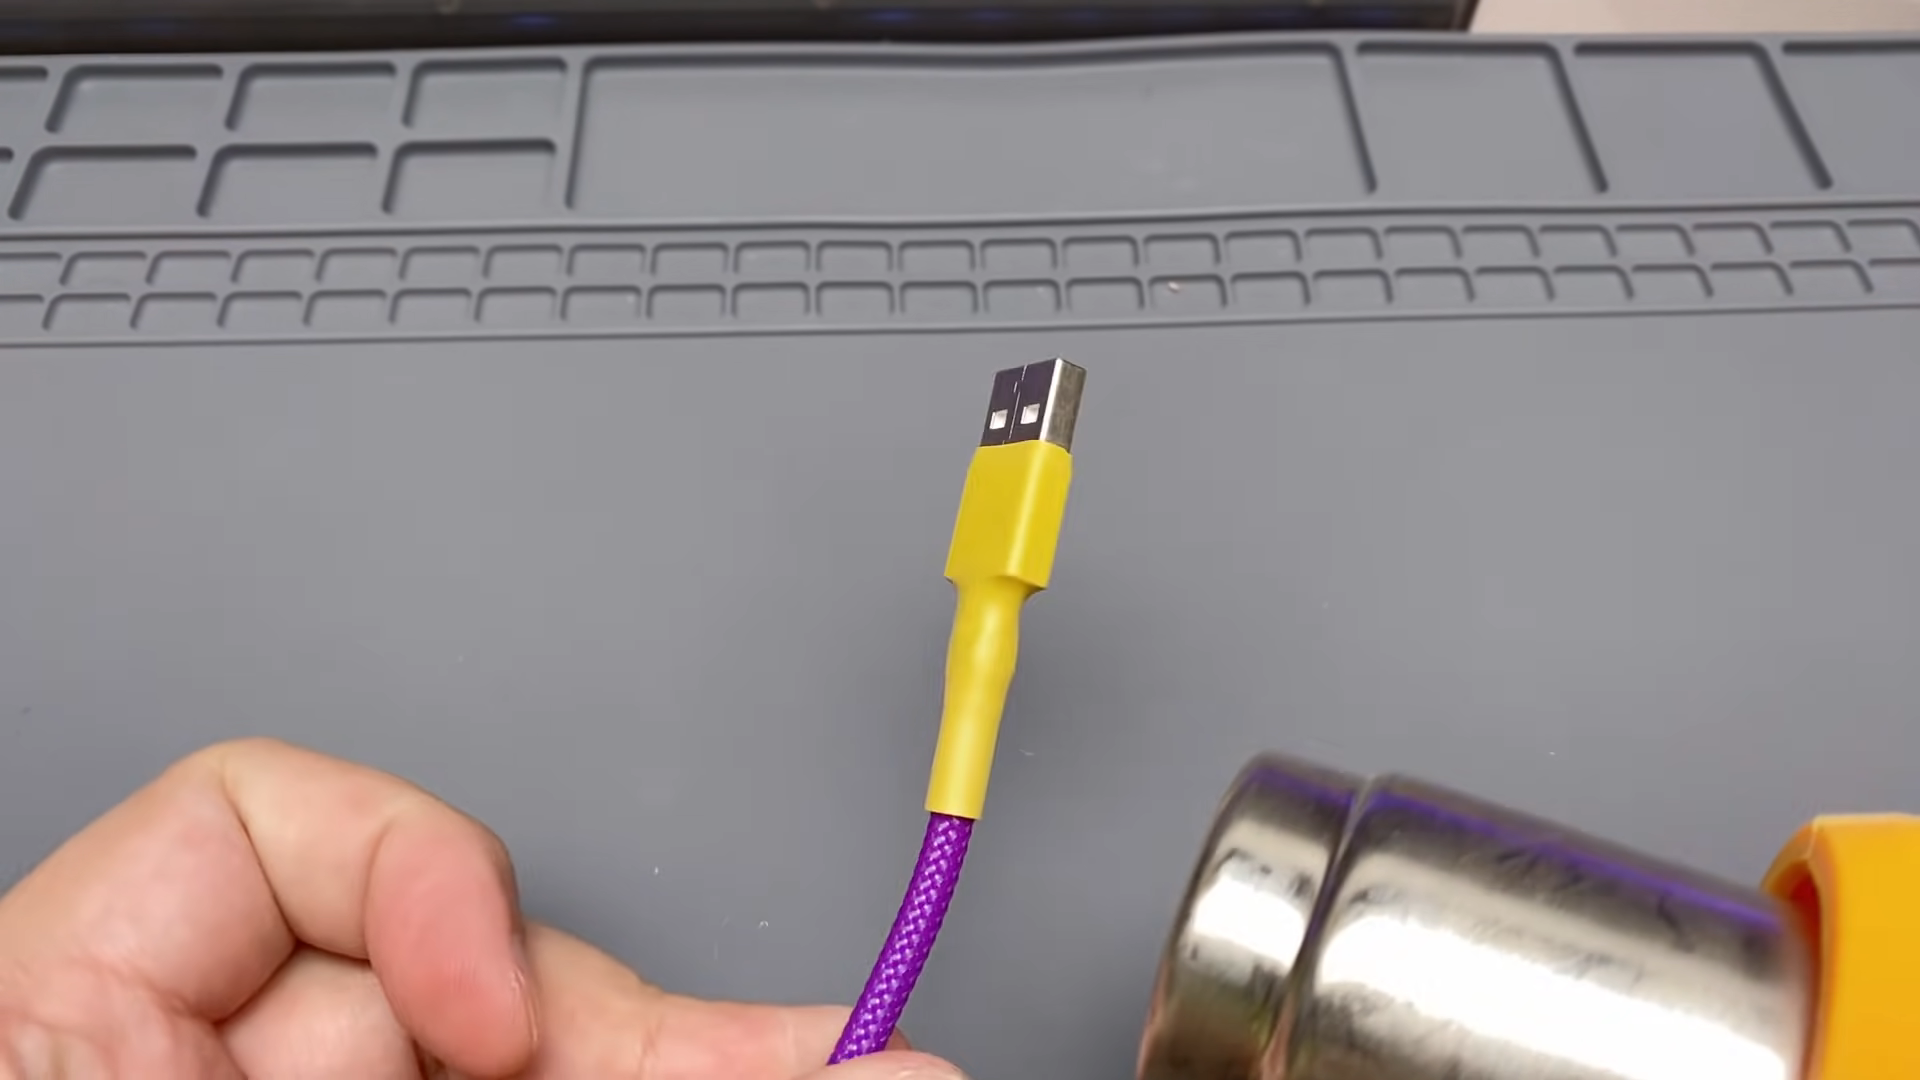
- Attach the two parts of the cable head together. You may use electrical tape, your glue gun, or the heat shrink tube method mentioned earlier.

This technique requires a certain level of expertise with a soldering iron. It will also not work if a broken internal wire is not the issue that’s causing your charging cable to stop working.
How to Fix a Broken Android Charger
While Android charging cables are more generic than Apple’s Lightning Cables, they operate similarly. As such, some of the fixes described above will work for an Android cable too. For example, the electrical tape and heat shrink tubing solutions are just as effective for Android cables. In both cases, you’re using the solution to strengthen the connection between wires whiles fixing a split in the cable.
Similarly, the soldering method described for an Apple charger can also work for an Android charger. However, the key difference here relates to the color of the cable’s internal wires.
With an official Apple cable, the wires will always be red, white, green, and black. However, Android chargers may not follow this pattern, especially if you’re using a third-party charger. This means extra care must be taken to ensure you’re connecting the correct wires when soldering.
Complete the Fix
Whether you fix your charger cable or not may depend on the extent of the work you need to put into the task. If you can fix the cable using electrical tape or heat sink tubing, you achieve an inexpensive and timely fix that may extend the cable’s life by several months.
The soldering method offers a more permanent fix. However, it requires you to possess several tools, in addition to having the necessary soldering expertise to delicately reconnect the thin wires inside your charging cable. You may find that this solution is too work-intensive, leading you to the decision to simply buy a new cable.
Ultimately, the choice is up to you.
So, would you try to fix your device’s broken charger cable? Or, would you simply replace it and discard the old one? Do any of these solutions intrigue you enough to give them a try? Perhaps you even have solutions of your own that we haven’t covered here. Whatever the case may be, let us know in the comments section below.
Disclaimer: Some pages on this site may include an affiliate link. This does not effect our editorial in any way.