Google Docs is a fantastic free tool for creating and editing documents. Sadly, many features are much better in the web version, while the apps are lacking.
If you want to make a hanging indent in Google Docs, for example, the only way to do it is via the web version. This is due to the apps not allowing you to adjust the ruler in any of the documents. And the ruler is essential for making this indent.
Read on and find out how to make a Google Docs hanging indent without too much effort.
Getting Started
To get a hanging indent in Google Docs, all you need is a Google account and internet access. Unfortunately, the iOS and Android apps for Google Docs don’t allow you to see and adjust the ruler, which, as mentioned above, is crucial for making the hanging indent.
The mobile apps are best used for viewing documents, while the web version is far superior for editing documents. Also, it’s common sense that writing and editing documents are much easier on a computer than on a mobile phone or tablet.
Each to their own, but if you want to learn how to make these indents, you’ll have to switch to Google Docs web. Sign in to your Google accounts and read on for further instructions.
How to Create an Indent in Google Docs
Without any further ado, let’s get straight to making indents in Google Docs (web):
- Launch Google Docs in any browser on your computer and sign in.

- Open the document that you want to edit.
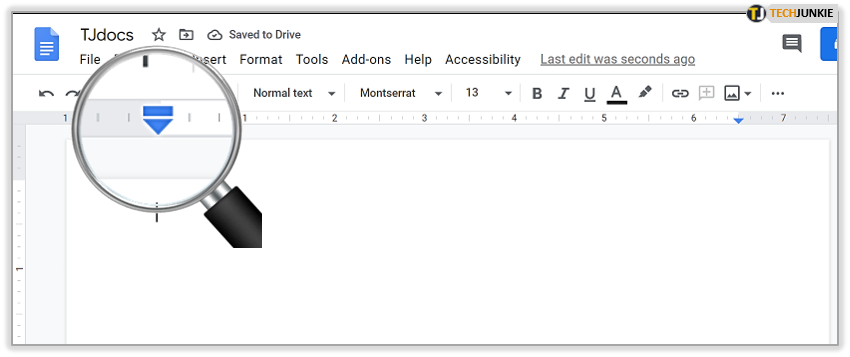
- Make sure to enable the ruler right away. Click on the View tab (top-left corner of your screen), and then select Show Ruler from the dropdown menu.
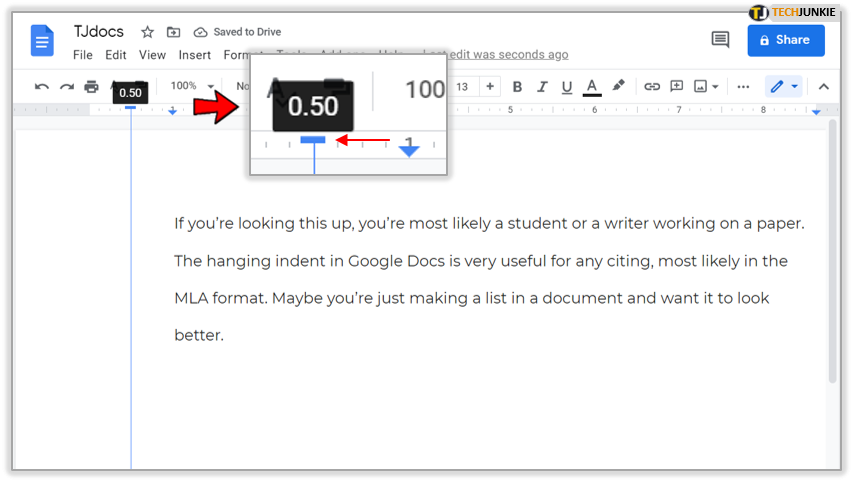
- You will notice two blue arrows at the beginning of the ruler. One is the indent marker for your first line, and the other one is the left indent marker. They show you the path which your text is going to follow. To make an indent, select the paragraph(s) you want to adjust.
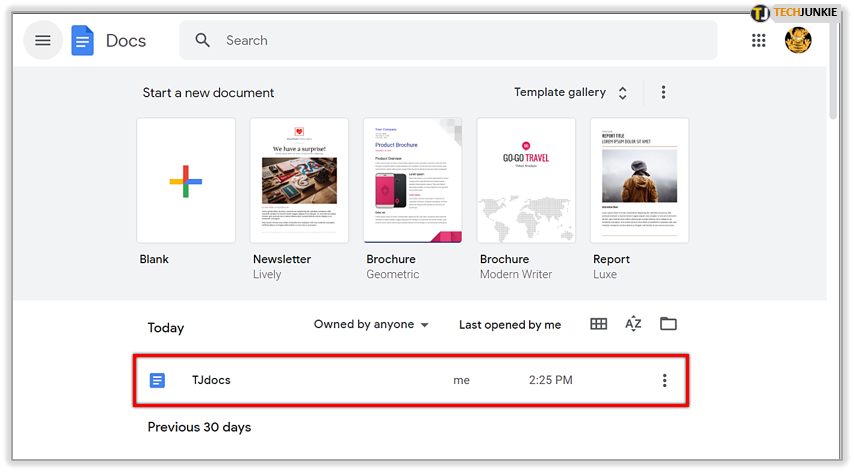
- Click on the upper marker (first line indent) and drag it to the right. Since this is a touchy button, feel free to zoom in your browser.
- While you’re dragging, a line will appear and show you the length of your indent (in inches). When you release the first line marker, the paragraph(s) will be placed accordingly, with the first line showing indentation.
- If you use the left indent marker, you can make an indent for the entire paragraph, not just the first line. Select the section (s) and drag the lower (left indent) marker to the right. When you release it, all the paragraph lines will move right.


How to Create a Hanging Indent in Google Docs
You just learned how to make regular indents in Google Docs. Here’s how you create a hanging indent:
- The hanging (or negative) indent is used by combining both indents. A negative indent is when all the lines of a paragraph are indented but the first one. Most commonly, you’ll create a hanging indent for bibliographies, citing, and referencing. To begin, select your section(s) and drag the bottom marker (left indent) to the right.
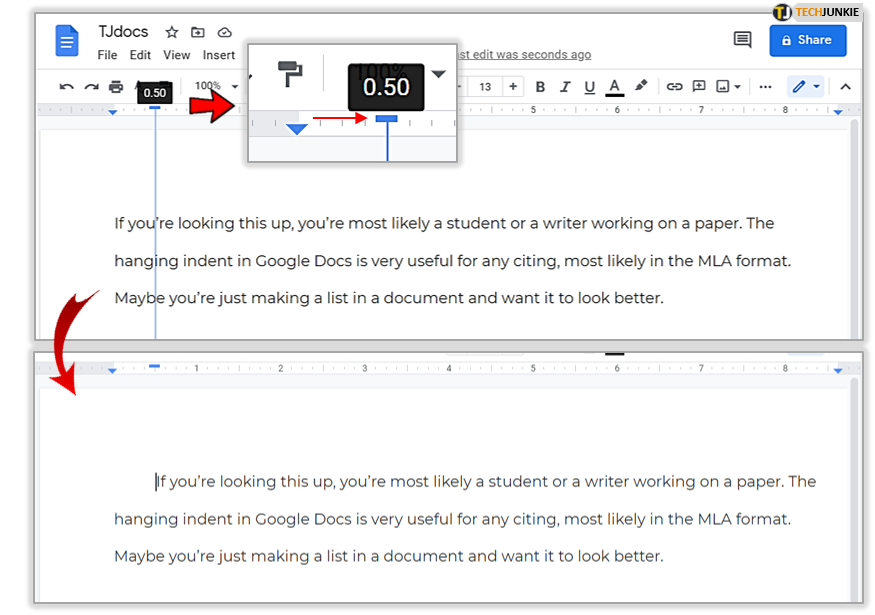
- Then, drag the upper marker (first line indent) to the left of the ruler.
- Doing so will negate the indentation of the first line in your paragraph(s). All paragraph lines except the first one will be indented.


Creating a hanging indent in Google Docs is as simple as that. In addition, you can tinker with the indents by using the decrease and increase indent options. They should be in the top-right corner of your screen, just above the ruler.
By using these options, you can decrease or increase the indentation for half an inch per click on each of the buttons. The markers are a much better way of making the indents to your preference.
Good Luck with Your Paper
If you’re looking this up, you’re most likely a student or a writer working on a paper. The hanging indent in Google Docs is very useful for any citing, most likely in the MLA format. Maybe you’re just making a list in a document and want it to look better.
In any case, have fun experimenting with indents. Note that you can use the Undo option any time you’re not satisfied and start over. Let us know if there’s anything else you’d like to add in comments section below.
Disclaimer: Some pages on this site may include an affiliate link. This does not effect our editorial in any way.


