When objects overlap in a slide presentation, selecting the one you want can be tricky. If you’re having trouble selecting an object that’s behind another item, don’t worry. Google Slides has built-in tricks to help you select something that is overlapped.
This article will explain how to select an object behind another object in Google Slides.
How to Select an Object That Is Behind Another Object
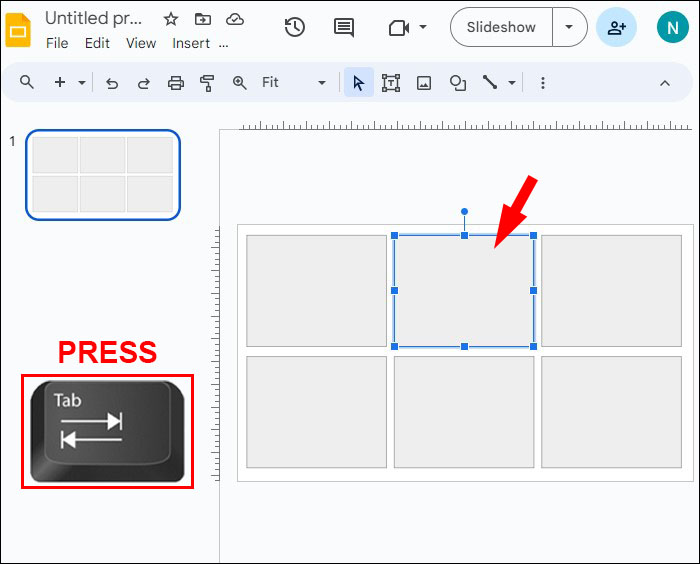
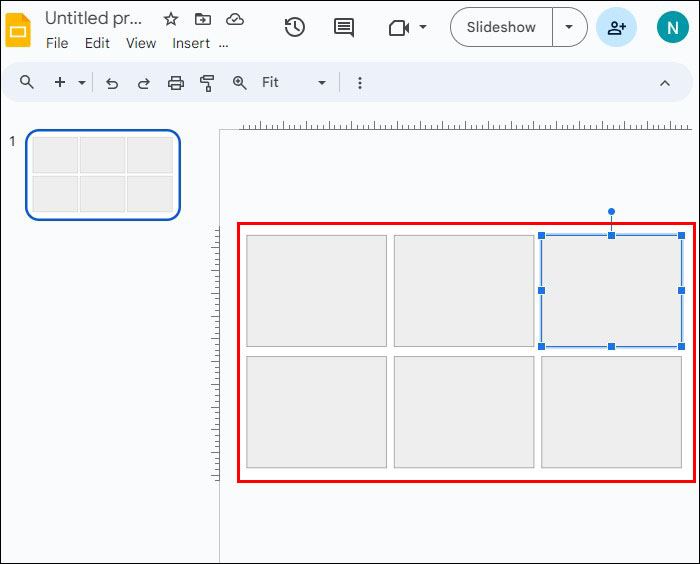
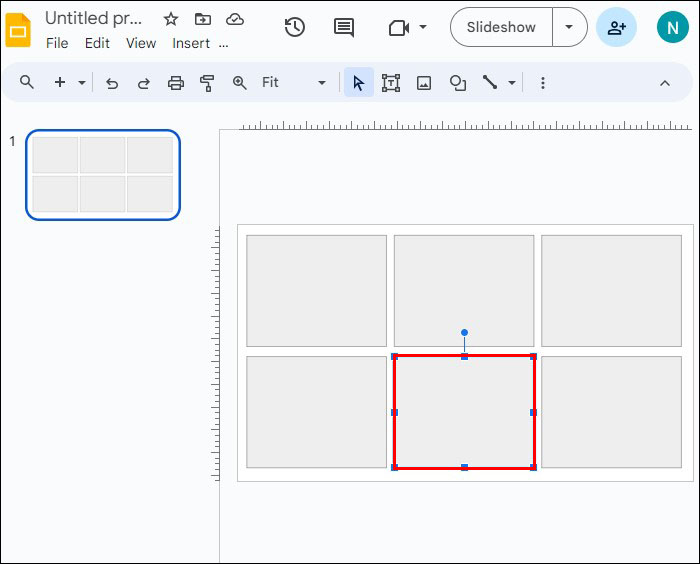
When you’re having trouble selecting an object, the fastest way to solve the problem is to use the tab key to cycle through all the objects in your slide.
- Select an object. This can be any object and doesn’t need to be the one that’s giving you trouble.

- Press the Tab key to select the next object on the slide.

- Continue to press the tab key to cycle through, object by object, every selectable part of your slide.
- When you’ve selected the object you need, proceed with the action you want to do with it.
This process is quick and easy when a slide features only a few objects. If your particular slide is overloaded with images and text, the next option for selecting an object might work better for you.
How to Move an Object to the Back
If you’re having a hard time selecting an object, chances are something else is in front of it. In this case, send the objects in the foreground to the back while you edit the object you have in mind. You can always rearrange them to their original positions when you’re done.
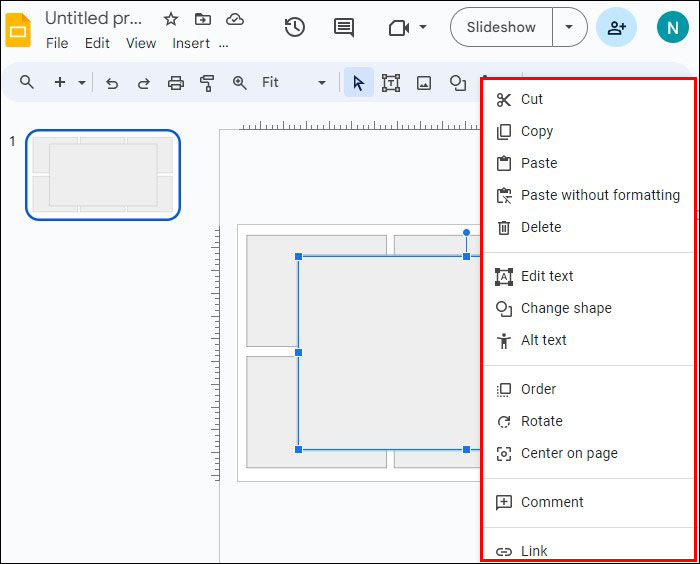
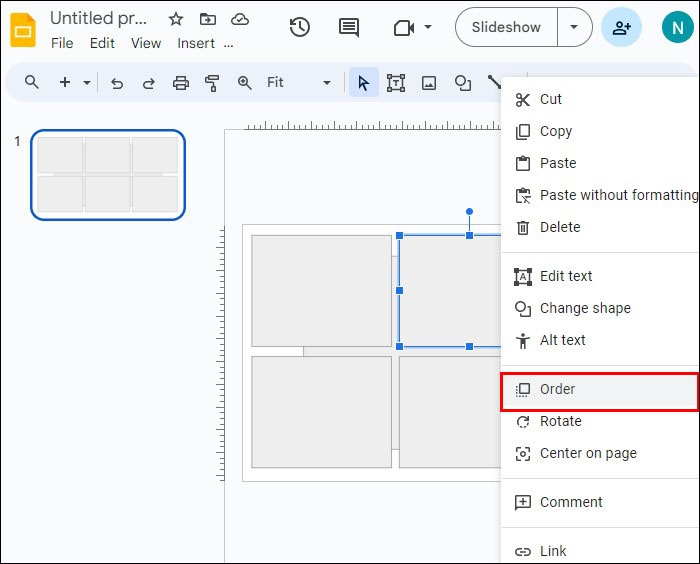
- Right-click the object you want to move out of the way.
- Select “Order.”
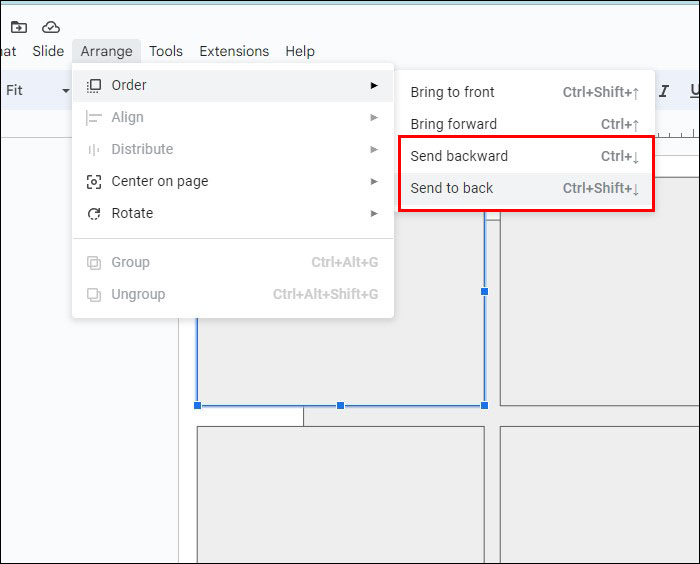
- You have two options that will impact the object in a backward direction:
- Choose “Send backward” to move the object one layer backward.
- Click “Send to back” to move the object behind every other object on the slide, skipping all the way to the back.
- Choose the appropriate action and select it.


You can also use the menus to do this instead of using a right-click shortcut.
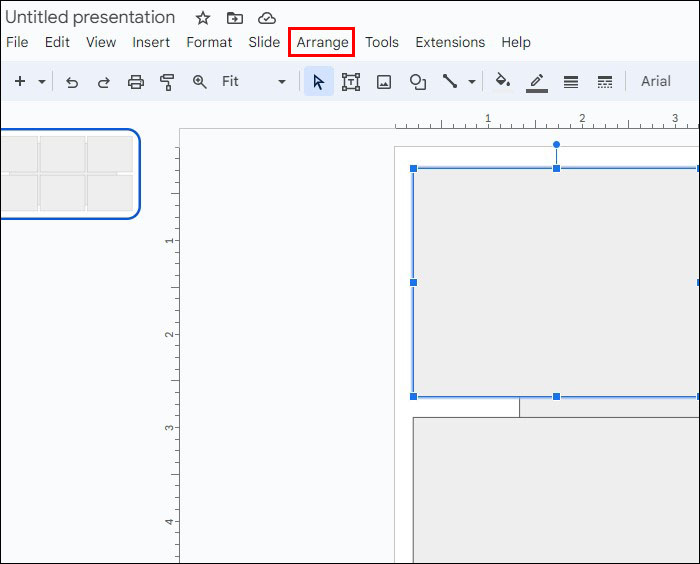
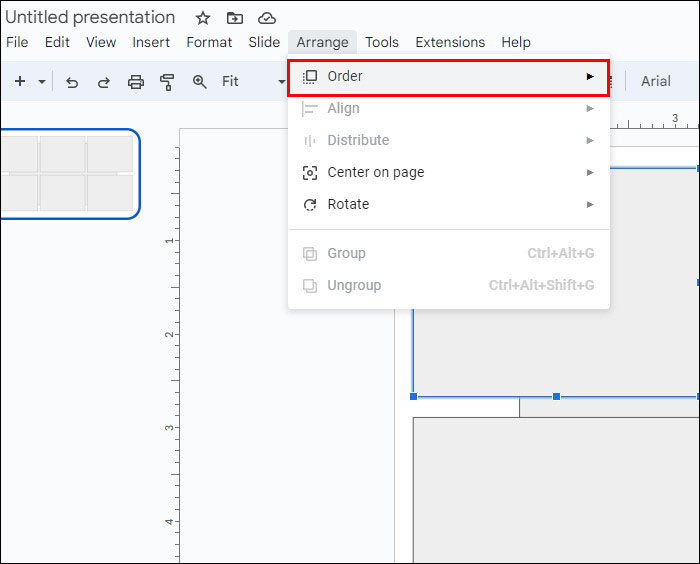
- Select the object you want to move.
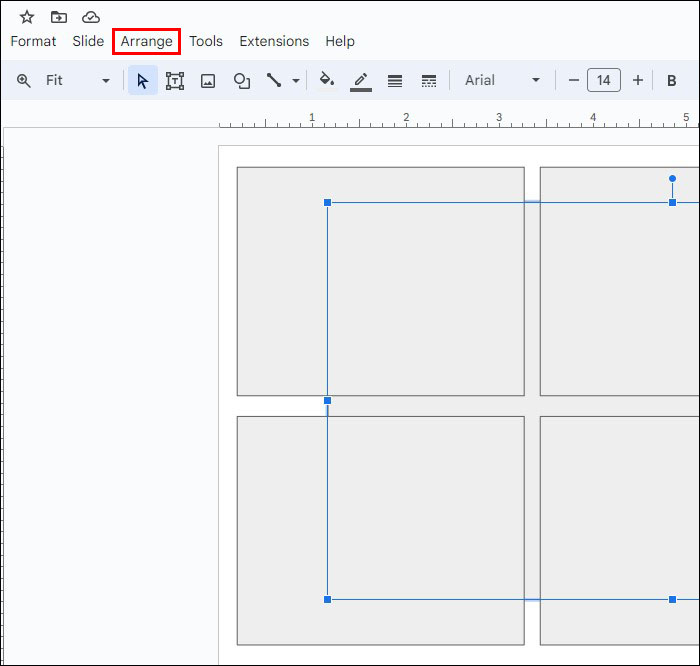
- Click the “Arrange” tab.
- Choose “Order.”
- Select the appropriate action:
- Click “Send to back” if you want the object moved to the very back of the slide.
- Choose “Send backward” to move the object only one layer backward.
You can move objects that are in your way temporarily to keep them from blocking other objects. When you’re done, you can reorder all objects in the slide by moving their positions forward and backward.
How to Bring an Object Forward
Once you’ve selected an object that’s situated behind another object, it can be helpful to bring it to the front to make it easily accessible. This is especially useful if you need to edit it repeatedly and don’t want to keep moving through the steps to select it while it’s in the back.
- Right-click the object.
- Choose “Order.”
- Select how far forward you want to bring the object:
- Choose “Bring forward” to move it one layer ahead of the other objects. Sometimes this is enough to make it easily selectable.
- Click “Bring to the front” to move the object in front of all the other objects on the slide.
- When you’re finished interacting with the object, you can move it back to its original position.


If the object you want to move is obstructed by other objects, and right-clicking it isn’t possible, you can use the Tab button and menus instead.
- Select the object that you want to bring forward. Use the steps above to cycle with the Tab key if the object is hard to select with your mouse.
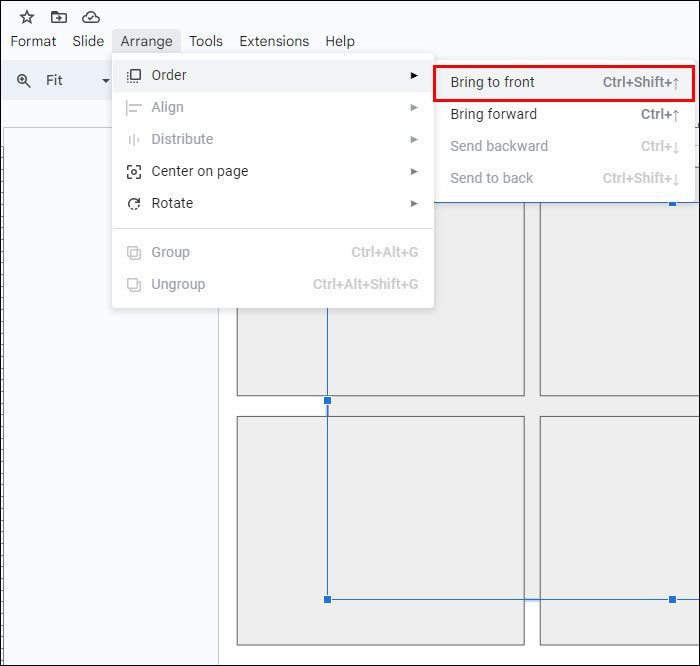
- Click the “Arrange” tab.
- Choose “Order.”
- Select one of two options:
- “Bring to the front” will place the object in front of all other objects on the slide.
- “Bring forward” will move the object one layer forward.
- Once you’re done with the object, move it back into its original place if you desire.

It’s possible to move the object backward and forward as many times as necessary while you layer them to give the appropriate look to your slide presentation.
Grouped Objects
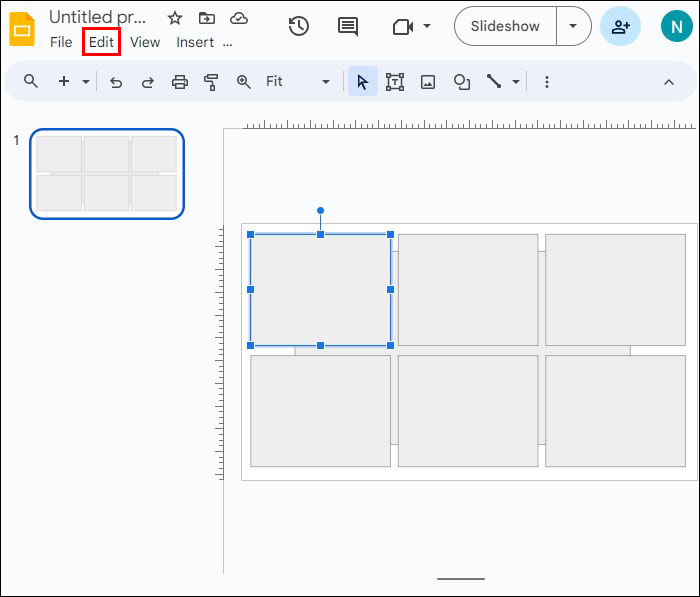
You may have trouble selecting an individual object if it’s part of a “Group” with other objects. Grouped objects act as one entity and can’t be selected by themselves. This feature is great for reducing the amount of work it takes to move and resize things that are related to each other. When you need to edit an individual group member, however, you’ll have to ungroup them first.
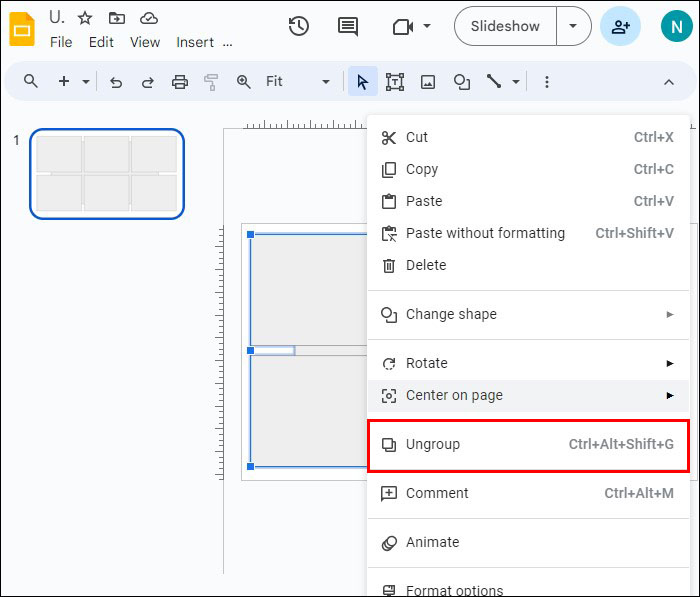
- Select the group of objects.
- Right-click the group and choose “Ungroup.”
- You can now edit individual objects.
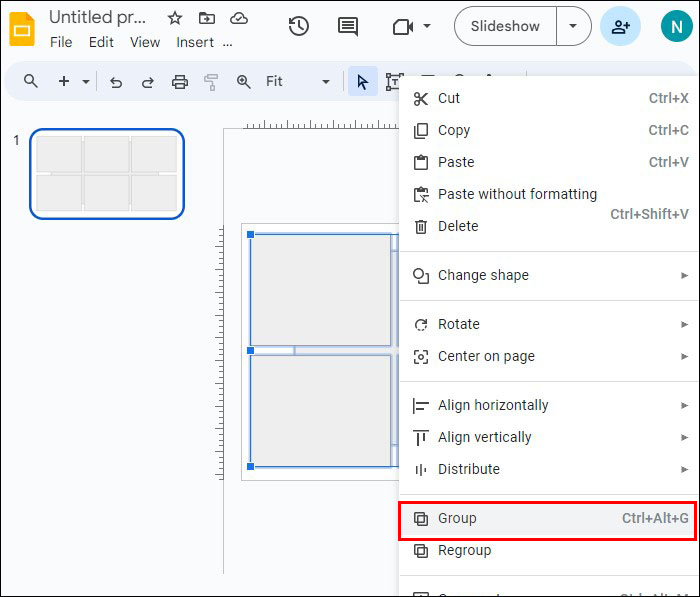
- When you’re finished, if you want to regroup them again, select them all. You can select them with either of these two methods:
- Click and drag to select them all together.
- Click each one while holding the “Shift” key.
- Right-click on the selection and select “Group.”

Google Slides Short Cuts
Many of the possible actions have keyboard shortcuts to make them even easier. Here’s a list of some of the most helpful Google Slides shortcuts and what they do:
- Tab: Select the next object (shape, text, image, etc.)
- Shift + Tab: Select the previous object (shape, text, image, etc.)
- Ctrl + Alt + Shift + G: Ungroup objects
- Ctrl + Shift + Down Arrow: Send the selected object to the back (Windows)
- Cmd + Shift + Down Arrow: Send the selected object to the back (macOS)
- Ctrl + Shift + Up Arrow: Send the selected object to the front (Windows)
- Cmd + Shift + Up Arrow: Send the selected object to the front (macOS)
For more shortcuts, visit the Google Slides keyboard shortcuts page. Shortcuts are listed by platform, including PC, Mac, Chrome OS, Android, and iPhone/iPad.
FAQ
Does Google Slides have a “Selection Pane” option like PowerPoint does?
No, unfortunately, this feature isn’t currently available in Google Slides.
Why do all the objects I insert appear in the same place?
Google Slides tends to add all objects to the same location. It’s helpful to add an object and reposition it before you add another object. This prevents an overlapping situation where selecting the behind object becomes difficult.
Selecting Layered Objects in Google Slides
It can be frustrating to continually try to select an object only to select something else instead. Fortunately, with the right steps, you can select the object you want while leaving the other slide elements untouched. Layering gives slides a dynamic and complex appearance. Fortunately, you can layer things without worrying about being unable to select the objects in the back.
Have you ever selected objects behind other objects in Google Slides? Did you use any of the tips and tricks in this article to help you? Let us know in the comments section below.
Disclaimer: Some pages on this site may include an affiliate link. This does not effect our editorial in any way.