Our Windows desktop is often our go-to location to put files and folders, especially if we want quick and convenient access. As a result, our desktops could look like a massive heap of clutter – a hodgepodge of files on screen.
In part this is the fault of the operating system; the Desktop appears first in just about every file save dialog making it an incredibly handy place to stow “just a couple of files”. Unfortunately, these couple of files quickly accumulate into so much more. Your desktop quickly ends up looking like chaos.
It doesn’t have to be that way. Organizing your Windows desktop is a lot easier than cleaning up real-life clutter, and you don’t even have to stop using the Desktop as your default organizing space. In this article, we will show you how to get your Windows desktop organized so that it’s clutter-free, efficient, and convenient.
(Just need a short-term fix for a crowded desktop without doing a major reorganization? You might try our tutorial on how to shrink your desktop icons, although that’s only a temporary fix.)
Windows has some built-in features for organizing files and folders, which might just be what you need. For a more robust solution, there are some third-party packages which you can use to group desktop icons into specific categories. Let’s have a closer look at both of these solutions.
Organizing the Desktop Icons With Folders
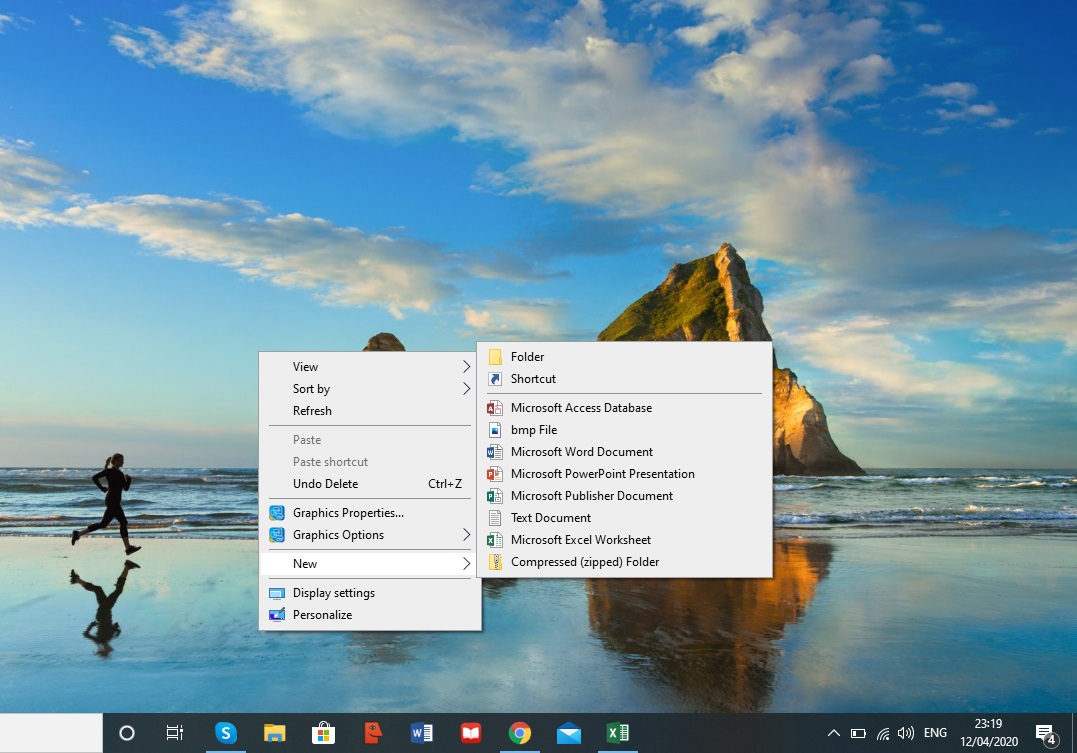
The most straightforward way of getting your desktop under control is to use folders. Adding new folders to the desktop is simple. First, right-click on the desktop, and select New. Then, click on Folder from the drop down to create an empty folder.
It’s a good idea to name the folder when you make it to be more organized. But in case you forget, you can always rename it by right-clicking on the folder and selecting Rename. You can then type in a name for it. Remember that you are trying to make your desktop more organized, and the least thing you want is seeing your folders named New Folder, New Folder (2), New Folder (3), and so on.
Now you can drag and drop the appropriate desktop shortcuts into your new folder. This will save the files in your folder instead of having them scattered around your screen. You could add any number of folders to the desktop for alternative shortcut categories such as applications, utilities, multimedia software, and so on. Then you could move the icons into the folders as in the snapshot below.
![]()
If you have a lot of files on your desktop, getting them organized can be difficult, especially if they start overlapping. One useful technique is to use the built-in sorting functions of Windows 10 to sort your files by type. This will put all the files of the same type together, so that for example if you have a “Movies” folder, doing a sort by type will put all the video files in one place. This way, you can you can easily group-select and drag them to your “Movies” folder. Just right-click on the desktop, click Sort by -> Item type.

Third-Party Tools
Nimi Places
The built-in folder system for Windows is simple and effective, but it isn’t feature-rich. One feature you might want to have is the ability to see inside folders without having to open them, just to remind you whats in there. You can create folders like that using a third-party tool called Nimi Places. It is a portable software package that you can use to add folder groups to the desktop. Open this page and click “Download Nimi Places” and save the executable. Then click on the .exe file and select “Extract Nimi Places” to launch the software.
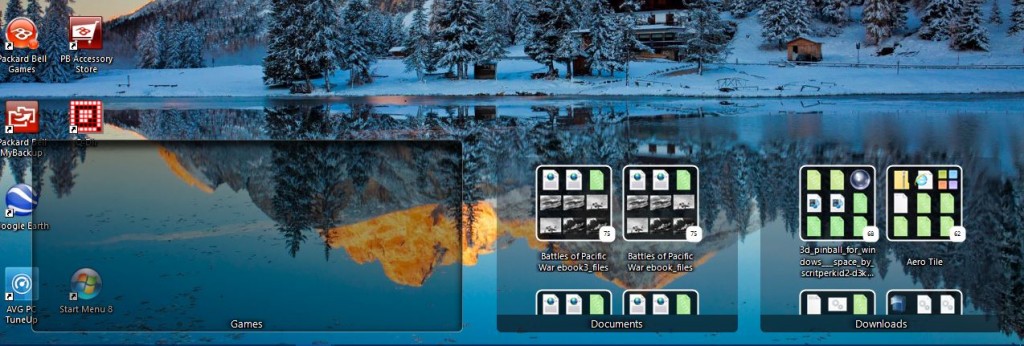
Nimi Places launches with four ready-made container groups for Applications, Games, Documents, and Downloads. You can copy and paste desktop shortcuts into those boxes by right-clicking an icon and selecting “Copy.” Then right-click inside one of the container boxes and click “Paste” to add the copied shortcut to it.
You can also drag the containers to re-position them on the desktop. However, there is a tendency for you to drag them around the screen by accident. To avoid this, just right click on a container and click Lock. You can unlock them the same way, by right-clicking the container and selecting Unlock.
To add your own group containers to the desktop, click the Nimi Places icon in the system tray. This will open the window as shown in the screenshot below. Click the + button at the bottom right to make a new container. Then click Place, and select one of your desktop shortcut folders. That will add the folder container to the desktop, and you can open the shortcuts it includes from there.

You can resize the containers by clicking dragging their borders with the mouse. Note that you can also scroll through the contents of larger containers with a scroll bar by clicking the right side of a container and then dragging its scroll bar up and down.
To edit the containers’ titles, right-click on the title bar at the top of the container box. Then, select the Rename container option, which opens the text box below. Enter an alternative title for the container there.

The software has some other customization options for the containers. To see them, right-click a container and select Appearance and Theme from the sub-menu. This will let you choose some alternative backgrounds for the containers.

ToolBox
ToolBox is another third-party package you can use to group your desktop icons. You can download the program from here. Click tbox285.zip to save its Zip. Then open the Zip folder in File Explorer and click Extract all to extract the contents of the folder. When you’ve extracted the Zip file’s contents, you can run ToolBox from there.
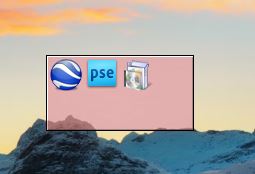
Now you can set up new icon boxes for the desktop by right-clicking the ToolBox icon on the system tray and selecting New Toolbox. That adds a box to the desktop as you can see in the screenshot below. Drag desktop icons into the box or boxes to organize them.
To further customize those desktop icon boxes, right-click one and select Toolbox Properties from the contextual menu. That opens the window in the snapshot directly below. There, you can resize the boxes, alter their colors, and apply new effects to them.
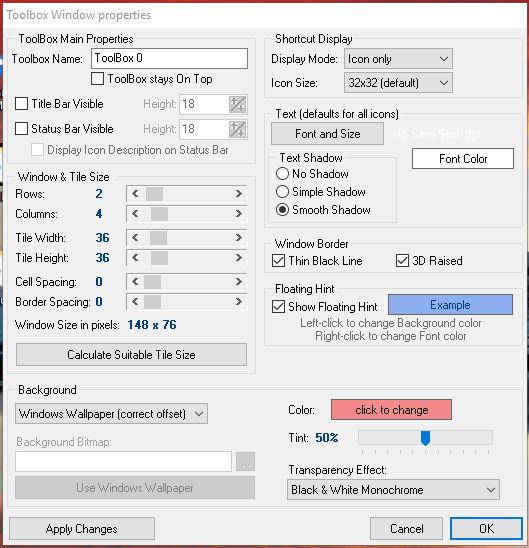
To resize the icon boxes, drag the bars under Window & Tile Size. Drag the Rows bar to expand or contract the height of the box. Alternatively, you can drag the Columns bar right or left to alter the width.
You can alter the colors of the boxes by clicking the box next to Color. That will open a color palette from which you can choose other colors. Or you can add some background wallpaper to the box by selecting Bitmap from the drop-down menu and pressing the … button beside the Background Bitmap path box.
You can include the title at the top the box by clicking the Title Bar Visible check box (or hide the title by unchecking it). Enter new titles for the box in the Toolbox Name text box at the top of the window.
Once you’re done, click the Apply Changes button to apply any newly selected settings.
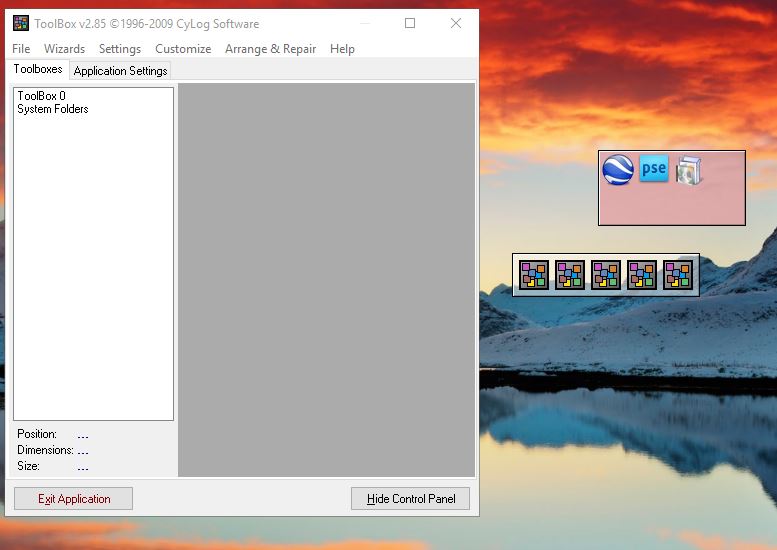
The Toolbar Control Panel lists all your icon boxes. You can right-click a box and select Toolbar Control Panel to open the window shown below. The Toolboxes tab lists the desktop icon boxes. You can a delete a box by right-clicking its title there and selecting Delete Toolbox. Click Settings > Save all toolbox settings to quickly save all the shortcuts, effects, and desktop positions of the icon boxes.

In addition, you can also set up boxes that include system tray shortcuts. The Toolbar Control Panel includes a Wizards menu at the top. Select that to open a small menu where you can set up a system folder, drive, and megapack shortcut box.
With Windows 10 folders, Nimi Places, and ToolBox, you can now effectively group your desktop icons and organize shortcuts. You might also look at app launchers as a way to clear up a cluttered desktop, as covered in our How to add new app Launchers to Windows 10 article.
Disclaimer: Some pages on this site may include an affiliate link. This does not effect our editorial in any way.


