The first hard drive hit the market in 1956; it was a 5-megabyte drive for an IBM mainframe, it weighed more than a ton, and it eventually failed. All hard drives fail, because despite their connection to electronic devices, hard drives are (or were) mechanical in nature: a physical platter spins at thousands of revolutions per minute and a moving arm equipped with magnetic sensors reads magnetic pulses stored on the platter. Today’s solid-state drives (SSDs) do not have any moving parts and so they last longer, but they too eventually wear out. When a hard drive fails, it can be anything from an annoyance to a catastrophe, depending on the backup system that was in place to keep that data safe and secure. Fortunately, there are some warning signs of an impending hard drive failure, and some things that you can do to protect yourself from a drive failure. In this article, I will show you how to prepare for the worst and the warnings you should look out for.
Note that this article is written with a Windows PC in mind, and the software tools I mention will generally be Windows-specific, but the general concepts discussed apply to Mac or Linux computers as well.
Warnings of an Impending Failure
Most components on a PC that can fail will give some warning of their deteriorating condition before they just stop working altogether, and hard drives are no exception. Here are some warning signs of a developing hard drive problem:
- Disappearing files: If a file simply disappears from your system, this can be a sign that the hard drive is developing issues.
- Computer freezing: Computer freeze up from time to time, and it’s almost always solved by a quick reboot. However, if you find that you need to reboot more and more frequently, that could be an indication that your hard drive is beginning to fail.
- Corrupted data: If files on the drive are suddenly corrupted or unreadable for no apparent reason, it’s possible that your hard drive is experiencing a gradual failure.
- Bad sectors: If you start receiving error messages about “bad sectors”, “CRC” or “Cyclic Redundancy Error”, that is a sure sign that your drive is developing problems.
- Sounds: If your hard drive is making sounds that you aren’t familiar with, this could also be bad news, particularly if it’s a grinding, clicking or screeching noise.
Diagnosing the Problem

Diagnosing hard drive problems is generally a process of elimination. There are multiple points of possible failure, and not all of them are in the hard drive itself.
What to do if Your Computer Still Boots to the Operating System
Investigate Your Hardware With Device Manager
The first thing to do is to use Device Manager to check and see whether your controller or motherboard is the source of the problem.
Run a Virus/Malware Scan
The second thing to do is to run a complete virus and malware check, as malicious software can often cause problems such as freezing or file corruption that you could mistake for problems with your drive. There are many good programs available for this; read this TechJunkie article on the best antivirus programs as well as our article on the best anti-malware programs.
Use Windows Diagnostic Tools
Next, use Windows’ own diagnostic software to see if it can detect any problems.
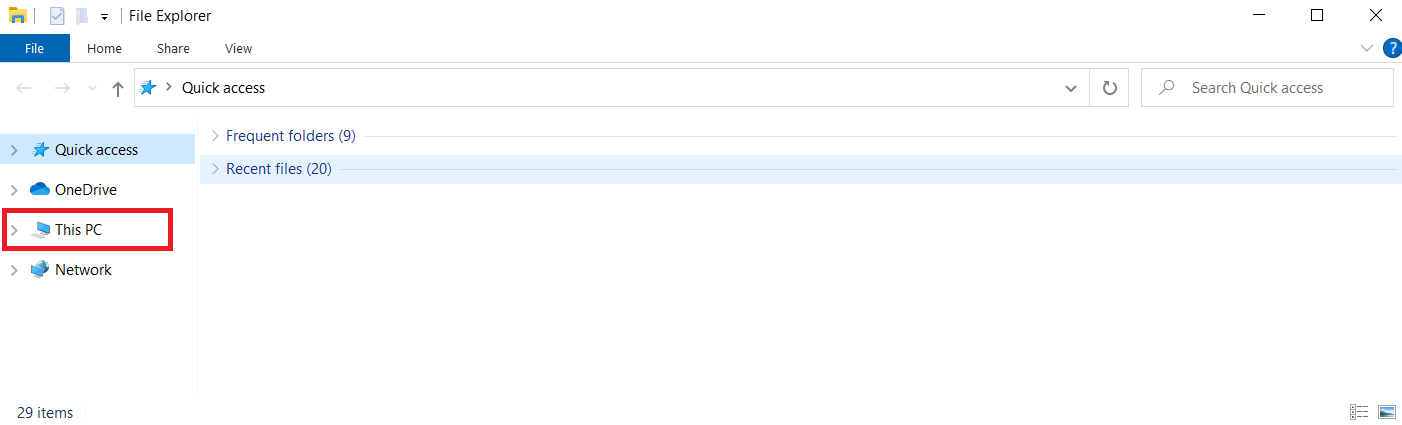
- Open File Explorer and click on This PC.

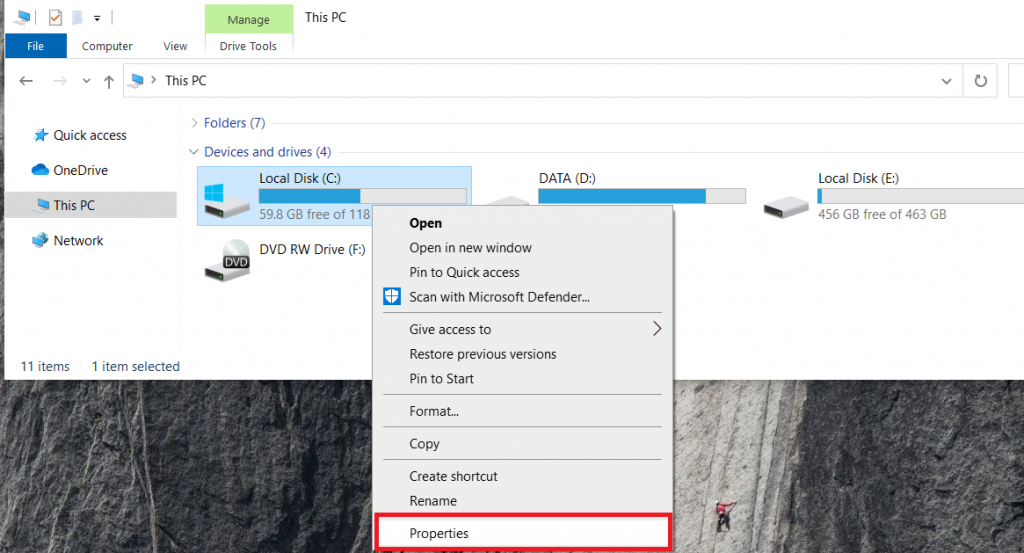
- Now, right-click on the drive and select Properties.
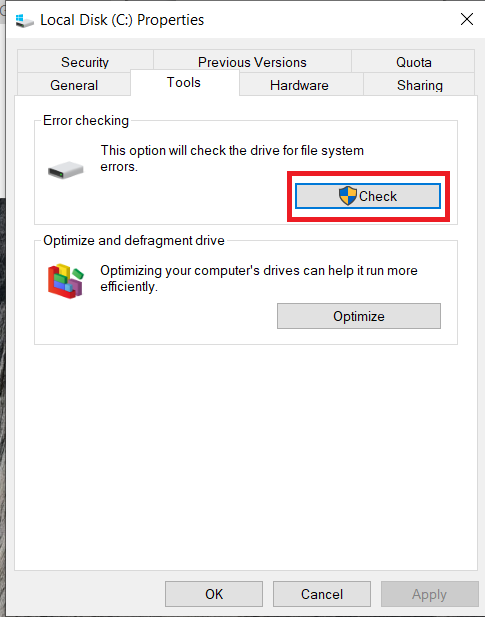
- Next, navigate to the Tools tab.
- Then, under Error Checking select the Check button.
- This will take quite some time, Windows will identify any sectors that have gone bad. This diagnostic procedure actually can fix many minor drive problems by detecting which section of the drive has a problem and not using that part of the drive anymore. However, this should be regarded as a temporary fix, and you should back up your data as soon as possible.

Check Your Hardware
If you suspect your hard drive of failing, you’ll want to inspect and test your hardware.
- Start by replacing the SATA or IDE cable for your hard drive and testing it, it’s the quickest and cheapest hardware solution. Reboot the PC and see if the problem persists.
- Next, plug your drive with the old cable into a different SATA or IDE port, if applicable, or use an external disk drive enclosure. Again, reboot the PC and test it.
- Create a Windows Recovery Tool on a USB drive and boot into it to scan your drive for errors. The various scans that can be performed at the command line exceed those of Windows Check option for drives.
What to do if Your Machine Won’t Boot From the Hard Drive
Use Windows Recovery Tool
- Again, you can try and boot into the Windows Recovery Tool to repair the drive or test if it’s being detected.
- Enter the Command Prompt under Advanced Options.
- Now, start by running “sfc /scannow“, without the quotes, this will scan your drive for errors and attempt to repair it.
- After running the scans, attempt to boot into safe mode, download anti-virus software from there, and check the system. The best way to verify is to use a antivirus boot disc to scan and repair your PC. You can burn the bootable software to a CD or even install it on a USB drive (using a different computer). This will let you load the special antivirus environment to check your PC for any problems outside of the Windows environment.
You can also check to see if there are partitions on the drive at all using DiskPart or another third-party disk utility tool. If it doesn’t see any partitions, it’s likely that there was a partition mess up somewhere along the line. Unfortunately, recovering files from a situation like this isn’t always possible, as you’ll need to repartition the drive.
Inspect and Test the Hardware
- Check the connections inside the machine to make sure that the hard drive is properly connected to the motherboard. On a modern HDD/SSD this is very simple. For IDE drives, there are some other things to try. Machines made before 2007 or so will often have an IDE controller rather than a modern SATA controller. Check that the red edge of the drive cable is aligned with Pin 1 of the connector on the drive. Pin 1 is closest to the power plug, typically. IDE machines also use a master/slave assignment for the drives, so check that the jumpers are set correctly. Boot again to the BIOS screen and see if it can auto-detect the drive. This will establish that the drive is properly connected, at least.
- Remove your failing drive, put it in an external HDD enclosure or SATA to USB cable, and plug it into another PC or use a Live boot USB of Ubuntu, Gparted, Windows Recovery Tool, etc. After booting up, search for the drive and see if it’s being detected.
Attempt to Clone the Failing Drive
There are several options available to clone drives and partitions, we’ll discuss Clonezilla here.
- Download Clonezilla and use your USB imager of choice, such as Etcher, to make a bootable flash drive of it.
- Obtain a new HDD or SSD, you’ll need another drive of equal or greater size for it to work, and plug it in to your PC via another SATA or IDE port or USB.
- Now, plug it in and reboot your device, the failing drive can remain in the PC.
- Next, enter the BIOS by typing either F8, F10, F12, or Del at the screen when the computer first loads.
- Now, under Boot or Boot Options, set the boot order so that CD/USB boots before HDD/SDD.
- Then, click Save & Exit and boot into Clonezilla.
- Follow the prompt within Clonezilla until you get to the cloning/restoring options.
- Now, you’ll want to choose either, partition-to-partition or device-to-device for the cloning options, if unsure, just clone the whole device.
- Now, select your source drive, it’s the one that’s failing.
- Next, select your target drive, it’s the new one.
- Now, agree to the procedure and let it run. This will take quite a while.
- After it’s complete, reboot the PC and remove the flash drive before the boot screen loads.
Note, if you’re ever unsure of what to select in Clonezilla, the default settings work for most people.
Data Recovery Options
There are many options available to attempt to clone a hard drive or recover data from a failing hard drive. One such software solution is a free tool called Recuva from Piriform. The company claims that it can recover lost files from damaged disks or newly formatted drives, but your mileage may vary. It works for some people and doesn’t work for others. Every situation is unique, but it’s definitely worth a shot.
Plug Your Failing Drive into Another PC
- Use an external HDD enclosure to try and access your documents/etc. by plugging into another PC, it can be running Windows, Mac, or Linux.
- Now, give the OS time to detect the device and read the contents of it.
- Next, open the drive and locate the content you want to save.
- Copy the files onto another PC, drive, or cloud storage.
Note, it’s recommended to try and backup the files before attempting to clone the failing HDD.
Clone the Drive
As mentioned above, you can still try and clone the drive and its partitions with a tool like Clonezilla. Follow the above directions to attempt the process, you’ll need another drive of equal or greater size for it to work.
Use a Data Recovery Service
Your last option is hiring a data recovery service. It goes without saying, their services are pricey, no matter what company you go with, and there’s no guarantee that they can recover your data, especially if it was a mechanical failure and not a electronics failure.
A Word on SSDs
It’s worth noting that SSD failure (see our troubleshooting guide here) is essentially a different ball game than HDD failure. SSDs aren’t subject to the same pitfalls of hard disk failure simply because there are no moving parts within the SSD. However, they aren’t immune to failing, as there are a number of things that can still go wrong.
The biggest issue is a pitfall of all types of flash memory. You have a limited number of read/write cycles. But, the good news is that usually only the write portion is affected if you run into a read/write issue. In other words, you’ll be able to recover all of that data still on your SSD and put it somewhere else. While an SSD is less likely to malfunction considering that there are no moving parts, it’s still susceptible to the everyday wear and tear.
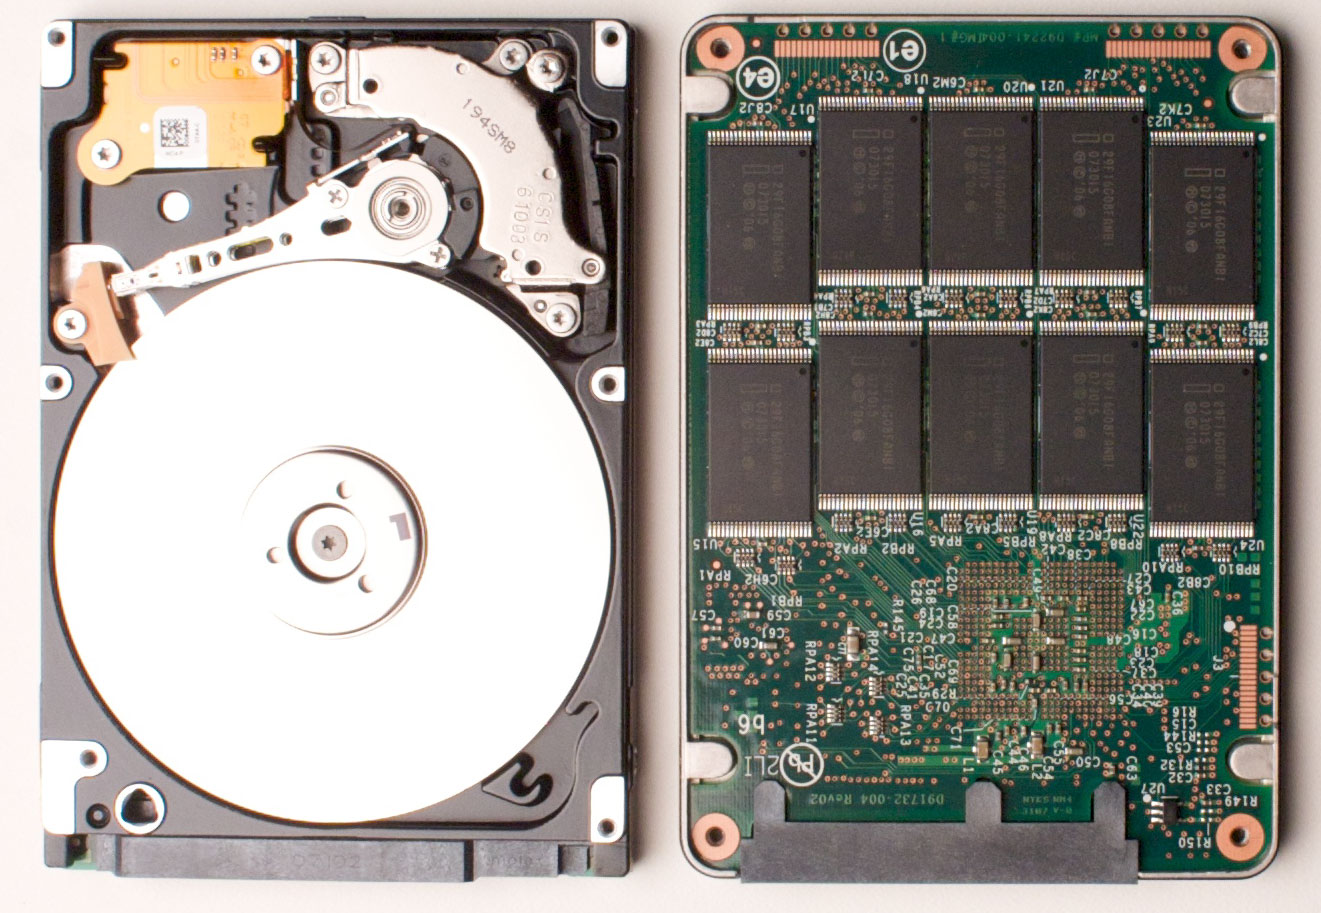
A side-by-side comparison of an HDD (left) and SSD (right). Image Credit: Juxova
You can generally follow all of the steps above to diagnose the problem, though SSDs generally don’t produce noises when they’re going bad. All of the other steps do apply, though.
The Future
In the future, there’s not much you can do to prevent SSDs or HDDs from going bad. It’s just a fact of life. Just like wear and tear on your car eventually destroys it, wear and tear on your hard drives will eventually destroy them. That goes for almost everything in life, and there’s no getting around it. But there are steps you can take to make the whole situation a lot less stressful when it comes around.
The main thing you can do is create backups often. Once a week is a usual timeframe. If you’re on a Mac, you can do this easily through Time Machine and an external hard drive. On Windows, it’s a little bit different. Your best bet is to use a service like Carbonite that automatically backs up everything on your PC and stores them in the Cloud on an encrypted server.
Please share your thoughts on failing hard disk drives in the comments below.
Disclaimer: Some pages on this site may include an affiliate link. This does not effect our editorial in any way.


