With so many fonts that come with Microsoft Word, chances are you’ll find the right one for any occasion. But, even that many fonts may not be enough sometimes. Perhaps you’re looking for a font that will make your text a bit different than the rest but not too much? Other times, you might want to use a font that’s unlike any other to achieve that “wow” effect you’re looking for.
Either way, after you find and download the font that you’d like to use in your document, you’ll have to add it to Word first. Although this might sound pretty simple, there are instances when it becomes a pretty complex task.
How to Add New Fonts to Microsoft Word on a Mac
Since Microsoft Word uses the font library in the Mac OS X operating system, you’ll have to add them to the library first. To manage fonts on your Mac computer, it’s best to use the native app Font Book.
- Open Finder on your Mac.

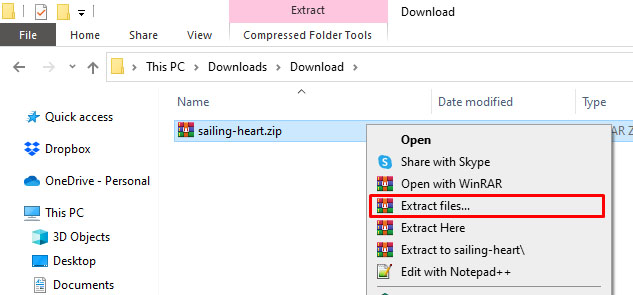
- Navigate to the location where your new font file is. If it’s in a ZIP archive, you’ll have to unpack it first.

- Double-click the font file you want to install.
- The font preview window opens. Click the “Install Font” button at the bottom of the window.
- This will install the font and open the Font Book. Check if you’ve installed the font correctly.
- Restart your computer for the changes to take effect.


And that’s it, your new font is in Mac’s font library and available to any app that works with fonts, including Microsoft Word.
Note that if you’re using Microsoft Office 2011 for Mac, you’ll have to manually add the new font to the collection of Office-compatible fonts. When you install a new font and the Font Book opens, drag and drop the font to the “Windows Office Compatible” collection. You can find it in Font Book’s left menu, under the “Collection” section.
There’s one more important thing to note here. When you use a specific font that’s not available in Microsoft Word by default, only you will be able to see it. If you share your document with someone who doesn’t have that specific font on their device, the text will appear in the default Word font.
To get around this problem, you’ll have to embed that font into your Word document. Unfortunately, the Mac OS version of Microsoft Word doesn’t support this feature. The only way to do this is to open your Word document on a Windows computer and embed the font. Of course, this implies that you’ll have to have installed the font on the Windows computer
If you don’t need anybody else to edit your Word file, then you can export it to a PDF. This will automatically save the file with that specific font for view on all other devices.
How to Add New Fonts to Microsoft Word on a PC
Similar to Mac, you’ll also have to install your font before you can use it. It’ll be available to all other apps on your computer that work with fonts. To do this, follow the steps below.
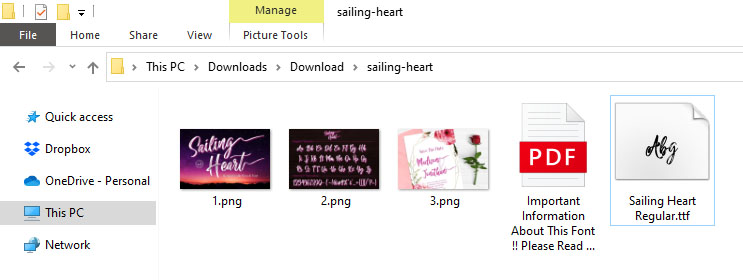
- Open File Explorer on your computer and navigate to the location of your new font. If it’s in a ZIP file, you’ll have to extract it first.
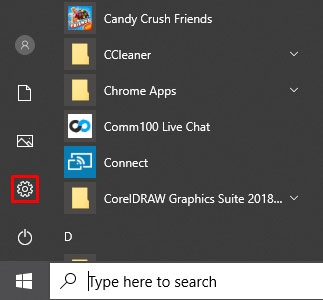
- Now click the “Windows” logo in the bottom left corner of the screen. If you’re using an older version of Windows, click the “Start” button in the same location.
- Click the “Settings” icon right above the “Windows” button.
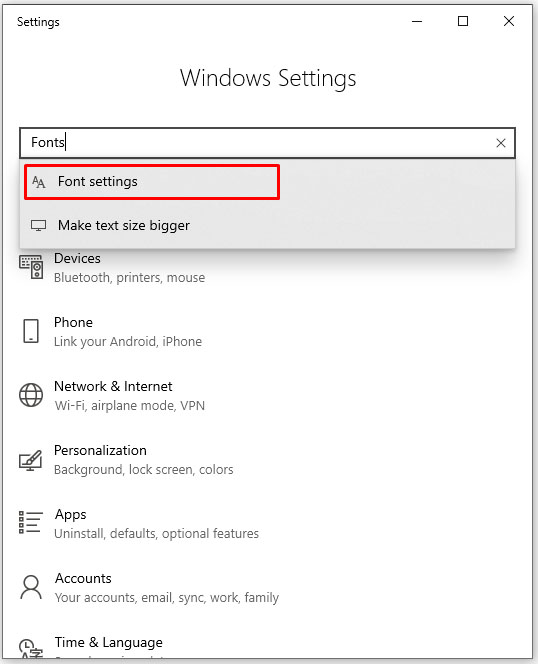
- In the search bar, type in “fonts” and click the “Font Settings” option that appears in the results list.
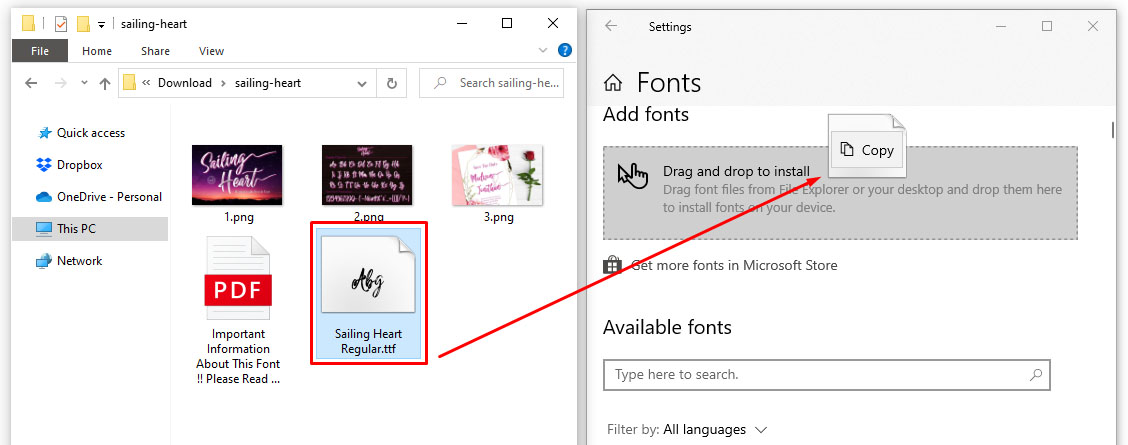
- Now move both the font location window and “Fonts” window so they’re next to each other.
- Drag and drop your font file to the “Add fonts” section of the “Fonts” window. It’s best to drop it to the rectangle area that says “Drag and drop to install.”
- This action will automatically install your new font and that’s it.

Although the font should now be available, it’s best to restart your computer at this point. That’s if you want to make sure that all relevant apps will be able to see it.
If for some reason you can’t find the new font in Word, you can try installing it this way.
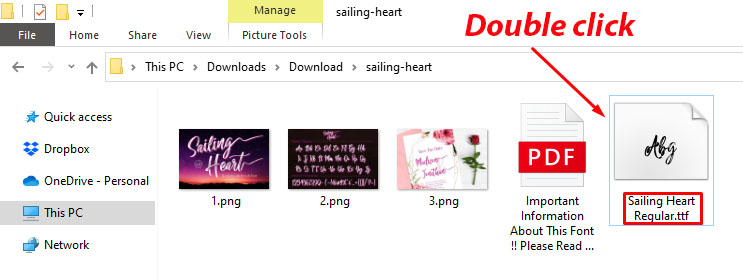
- Open the new font’s location in File Explorer.
- Double-click either the .ttf or .otf file, whichever is available.
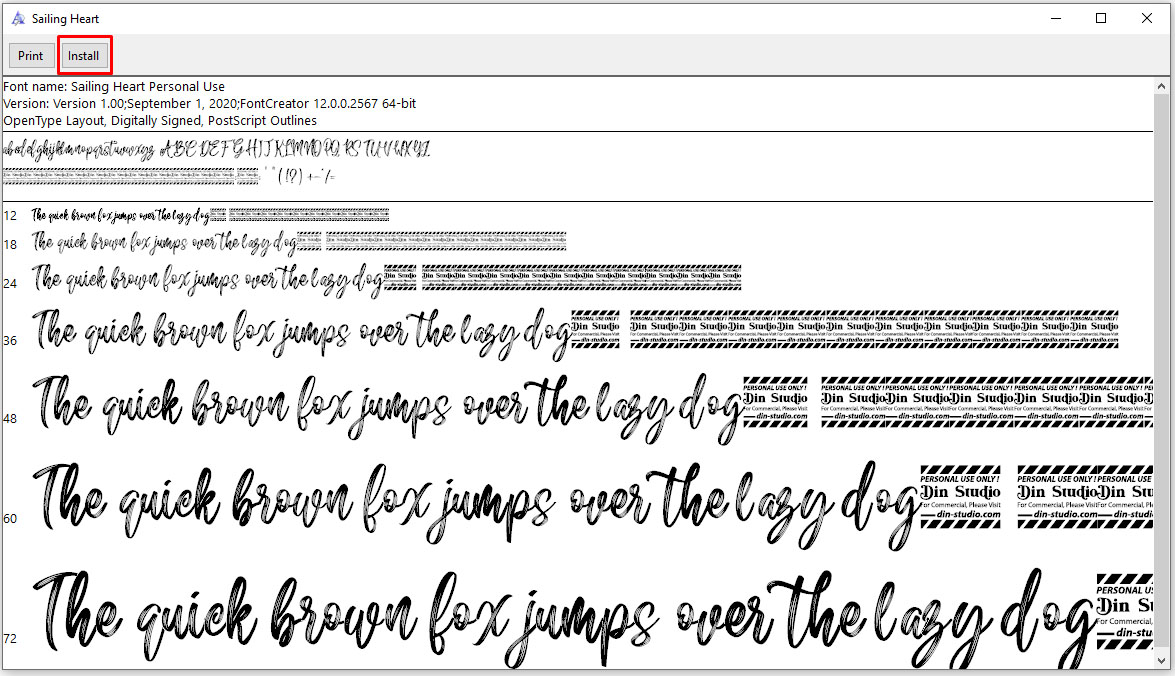
- This will open the font preview window. Click the “Install” button on the top left corner of the screen.
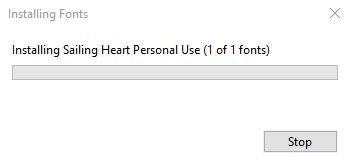
- Depending on the privacy and security settings on your computer, you might have to confirm the install action.
If you want to share a Word document that uses your new font, you’ll have to embed it into the doc first. By doing this, others will be able to see the font if they open the document. To do this, follow the steps below.
- Open the Word document in question.
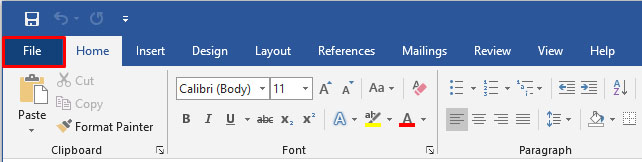
- Click the “File” tab at the top of the window.
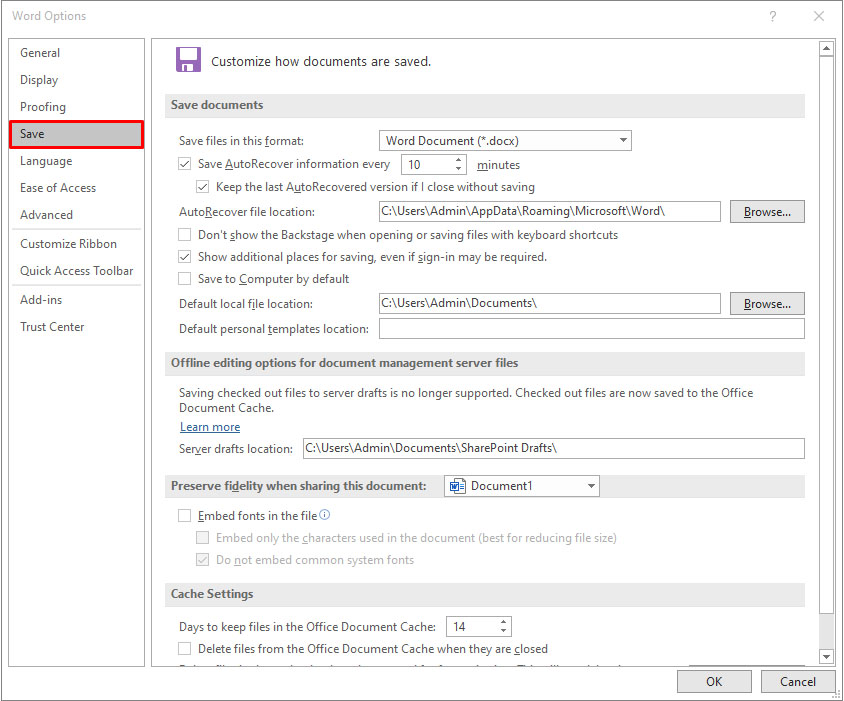
- Click “Options” at the very bottom.
- The “Word Options” menu appears. Click “Save” on the left.
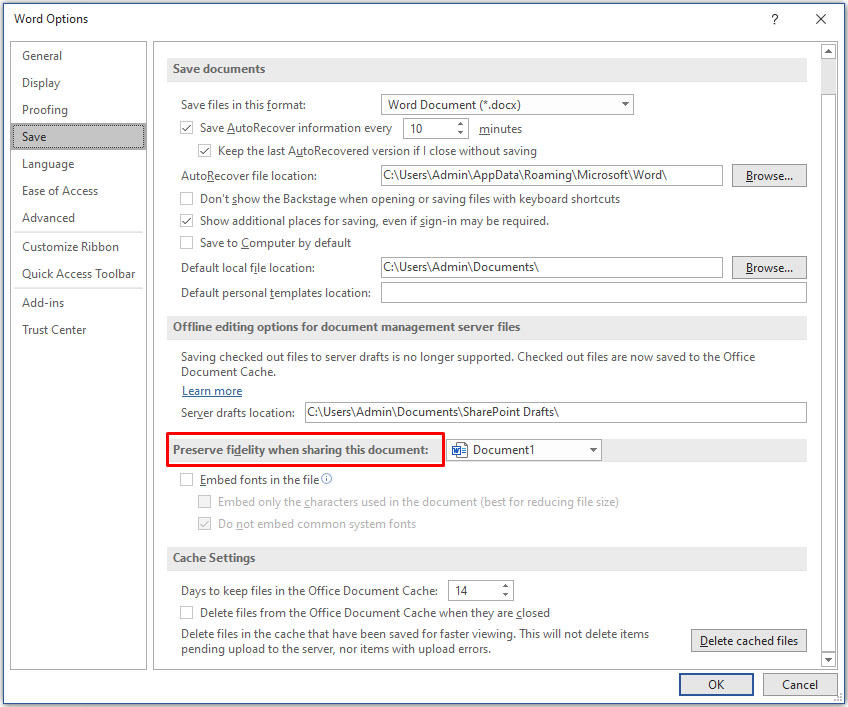
- In the main portion of the screen, scroll down to the “Preserve fidelity when sharing this document:” section.
- Check the checkbox next to “Embed fonts in the file.”
- Next, you may also want to check the box next to “Embed only the characters used in the document.” This will help reduce the overall file size of your document.
- Leave the “Do not embed common system fonts” option checked to further reduce the file size. This is an important step since Word will embed all other system fonts even if not used.
- Click “OK” to confirm the changes and that’s it. You’ve embedded your new font to your Word document.


How to Add New Fonts to Microsoft Word on an iPhone
If you want to add fonts to your iPhone, you’ll need to use a third-party app to do it. One such app is AnyFont and it’s available on Apple’s App Store. Install the app and you’re ready to begin.
The first step is to copy the new font to your iCloud online storage. Once you do that, do the following.
- Open iCloud and navigate to the location of the font.
- Tap the font file.
- Tap the options menu in the top right corner of the screen.
- Tap “Export.”
- Tap “Open In.”
- Tap “Import with AnyFont.”
- When the AnyFont app opens, tap the font file you want to use.
- Tap the “Aa” icon.
- If the font installation doesn’t start automatically, another screen will appear. Tap “Install.”
- Once installed, restart Microsoft Word and you’re ready to use your new font.
How to Add New Fonts to Microsoft Word on an iPad
Just like the iPhone, installing new fonts to Microsoft Word on an iPad requires a third-party app. Check the section above to read the step by step process that can help you with this.
How to Add New Fonts to Microsoft Word on an Android Device
Unlike iOS, adding new fonts to MS Word on Android is not that easy, unfortunately. The main reason is that there aren’t any third-party apps that allow you to do that.
Fortunately for Samsung users, there’s the iFont app by diyun. It allows the installation of various fonts to your device, and it’s available on Google Play. If you don’t have a Samsung device, the only way to use the iFont app is by rooting your smartphone or tablet.
If you don’t feel like rooting your Android for security reasons, you can try using the GO Launcher EX home screen launcher. Although it’s not a great option if you don’t like third-party launchers, this one will allow you to add any font you’d like.
- Install GO Launcher EX from Google Play to your Android device.
- Once it’s done, restart your device.
- When the device is up and running, the entire interface of your device will now be GO Launcher EX.


To use any font, you can add them to a dedicated fonts folder in GO Launcher EX. Simply browse Local Storage/Go Launcher EX/Fonts and copy any fonts to that location. You can do it from your computer or by downloading the fonts using your Android device.
Please note that some computers won’t be able to see the GO Launcher EX parent folder. If so, create a new folder on your device, for example, “Fonts,” and copy the files there. With that done, you can simply use the file browser on your Android to copy the files to the GO Launcher EX/Fonts folder.
Once you have the fonts in the right folder, follow the steps below to make sure GO Launcher EX scans them properly.
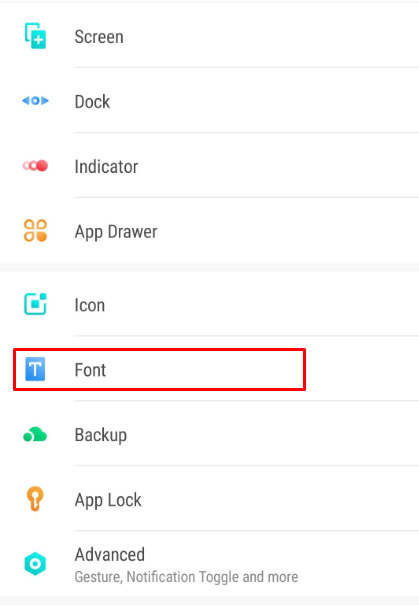
- On your home screen, tap and hold on an empty space.
- Tap “Preferences.”
- Tap “Font.”
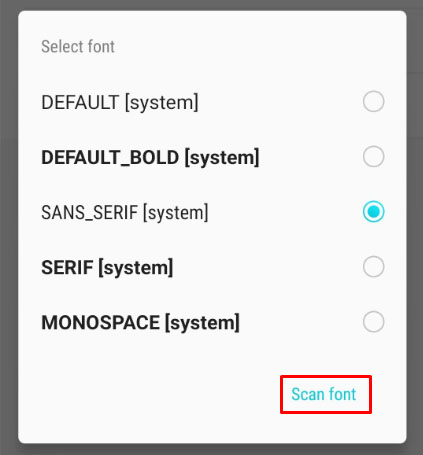
- Tap “Scan font” and wait for the scan to complete.
- Now the list of available fonts will appear. Tap the font you’d like to use to complete the action.


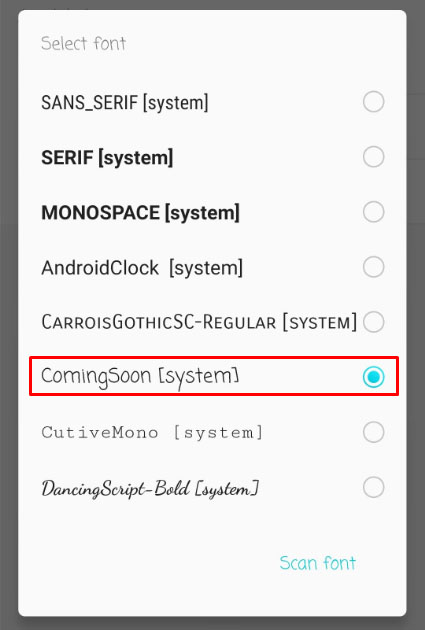
This effect
Device Links
ly adds the new font to the system, allowing Microsoft Word to use it as well.
Additional FAQ
Are there any good free font resources you can recommend?
Yes, there are quite a few. You can find below six websites that offer free fonts. Of course, there are many others so feel free to search for them online.
• https://freedesignresources.net/category/free-fonts
• https://www.fontsquirrel.com
• https://open-foundry.com/fonts
• https://www.theleagueofmoveabletype.com
Custom Fonts for Your Word
Hopefully, now you know how to add fonts to Microsoft Word for any of your devices. Be it a Mac, Windows PC, Android, or iOS device, adding fonts will help you customize your documents and other text. Although adding fonts to Android is a bit trickier, there are a few solutions that will work without rooting your device.
Have you managed to add fonts to your Microsoft Word? Which platform are you using it on? Please share your experiences in the comments section below.
Disclaimer: Some pages on this site may include an affiliate link. This does not effect our editorial in any way.