Note: Deleting all or any images and videos from Google Photos also deletes them from any synced devices. Therefore, be sure you have a backup of sorts.
Google Photos is an excellent cloud service with fair pricing and tons of free storage. However, since the “Unlimited” option got removed, you may find yourself stuck with little space left for new images. Your only options are to find another cloud source, upgrade your space limit, or delete many photos, screenshots, videos, and created images.
Sadly, if you want to delete all images/videos in Google Photos, you cannot do it with a simple click. There is no “Select All” option. Regardless, you can delete images and videos in bulk using a combination of keys and the mouse. The trick you’ll use allows you to select everything, but it’s recommended that you do it in smaller sections, such as 500.
No matter how you decide to manage the process, it is tedious, but not as much as group-deleting images by date, especially if you have over 2,000 photos to manage. Before you go on a deleting spree, you should take some precautions first. Here’s how to do it!
How to Protect Synced Google Photos Images from Accidental Deletion
Whenever you delete some or all images/videos from Google Photos, the process removes the same ones from all synced devices, and vice-versa. To avoid this scenario, here is what you can do.
- Bring up the Google Photos app on your iPhone or Android device.

- Go to Photos settings then Backup & sync.

- Disable the Backup & sync option.

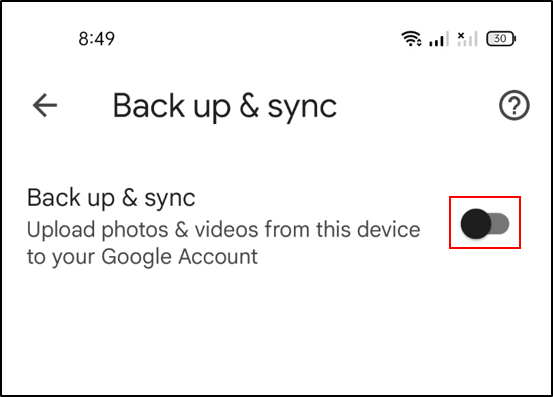
This setting will un-sync your devices and ensure that you can free up cloud storage without deleting anything on your phone or tablet. It works the other way around too.
If you want to delete individual photos, open the photo you want to delete and click on the bin icon in the upper right corner. This action sends the images to the Trash folder.
To avoid potential issues, we recommend using Google Chrome as your browser of choice when going through your Google Photos and making any changes.
Note for Chromebook Users – Since 2019, Google Photos and Google Drive no longer sync. It means that you can not access your Google Photos from the Google Drive shortcut on your Chromebook. Thus, you need to use the browser and access photos.google.com to delete your pics.
How to Delete All Google Photos using Windows, Mac, Linux, or Chromebook
The process of deleting all your Google Photos from a computer is the same, whether you use Windows, Mac, Linux, or Chromebook. You can do it on any browser, so the steps work on any OS. It is best to delete images in groups, but you can try to delete all images/videos at once. Deleting smaller groups of items prevents accidental scenarios where you lose the selection cue and have to start over.
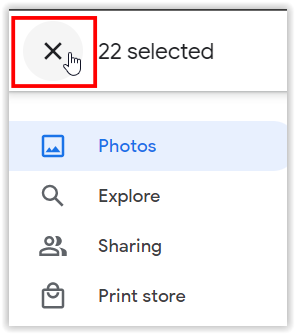
Note: If you get stuck somehow during the highlighting and deleting steps, shift-click on the last checked-off item and then shift-click again to reselect it. From there, you can continue scrolling and highlighting. Also, you can click the “X” next to “[###] selected” in the top-left section and start over.
Here’s how to delete all Google Photos images using Windows, Mac, Linux, or Chromebook.
- Log into the Google Photos website with your Google account credentials.
- Select the “first image” by left-clicking it—ensure it is marked with a blue-circle checkmark.
- Scroll down the page until you pass several rows/images. Hold down the “Shift key” on the last visible image (should highlight in blue) and left-click it to select everything in between, then release the “Shift key.” If it doesn’t highlight the items, scroll up some and repeat until it does.
- If you reached the max selection in Step 3 but still have them checked off, repeat the process until you have a good amount of items selected. Google remembers your last action and adds to it as you progress.
- To select all images, your success depends on your system and the data in your Google Photos profile. We went as far as 400-500 selected images/videos in one session and got all of them (1800+) in another. If it highlights everything in blue, left-click to select them. Otherwise, you’ll have to do smaller increments (Steps 3-4).
- Optional: You can also hold down the “Shift key” over the first image, then move the mouse/trackpad cursor over/across others. However, you cannot scroll down until you click the left mouse button to select all highlighted items. This process is time-consuming.
- Once you have all images/videos or a large group of them checked off, click on the “trash can icon,” then select “Move to trash” to delete the checked/highlighted items.


The trick to selecting a higher quantity of images is to scroll down in more significant segments until it doesn’t highlight the last image on the screen when tapping the “Shift” key. From there, you scroll up and repeat tapping the “Shift key” until it does. Then, you hold “Shift” and left-click to select them and continue the process until you get everything or a big chunk of images selected.
Also, each image must have loaded on the screen (at least partially) for Google Photos to allow you to highlight items up to it. You can speed scroll down to 100 or slow scroll and confirm image loads to get all the way down to over 2,000 or more. With faster internet and a faster device, you may get to scroll quickly, all the way down to the bottom. After that process, you can delete them. The process is all about trial and error.
How to Delete All Google Photos from an Android Device
Selecting all your photos to delete them takes a while on mobile devices, especially when you have a large library. Because there is no bulk-delete or “Select All” option on tablets and smartphones, you need to select each image individually, but you can at least select the days to select in groups. Here’s the method you can use.
- Launch the “Google Photos” app on your smartphone.
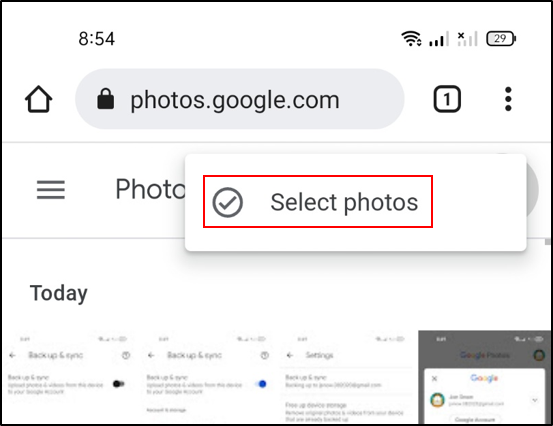
- Tap on the “menu icon” (three dots on the upper-right side), not the top-most menu icon for the browser.
- Tap on “Select photos.”
- Select the photos that you want to delete or the day to mark them all.
- Tap on “Move to trash” to confirm the deletion.
- For permanent deletion, go back to the “Menu” and then select “Trash.”
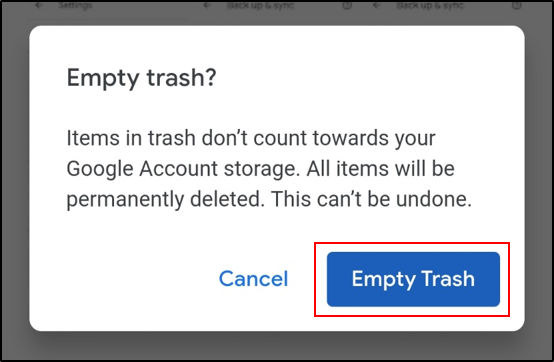
- Tap on the “Trash icon.”
- Select the “Empty Trash” option to confirm.


How to Delete All Google Photos from an iPhone
Many iPhone users also use Google Photos, and the reason is simple. Compared to iCloud, Google Photos offers more free storage capacity. At the same time, upgrading is cheaper too with Google’s storage.
If you want to free up space in your Google Photos and you are using an iPhone, the following steps apply.
- Launch the app from your iPhone.
- Tap on the Free up Space button located under the Trash folder. This will delete all of your photos.
As an alternative, manually select all the photos in your folder. Then tap the trash bin icon to delete the photos.

Although this frees up space, note that you can still restore your photos from the Trash folder.
iPhone users may face some challenges. For example, deleting photos from the Google Photos app may also delete them on your iCloud storage. However, you should get a notification that asks you if you agree with the action.
Additional FAQ
Device Links
Here are some additional answers to common Google Photos questions that PC and mobile device users have.
How to undelete Google Photos?
If you are a PC user, you should be familiar with the Recycle Bin. When you delete something, it does not automatically disappear. Many files and photos end up in the bin. This system is beneficial as it allows you to clear some storage space but also recover your files later.
You can access the trash folder and undelete all or only some of your photos. But be careful, as the 60-day grace period is not folder-wide but per picture based on the individual deletion date and time.
Tap on an image that you want to recover and then tap the Restore button. Alternatively, tap the Delete button if you want to skip the counter and destroy the pic for good right away.
Are my Google Photos permanently deleted after deleting?
Deleted Google Photos end up in the trash. However, you can not leave them there indefinitely. There is a default grace period before you lose your photos forever.
Google Photos keeps deleted pics in the trash for 60 days. After the 60 days, they disappear. Of course, each picture has a 60-day recovery period since you added it to the trash folder. It is best to check the new indicator system to see how much time you have left to recover each picture.
At the end of those 60 days, you cannot recover those photos anymore. It’s especially true when you sync all your devices. If you don’t sync your devices then deleting something on Google Photos won’t cause you to lose the pic from the device you used to take the photos.
Final Thoughts
Unless you really do not mind losing image quality, chances are your Google Photos storage will run out. Sooner or later, you may have to face the fact that a storage upgrade is necessary. But not everyone will want to spend on that, despite Google offering some reasonable prices.
The good news is that you can always delete some of your older photos, or your bad shots. If push comes to shove, you can delete all your photos with a few clicks. And even permanently delete them at your whim.
Now that you know how to free up Google Photos storage space, do you think that the process could be made simpler? Let us know if you find Google Photos advantageous or if you prefer other cloud storage options. Also, tell us if you encounter any unexpected issues with device syncing and disappearing photos.
Disclaimer: Some pages on this site may include an affiliate link. This does not effect our editorial in any way.