Dominic Anderson
As a content marketer by day and tech enthusiast by night (and some of the day too), I share my thoughts about new platforms and fixes for the problems I’ve encountered with the technology I use. Read more
July 29, 2020
Google Sheets are useful in so many ways. But that doesn’t mean that the service can’t be intimidating at times. Whenever you work with spreadsheets, there’s a lot you can do to customize and optimize the data, be it through filters, different views, specific formulas, and so on.
There are two great things you can do in a Google spreadsheet. Firstly, keep certain bits of information locked on the screen. Secondly, keep specific data sets from getting edited after you send the file to someone else. Here’s how you can do both things.
Protecting a Row or Column
It’s possible to go even further with locking down rows and columns. You can use the same approach as you do with cells and use the protection feature.
Select an entire row or column.
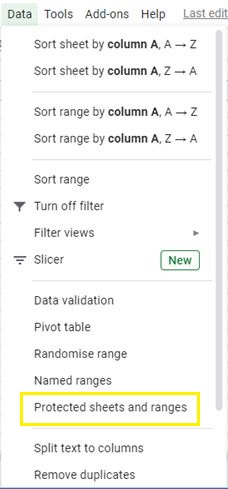
Click on the Data Tab.
Select the Protect Sheet and Ranges option.
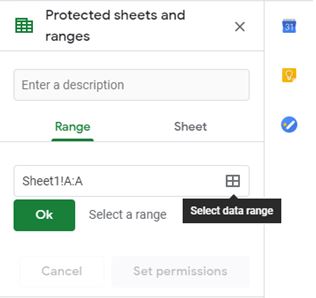
Go to the Range section.
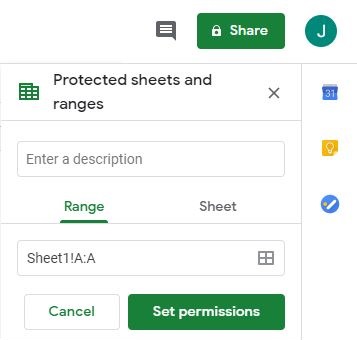
Modify the selection if needed. Click on the Set Permission button.
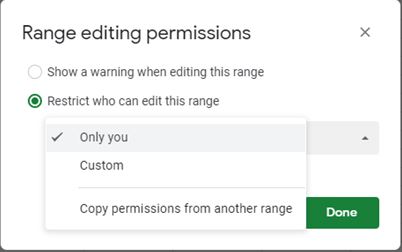
Apply restrictions for who can edit the range.
If you don’t want to grant anyone else editor privileges click on the Only You option.
Click on the Done button to apply for the changes and permissions.
Lock a Row on a Desktop or Laptop
Launch the Google Sheets app. Select a row you want to lock. Then, follow these steps:
Click the View button in the top bar.
Select the Freeze option.
Choose how many rows you want.
You can use the same method to lock a column, or multiple rows or columns. To freeze or lock multiple rows or columns, you can use the drag selection tool.
To unfreeze selections simply go to the View tab, select the Freeze menu, and select, No Rows and No Columns.
How to Lock a Cell
You can also customize your spreadsheets further to make sure no data gets modified by accident. For example, you can lock a single cell or multiple cells, instead of entire rows or columns.
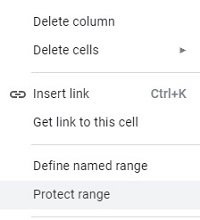
Open your spreadsheet. Click on the cell you want to lock.
Right-click on it and select the Protect Range option.
From the Protected Sheets & Ranges menu, enter a description.
Modify the range selection if you have to.
Click on the Set Permissions button.
Now the cell with remain as it was, no matter what other modifications are done in the spreadsheet. This can be very useful when you create sign-out sheets as you can lock the date formulas in place and leave other fields free to edit. However, note that any sheet editors can still change the permissions or edit the locked fields, and so can the sheet owner.
Protecting a Row or Column
It’s possible to go even further with locking down rows and columns. You can use the same approach as you do with cells and use the protection feature.
Select an entire row or column.
Click on the Data Tab.
Select the Protect Sheet and Ranges option. Modify the selection if needed.
Click on the Set Permission button.
Go to the Range section.
Apply restrictions for who can edit the range.
If you don’t want to grant anyone else editor privileges click on the Only You option.
Click on the Done button to apply for the changes and permissions.
Freezing vs. Locking
Sometimes these two terms get confused. Freezing a row or column is an action that locks the selected lines but only from a UI perspective. Therefore, you can scroll through the spreadsheet at will but those rows will always remain visible at the top.
The locking feature or protect feature is a bit different. Doing this to a row, column, or even a single cell, will prevent it from being editable. Based, of course, on what permissions you set and how you have set the editing privileges.
Freezing certain parts of a spreadsheet can be useful if you want to keep certain information on top, such as headers, dates, time, etc.
Locking can help prevent anyone from modifying any data except you.
Optimizing Your Google Spreadsheets
Google Spreadsheets is a fantastic app that allows in-depth customization of almost everything. It’s also a cheap way to use spreadsheets in the workplace without having to splurge on other expensive worksheet editors. Plus, by using the protect feature you can also make sure that no one messes with your data, post save.
Related Posts
No related posts.
Disclaimer: Some pages on this site may include an affiliate link. This does not effect our editorial in any way.