Despite launching in 2013, Rust has remained one of the top 10 games on Steam. It owes a lot of its popularity to its immersive gameplay and realistic game mechanics. One such mechanic is the ability to repair a tool once it has been used beyond its limits.
New players often throw away the tools they can no longer use, which can be a direct loss of precious resources. Thankfully, we’re here to help you get better at playing Rust by providing practical advice to use in your next game.
In this article, we’ll teach you how to repair tools and give you the best repair tips for Rust.
How to Repair Items in Rust
In Rust, all repairs are done through the repair bench item menu. Before you even attempt to repair a trusty hatchet you’ve used from the beginning, you’ll need to find or make a new repair bench to jumpstart the process.
Once you’re at the repair bench, all you have to do is drag the item from your inventory to the repair slot and press the “repair” button. If it’s greyed out, it means you lack the necessary resources to repair the item.
Items require up to 20% of their crafting resources to be repaired. If you don’t have these resources at hand, you won’t be able to fix the item just yet, and you may have to look for a replacement. Some items, such as metal blades and pipes, might not require the exact components to undergo a repair, but you’ll need their constituent materials instead.

Some items will require repair to the item’s crafting blueprint. This applies only to tier 2 or 3 items, so most common tools can be repaired without them.
When you repair the item, you’ll find that it breaks more quickly as you use it due to the game’s underlying reduction mechanic. Every time you repair an item, its maximum durability is lowered by 20%. The game displays this durability loss with a red bar on the left of the item’s icon in your inventory, showing you the maximum and current durability values.
Tips for Repairing Tools in Rust
Since repairing tools puts them at lower maximum durability, each subsequent repair has diminishing returns. Most players will only repair items until they reach below 50% of their original durability, at which point it becomes more resource-efficient to craft a new item altogether.
How to Craft a Repair Bench
You will use 125 metal fragments to craft a repair bench. While you often need to find crafting blueprints, the repair bench blueprints are available to players by default.
Once you’ve made a repair bench, you can put it anywhere in the game world, but we recommend using your base. You can move the bench around by holding a hammer in your hand and pressing the interact button (E) when looking at it. Since the bench doesn’t take damage when picked up this way, you can shelve it in your inventory to save on base space when you don’t need it.
Where to Find a Repair Bench
If you don’t have a repair bench on you and can’t afford the crafting cost, there is still a way to obtain one without spending resources. Repair benches are scattered across the map, hidden inside some notable map locations. Finding them won’t take a lot of time, but you may encounter enemies along the way, so it’s best to prepare.
Here are all the locations where you can find the repair bench.
Airfield
The Airfield repair bench is located in a large building directly opposite the hangars. When facing the building, go left into the garage doors. You’ll enter a room with a recycler and a repair bench along a wall.
Bandit Camp
The repair bench is located in the building closest to the Air Wolf shop and the gated helipad. When you leave the Air Wolf shop via the large doors, all you have to do is walk straight into the first building you can see. The repair bench is on the second floor, so you’ll need to go up the stairs.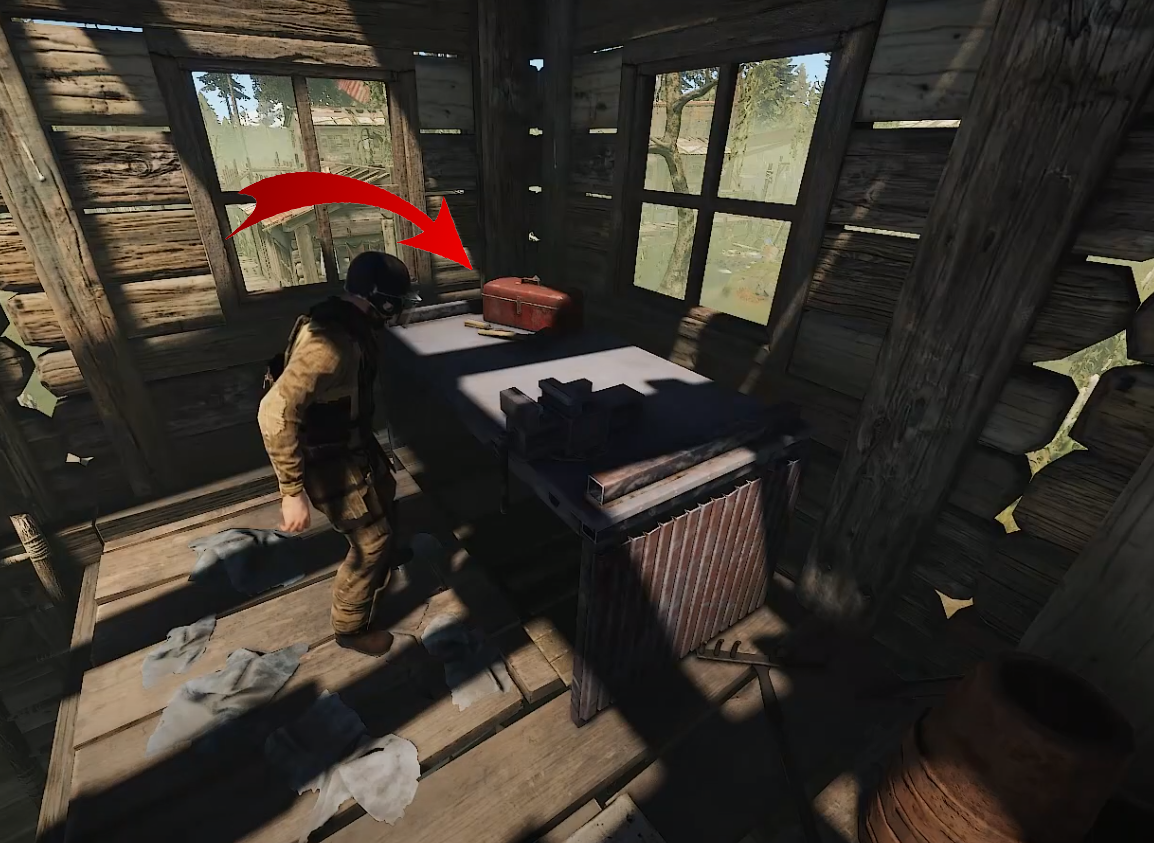
Launch Site
You can find the repair bench in the administrative section of the launch site. The quickest way to locate it is to enter from the launch site, run around the first building, and enter through a door that faces another admin building. The bench is nestled in a small office on a double right turn into the building.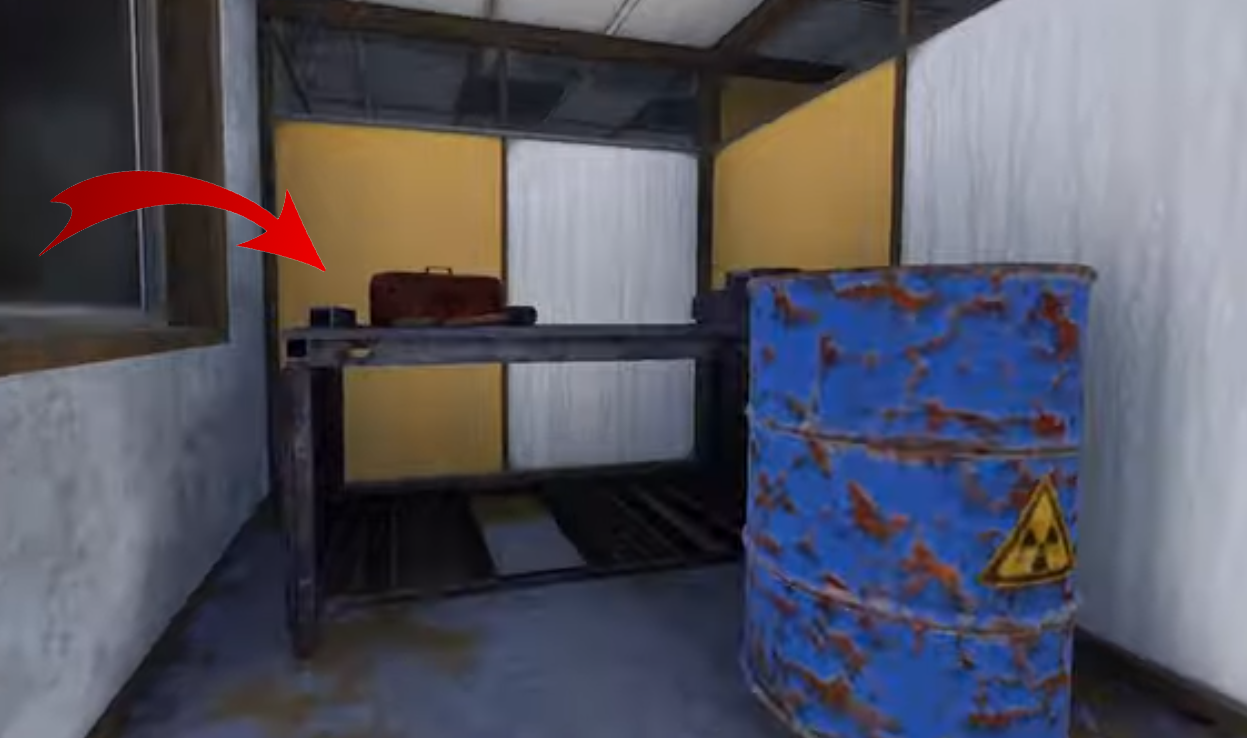
Mining Outpost
You can find the repair bench easily in the Mining Outpost once you enter the building. It’s alongside one of the building’s walls, opposite the recycler.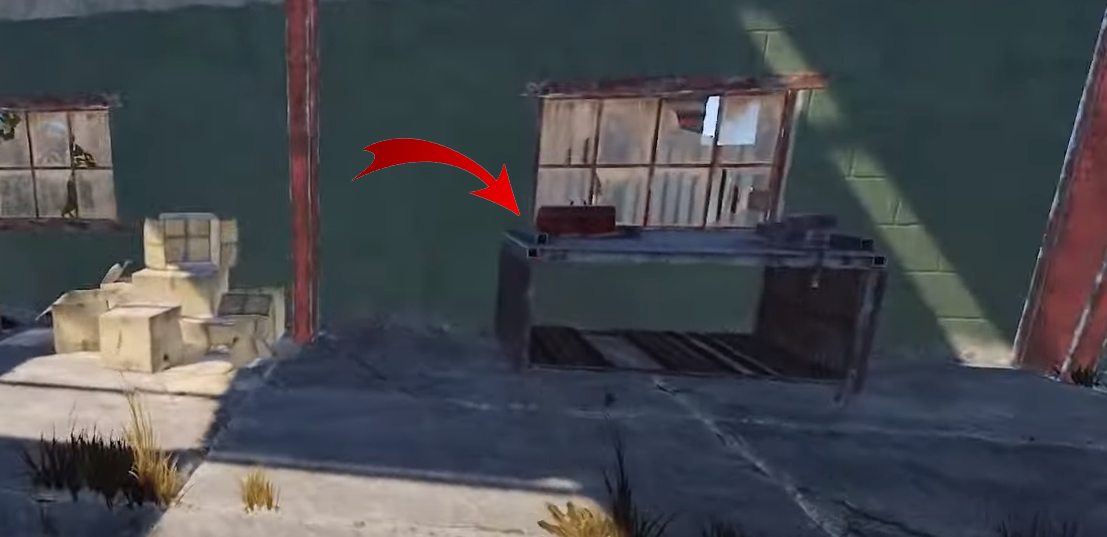
Outpost
The quickest way to find a repair bench in the Outpost is to look for a building with a sign that reads “Repairs.” It’s in a building on your right if you enter the Outpost via Gate 1.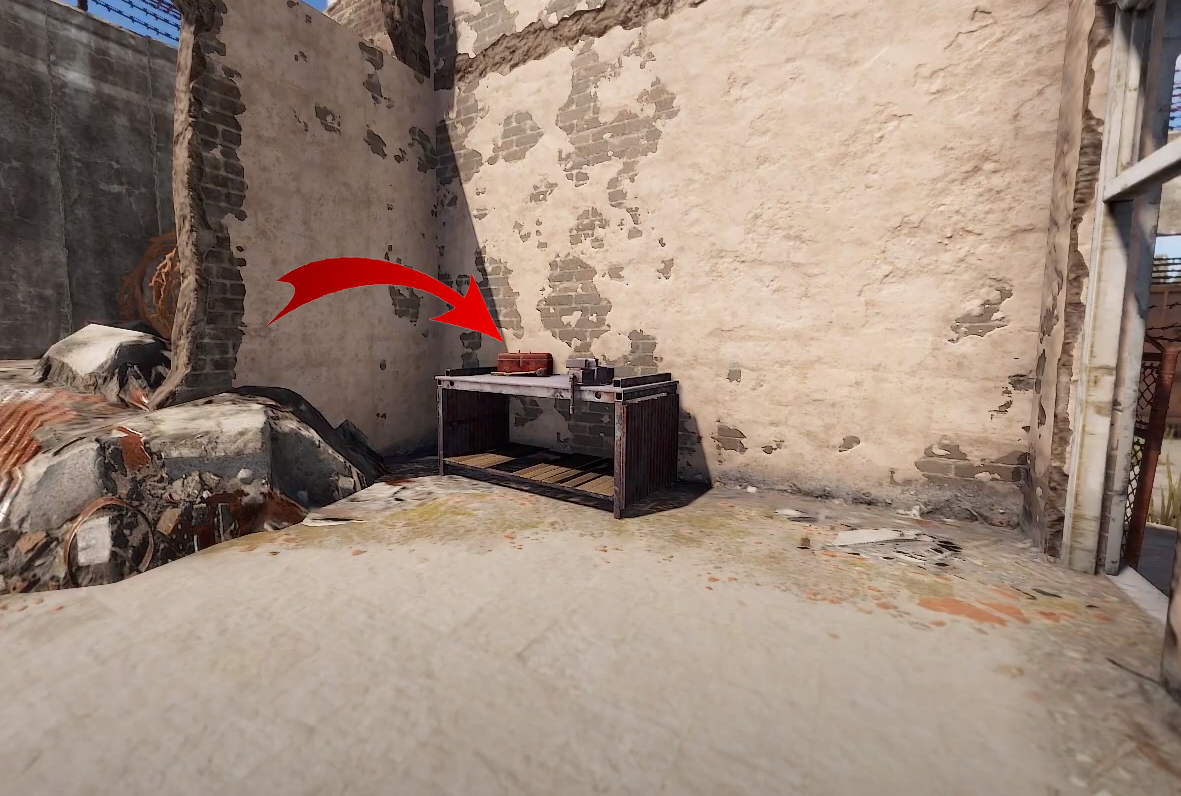
Power Plant
You can find two repair benches in the power plant, both in the same room. You need to follow the pipes from the cooling towers until you reach a warehouse building. Find the stairs to get into the warehouse, then take the next flight of stairs you see on the right. The benches are next to a partitioning wall in the room you enter from the stairs.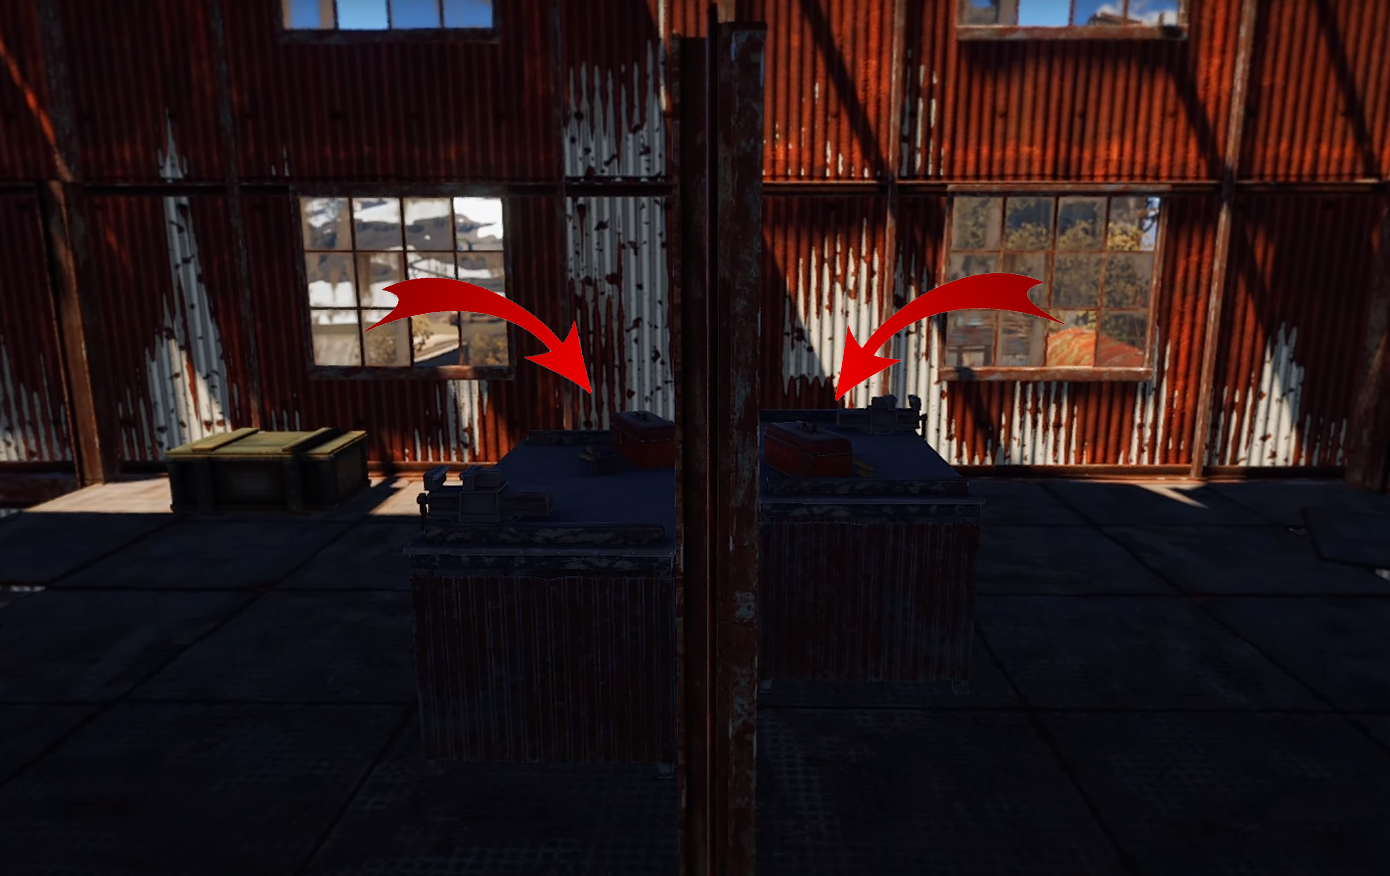
Train Yard
The Train Yard’s repair bench is in the biggest red warehouse building. Once you enter the warehouse via the garage, take the first staircase you see. You’ll enter a long walkway that encompasses the entire warehouse floor. The repair bench can be found by following this walkway.
Water Treatment
The final two benches on the map are found in the Water Treatment. The first one is on the top-most floor of the central building in the area. It is a warehouse surrounded by a road on three sides.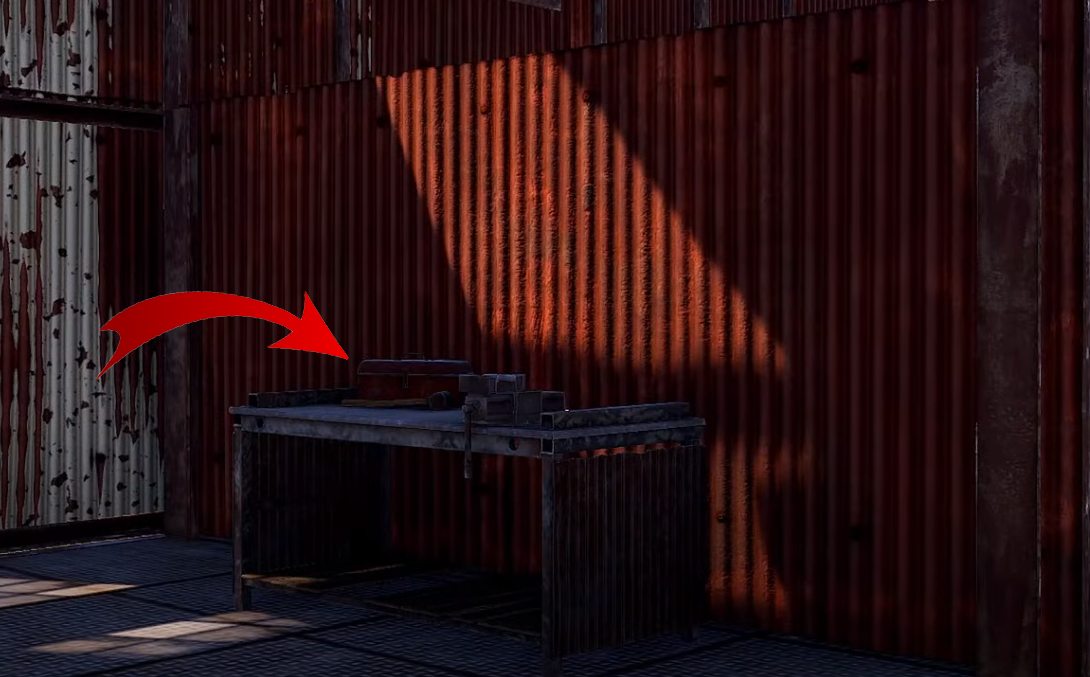
The second repair bench is in the southern-most building in the location. You can follow the road from the central warehouse to get to it. The bench shares a partition wall with a recycler.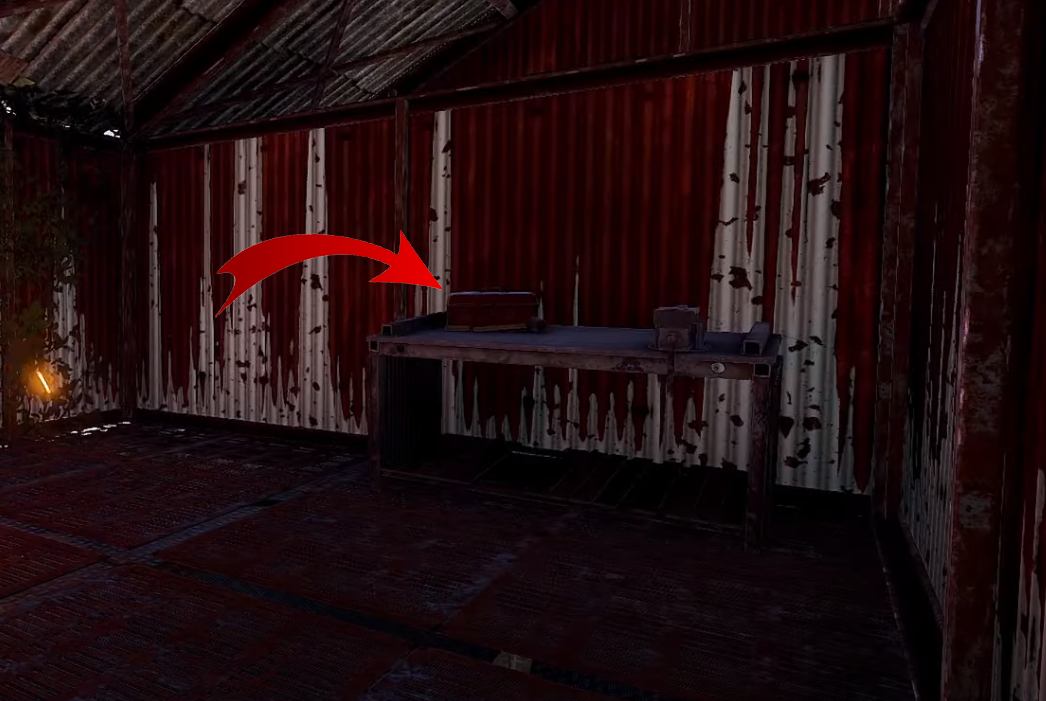
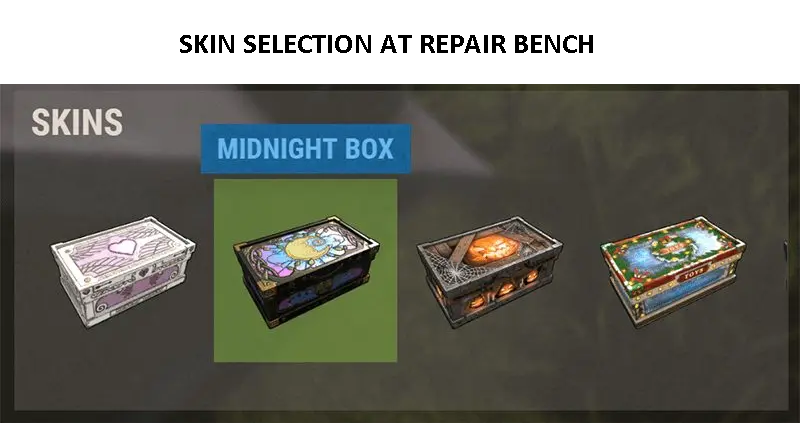
How to Use a Repair Bench to Change Item Skins
Another useful function of the repair bench is to change an item’s skin, or cosmetic appearance once you’ve unlocked a different skin for that item.
To change the skin, follow these steps:
- Open the repair bench screen.
- Put the item from your inventory into the repair bench slot.
- Browse through the “Skins” screen.

- Select the skin you want to use.
- Drag the item back to your inventory to use it with the new skin.
Changing an item’s skin doesn’t cost any resources. You also don’t need to know the item’s blueprint if it’s a higher-tier tool.
Additional FAQ
Can You Only Repair Items if You Have the Blueprint?
For tier 2 and 3 items, you’ll need a blueprint to get them repaired, but lower-tier tools don’t require them. You don’t need a blueprint to change an item’s skin regardless of its tier.
What Are Some Other Uses for a Repair Bench?
Repair benches are also useful to block entry into your base. If you plop one in front of a door, the doors become much harder to open (if it opens to the side with the bench) until someone removes the bench. You can block your base’s entry points before going offline. You can pick the repair bench up after you log back in, as it won’t get damaged by being picked up.
Don’t Let Your Items Go Rust-y
Keeping a close eye on your tools can be the difference between them breaking in the middle of an empty field with no easy way to repair them. Repair benches are a vital crafting tool to give your older tools a new lease on life. Now you know where you can find or how to craft a repair bench and all of its uses.
What are your Rust tool repair tips? Let us know in the comment section below.
Disclaimer: Some pages on this site may include an affiliate link. This does not effect our editorial in any way.