With today’s modern gadgets, taking photos has become so easy that having hundreds of images in storage is not a particularly strange or uncommon thing. Storage does become a problem, though, as the better the camera quality gets, the larger the photo’s file size.
Resizing is not just cropping an image; it can also mean the manipulation of pixels to reduce the file size. If you’re trying to send a lot of pictures to another person, but the file size is too large, you’ll need to condense the photo to send it.
This is where resizing images comes in handy. With the proper tools, you can adjust both the picture and file size of a particular image to suit your needs. In this article, we will show you how to resize an image for a variety of devices.
How to Resize an Image in Windows
Probably one of the most versatile tools for image editing, a Windows, Mac, or Chromebook will usually come with programs that allow you to edit images. Additionally, some of the best photo editing tools are available for free. We’ll list a few programs along with some tips on how to reduce images.
TinyWow
The fastest way to resize images without downloading or installing programs is by using TinyWow. TinyWow is a free online tool that offers many extensive features for image processing, from background remover, resizing dimensions, adding text, and more! Here’s a quick guide on resizing an Image from Windows, Mac, and Chromebook.
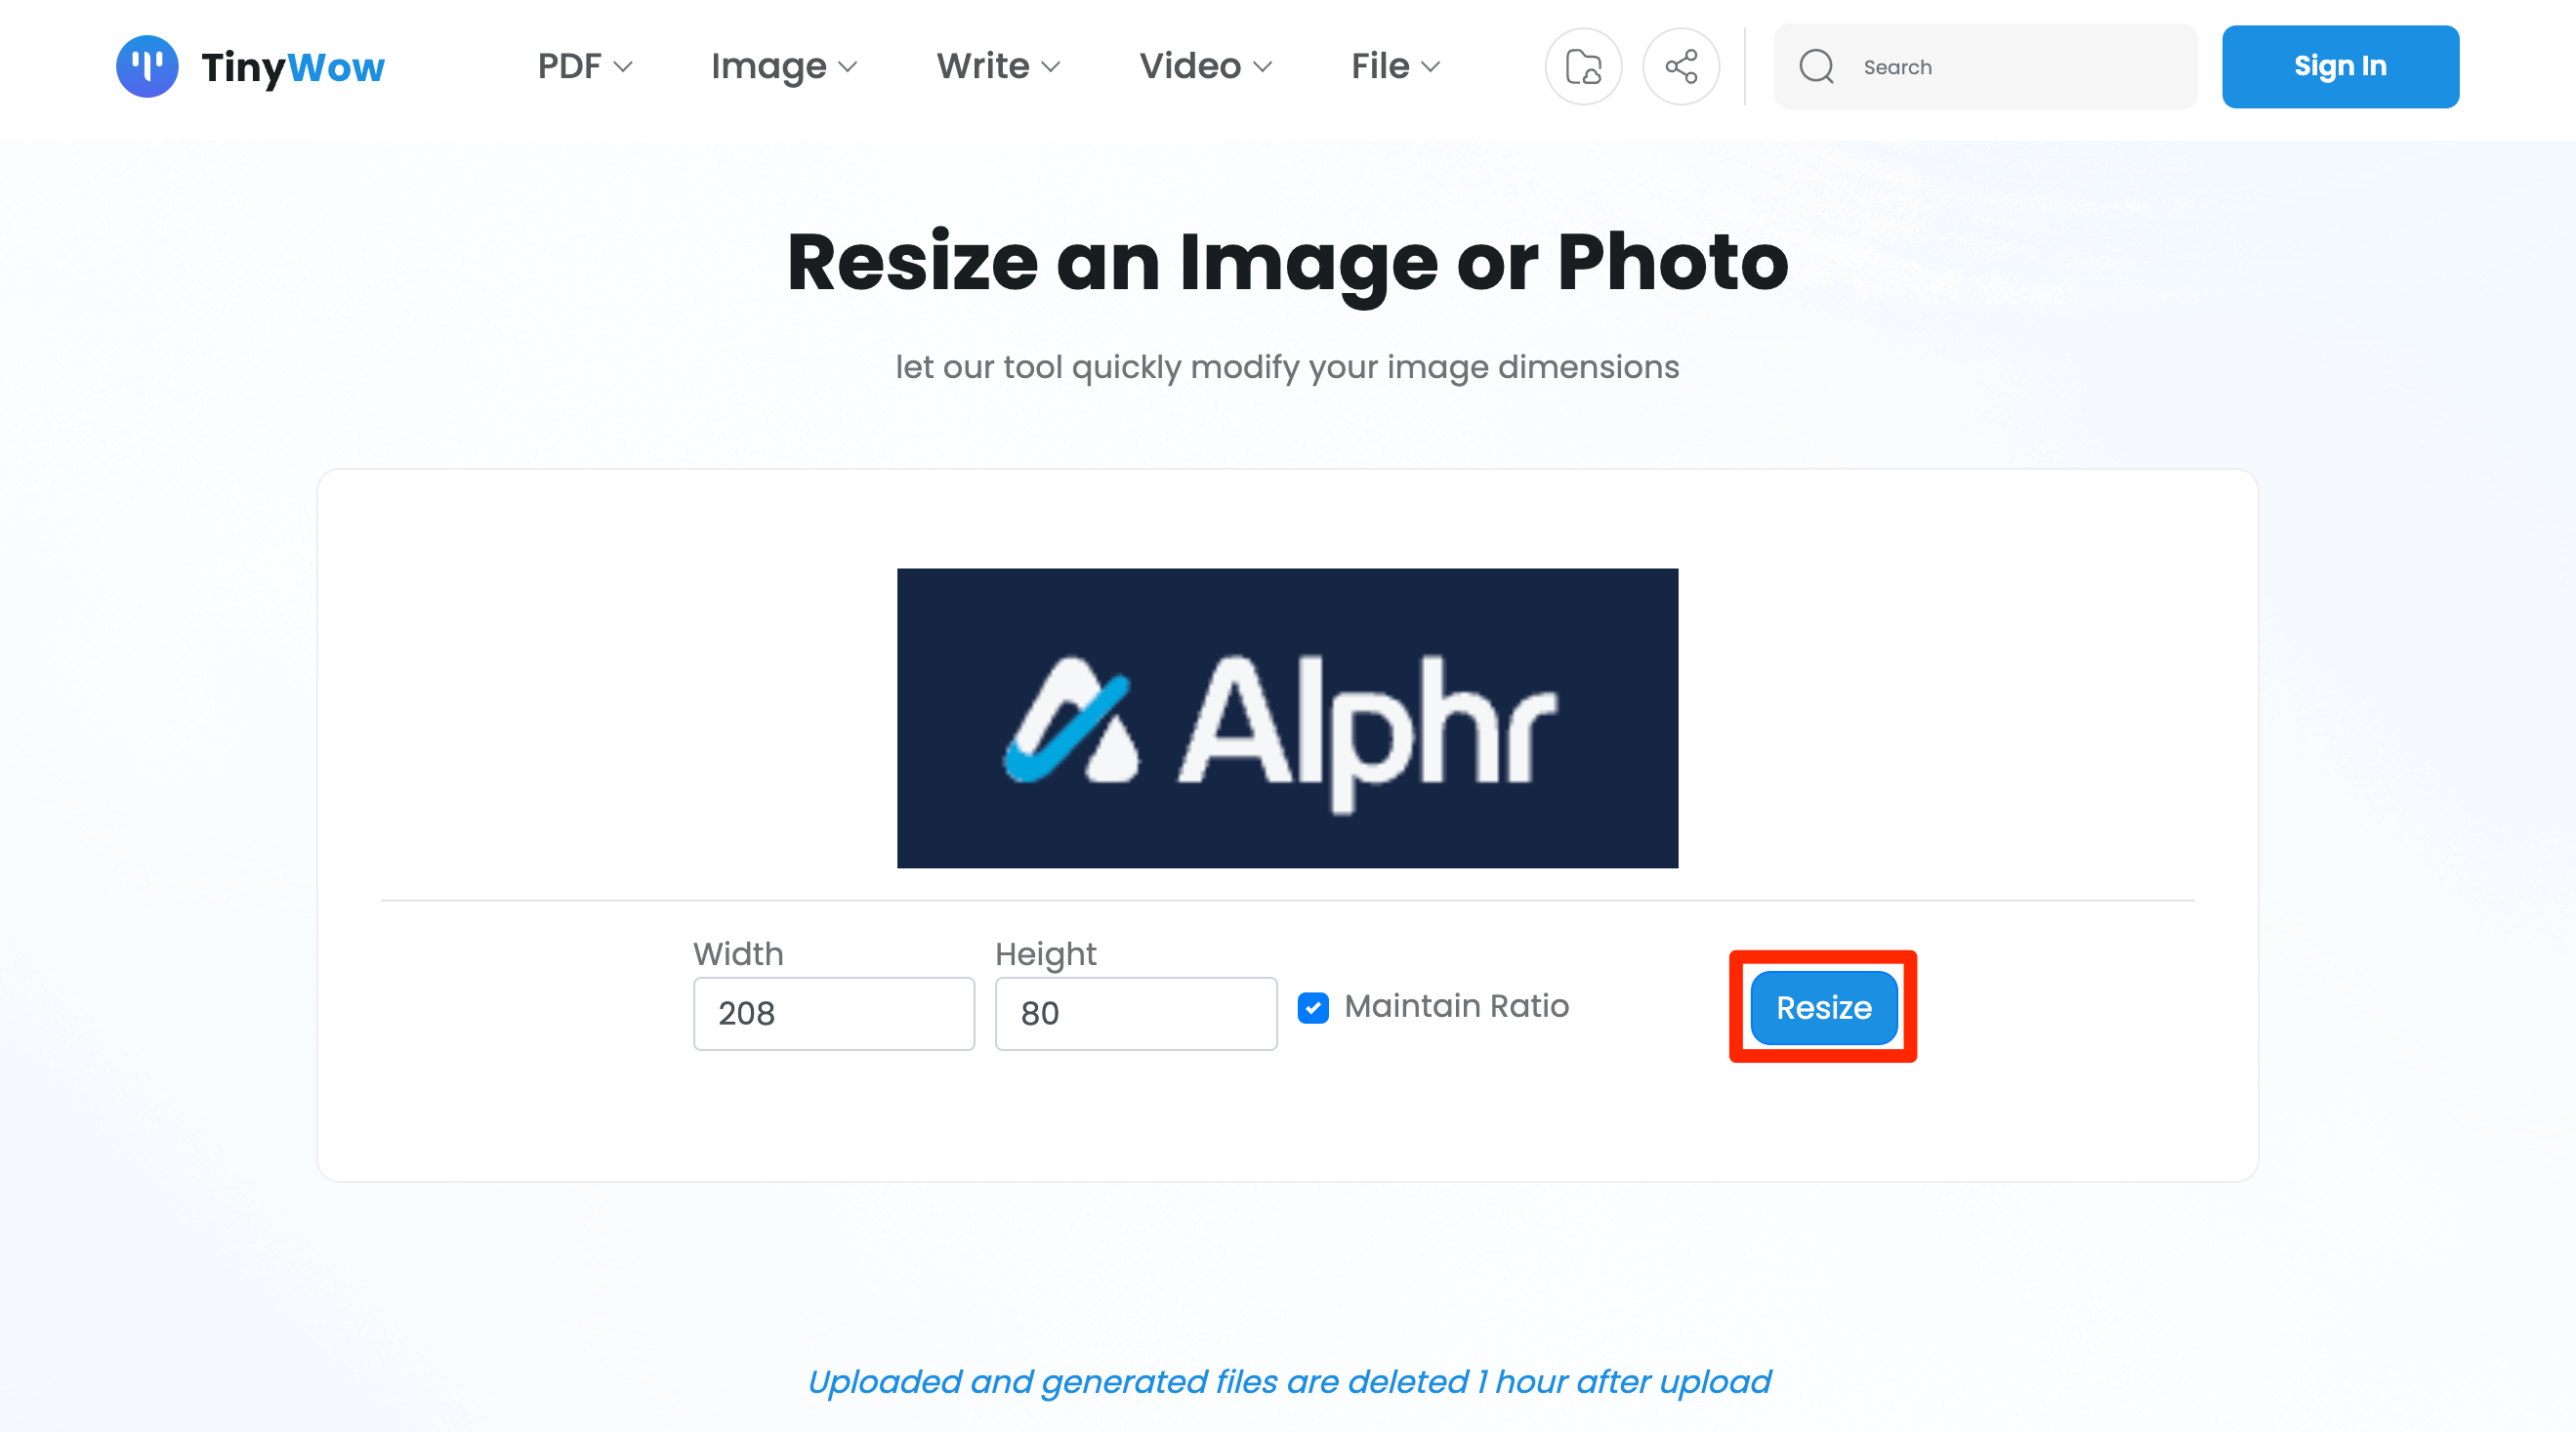
- Open one of your favorite browsers and visit TinyWow.com.
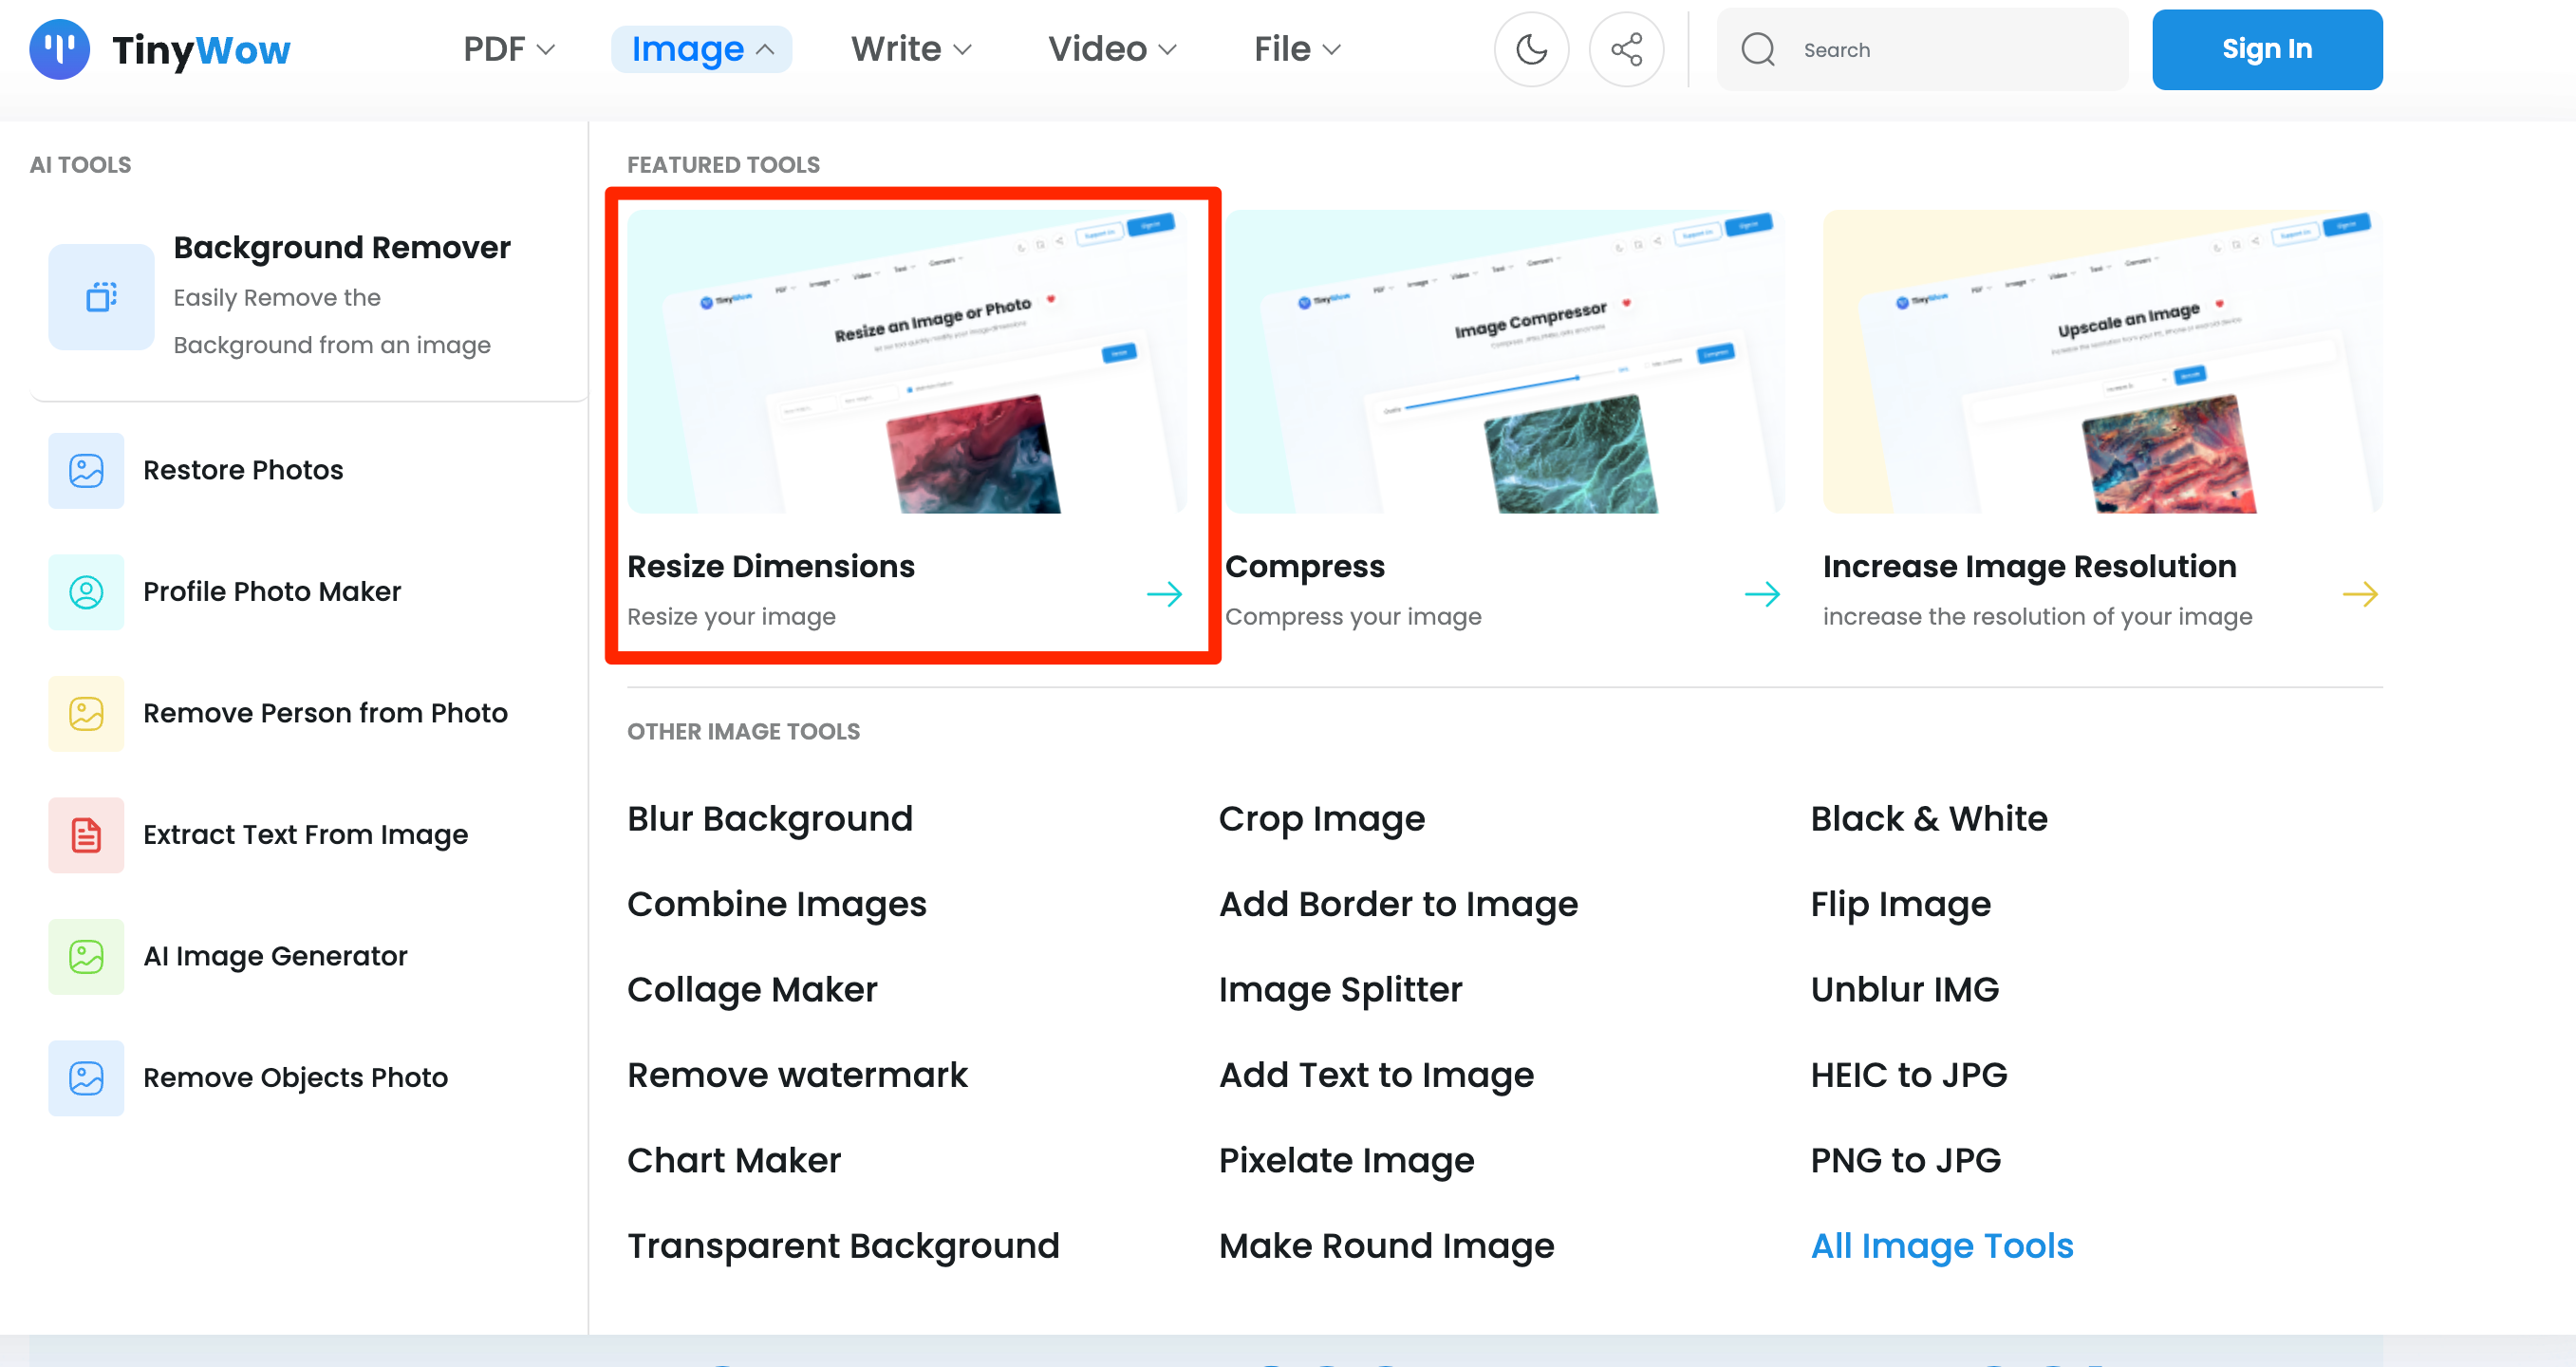
- Hover your mouse over the Image tab and click Resize Dimensions.

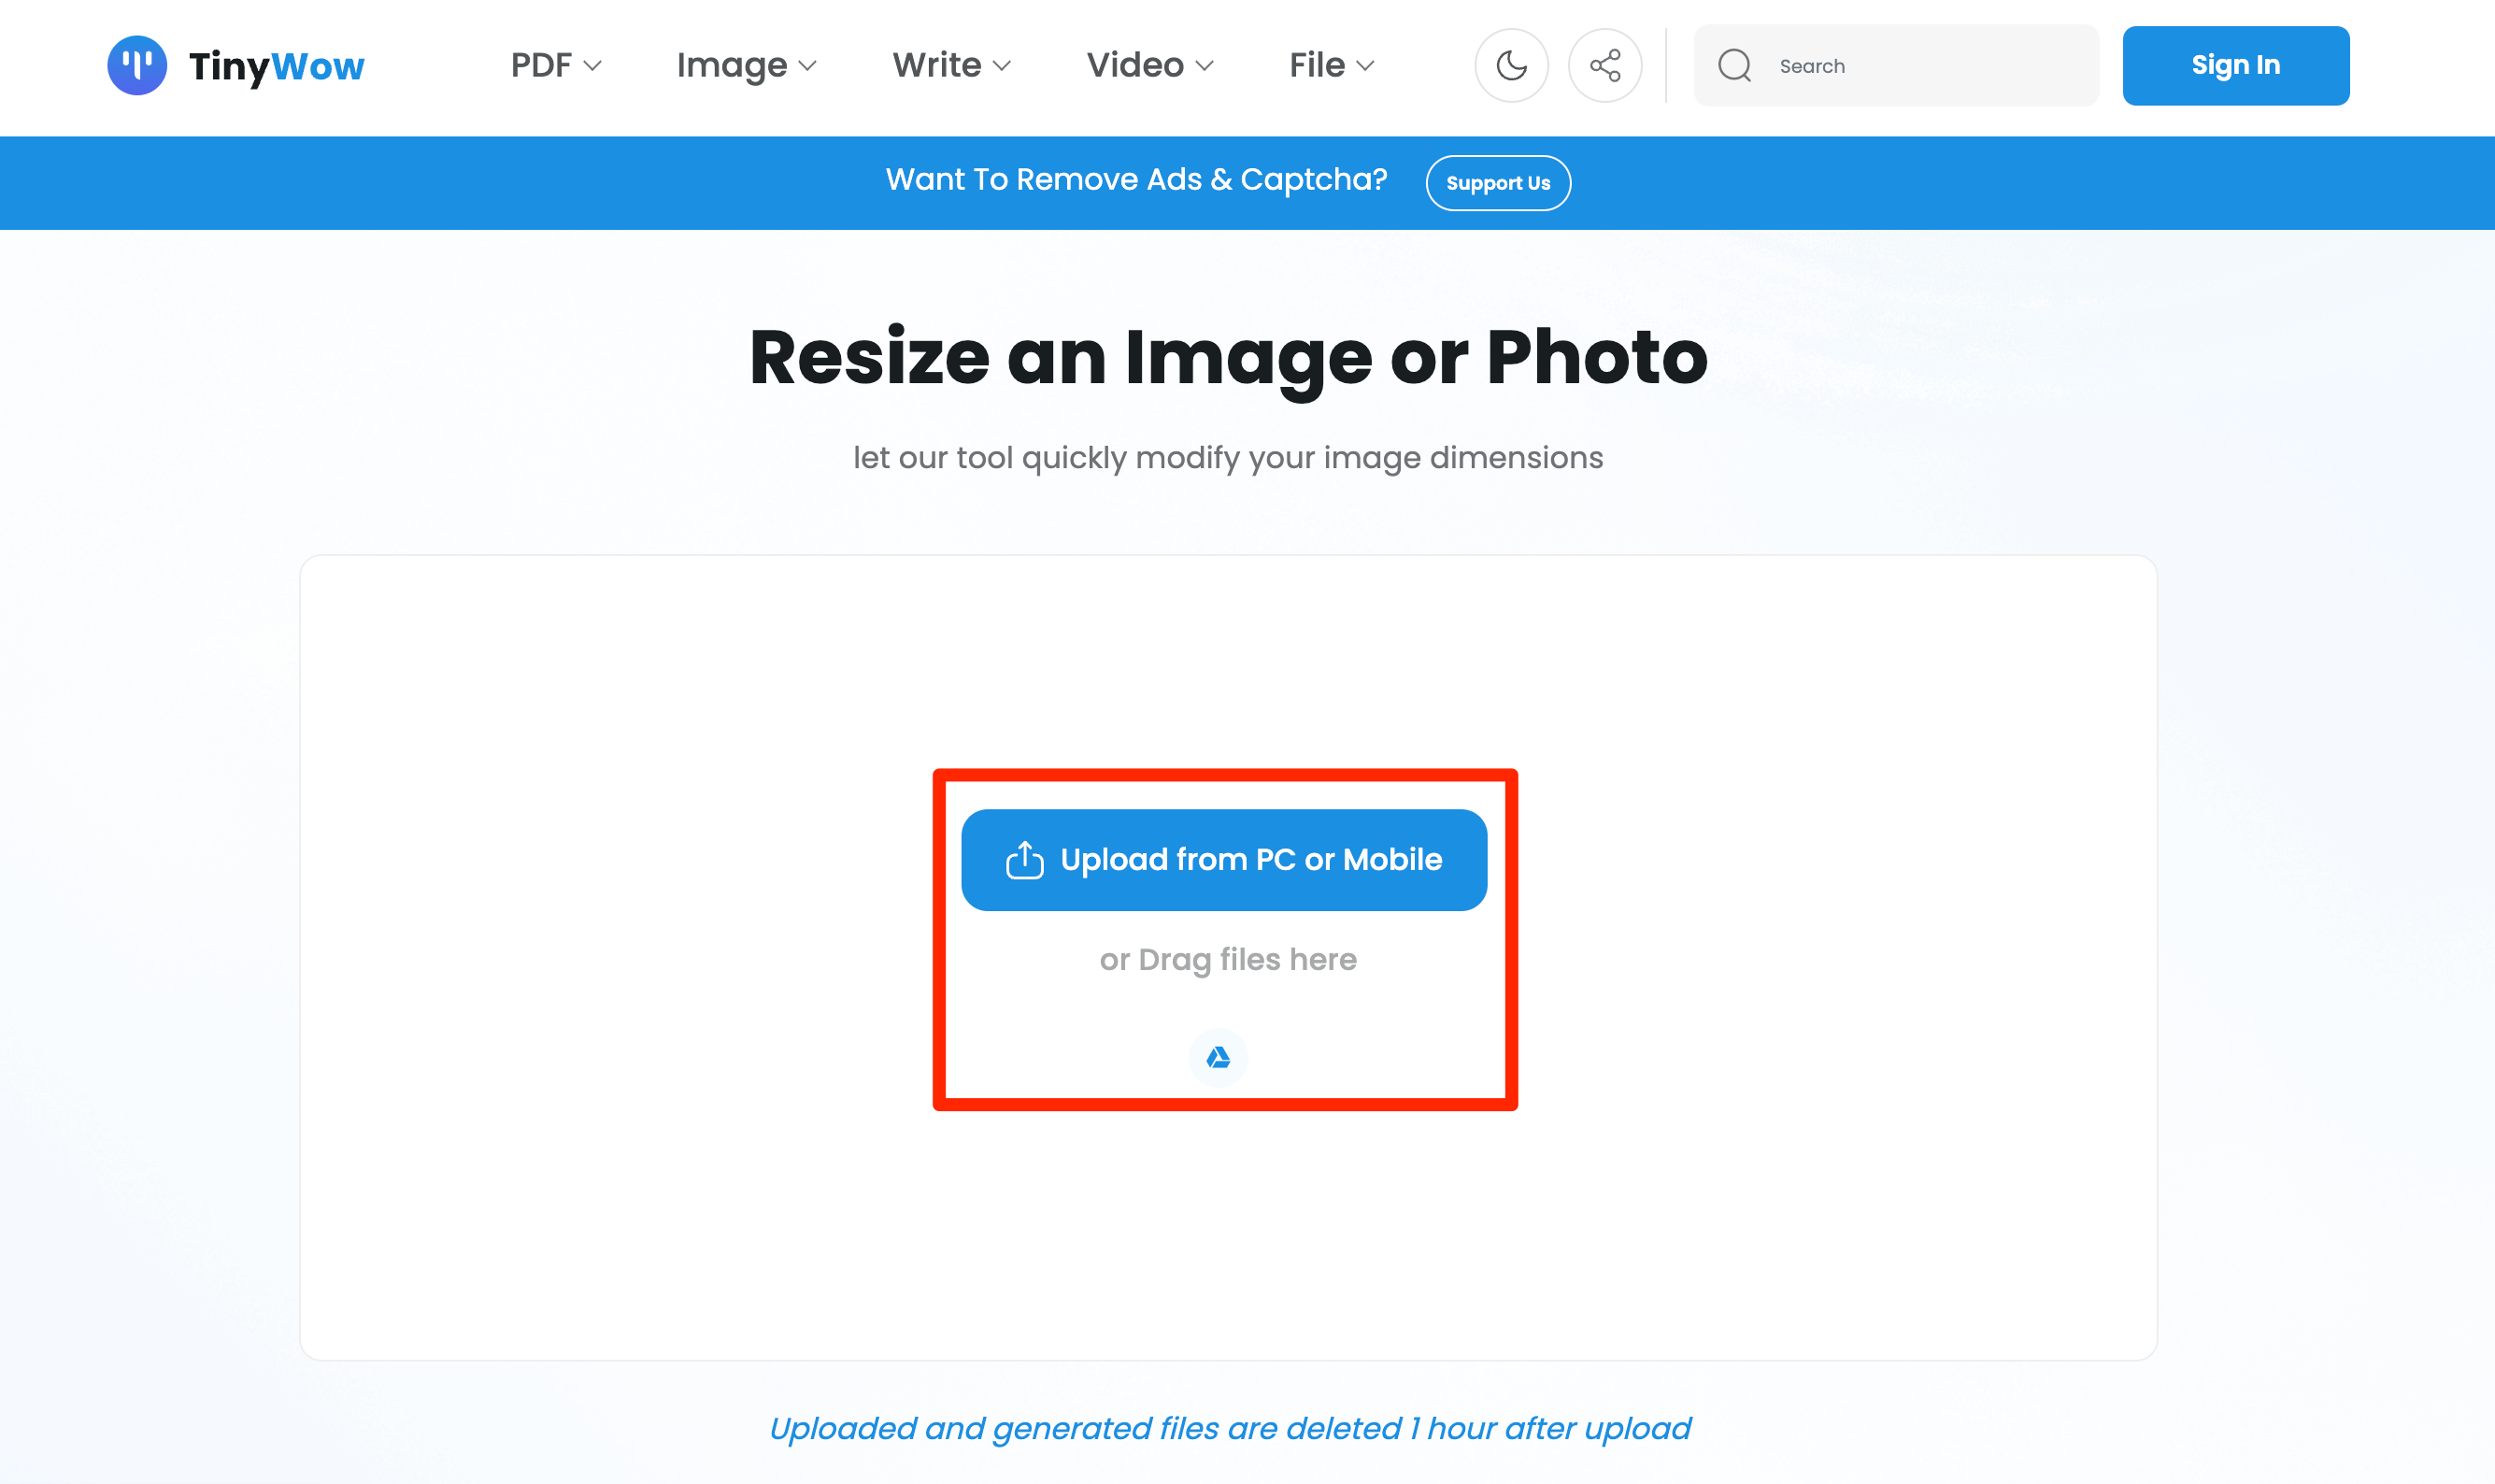
- Click Upload from your PC or Mobile or Drag some files.
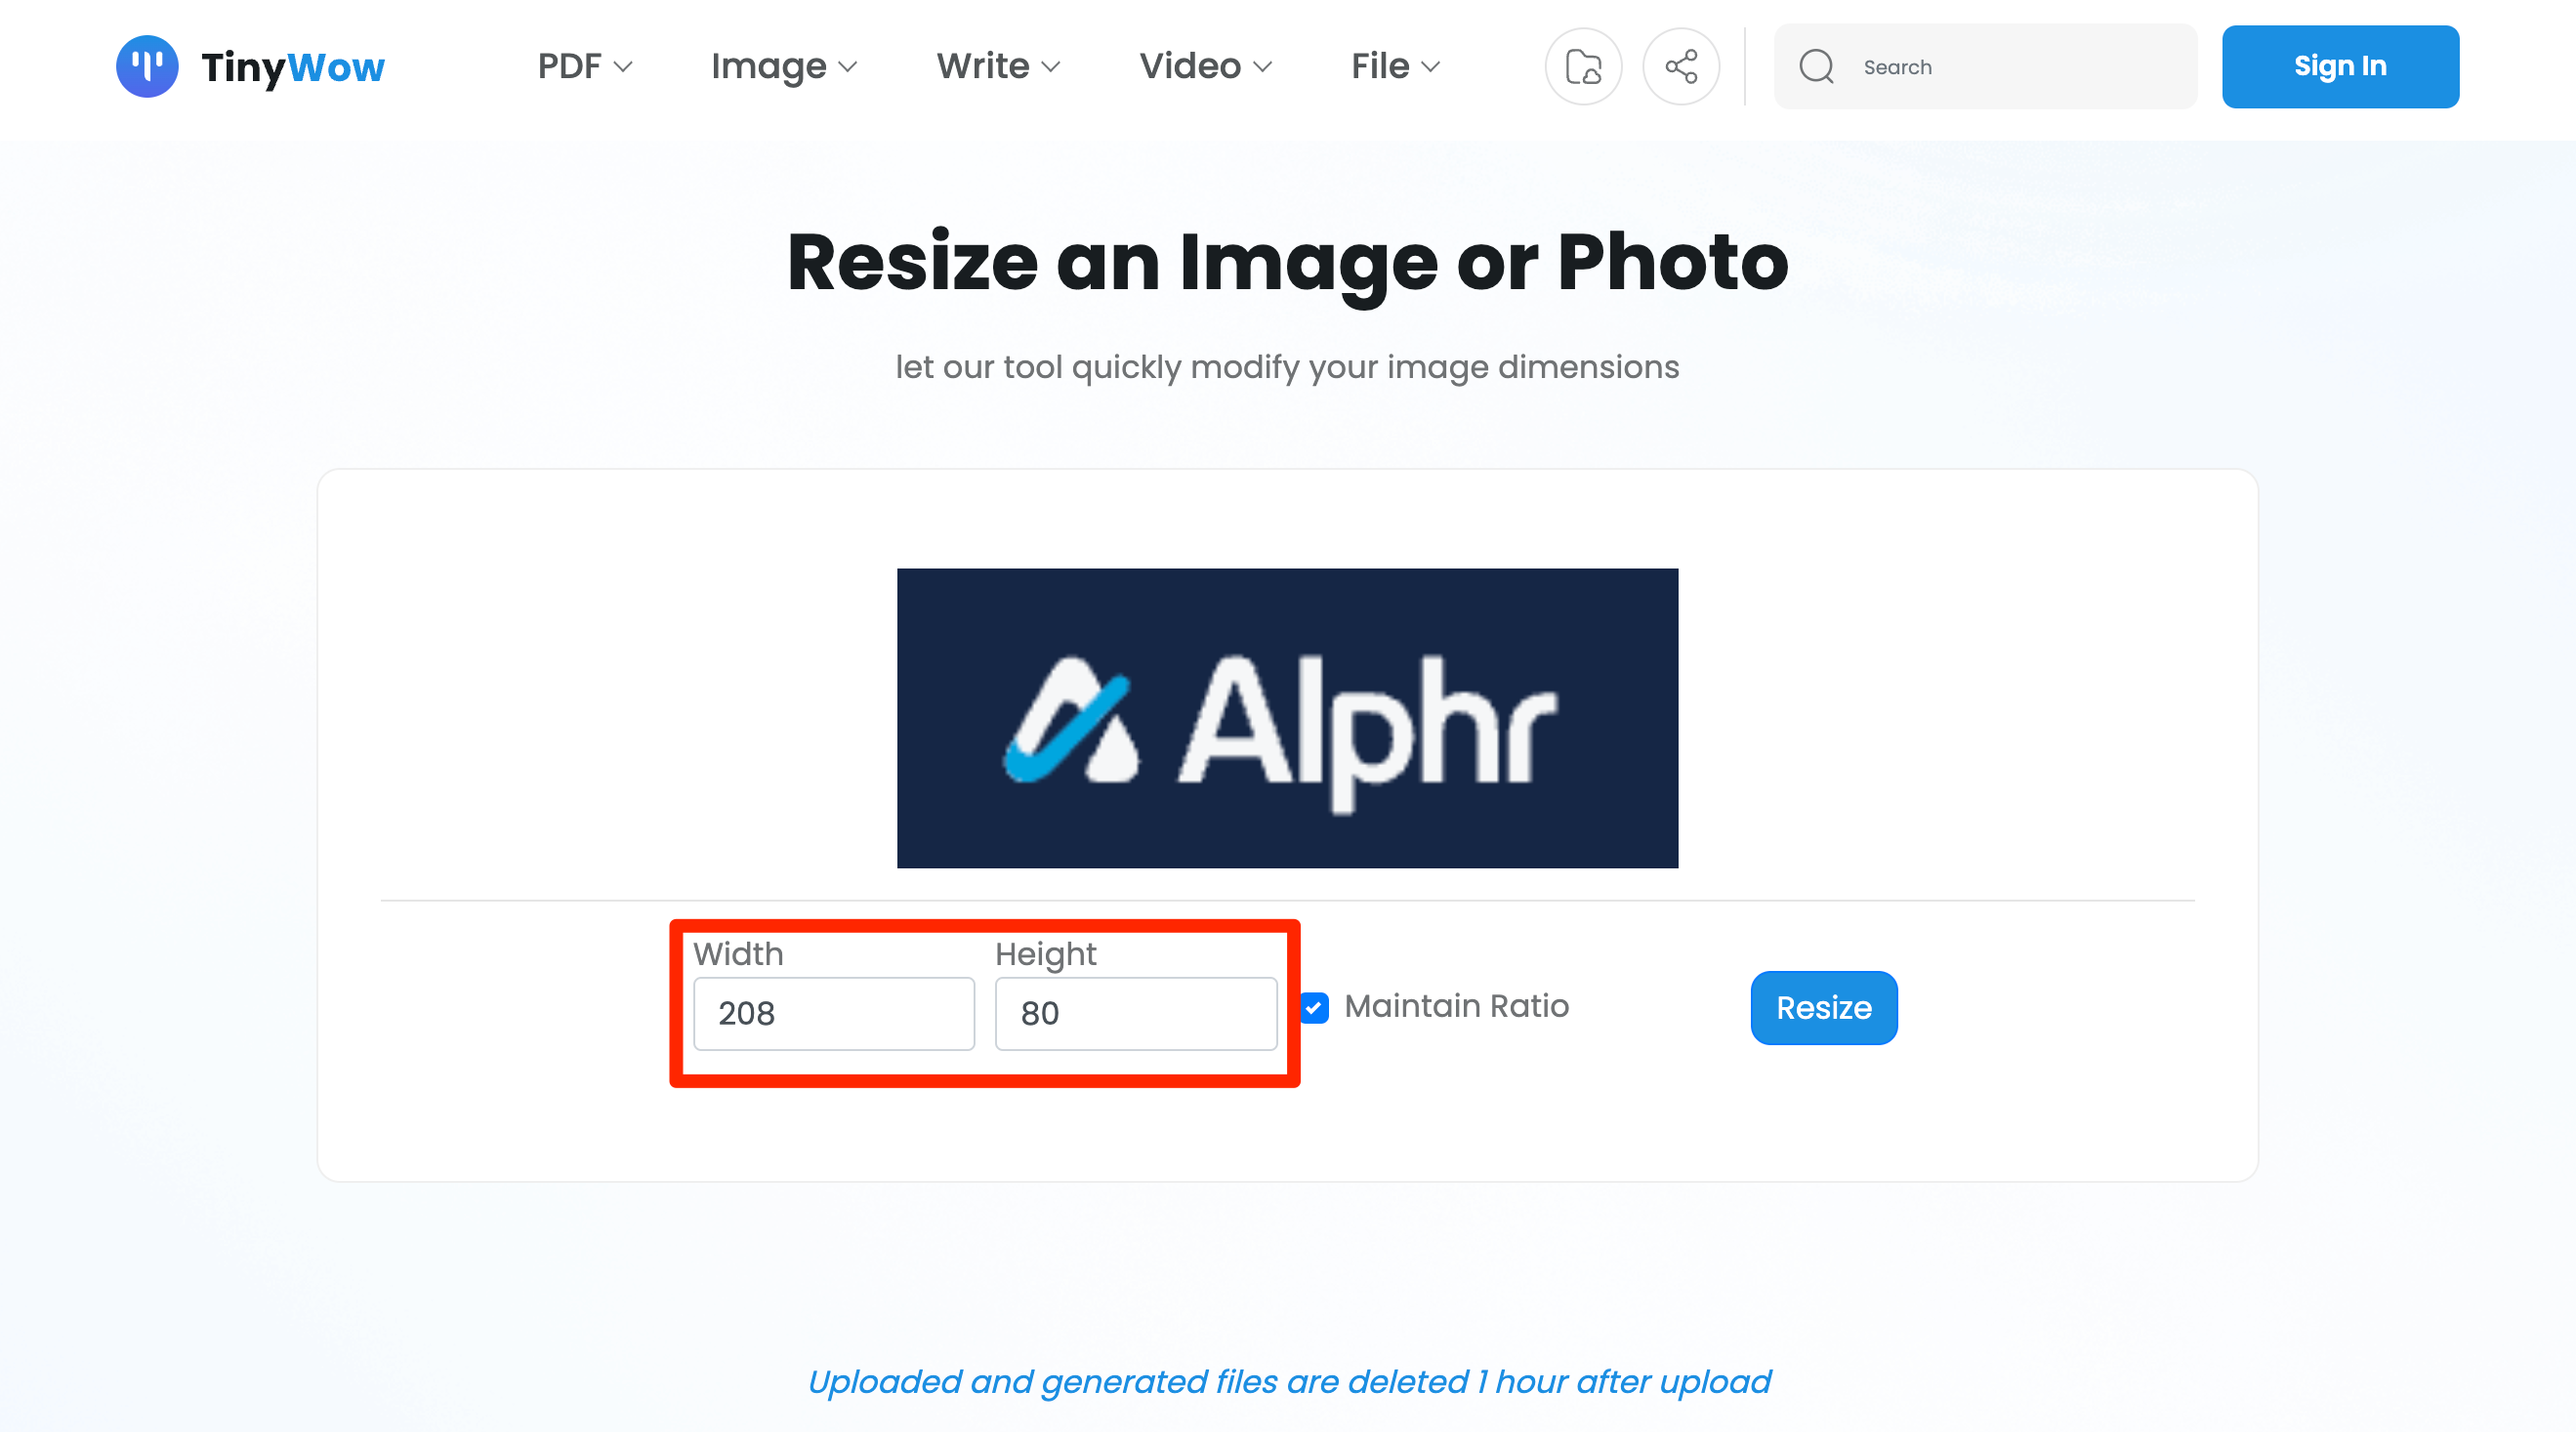
- Change the Ratio and Height of your preferred sizes.
- Click Resize.
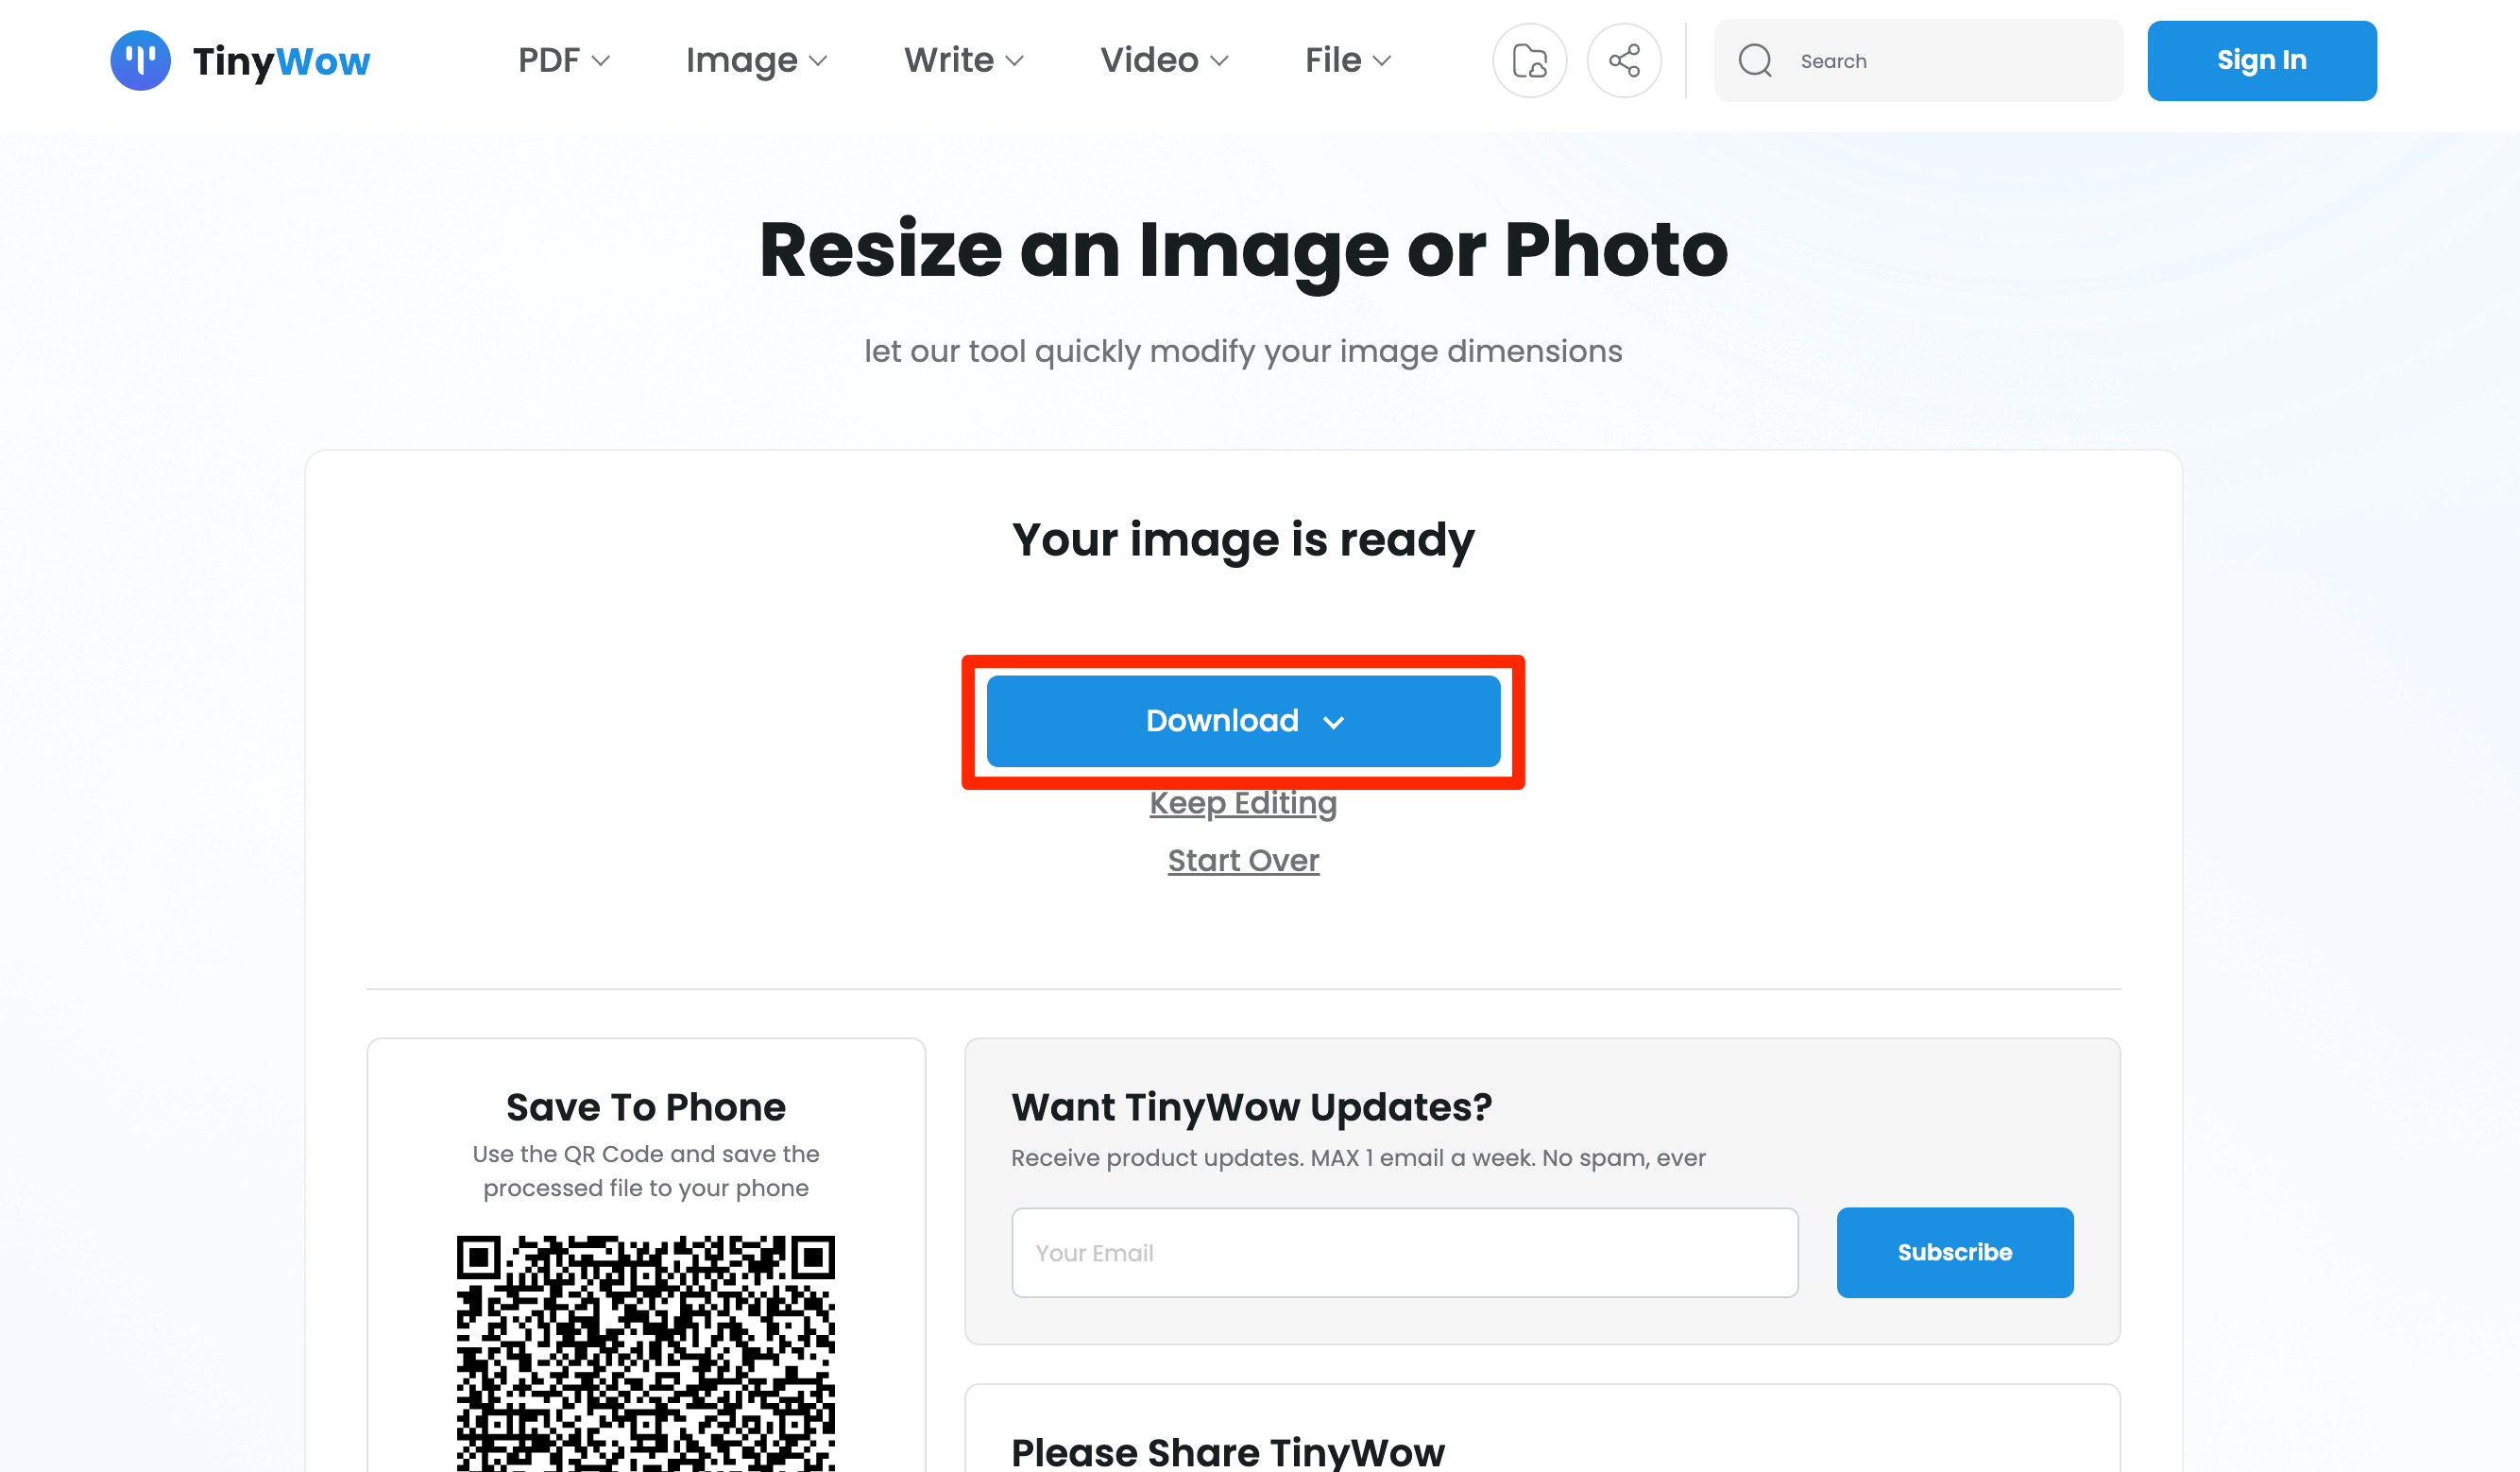
- Once the resizing is done, you can now Download the images.
Paint
All Windows versions below Windows 10 will come with MS Paint by default. Although quite basic as photo editing tools go, it can still resize pictures relatively easily. To do so, follow these steps:
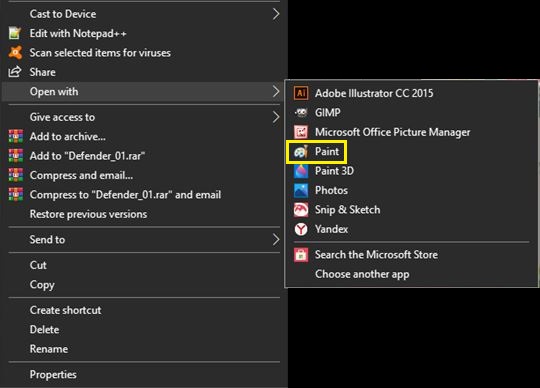
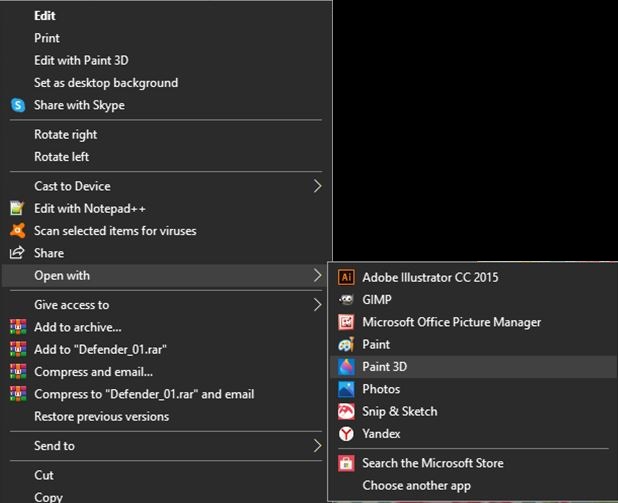
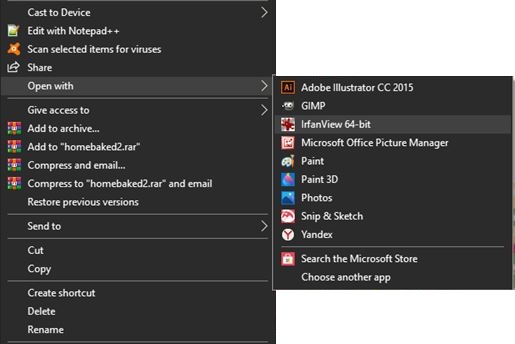
- Open the image by right-clicking on it and selecting Open With and Paint.
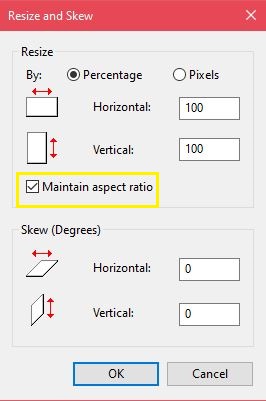
- On the Home tab, under Image, click on Resize.
- Adjust the image size either by percentage or pixels as you see fit. Click on Maintain aspect ratio to keep the image size constant when adjusting by percentage.
- Click on OK when you’ve made your adjustments.

Paint 3D
Windows 10 comes with an updated version of the Paint app, which has a lot more options than the original. The interface has been changed quite a bit, so those familiar with the previous program may find themselves lost when navigating the menus.
To resize an image in Paint 3D, do the following:
- Open the image in Paint 3D.
- Click on the Canvas tool at the top menu.
- In the menu on the right, you can adjust and resize the image by pixel or percentage. The lock aspect ratio maintains the proper image size balance, and Resize image with canvas increases or Decreases the Paint 3D canvas size in relation to your adjustments.
- Click on Menu, then Save to keep any changes.

Adobe Photoshop
Considered one of the best image tools around, we can’t talk about photo editing without mentioning Adobe Photoshop. Although not free like the others mentioned, this program’s versatility is well worth the price. To resize an image in Photoshop, follow these steps:
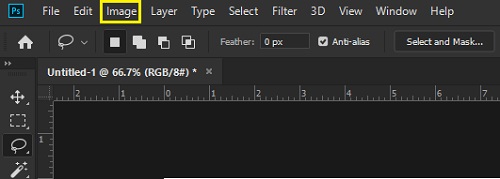
- Click on Image in the top menu.
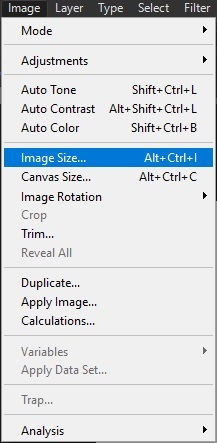
- Choose Image Size.
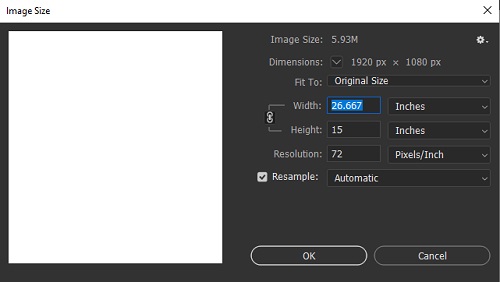
- Adjust the dimensions as you see fit the click on OK.
Batch resizing can also be done, though it will require recording Actions, then proceeding to choose File, Automate, then Batch.
Irfanview
A free and very popular image viewer, Irfanview also can resize images, both individually and in batches, without having to record program actions first. It is a convenient tool to have, and as it costs nothing to install, it’s worth giving this program a try. You can resize images in Irfanview like so:
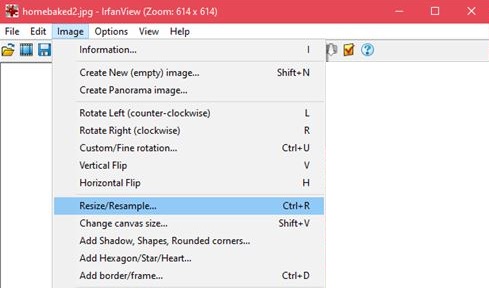
- Open the image by right-clicking and choosing Open with and IfranView.
- Click on Image on the top menu, then click on Resize/Resample.
- Adjust the image values as you see fit, then click on OK.
Batch conversion of images located in one folder can be done by opening Irfanview, clicking on File, then choosing Batch Conversion/Rename. All images located in the folder will then be resized automatically.
How to Resize an Image on a Mac
The Mac is a powerful tool for people that want to edit images. Many graphic artists prefer to use a Mac when editing, though whether this is a professional or personal choice is up for debate. The available tools are still quite useful, though. Here are some of the easiest to use:
Preview
The default photo and image viewer for macOS has several editing options, including resizing. To do so, follow these steps:
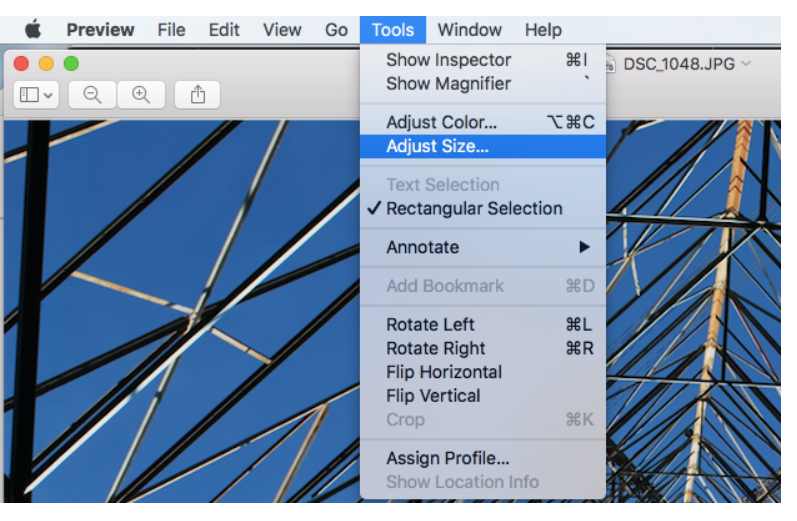
- Open the file you want to resize in Preview and then click on Tools > Adjust Size.
- Click the box next to Resample image and adjust the image to your liking.
- To do batch image resizes, open multiple images in the same window, then follow the steps given above.

How to Resize an Image on a Mac using Adobe Photoshop
This popular photo editing program is also available for use on Mac. The steps for image resizing are the same as those for the PC.
How to Resize an Image on a Chromebook
As the Chromebook is limited to only Google-approved applications, the choices for photo editing on this platform are not as varied as the others. However, it still comes with a default program that works nicely. Alternatively, you can enable the Google Play Store on your Chromebook and then download image editors as if using an Android device.
Image Editor
This is the default image viewer for your Chromebook and is the program used when you open an image file. To edit pictures using this app, do the following:
- Open your image file, then click on Edit in the menu.
- Now, click on Re-size.
- Adjust the values as you see fit.


How to Resize an Image on an Android Device
Out of the box, an Android phone or tablet does not come with applications that can be used to resize an image. The Photos app that comes as a standard with Android can be used to view files, but there are no available options for you to edit anything. Fortunately, useful applications for Android devices can be found in the Google Play Store.
The type of app may vary depending on both your device type and Android version, but most have very similar tools. The standard process of resizing an image is to select one or multiple images from your album, then choose the resolution to which you want it resized. Here are a few choice tools that are highly rated on Google Play:
1. Photo Compress & Resize
An easy-to-use and intuitive Image size reducer, Photo Compress & Resize allows the user to either decrease the image size or crop images and remove unwanted portions of the picture. It can perform batch image reductions, allowing multiple files to be selected and reduced at once.
2. Photo & Picture Resizer
A convenient photo resizer made for Android devices, the Photo & Picture Resizer app gives the user the option to quickly change the size of single or multiple images with a few simple taps. Made to match the original picture aspect ratio by default, the Photo & Picture Resizer makes it easy to upload images to various social media sites. The app also allows batch processing of multiple images in one go.
3. Q Reduce: Photo Reducer and Q Reduce Lite
The Q Reduce app is a no-nonsense, straightforward file size reducer that does one thing and does it well. The Lite version performs single image reductions, while the full version allows batch images and several other image editing options, such as crop selection and photo archiving.
How to Resize an Image on an iPhone
Although the Photos app that comes with your iPhone can crop images down to a certain size, it doesn’t have the feature to decrease its resolution or file size. There are, however, apps available through the Apple App Store that do the job very well:
1. Image Size
Simple to use and rather straightforward, Image Size is one of the most popular image editors in the App Store. This free tool is handy for those that would like a no-nonsense way to reduce picture file sizes.
2. ImageResize
A handy tool for quickly resizing and posting images from your iPhone, ImageResize is another popular editing tool in the Apple App Store. When resizing images, it displays the estimated file size, so you can easily adjust files for uploading to sites with specific file size requirements.
3. Batch Resize
A useful app that allows users to resize multiple images at once, Batch Resize is an excellent tool for those who like to take a lot of pictures and have albums with a lot of images.
Additional FAQ
Device Links
Here are the answers to a few of the most frequently asked questions on how to resize images.
1. What online tools can you recommend for resizing images?
The following tools offer simple drag-and-drop options when resizing picture files, and all of them are all free and available without installing anything. For single images, try using PicResize, or PhotoSize. For batch projects, BulkResize, and BIRME are rather useful. As they are online tools, it really does not matter which platform you use them on. You can use any of them as long as you have an online connection.
2. What programs can you recommend for resizing batches of images?
The applications provided for each platform above have choices that offer batch image processing. They are some of the most popular for each of their specific platforms and offer users an excellent tool for resizing multiple images.
3. What effect does resizing an image have on the file size?
Resizing an image has a very considerable effect on a picture’s file size. Decreasing or increasing the size of an image will respectively decrease or increase the number of pixels rendered when you open the file. This means that a smaller number of pixels creates a smaller file size and vice versa. This is important to remember, as many online sites have upload limitations and won’t accept images beyond a certain file size.
An Integral Part of Picture Taking
Now that taking pictures is so simple, the need to manage the size of image files has attained more significance, especially for those that do it often. It would be extremely frustrating to take a picture of an important moment only to find that you have run out of storage space. Resizing pictures has now arguably become an integral part of taking them.
Do you know of other ways to resize images on different devices? Share your thoughts in the comments section below.
Disclaimer: Some pages on this site may include an affiliate link. This does not effect our editorial in any way.