Did you know that Windows sometimes marks files as hidden to prevent you from modifying or deleting important information? Likewise, you can also hide folders from prying eyes or simply reduce clutter.
But how do you reveal all of these hidden gems?
Showing hidden folders is just as simple as hiding them. Keep reading to find out how to uncover hidden folders in Windows and what to do when hidden folders fail to reveal themselves.
How to Show Hidden Files in Windows 10
You can show any hidden files in Windows 10 with a few simple clicks of the mouse. Follow the steps below to get started:
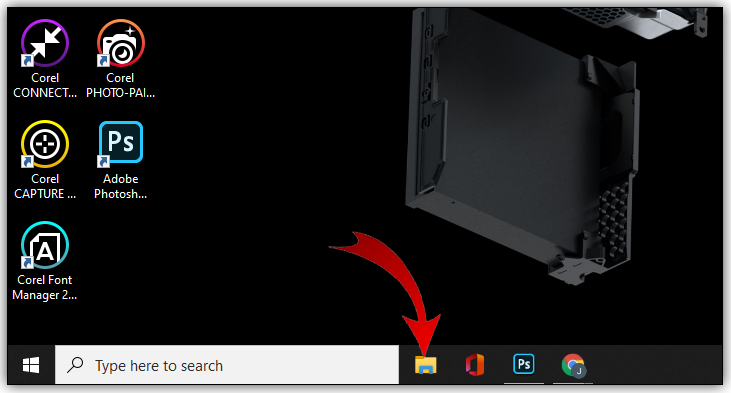
- Choose the File Explorer icon in the taskbar.
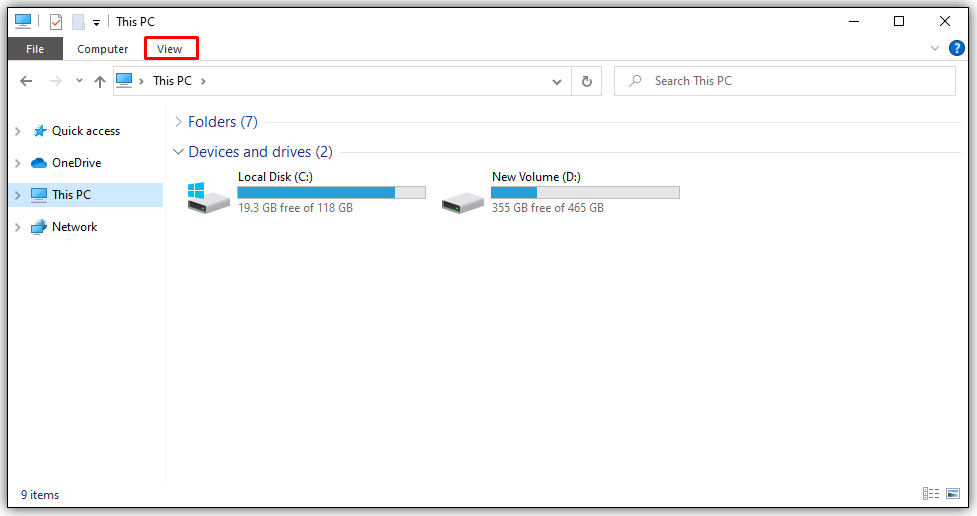
- Pick the View tab.

- In the header bar, choose the Options choice.
- Select “Change folder and search options.”
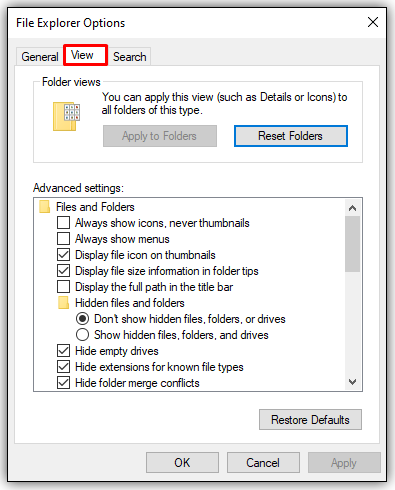
- Pick the View tab (again).
- Choose the View tab
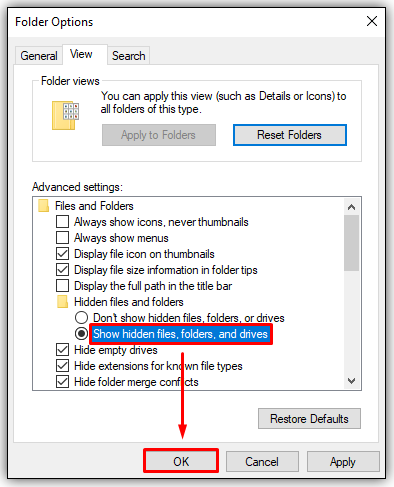
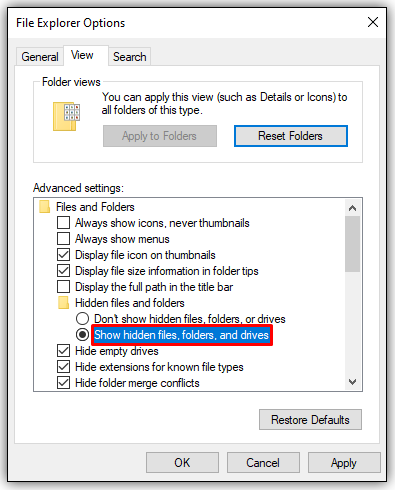
- Go to “Advanced settings.”
- Choose the option to “Show hidden files, folders, and drives” and press the OK button.


OR:
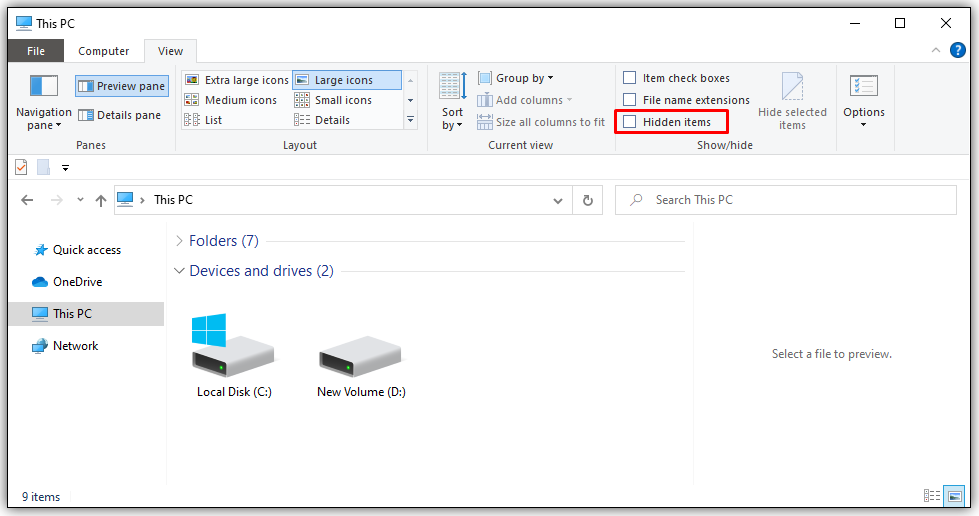
- Open the File Explorer window.
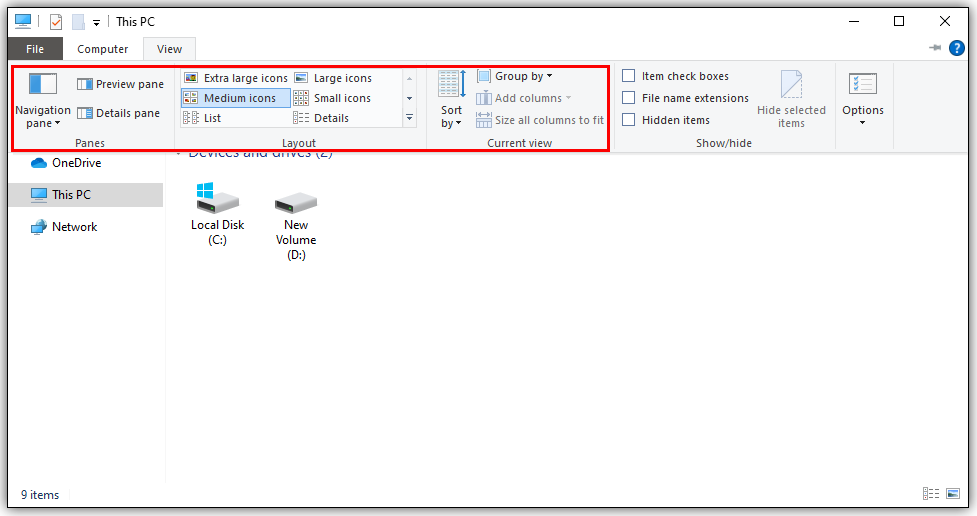
- Choose the View tab.
- Check the box for “Hidden Items” in the File Explorer ribbon’s Show/Hide section.
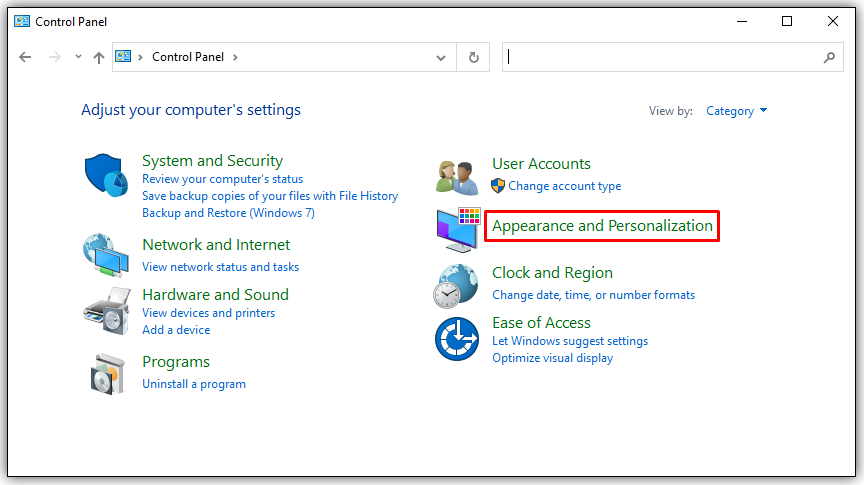
Yes, the second method is faster. But it’s always nice to have options, right? You also have another option if you like to work from the Windows’ Control Panel:
- Choose Appearance and Personalization.
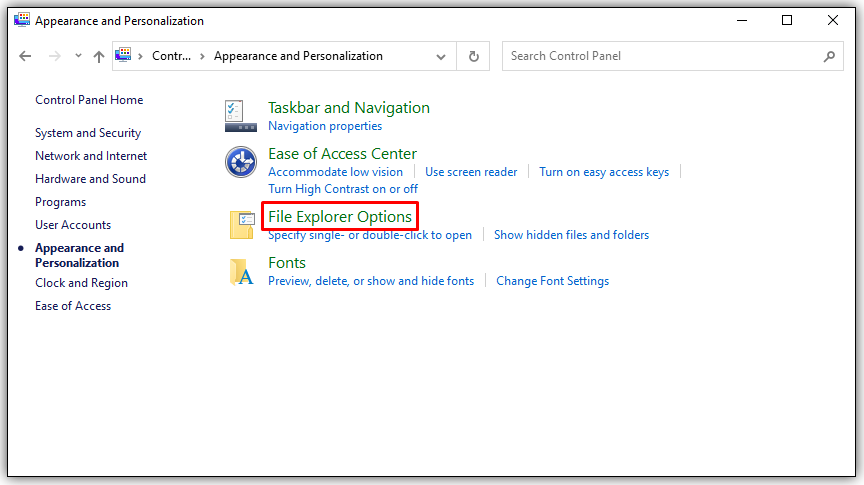
- Pick the File Explorer Options to open a new window.
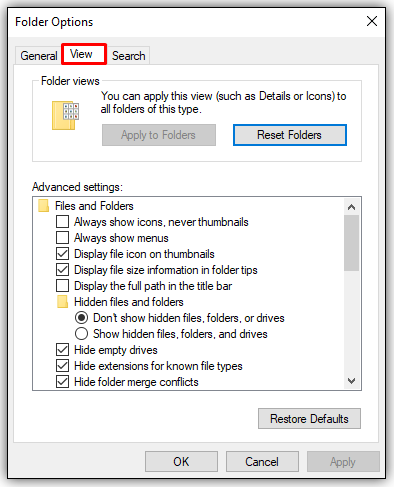
- Choose the View tab.
- Go down to “Hidden files and folders” and choose “Show hidden files, folders, and drives.”
- Choose Apply and then OK.

These methods also work for users running Windows 8, too.
How to Show Hidden Files in Windows 10 Command Prompt
Some people prefer using the command prompt over a settings menu. They use the cmd feature exclusively to change things on their operating system. If you prefer to use the command prompt instead of the Setting menu, these steps are for you:
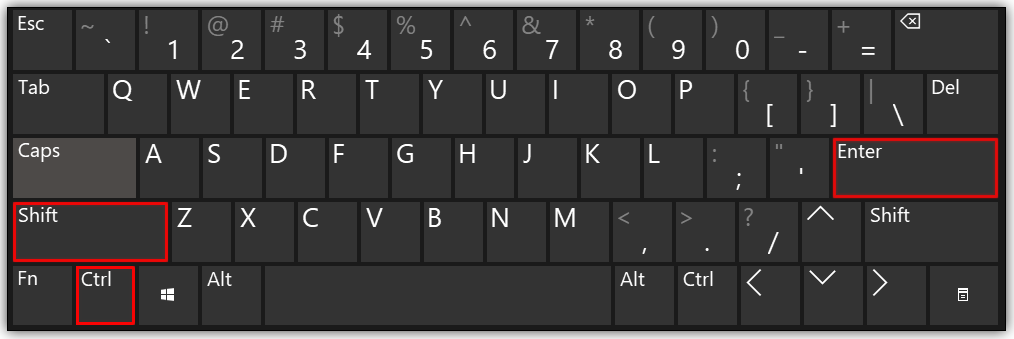
- Open Run by pressing the Windows key + R.
- Type “cmd” in the text box (no quotations).
- Press Ctrl + Shift + Enter to open elevated Command Prompt.
- Type in the following command line:
attrib -h -r -s / s / d E:\**(the E: prompt directs the command to the E drive, replace the drive letter as needed.)
How to Show Hidden Files in Windows 8
Windows 8 and Windows 10 have the same steps to reveal hidden files. So, you can choose between the methods listed below:
Control Panel Method
- Tap the Desktop button.
- Choose the Control Panel option and then Folder Options.
- Choose Appearance and Personalization.
- Go to Options, located to the right of the ribbon.
- In the new dialog box, choose the View tab.
- Choose the “Show hidden files, folders and drives” option.
- Deselect the option for “Hide extensions for known file types.”
- 8 Press the OK button.
File Explorer Method
- Open File Explorer.
- Choose the View tab.
- Go to the Show/hide section in File Explorer’s ribbon.
- Check/uncheck the box for “Hidden items.”
The changes happen immediately after clicking the box. If you want to hide folders again, you need to go back in and change it because Windows remembers this setting.
How to Show Hidden Files in Windows 7
Enabling hidden files on Windows 7 is a little more complex than doing it on Windows 8 or higher. It’s not impossible, but if you don’t know where to look you may never figure it out on your own.
Fortunately, you have this step-by-step guide to point you in the right direction. Do the following to show hidden files on Windows 7:
- Go to the Windows Explorer toolbar and press the Organize button.
- Go to the “Folder and search options” from the drop-down menu.
- Choose the View tab located near the top of the Folders Options window.
- Under “Hidden files and folders” choose the “Show hidden files, folders, and drives” option.
- Press OK to save the new setting.
How to Show Hidden Files in Windows XP
Finding the place to reveal hidden files on Windows XP can be a little confusing if you try it alone. So, here’s a quick guide to get you to the right setting option to show those hidden files:
- Open Windows Explorer and select Tools.
- Choose Folder Options.
- In the new window, choose the View tab option.
- Go to Advanced Settings and choose “Show hidden files and folders.”
- Uncheck the option to “Hide Extensions for Known File Types.”
- Select OK to save and exit.
How to Show Hidden Files in Windows Vista
The steps to view hidden files on Windows Vista is like other Windows versions. But finding the option on Vista can get a little confusing because the starting place is slightly different. Check out these steps to reveal hidden files using Windows Vista:
- Choose Organize in Windows Explorer.
- Choose the selection that says Folder and Search Options.
- In the new dialog box, choose the View tab and go to Advanced Settings.
- Uncheck/deselect the option to “Hide Extensions for Known File Types.”
- Press the OK button when finished to save setting changes and exit.
Additional FAQs
Why Are My Hidden Files Not Showing?
Some users find that quick setting changes don’t make hidden files appear. In most cases, using a CMD or registry command can fix the issue because these methods dive deeper into your computer’s drive.
Method 1 – CMD Fix
Let’s assume that you want to reveal hidden folders on the G drive. Here are the steps you need to see hidden folders using a command prompt:
• Go to your search box and type cmd.

• In the Command Prompt window, type G: (or the drive that you want to target) and press OK.

• Type the following command in the command prompt:
attrib -s -h -r / s /d
Method 2 – Registry Change
Making registry changes can cause massive problems if you don’t know what you’re doing. For that reason, only use this method as a last resort:
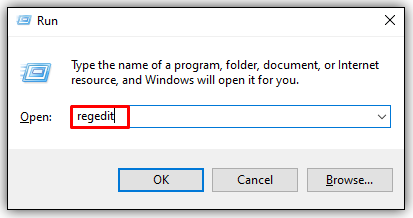
• Open the Run window by pressing Windows + R at the same time.

• Type regedit in the text box and press OK to open the Registry Editor tool.
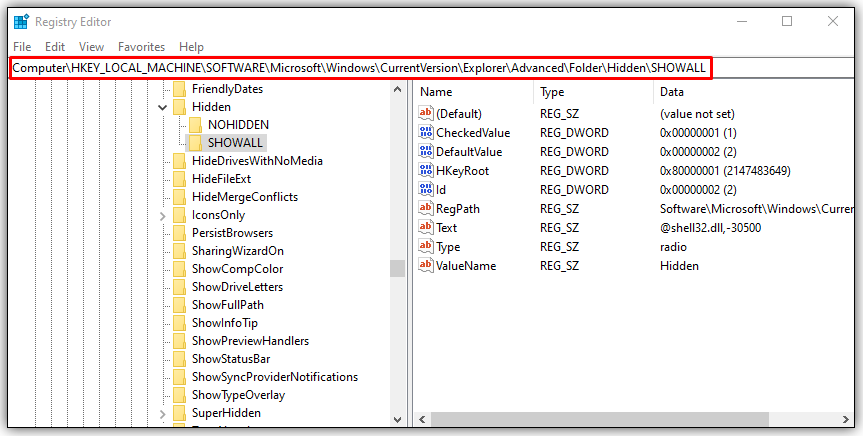
• Navigate to the following key location:
HKEY_LOCAL_MACHINE\SOFTWARE\Microsoft\Windows\CurrentVersion\Explorer\Advanced\Folder\Hidden\SHOWALL
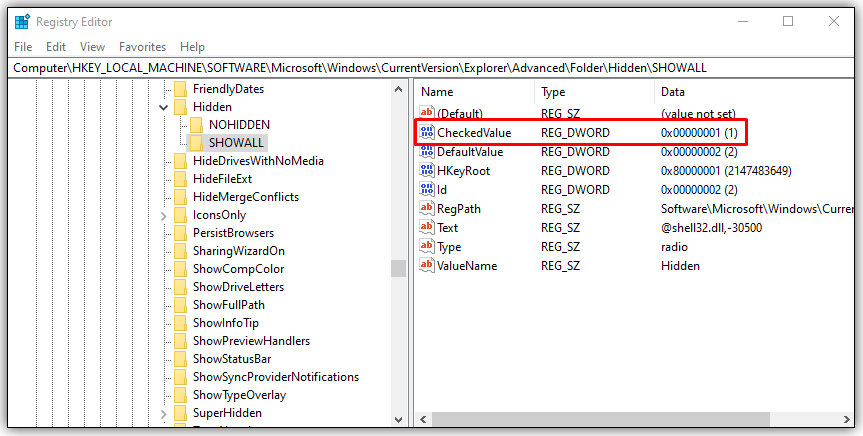
• Find the CheckedValue entry and make sure that the data is listed as “1” at the end of the entry line.
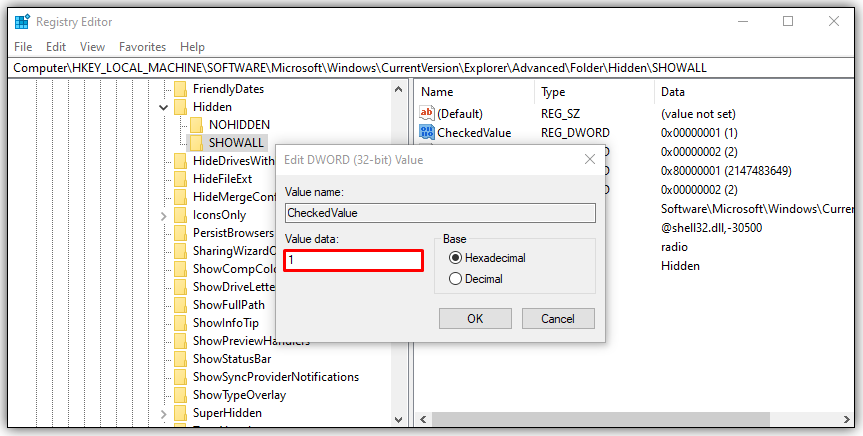
• If the value is not listed as one, go to Edit DWORD and manually change CheckedValue to “1.”
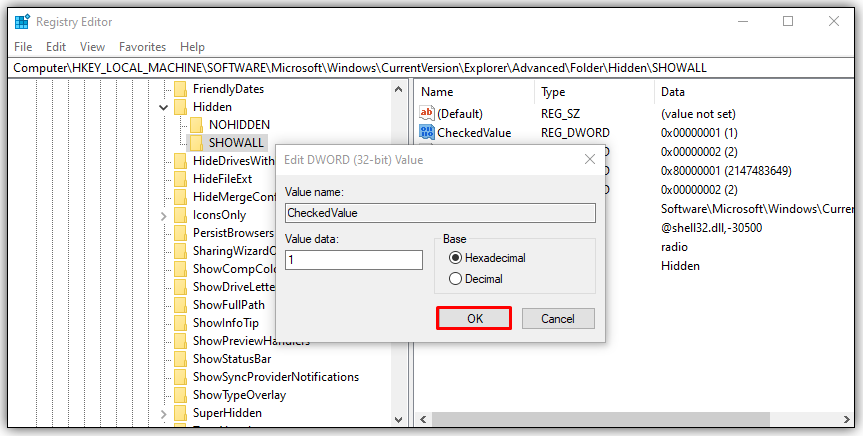
• Press the OK button to save changes and restart your computer so that they can take effect.
Finding Hidden Folders
It only takes a few steps to find hidden folders in most Windows operating systems and most of the time the setting option is in the same place. It’s just that getting there can pose a problem for some people. Luckily, you have a variety of options to choose from to uncover these mystery files. Just be careful about editing or altering permanent files from your operating system or you may end up with some major issues down the line.
How often do you use the hidden folders option? Which is your preferred method for accessing hidden folders? Tell us about it in the comments section below.
Disclaimer: Some pages on this site may include an affiliate link. This does not effect our editorial in any way.


