There are a lot of ways you can connect a printer to your PC or laptop. For example, you can use a USB cable, Bluetooth, a Wi-Fi connection, share another computer’s printer, or with an IP address.
Adding a printer with an IP address is fairly simple, and it can be done in a matter of minutes.
In this guide, we’ll show you how to install a printer on your PC by using the IP address on Windows and Mac. We’ll also go through the process of finding your printer’s IP address.
How to Install a Printer by IP Address?
Whether you have Windows or Mac, installing a printer using its IP address is a relatively straightforward process.
Steps to Add a Printer Using IP Address for Windows
To add a printer using an IP address on Windows 10, follow the steps below:
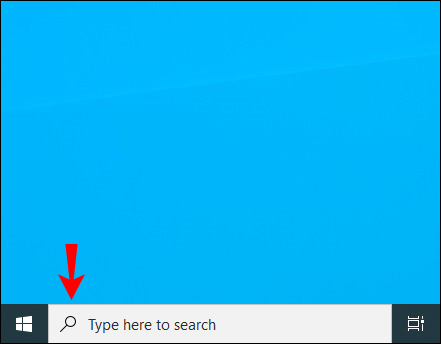
- Click on the magnifying glass in the bottom-left corner of your screen.
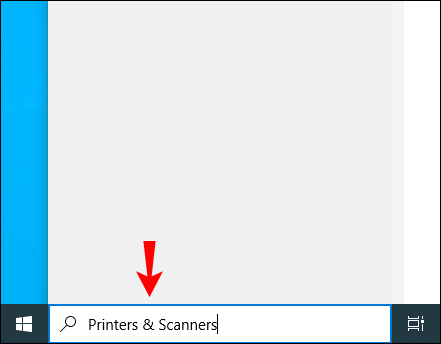
- Type in “
Printers & scanners” and open.
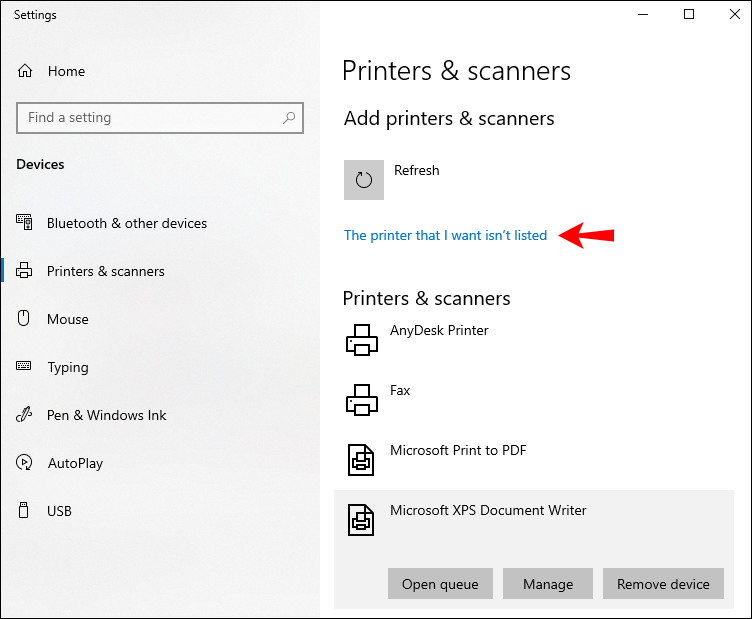
- Select “Add a printer or scanner.”
- Proceed to “The printer that I want isn’t listed” on the same tab.
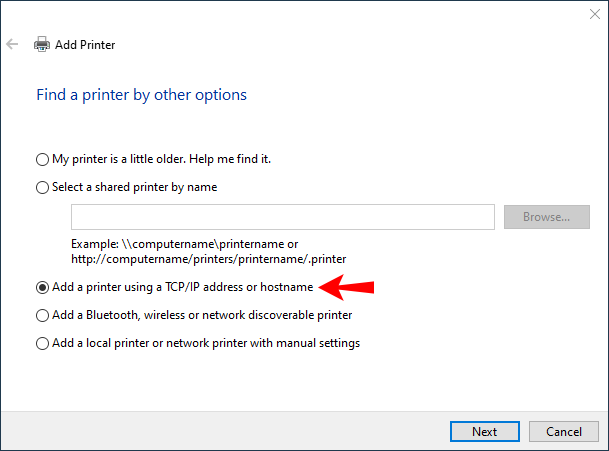
- Click on “Add a printer using a TCP/IP address or hostname.”
- Go to “Next” in the bottom-right corner of the window.
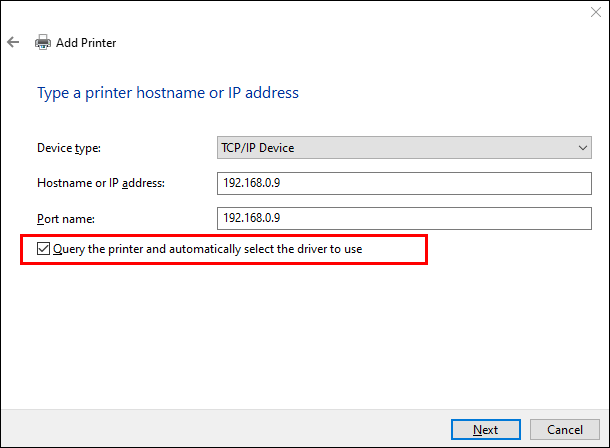
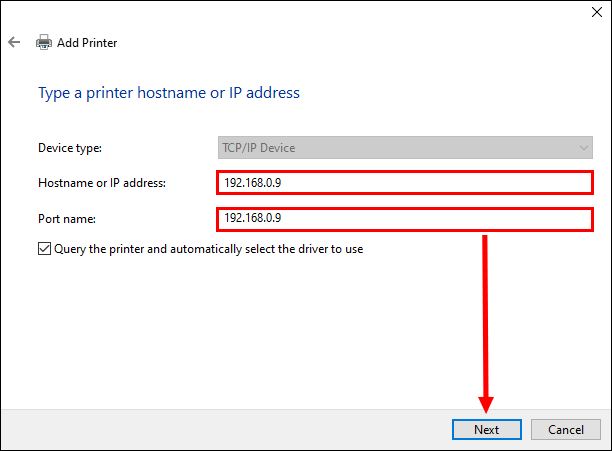
- Under “Device type,” choose “TCP/IP Device.”
- Next to “Hostname or the IP address,” type in your IP address.
- Choose “Next.”


Note: Don’t uncheck the “Query the printer and automatically select the driver to use” box.
That’s all there is to it. It will take a couple of seconds for Windows to locate the printer. Once the two devices are connected, type in the printer’s name. In addition, if you want this device to be set as the default printer, all you need to do is check the “Set as the default printer” box. Afterward, click “Finish,” and you’re good to go.
Another way you can add a network printer using an IP address on Windows 10 is with “Control Panel.” Here’s how it’s done:
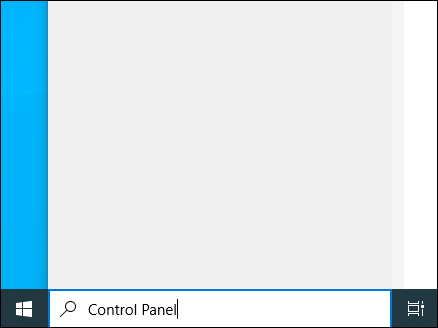
- Go to the magnifying glass in the bottom-left corner of your screen.
- Type in “
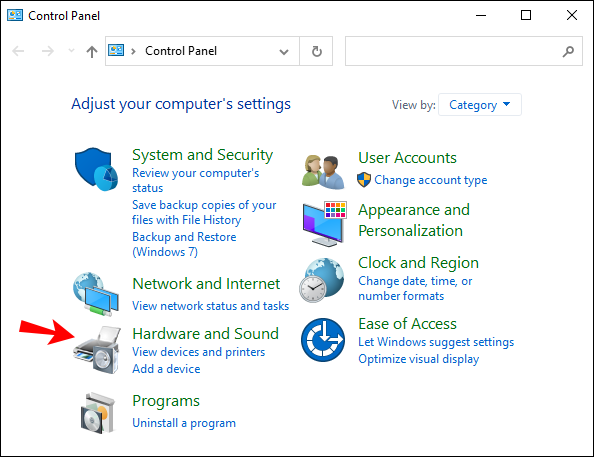
Control Panel” and open. - Navigate to “Hardware and Sound.”
- Proceed to “Devices and Printers” at the top of the window.
- Click on “Add a device” directly under “Devices and Printers.”
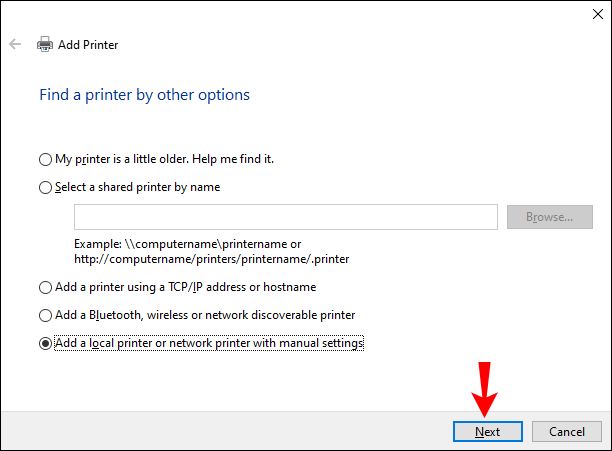
- Once again, proceed to “The printer that I want isn’t listed.”
- Click on the “Add a local printer or network printer with manual settings” box.
- Select “Next.”
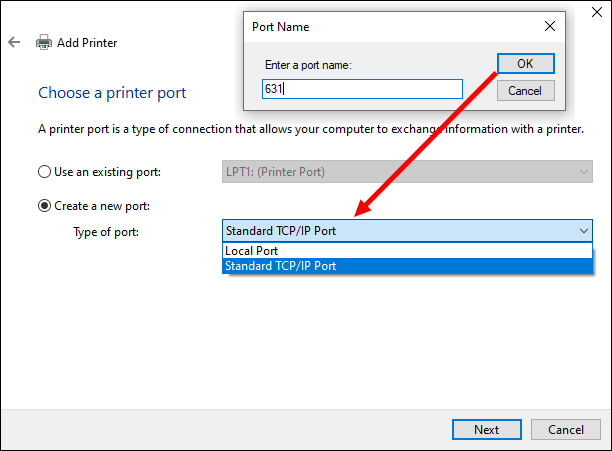
- Go to “Create a new port.”
- Next to “Type of port,” choose “Standard TCP/IP Port.”
- Type in the IP address and the port name, and go to “Next.”
- Type in the printer’s name.
- Choose “Do not share this printer.”
- Check the “Set as the default printer” box.
- Click on “Finish” in the bottom-right corner of the window.


If you have Windows 7 or Windows Vista, this is how you can add a printer by using its IP address:
- Go to the Start button in the bottom-left corner of your screen.
- Find “Devices and Printers” on the right side of the pop-up menu.
- Navigate to “Add a printer” on the top of the new tab.
- Select “Add a local printer” on the new window, and then click on “Next.”
- Next to “Create a new port,” choose “Standard TCP/IP Port.”
- Go to “Next” once again.
- Type in the IP address of the printer, and click on “Next.”
That’s about it. Wait a couple of seconds for your Windows to install the printer. In the next tab, choose not to share this printer so that other networks can’t find and use it.
Windows also gives you the option to print a test page at this point. Just to make sure everything works fine, we suggest you do this. But if you want to skip this step, just go to “Finish.”
Steps to Add a Printer Using IP Address for Mac
Adding a printer using the IP address on your Mac is just as straightforward. Here’s how it’s done:
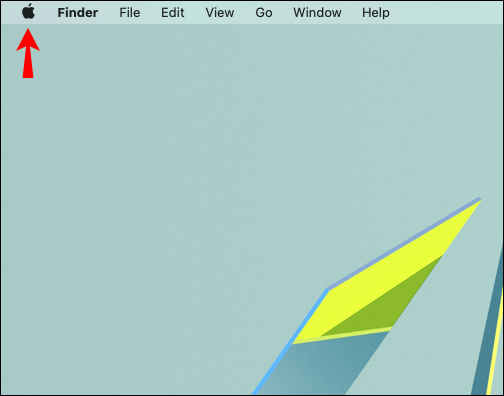
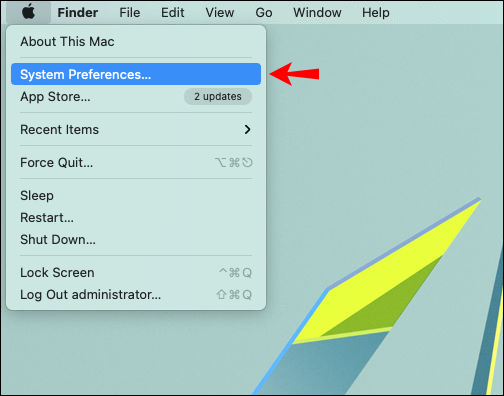
- Navigate to the apple icon in the upper-left corner of your screen.
- Choose “System Preferences…” on the drop-down menu.
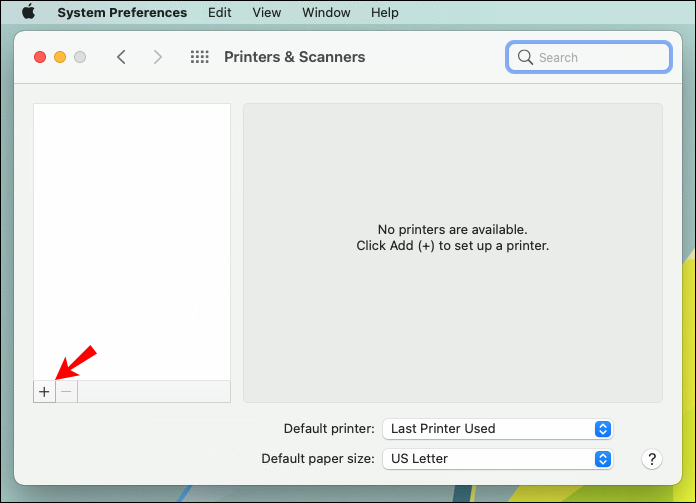
- Find “Printers & Scanners” on the list of options and click on it.
- Select “+” in the bottom-left corner of the new window.
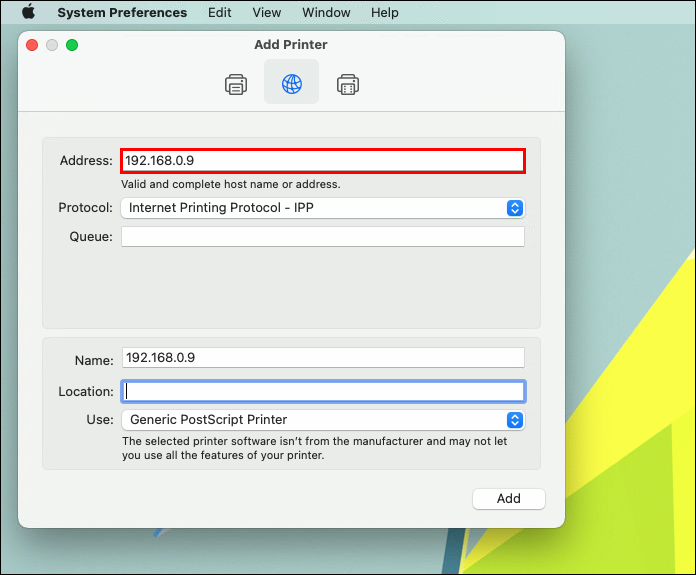
Note: Some older Mac versions require you to click on “Add printer” before proceeding to the next step. - Go to the IP icon on the upper-left part of the new window.
- Type in the IP address of your printer.
- Fill out the rest of the information, like the printer’s name and use.
- When you’re done, click on “Add” in the bottom-right corner of the tab.


You’ve successfully managed to connect your printer to your Mac using its IP address. Now you can start using it normally.
Additional FAQs
How Do I Find the IP Address for My Printer?
Connecting your PC and printer with the printer’s IP address is a simple process. But in order for you to do so, you will need to know the IP address beforehand. Since the majority of printers don’t come with screens, you might wonder how you can find the necessary information.
The good news is that there are a couple of ways you can do so.
If your printer does have a screen, then it will be a piece of cake. Simply go to the menu, and find the IP address in the network settings.
The second method of figuring out your printer’s IP address is with the configuration sheet. All you need to do is press the power button for a couple of seconds. For some printers, you have to press and hold the “Go” button. If this doesn’t work with your printer, then you might have to go to the system’s menu first. Go to “Information” and then find the “Print configuration” option. Once the piece of paper is printed, you’ll find your printer’s IP address there.
The third option only works when the printer is currently connected to a computer. If that’s the case, navigate to “Devices and Printers” or “Devices & Scanners.” When you find the printer that’s connected to the PC, right-click on it, and go to “Printer Properties.” If there are any registered ports, your printer’s IP address should be written down there.
Another option is to download a third-party app that can scan all nearby IP addresses connected to your network.
Print to Your Heart’s Content
Now you know how to install a printer on your Windows and Mac with the printer’s IP address. You also know how to find your printer’s IP address. Once you link the two devices, you can start printing everything you need.
Have you ever connected a printer to a PC or laptop using its IP address? Did you use any of the methods explained in this article? Let us know in the comments section below.
Disclaimer: Some pages on this site may include an affiliate link. This does not effect our editorial in any way.

