Deleting pictures from your iPhone photo gallery one by one can be time-consuming, especially if you have hundreds or thousands of them. Thankfully, iOS lets users delete entire albums with a few taps. If you’re wondering how to speed up the process of deleting photos and freeing up your device’s memory, we’ve got your back.
In this guide, we’ll share instructions on deleting entire albums from your Photos app at once on different iPhone models. Additionally, we’ll explain how to recover deleted albums or delete them permanently. Read on to find out how to make your picture gallery cleaner.
How to Delete Photo Albums on an iPhone X, 11, or 12
Instead of deleting pictures one by one, you can delete an entire album at once. Here’s how to do that on the newest iPhone models:
- From the main iPhone menu, tap the Photos app icon.

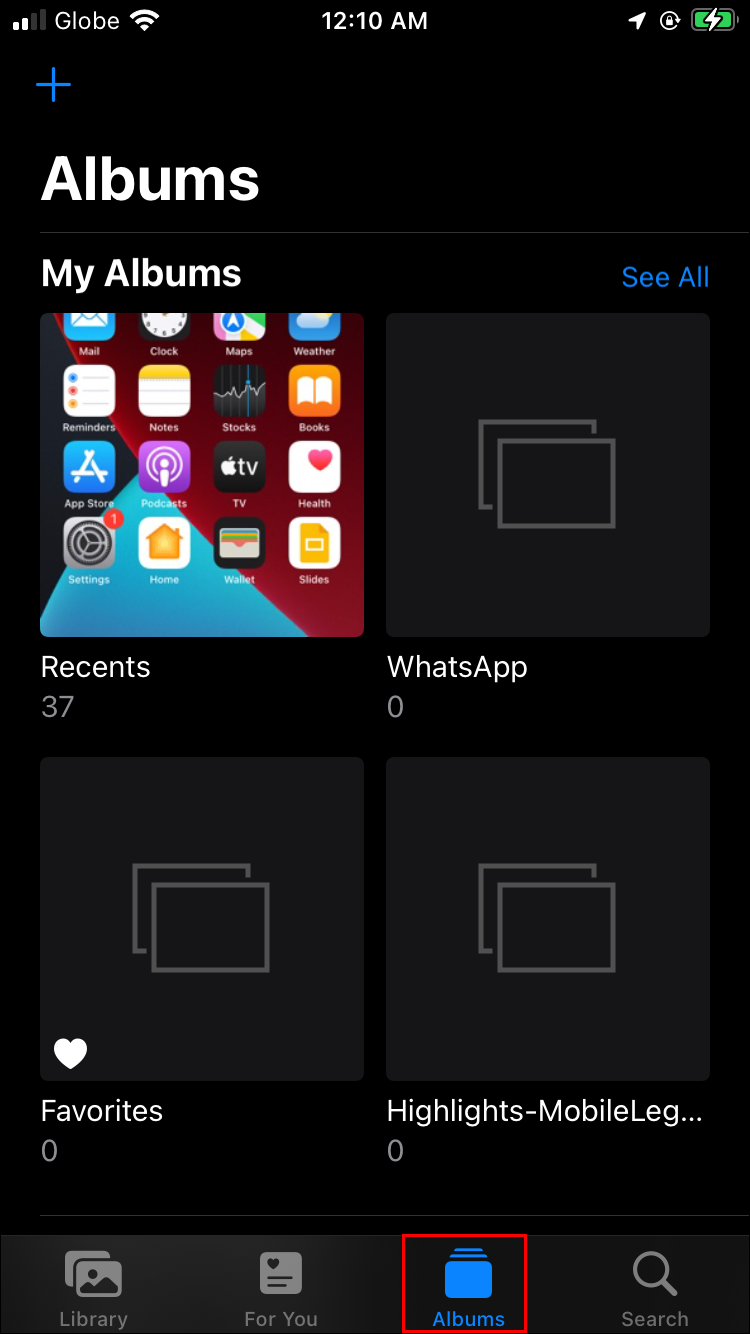
- Tap “Albums” at the bottom of your screen.

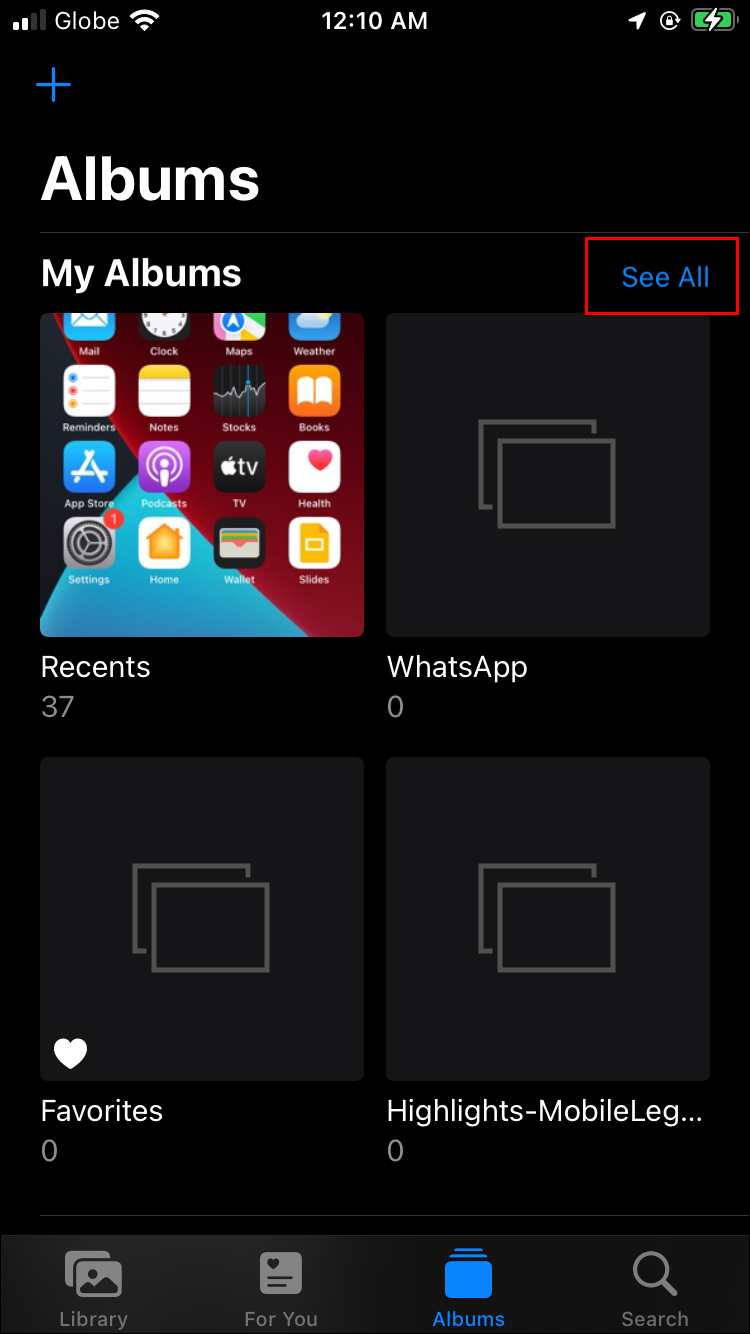
- Tap “See All” at the upper right corner of your screen to access all your albums.
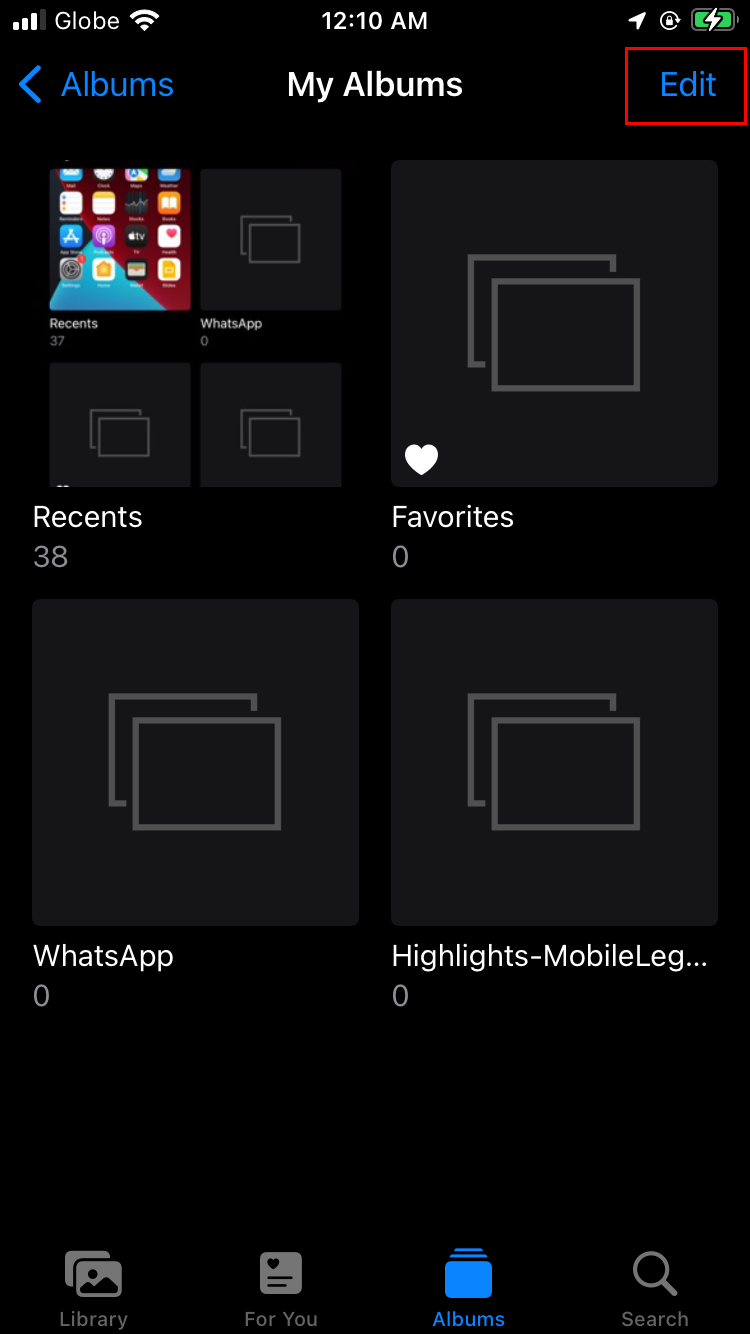
- Tap “Edit” at the upper right corner of your screen.
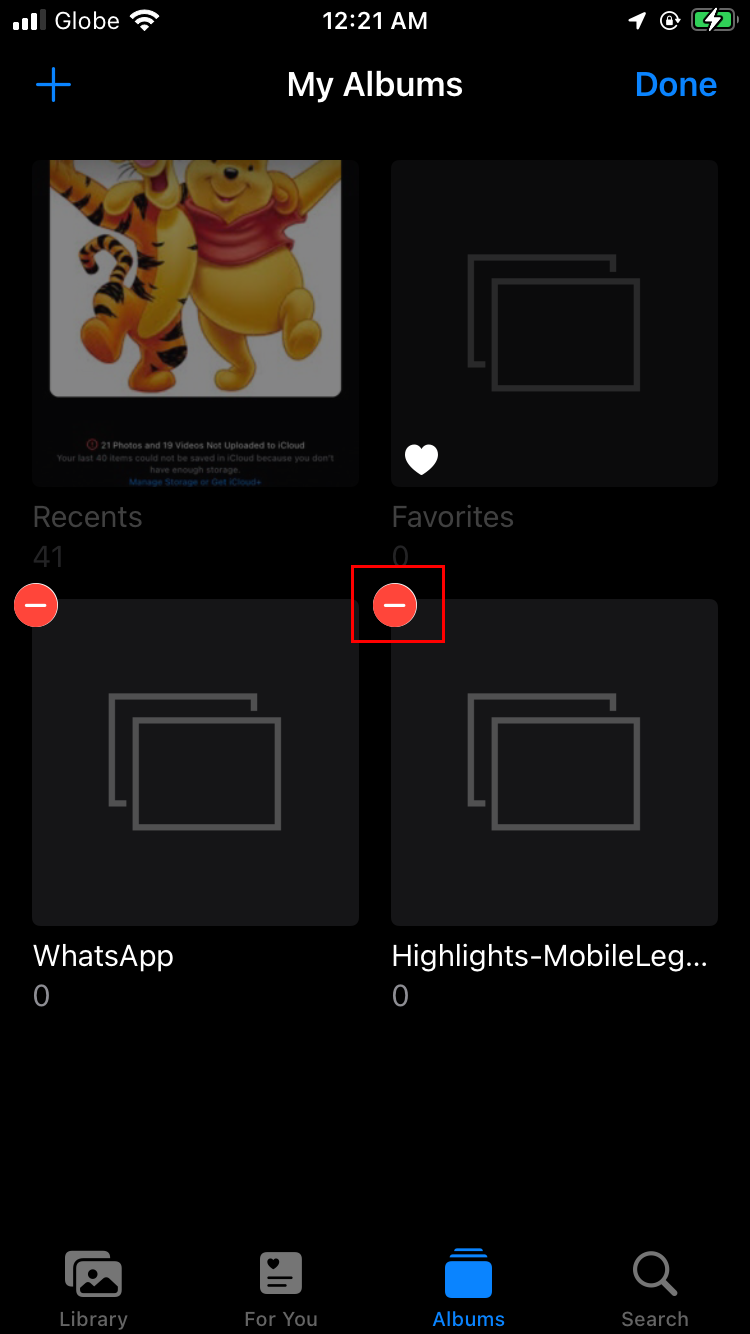
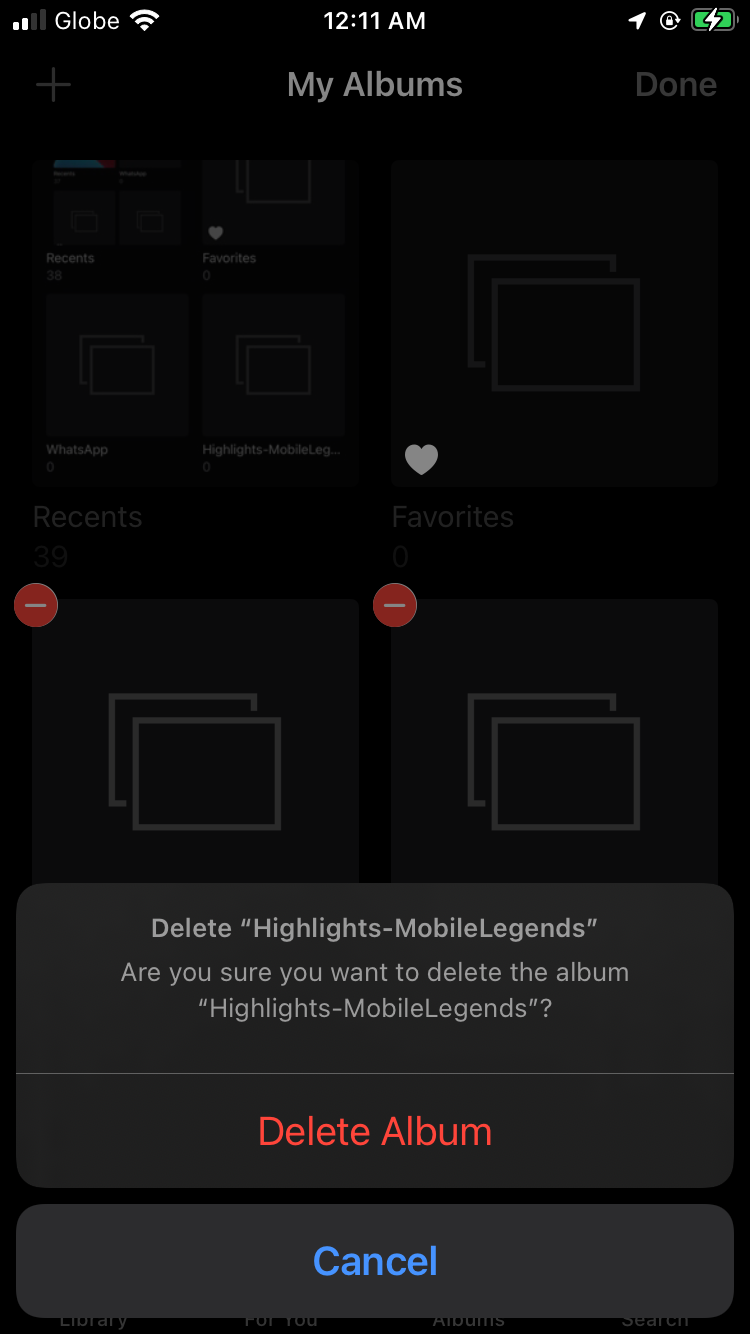
- Scroll through your album list to find the albums you wish to delete. Tap the red minus icon next to an album.
- Tap “Delete Album” to confirm or “Cancel” if you’ve tapped the minus icon accidentally.
How to Delete Photo Albums on an iPhone 6, 7, or 8
Deleting an entire album on iPhones 6, 7, and 8 updated to the latest iOS version is no different from doing it on newer iPhone models. Follow the steps below:
- From your iPhone menu, open your Photo gallery.
- Navigate to the “Albums” tab at the bottom of your screen.
- Select “See All,” located at the upper right corner.
- Tap “Edit” at the upper right corner and tap the red minus icons next to albums you wish to delete.
- Tap “Delete Album” to confirm. Alternatively, tap “Cancel” to go back to selection.
How to Delete Multiple Photo Albums at Once on an iPhone
Sometimes, you may need to speed up the process and delete multiple albums at once from your iPhone. Unfortunately, this can’t be done directly on your iPhone; albums can only be deleted one by one.
FAQs
Why Can’t I Delete an iPhone Album?
Some albums on iPhone are created by default and can’t be deleted on the device. These albums include the Camera Roll, People, and Places, and albums synced with your PC via iTunes. You also can’t disable filtering by media type. However, albums that are synced with your PC can be deleted via iTunes on the PC.
How Do I Delete an Album Synced via iTunes?
You can’t delete albums synced with your computer from your iPhone, but you can do this through iTunes on your PC. Follow the instructions below:
1. Connect your iPhone to your computer using the Lightning cable.
2. Double-click iTunes on your computer to launch the app.
3. From the left sidebar, select your iPhone name.
4. Click “Photos.”
5. In the “Sync Photos” menu, click the circle next to “Selected Albums.”
6. Select all albums you don’t want to delete. Be careful not to do the other way around, as non-selected albums won’t be synced with your iPhone.
7. Click “Apply.” Wait for the sync to finish and disconnect your iPhone. The albums should now be gone.
How Do I Recover a Deleted Album on an iPhone?
Sometimes, people delete iPhone albums accidentally or realize they miss the photos afterward. Thankfully, you have 30 days to change your mind after you delete anything from your iPhone gallery. However, there’s no way to recover entire albums. Instead, you’ll need to recover pictures one by one or all deleted pictures at once. Here’s how to do that:
1. Open the Photos app on your iPhone.
2. Tap “Albums” at the bottom of your screen.
3. Tap “Recently Deleted.”
4. Tap “Select.”
5. Tap the pictures you want to recover. Alternatively, tap “Recover All.”
6. Tap “Recover” to confirm your selection. You’ll see the recovered photos appear in their initial albums.
Why Did an Album I Didn’t Create Appear in My iPhone Photos App?
Sometimes, iPhone users come across albums they’ve never created and wonder how they got there. This may be annoying, as iPhone’s memory is limited, and such albums often contain duplicate content.
iPhone can automatically create new albums for apps that have your permission to save content you post using them. For instance, when you post something on Instagram, iPhone saves your post content in a dedicated album. This isn’t iPhone’s fault but rather Instagram’s. To stop Instagram from saving the pictures you post to your Photos app, follow the steps below:
1. Launch Instagram and log in to your account.
2. Tap your profile picture located at the bottom right corner of your screen.
3. From your profile page, tap the upper right corner to access the menu.
4. From the menu, select “Settings,” then “Account.”
5. Scroll down and tap “Original Photos.”
6. Shift the toggle next to “Save Original Photos” to the “Off” position (from right to left). If the button is greyed out, the action was successful.
Some iPhone albums may also be created by default. iPhone filters content by media type, so albums such as “Video” are created automatically.
Think Twice Before Deleting
Hopefully, our guide has helped you clear your iPhone Photos app of redundant pictures. Before deleting an entire album, make sure to check whether it contains something worthwhile. It’s especially important to check with the “Recently Deleted” album, as upon clearing it, you will be unable to restore any content.
Do you know any smart ways of organizing iPhone photos? Or, perhaps, you know an app that lets users delete multiple albums at once? Share your experiences in the comments section below.
Disclaimer: Some pages on this site may include an affiliate link. This does not effect our editorial in any way.


