Of all the recent trends in technology and gadgets, none of them have quite exploded in popularity like smart speakers. It seems everyone is focused on selling a smart speaker to consumers, able to play music, search for information, report the news and weather, and even shop for you. Smart speakers use mesh networking and personal assistant AI technology to power your home with an always-active, always-listening speaker. For many, smart speakers are their first entry into the “Internet of Things,” which uses wireless networks to connect physical objects together to create a network of devices and objects that can be used to control all aspects of the area around you. Plenty of these smart home devices can control the objects around us, allowing users to turn lights on and off or stream Netflix on our televisions without having to use physical switches or remotes.
Of course, the problem with these smart speakers is that every company seems to be focused on making their own platform. Amazon’s Alexa-powered speaker, the Amazon Echo, first kicked things off, but since then, Google’s own Home speaker, Lenovo’s Alexa-based Smart Assistant speaker, and even Apple’s own HomePod have filled the market with devices that don’t seem to interact well with each other. As a consumer, it can be a difficult choice on which device to pick, especially now that Apple’s entered the market with a Siri-based option. The HomePod costs nearly twice as much as an Amazon Echo, and while the HomePod features improved speakers over Amazon’s own device, for some consumers, it doesn’t make sense to stick to Apple’s products when Amazon’s Echo is available for purchase right now.
If you’ve bought into the Echo and Alexa ecosystem, but you primarily use iTunes or Apple Music to host your library of songs and playlists, you aren’t out of luck. No matter whether you’ve paid a bit of cas We have a few different options for you to be able to play your library whenever you want. So whether you’ve built a library of iTunes purchases and CD rips over the decade and a half since the iPod’s rise to prominence, or you stream your music using Apple’s own streaming service, these are the best ways to play your Apple-based library of songs through your Amazon Echo.
Listening to Apple Music
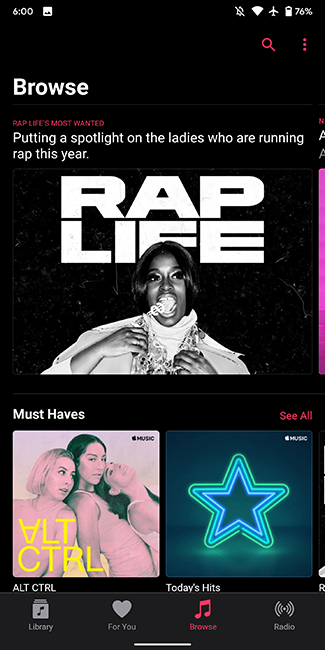
Though iTunes is Apple’s long-running music service for your computer and for their online storefront, we’ll actually be starting by discussing Apple’s newest streaming service and Spotify competitor, Apple Music. For $9.99 per month, Apple Music grants you access to 50 million streaming songs per month, along with offline play, exclusive content like the Beats 1 Radio show, and of course, access to your entire iTunes library of purchases. For many, Apple Music is a no brainer—it syncs directly with your iPhone, iPad, Apple Watch, and even Android devices using the Apple Music application downloaded from the Play Store.
There’s a simple reason for starting with Apple Music first: as of December 2018, your Echo speakers works natively with Apple Music, as long as you activate it first within the settings of your Alexa application. The ability to play directly with Apple Music means that, for many users, the guide may end after we summarize how to link Apple Music to your Alexa device. Though a paid service, it should be obvious that using Apple Music with your Alexa device is by far the most straightforward route, allowing you to play both streaming music and your iTunes cloud locker. There are a few limitations, but for anyone with Apple Music, this is the way to go. Here’s how to do it.
Grab your mobile device and open up the Alexa application on your phone. The Alexa app is almost always required to make changes to your Echo speaker, and changing your primary music service is no exception. Click on the menu icon in the top left corner of the display to open the sliding menu on your screen, then select Settings from the list of available options. This list of options allows you to select from different preferences for your Alexa devices and preferences, including your main music service. Select “Music” from the list of settings, and you’ll be able to view your currently linked music services, plus the option to link a new service.
Select “Link New Service” from the list, and you’ll gain access to the ability to change your main music service from within Alexa. At the top of this list is the option to add Apple Music. Select this and press the “Enable to Use” option, then sign in with your Apple login information. This will allow you to automatically play your music with your Amazon Echo.
There are undoubtedly reasons to not use Apple Music with your Amazon Echo speaker. Though the capability to stream your Apple Music account to your Alexa device was added in December 2018 (just a week before we updated this article), it’s worth noting that the capability only works in the United States at the time of writing. So whether you’re neighboring the United States in Canada or Mexico, or you’re halfway around the world living in Australia, you’ll only be able to stream your Apple Music library if you’re in the United States. Our hope is that Apple Music and Amazon work together to bring their service to
Playing Over Bluetooth
We’ll talk more about the difficulties facing cloud playback and syncing your iTunes library with your Alexa devices below, but first, we need to stress than, in 2018, the easiest way to use your iTunes library (and, by extension, your iPhone or Android phone with Apple Music installed) with your Alexa is by relying on the classic wireless standard people love to hate: Bluetooth. Yes, while your Amazon Echo is primarily used as a smart speaker, designed to answer your inquiries and requests, the Echo pulls double duty with more traditional units by function as a Bluetooth speaker, able to communicate and playback audio from nearly any modern device. Here’s how to pair your devices with your Amazon Echo.
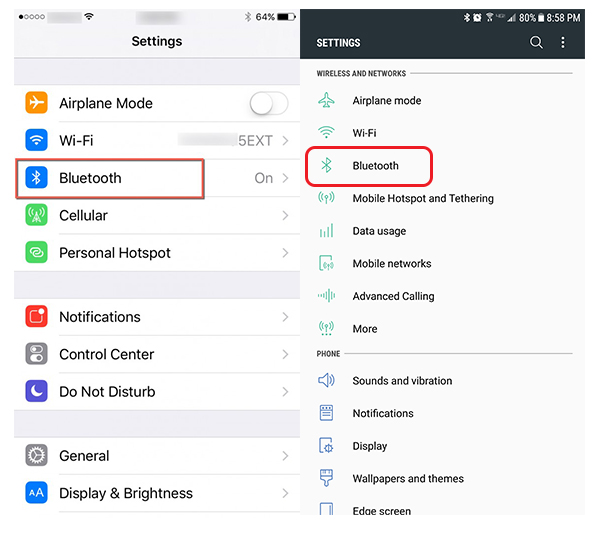
On your iOS or Android device, head into the settings of your phone. For iOS, the Settings menu is found on your home screen; for Android, you can either access your Settings menu through the app drawer on your device or by accessing the shortcut kept on the top of your notification tray. Inside your settings, you’ll want to look for the Bluetooth menu. On iOS , it’s right at the top of your settings menu, in the connections area of your device. On Android, it’s also located near the top, in the “Wireless and Networks” section. The exact appearance of your settings menu may differ on the version of Android on your phone, as well as the software skin your phone’s manufacturer applies to the software, but overall, it should be located near the top of your display.

Inside of the Bluetooth on your phone, ensure your Bluetooth is enabled on your device. Once active, you should automatically see your Echo available for pairing. Typically the name will depend on the variety of Echo you have (a traditional Echo, or the Dot or Tap). As with any Bluetooth device, tap on the selection to pair the devices together. Alexa will make an audio cue to alert you that your device has been paired, and the Bluetooth icon on your phone will change to indicate you’ve been connected to a new device. After this, you can use your phone to play music right from your mobile device to the Echo, though you won’t be able to activate Alexa to play specific songs. You can, however, use your voice for basic playback commands, including pause, next, previous, and play.
And of course, any Bluetooth-enabled device has support for the Echo as well, so if you’d rather connect your PC or Mac to your Echo, Echo Dot, or Echo Tap to play media, all you have to do is pair your device through Bluetooth on either Windows 10 or MacOS.

Using a Sonos One Speaker
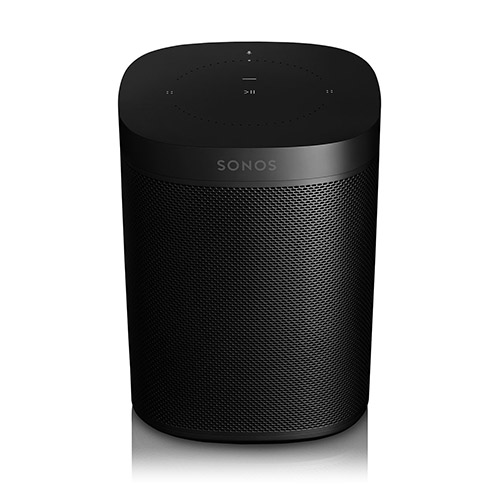
We’ll admit that few users are going to want to run out and purchase an additional speaker, on top of the Amazon Echo product they already own. But if you’re one of those users who simply must have your iTunes library controllable through your Amazon Echo, using Sonos is the way to do it. For those not familiar with the popular speaker company, Sonos helped to pioneer the smart speaker market, creating a series of speakers that connected to the web for playback from your smartphone or computer and to each other for multi-room listening over a mesh network. Last year, Sonos finally unveiled their newest product: the Sonos One, a smart speaker that has six built-in mics, along with support for Alexa out of the box, while retaining the sound quality and Sonos features that the company is so well-known for producing.
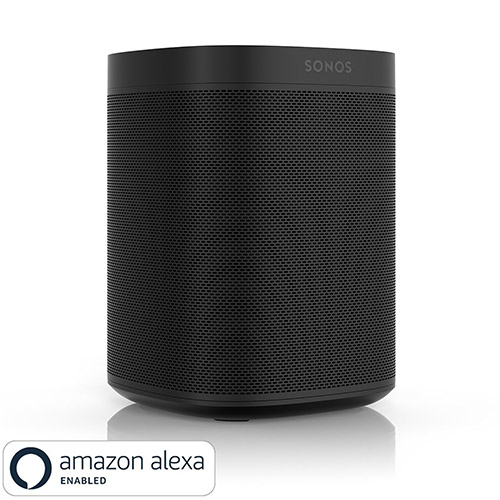
The Sonos One is, basically, a much-better version of the Amazon Echo, with great sound quality, support for a multitude of services, and even Google Assistant support promised for this year. Unfortunately, it’s also $200, a $100 price increase over the second-gen Echo, which may make this a non-starter for people who already own, just purchased, or were gifted their Echos and want to use it with their iTunes library. If you’re in the market to buy an Amazon Echo, of course, and you primarily want to play music using your iTunes library, the Sonos One is the better purchase. Let’s quickly outline the three reasons why:
-
- First, the Sonos One has full Alexa support (once you add the Alexa skill to the device), but it also syncs with Sonos’ own mobile app. That means you can download the Sonos app on your iOS or Android device, link Apple Music to your Sonos account, and you’re all set to begin playback. You’ll need to start playback within Sonos itself, but once music is playing, you can use Alexa for playback controls (just like Bluetooth), and, as a bonus, to identify the song currently playing.
- Second, the sound quality is improved on the Sonos One compared to the Echo. If you’re looking to use your smart speaker as a way to listen to music regularly and primarily, you can pick one up to use as your main speaker, which will grant you better audio quality and improved features over the Echo.
- Finally, the Sonos One has support for Airplay 2 from Apple, giving users Alexa support with Airplay, bringing your Amazon technology and your Apple Music library closer than ever before.
To reiterate, buying a brand new smart speaker for an additional $200 to replace an Amazon Echo or Echo Dot is not meant to be taken as an option everyone must choose to buy into; rather, it’s supposed to be the ideal way for users to get an Alexa-enabled, Echo-like device that supports Apple Music and iTunes in one complete package. The Sonos One isn’t an option that’s going to appeal to everyone, but if you can manage to pick one up, we highly recommend it.
Playing Local Music through the Cloud
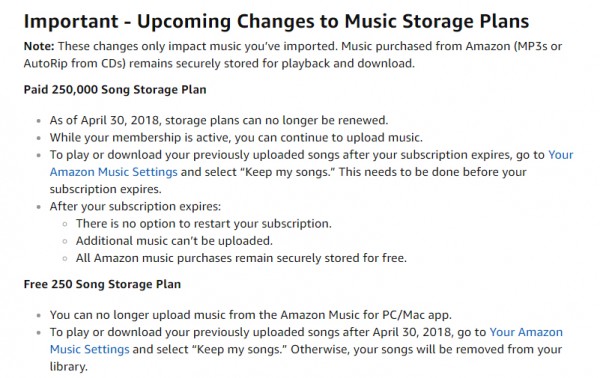
This used to be our ideal way of playing your iTunes library, Apple Music subscribers aside. Anyone with a massive, curated iTunes library was able to pay just $24.99 a year to upload their songs to Amazon’s own cloud servers. It allowed you to take advantage of the space provided by Amazon, and made it easy to simply ask Alexa to play your favorite songs and artists. Unfortunately, Amazon announced at the end of 2017 that they would be discontinuing their Amazon Cloud Locker service. New users were accepted until January 15th, 2018, but anyone who signs up for Amazon Music currently will not be able to upload their music to the service. Furthermore, anyone who did have music uploaded to Amazon’s cloud service had access to their library cut off after January 2019, leaving Amazon’s locker for cloud songs completely defunct.
The shutdown of Amazon Cloud Locker’s music section leaves the Amazon Echo in a frustrating place, especially for those with wide varieties of local music. If you’re streaming from a paid service like Apple Music, it’s easy to predict that your library might not fit well together with Amazon’s own products, especially since they carry their own music streaming service, while also providing support for Spotify. Local music users, unfortunately, are seemingly out of luck—or would be, if it wasn’t for one of our favorite cloud platforms having an Alexa skill that makes it easy to play your music through Alexa.
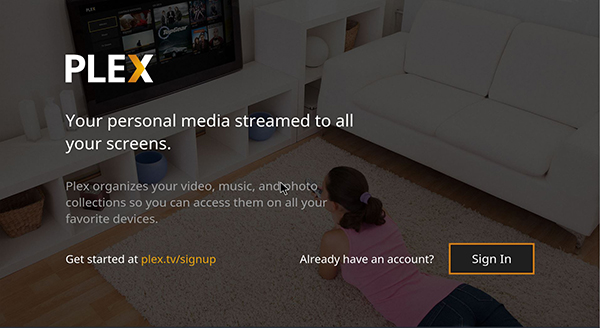
Plex is known for being one of the preferred platforms for anyone looking to build a library of locally based media created to be streamed anywhere and everywhere. It isn’t a perfect platform—or a perfect match with Alexa—but you’d be surprised how well Plex can replicate the old Amazon cloud service we previously recommended for iTunes users. Before you jump head first into describing how to set up Plex for your music storage, there are a few things you should know about Plex’s limits and abilities to properly offer a cloud service for your local library:
-
- Plex isn’t a native Amazon music player (which is now limited to only their streaming service), so you may have to deal with slower connect times.
- To play music from a Plex server, you’ll have to use the “ask Plex” command, as in, “Alexa, ask Plex…” or “Alexa, tell Plex…”
- Likewise, Plex can’t be set as your default music service.
- You’ll need to have a computer capable of either running 24/7 in order to setup your media server, or be able to put up with not connecting to your network when your computer is shut down or in hibernation mode.
- You can only listen to your music on one Echo device at a time.
Assuming you’re capable of dealing with these assorted limitations, Plex is a great service for your music, and you won’t have to pay a single cent for Plex to use it. To start, sign up for a Plex account at Plex’s website here, and then download the Plex Media Server application on your computer. Ideally, a secondary computer that allows you to keep the server running in the background is the best bet. You can pick up cheap PCs from Ebay for around $100 to $150 bucks that have large hard drives and make it easy to stay running quietly in the background, without having to leave your normal PC running in the background permanently. Alternately, you can just use your normal everyday computer, though remember that, if it’s a laptop, it’ll go offline when you close the lid or put it to sleep. If your computer goes offline, so will your media service.
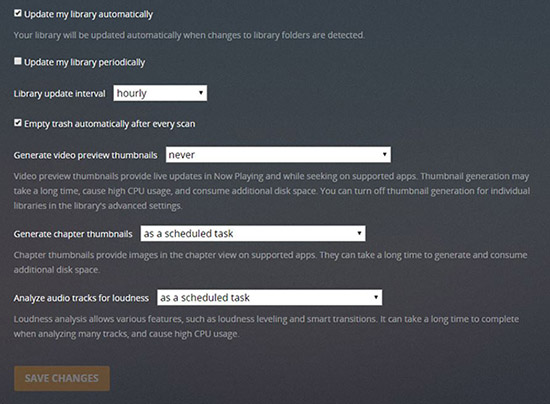
With your PC chosen, your server downloaded, and your account setup, follow the installation process within Plex to finish setting up the server. You’ll want to choose a folder you can upload content through, and select that anything placed within that folder is automatically uploaded. If you’re using the computer your iTunes library is stored on, selecting your iTunes library is the smart way to go about it here. After selecting the folder that has your media stored, make sure to refresh Plex. To test your cloud server and make sure everything is up and running properly, download the mobile app to your phone or check your server in your PC’s browser to see if everything has been synced. Remember that there’s no uploading here: Plex is going to play directly from whatever PC you have selected as your media server. This means there’s no waiting around for cloud uploads, but it also means that PC must be on and awake to work properly.
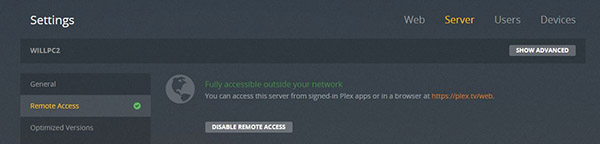
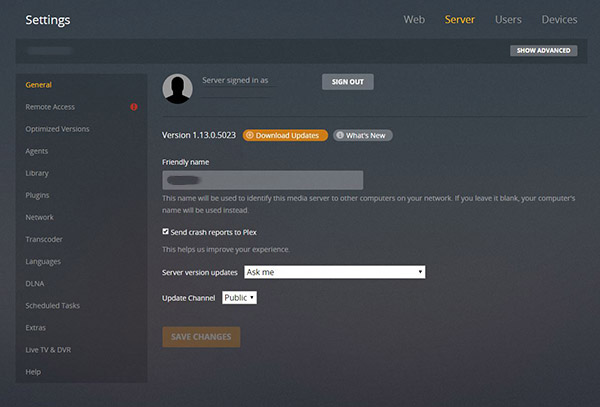
Now that Plex is set up, you’ll need to pair it with your Alexa to work properly. First, dive into your Plex settings and make sure Remote Access is enabled on your server (by default, it should be). Then, either using the web or the Alexa mobile app, find and install the Alexa skill for Plex on your Amazon Echo and sign in using your Plex account. Authorize your PC, then head over to your Echo. State the following to Alexa: “Alexa, ask Plex to change my server.” Since you just setup your first server and therefore only have one server selected to your account, Amazon and Plex will automatically select your media server.
There’s one final (and optional) step to finish setting up Plex with your Echo. If you use your Echo for voice commands with Alexa but have your primary speaker located elsewhere for better playback, you can automatically enable media playback through Plex at that speaker by asking Alexa, “Alexa, ask Plex to change my player.” Alexa will then list your available players that have previously been set up with your account, and you can choose which you want to use for playback. If you don’t set a default player on your Echo, the Echo’s speaker will be used as your primary listening device.
Plex’s voice commands are easy to use, and they have a full list available for users to pick from here. If you’re looking for some basic suggestions, here are what we recommend to use for syncing your voice commands here. Remember to use “Ask Plex” before every command.
-
- Play music by (artist)
- Play the song (song name)
- Shuffle the playlist (playlist name)
- Play the album (album name)
- Play some music
Once you have music playing, you can use the basic “Next,” “Previous,” and playback controls as you wish, all without having to say “Ask Plex.” Check out the full list of Plex-based Alexa commands, including non-music commands, here, and check out Plex’s full Alexa support page here for more information on how to make the two products work together as strongly as possible. Plex isn’t a perfect replacement for Amazon’s own cloud locker service, but it’s a good choice for anyone looking to setup a basic media server for their iTunes library to replace the now-defunct Amazon service. Just keep in mind that Plex isn’t going to be as fast and responsive as using either Amazon Music or Spotify with the Alexa skill setup.
***
Amazon’s Echo speaker was the first major smart speaker on the market with a prominent voice control system, and despite competition from both Google’s Home speaker and Apple’s forthcoming HomePod, Amazon has managed to retain a strong foothold on their audience. With a little bit of effort for setting up your Plex server, your Echo and your iTunes Library can coexist peacefully, even if it means keeping your main computer running in the background in order to command Alexa to play specific songs and artists. And even if you’re unwilling to set up Plex as a server to stream your local library using your Echo as a Bluetooth speaker still gives you control over voice commands to skip songs.
The Echo may not be alone in the market anymore, but with its support for a broad cloud-based streaming system, in addition to allowing Spotify to access Alexa, it’s still one of the most advanced devices on sale today. And with the addition of your iTunes library, it cements its position as one of our favorite smart speakers to date.
Disclaimer: Some pages on this site may include an affiliate link. This does not effect our editorial in any way.


