Device Links
With the ongoing technological advances, smartphones have become true productivity powerhouses. It’s been some time since the first feature movie was recorded entirely on a phone, but the tech didn’t stop at great phone cameras.
Apps like Kinemaster allow users to edit video material on their smartphones, creating a professional-level end-product. If you’re using Kinemaster to edit your vlogs, YouTube, or other videos, you might also want to add text to the images.
Luckily, adding text in Kinemaster is relatively straightforward. In this article, we’ll show you how to put words to your images.
How to Add Text to Video in the Kinemaster iPhone App
The method for adding text to video using the Kinemaster app on iPhone is quite easy. You’ll need to follow these steps:
- Import the recording into the app.
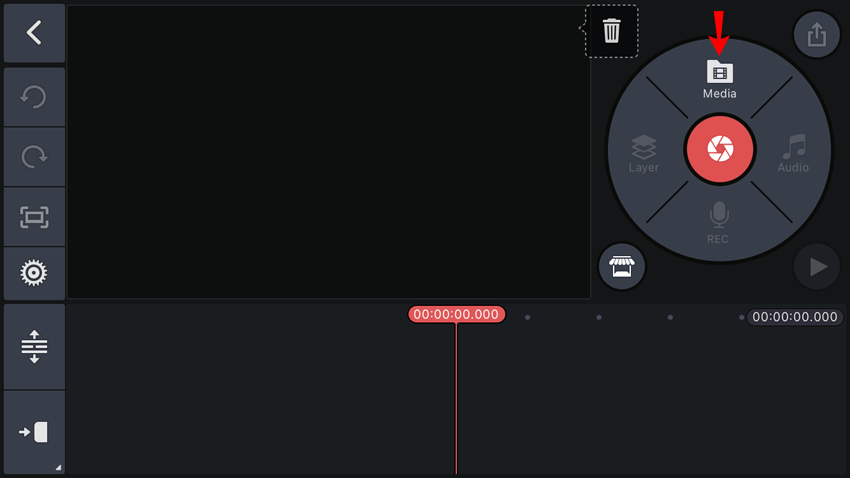
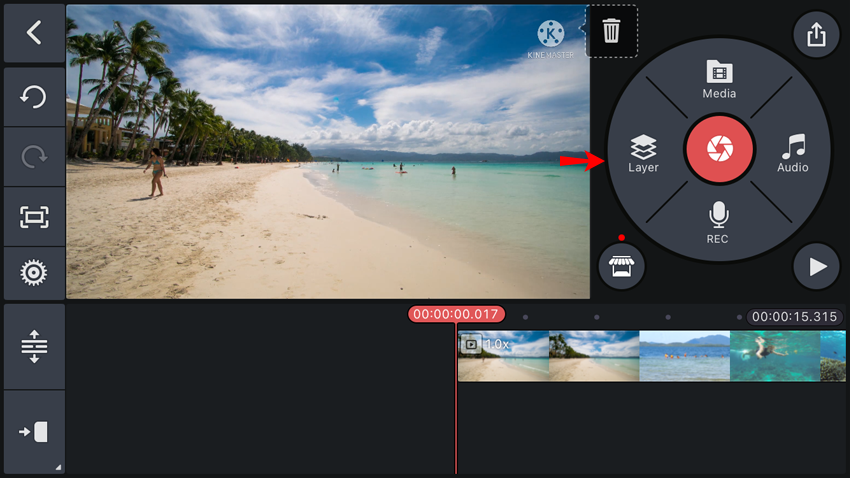
- The “Layer” icon will become available on the menu wheel on the right side. Click on it and choose “Text.”

- The app will take you to the text editing screen. There, you can enter the text you want to be displayed in the video. Tap “OK” to confirm.
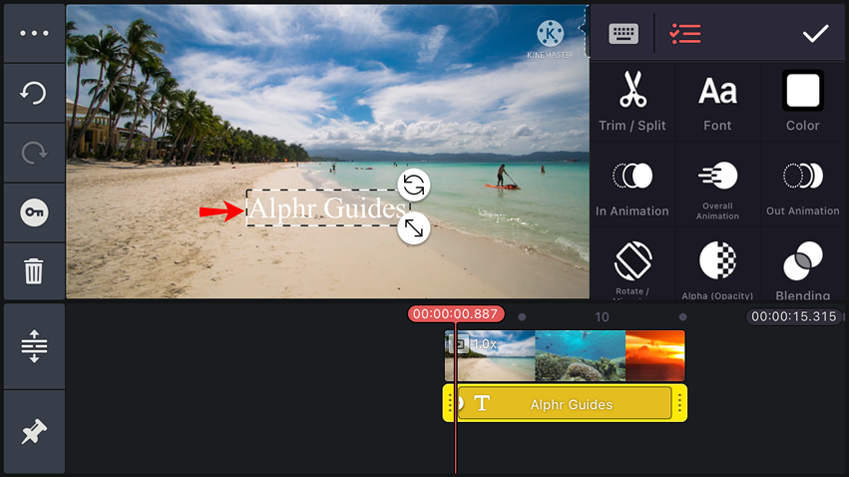
- Upon returning to the main project screen, you’ll see your text centered in front of the video. You can move the text box by dragging it to the new position.
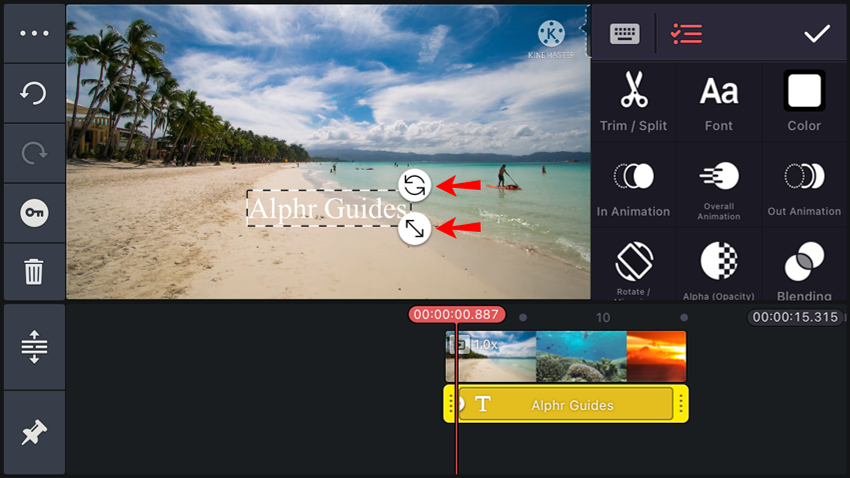
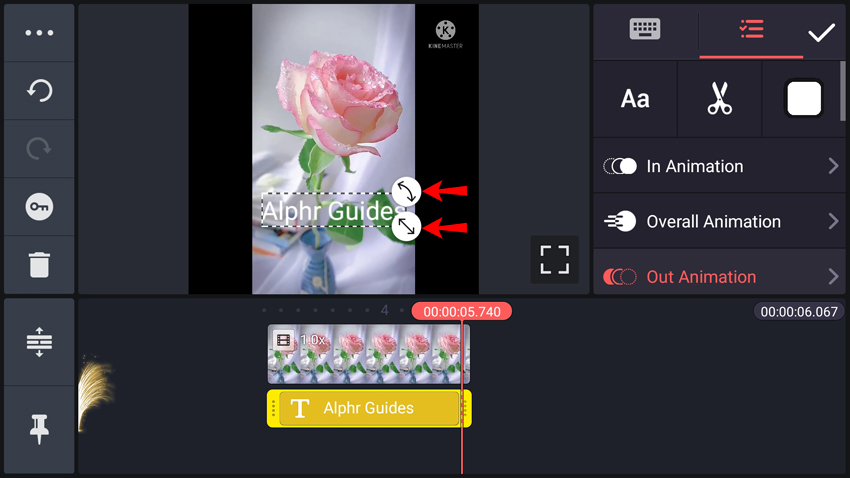
- If you want to resize or rotate the text, tap and drag one of the two arrow icons that appear at the edge of the box. The straight arrow icon is used for resizing, while the curved one rotates the text box.
- While the text box is selected, the text menu will be on the right side of the screen. Use the menu options to customize the text.

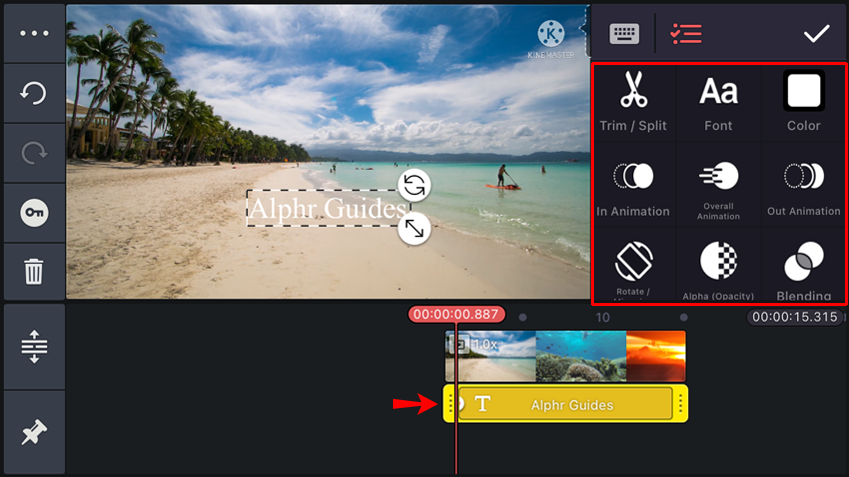
It’s possible to change the appearance of your text in Kinemaster. You can adjust its size, font, color, and background. Additionally, you can add various effects to the text and choose animations for it. These animations include rotation, sliding, dropping, and others. Here’s a detailed description of the menu from top to bottom and left to right:
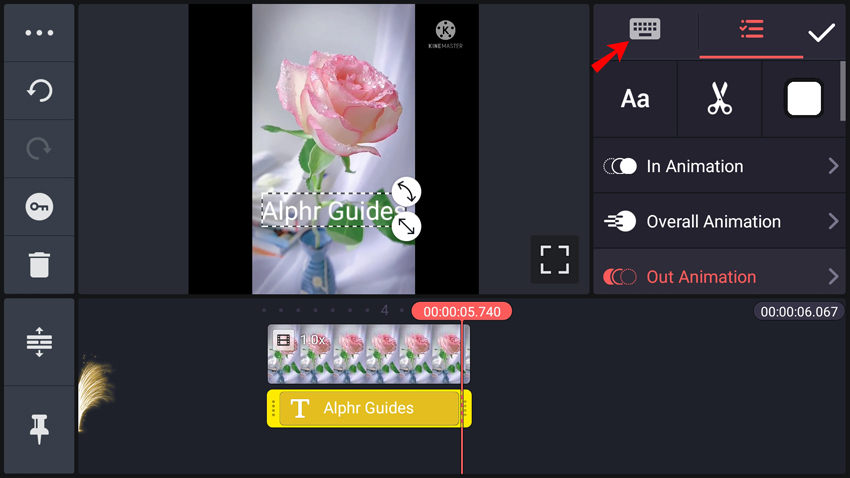
- The first row contains two icons and a button. The first icon is for text input, represented by a simplified keyboard image. The second is the text menu, shown as a slightly modified “hamburger” icon. Finally, tapping the button – a checkmark within a circle – accepts all changes you’ve made to the text.
- The second row has three icons: font selection (“Aa” icon), cut (represented by a pair of scissors), and color (a white square). Tapping on these icons allows you to change the font and size, cut the text, and change its color, respectively.
- The third, fourth, and fifth row relate to text animation. You can choose how the text is animated when entering the frame, while it’s in the video, and when it exits the frame. Tap on either field to view and choose the corresponding options.
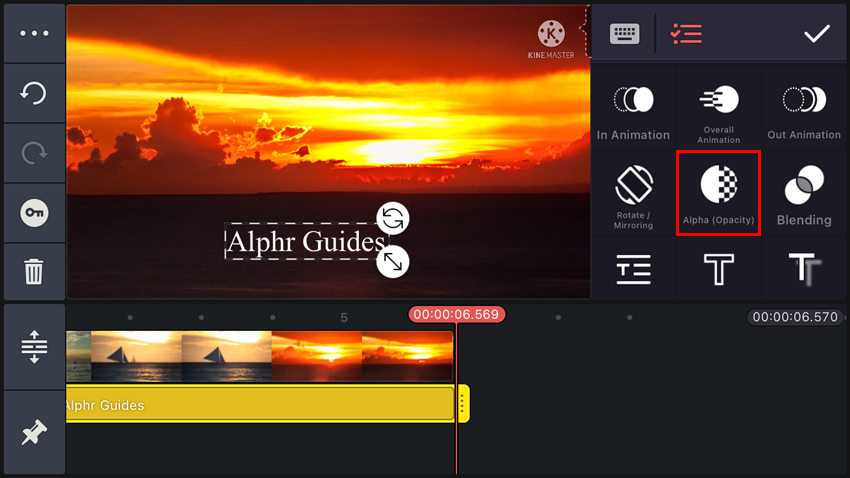
- Finally, the fifth row is called “Alpha (Opacity).” From there, you can control the brightness and transparency of the text.


Beneath the menu, you’ll see the video timeline and the text timeline below it. Tap and drag the edges of the text timeline box to adjust when the text appears and goes away. You can also drag the entire box to place it in a different section of the video.
How to Add Text to Video in the Kinemaster Android App
The Kinemaster app functions much the same on Android phones as it does on iOS. Here’s what you’ll need to do to add text to video on an Android device:
- Import the recording to enable the “Layer” option in the menu wheel.
- Click on “Layer,” then on “Text.”
- You’ll see the text editing screen. Write the text you want in the video and confirm by tapping “OK.” You’ll return to the main screen.
- Your text will now be at the center of the video preview. Tap and drag to reposition the text box.
- There will be two arrow icons at the right edge of the box. You can resize the text by dragging the straight arrow icon or drag the curved one to rotate it.
- If the box is selected, you’ll see the text menu on the right side. This menu contains various options for text customization.


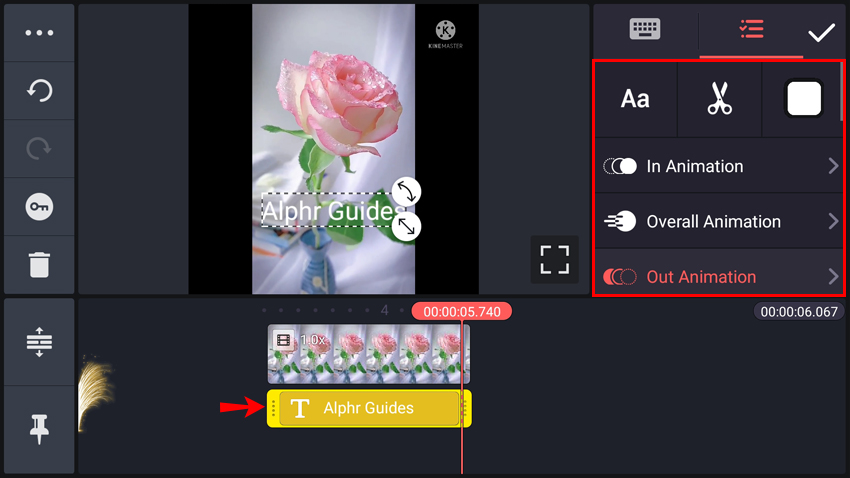
Kinemaster on Android allows you to change your text in many ways. The size, font, color, and background of the text are fully customizable, and there are various affects you can add. Finally, you can choose whether the text will rotate, slide, drop, or be animated in another way.
However, to set up your text just the way you want it, you’ll need to know your way around the menu. Here are all the menu options described by rows and as they appear from left to right on the Android app:
- The first row has two icons followed by a button. There’s a text input option, represented by a simplified keyboard image and the text menu, shown as a “hamburger” icon. The button is a circled checkmark, and it serves to accept changes.
- The second-row features three icons: the “Aa” icon for font selection, a pair of scissors that lets you delete text, and a white square for choosing the text color.
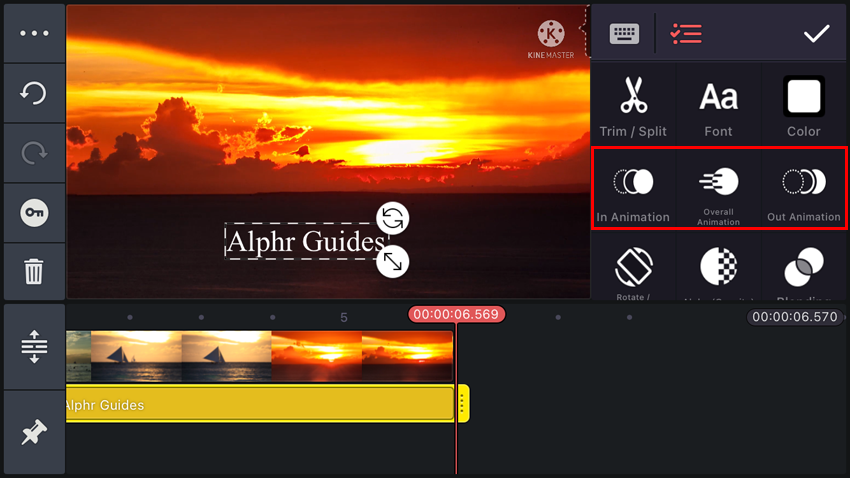
- The next three rows are called “In Animation,” “Overall Animation,” and “Out Animation.” These options control the animation type for the text while it’s displayed in the video. Tapping on each field will bring up options related to it.
- The final row is “Alpha (Opacity).” It allows you to adjust the brightness and transparency of the text.


Underneath the text menu is the video timeline with the text highlighted below. You can drag the edges of the text timeline box to stretch how long the text stays on the screen or drag the entire box to put it at a different point in the video.
How to Add Text to Video in the Kinemaster iPad App
Working in Kinemaster on an iPad is the same as using the app on an iPhone. For a more detailed explanation of how to add and adjust text in your video, please refer to the “How to Add Text to Video in the Kinemaster iPhone App” section of this article.
Here’s a brief overview of the method:
- Import your video to the app.
- Choose “Layer” in the menu, then tap “Text.”
- Enter the desired text and tap “OK” to confirm.
- On the main project screen, drag the text box to position it where you want.
- Use the straight and curved arrows on the edge of the box to resize or rotate the text.
- The text menu will be available every time the text box is selected. Use this menu for further customization.
How to Add Text to Video in Kinemaster on a Chromebook
Since Chromebooks run Android apps, there’ll be no difference between adding text on your Chromebook and the method described under the “How to Add Text to Video in the Kinemaster iPhone App” section of this article.
If you don’t want to read through the detailed explanation, here are the basic instructions:
- Import the video to the Kinemaster app.
- Under the “Layer” menu option, choose “Text.”
- Write the text you want to appear in the video, then confirm by tapping “OK.”
- Reposition the text box by dragging it on the preview screen.
- Using the two arrows on the box’s edge (the straight and curved one), resize and rotate the text to your liking.
- Customize the text further through the text menu, which will be available while the text box is selected.
Unleashing Your Creativity
Adding text to your videos will make your content more exciting and allow you to highlight specific parts of the recording. Now that you know how to add text to video in Kinemaster on all major platforms, you’ll be able to produce every type of video you imagine.
Did you manage to add text to your videos in Kinemaster? What kind of video did you make? Tell us in the comments section below.
Disclaimer: Some pages on this site may include an affiliate link. This does not effect our editorial in any way.


