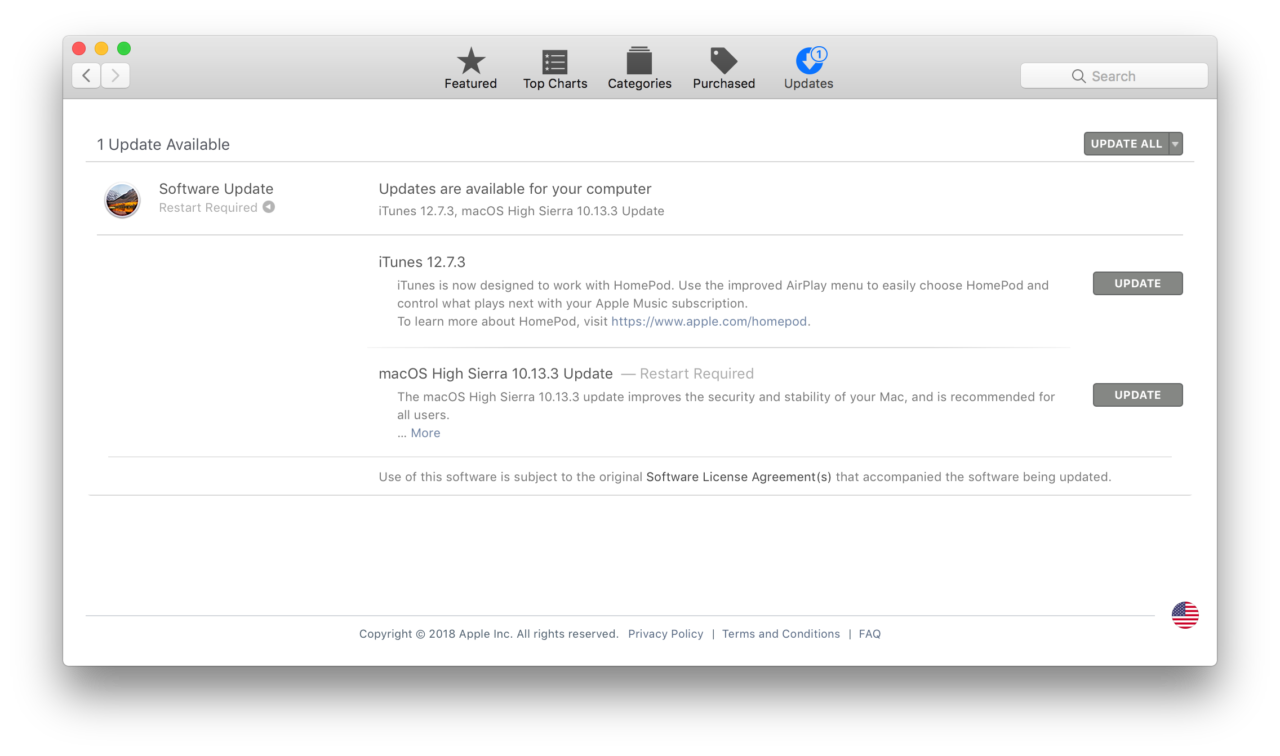
When you need to install software updates on your Mac, you probably head to the Mac App Store. Apple’s curated app store has long been the default method of not just finding and installing third party applications, but also of applying patches and updates for macOS and other Apple applications. But when it comes to macOS software updates, the Mac App Store is really just a front end for a UNIX command, and fans of the Mac’s Terminal can actually use this command to update their Mac and first party apps while bypassing the Mac App Store altogether.
The Mac software update command we’re talking about is helpfully well named: softwareupdate. Here’s how to use it.
- Launch the Terminal application (which can be found in the /Applications/Utilities folder or by searching for it with Spotlight).
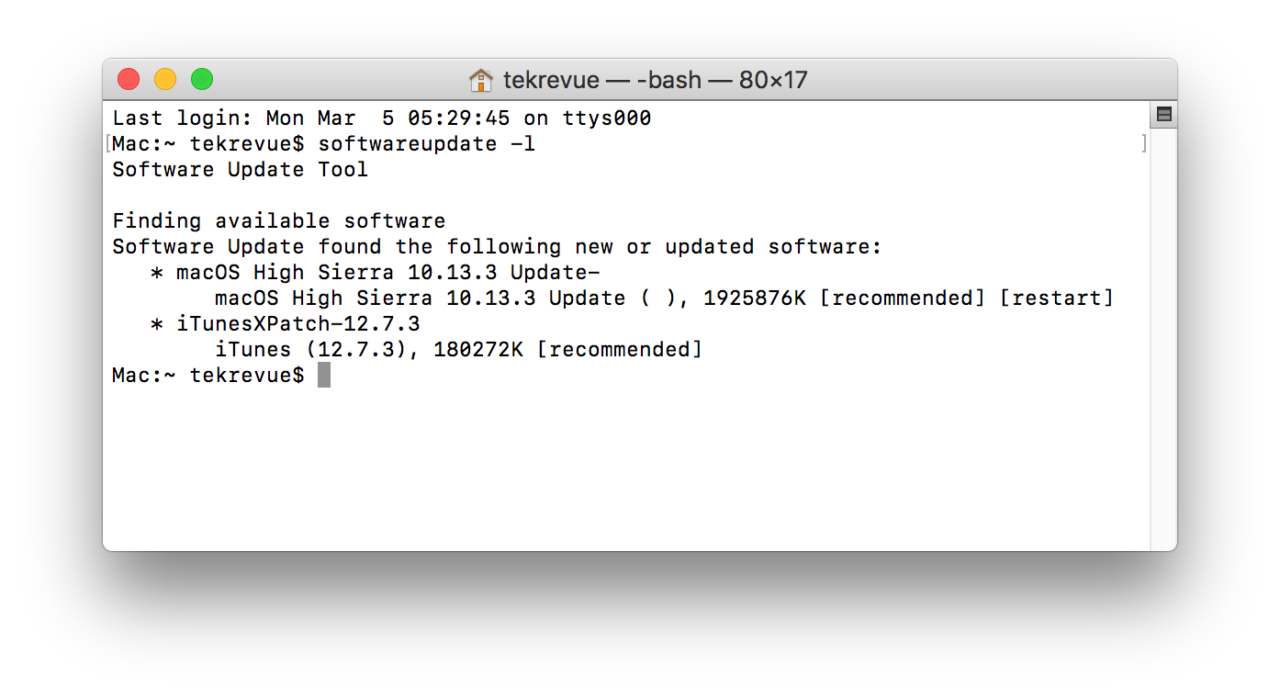
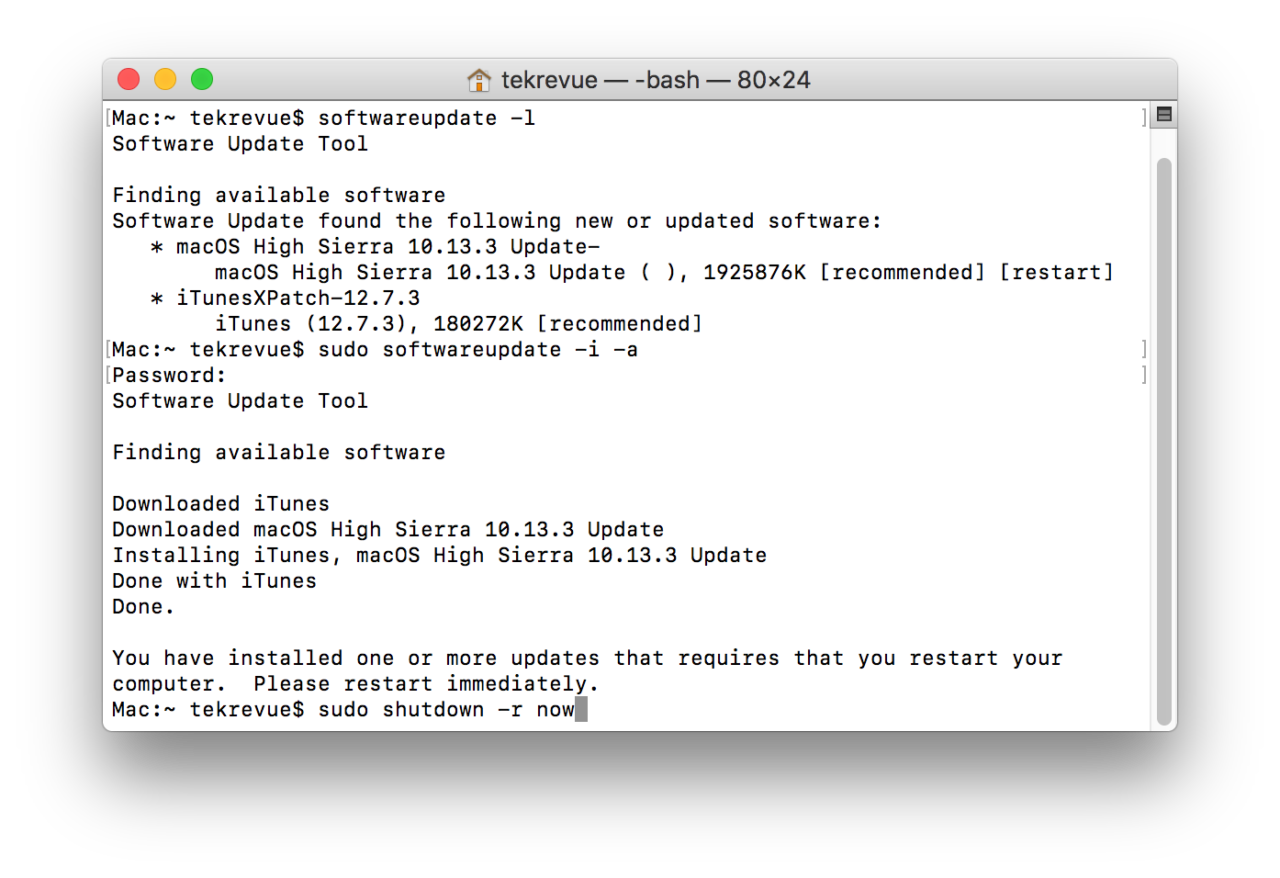
- From the Terminal, type softwareupdate -l (that’s a lowercase “L” and not the number one). This will provide a list of all available updates along with their individual file sizes and a note indicating whether you’ll need to restart your Mac to complete the update process.

- To install an individual software update, enter the command sudo softwareupdate -i name, where “name” is the exact name of one of the available updates revealed by the list command. As this is a superuser (sudo) command, you’ll need to enter your admin account password when prompted.
- To install all available software updates, instead use the command sudo softwareupdate -i -a. The “-a” switch simply instructs the command to install all updates. Again, you’ll need to enter your admin password when prompted.
- There’s no traditional progress bar, but you will see updated text entries in the Terminal window as each step is completed, letting you know both when certain updates have been downloaded and when the entire installation process is complete. If you installed software updates that require a reboot, you’ll see a final message instructing you to restart your Mac. You can do this via the normal macOS interface, but since we’re already using UNIX commands in Terminal, you can also type sudo shutdown -r now, which instructs shutdown command to restart the Mac (“-r”) immediately (“now”).
Benefits of Using Software Update via the Terminal
Now that you know how to run the Mac Software Update from the Terminal, the likely question is why you’d want to use this method instead of simply clicking a few buttons in the Mac App Store. One big reason is automation and remote management. Users with multiple Macs to manage can create scripts or remotely initiate a software update via a method such as SSH without needing to manually use screen sharing or remote management software.
Another potential benefit is speed. While not universal, many users report that updates install faster when installed via Terminal, both in terms of the initial installation as well as the post-restart portion as the Mac reboots. While not every update will see a significant speed increase, the Terminal method at least won’t add any time compared to the Mac App Store.
The One Big Downside of Using Software Update via the Terminal
Despite its benefits for many users, there’s one big caveat of running the Mac Software Update via the Terminal. As mentioned at the beginning of this article, the Terminal method only works with macOS system updates and first party Apple apps like iTunes. This is compared to the Mac App Store, which will update your third party apps alongside the official Apple updates.
Longtime Mac users may recognize this limitation is the same as the original Mac Software Update utility. This utility, which is how Apple delivered system and first party updates to users prior to the launch of the Mac App Store, did not support third party applications. Since the softwareupdate UNIX command also served as the basis of the original Software Update utility, this limitation makes sense.
So, if you only want to quickly install macOS system and first party updates, or if you don’t use any third party apps from the Mac App Store, the Terminal method has you covered. If not, you may be better off sticking with the default Mac App Store method as it keeps both your first and third party app updates all in one place.
Disclaimer: Some pages on this site may include an affiliate link. This does not effect our editorial in any way.


