VRChat is an online community that lets users create their avatars, share their world, and even watch movies with others. It’s a place where you can meet and hang out with like-minded individuals. The platform can be a little overwhelming for newcomers, but once you start to explore the various worlds, it becomes an exciting place to be.
If you are interested in taking the next step and becoming a creator, you can build your world and invite friends and strangers alike to enjoy the space you have made. It may sound daunting, but this guide walks you through the steps required to achieve your goal. Check out how to make a world in VRChat.
Creating a World
Before getting started, you will need to have a Unity project with the SDK (Software Development Kit) set up and ready to go. The platform has three SDKs available. These kits have content that is imported to the VRChat Unity Editor to help creators build avatars, worlds, and other such content. SDKs are necessary for world creation as you can’t upload content to the platform without them. This is how to set up your kit.
Setting Up the SDK
To set up your SDK, you will first need to install the latest version of Unity. Once this is done, you can proceed with the steps below:
- Open Unity Editor and tap “Create a new project.”
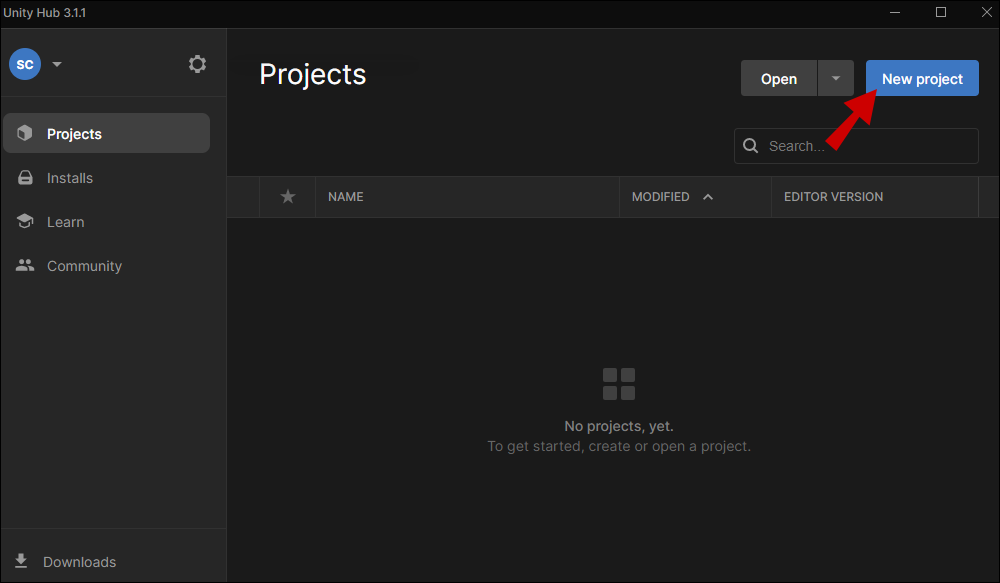
- Set it to 3D and check that it ends with PC, Mac, and Linux Standalone.

- If it doesn’t, navigate to “File,” then “Build Settings.”
- Pick PC, Mac, and Linux Standalone and then tap “Switch Platform” located in the bottom left corner.

Your SDK is ready to go. It’s advisable to store your projects on an external hard drive with lots of empty space as these can get quite large.
Importing the SDK
Once the SDK is ready, you will need to import it to the VRChat platform. Here’s how to do that:
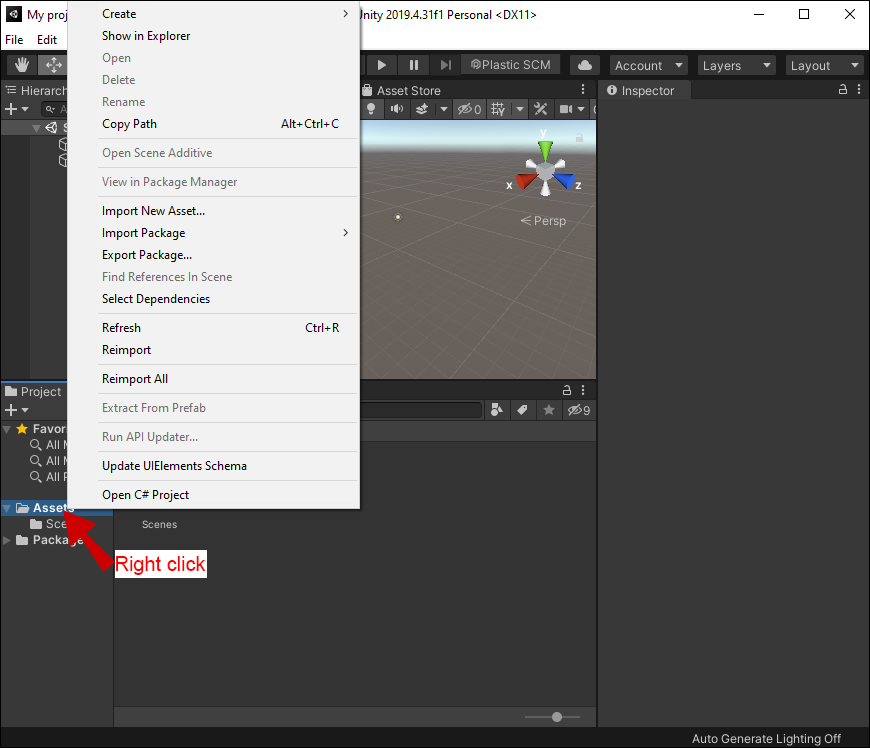
- Open the Unity Hub and navigate to your project.
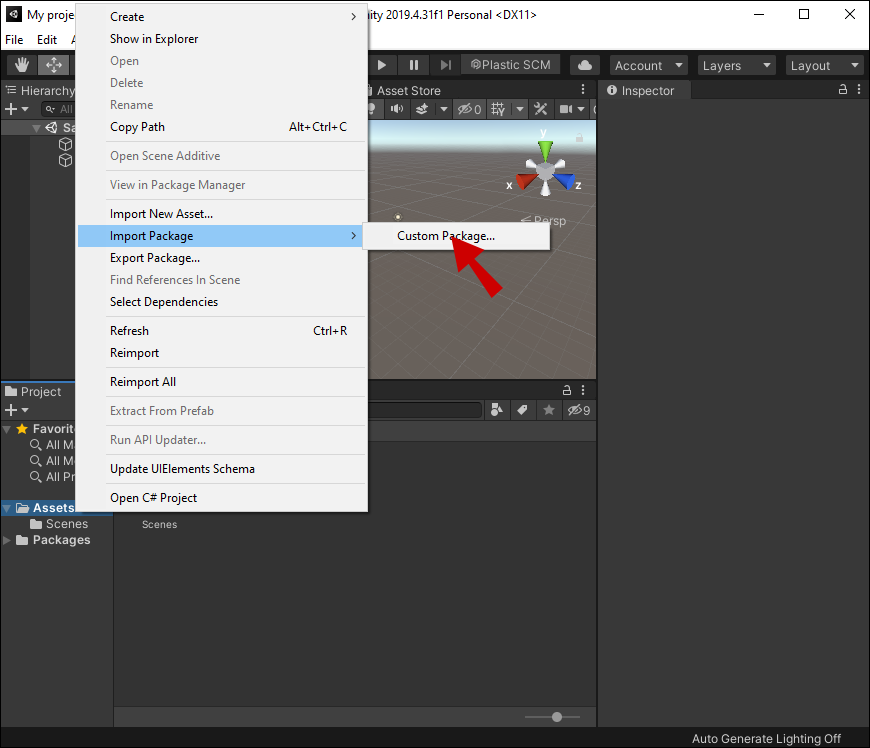
- From “Projects” in the bottom left corner, go to “Assets,” and right-click on it to display the pop-up menu.
- Click on “Import Package,” then tap “Custom Package.”
- Locate the SDK package and upload it to your project.
- Select the package contents you want to upload from the “Import Unity Package” window, then click “Import.”
- You can now log into the SDK by clicking “SDK Menu” in VRChat.
- Press “Settings” and input your login credentials.
Your SDK is now on Unity Editor, and you are ready to start creating your world.
Create a World in VRChat
To begin creating your VRChat world, you will first need to set up a scene. The instructions below will help you with this process. This will be a very basic scene to give you a rough idea of how to use the VRChat editor. Let’s start by making a floor:
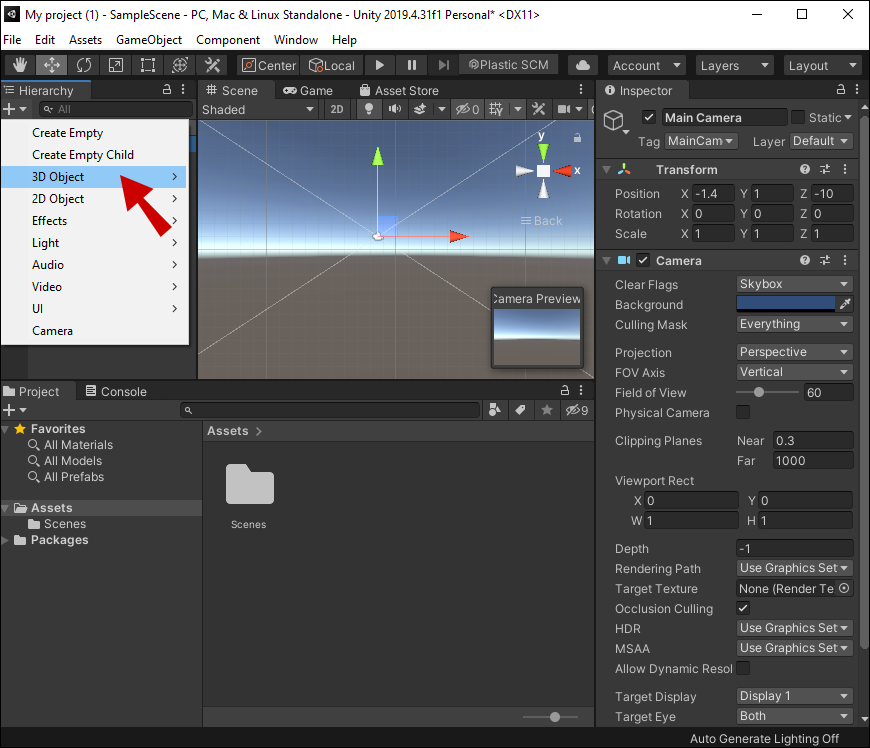
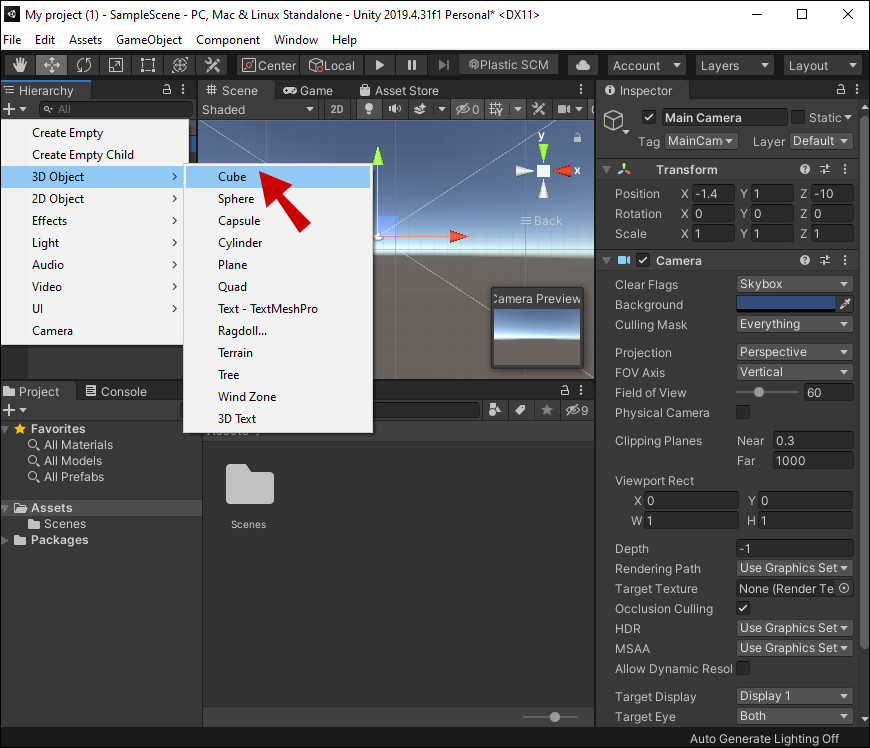
- Go to the “Hierarchy” and tap “3D Object” in the pop-up menu.
- Select “Cube” to display a cube on your screen.
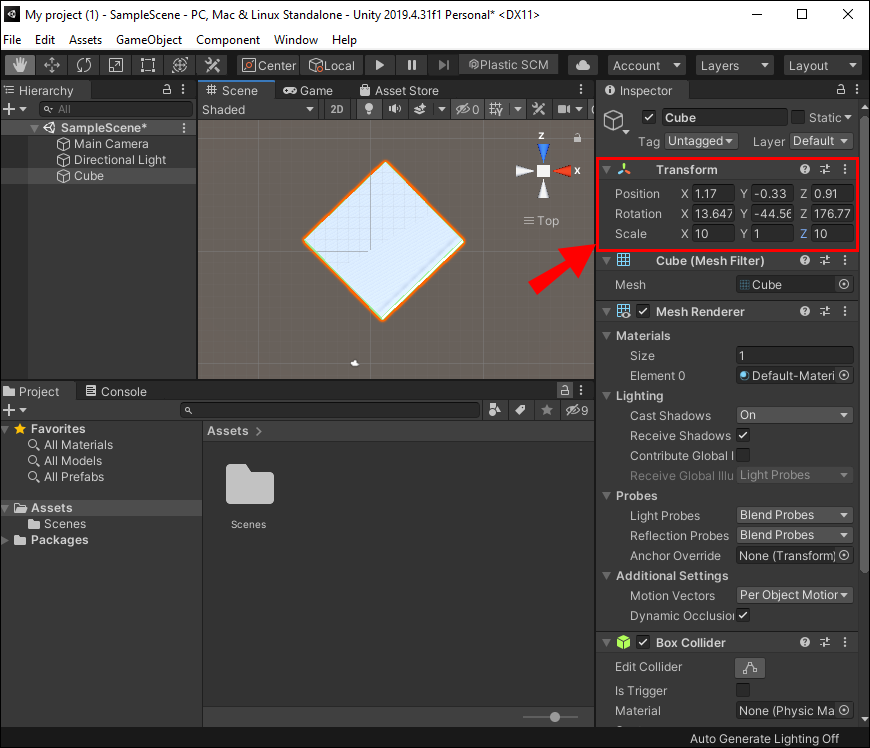
- Use “Transform” in the Inspector section to make the cube’s base is 10 by 10, keeping the height of 1.
- Move the floor so that the components reset at 0x, 0y, and 0z.
- Slide the floor cube down so that the cube’s top lies on 0 of the Y-axis.
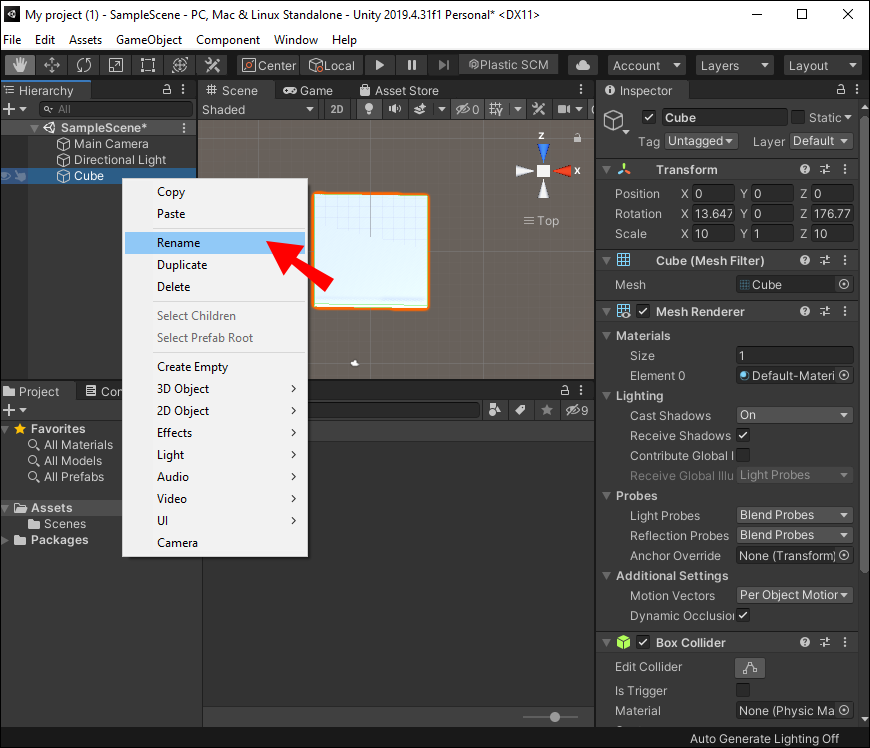
- Rename the cube by going to Hierarchy and right-clicking on “Cube.”
- Choose “Rename” and input “Floor.”


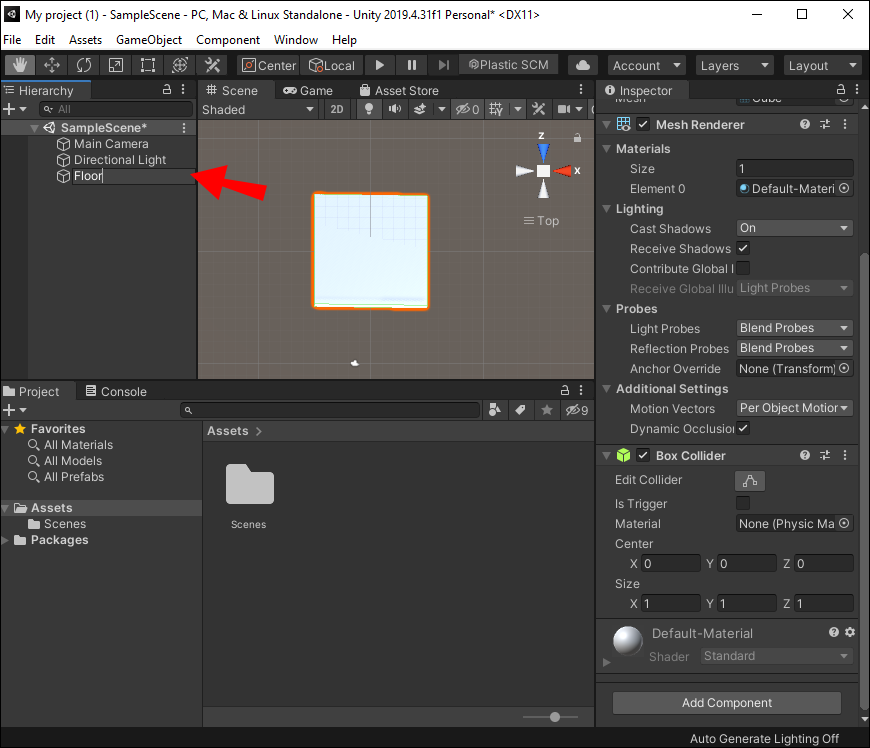
You have now created a floor in VRChat.
Create a Spawn Point
With your scene set, you will now need to create a spawn point where users can load onto your map. To do this, you will first have to make a game object by following the instructions below:
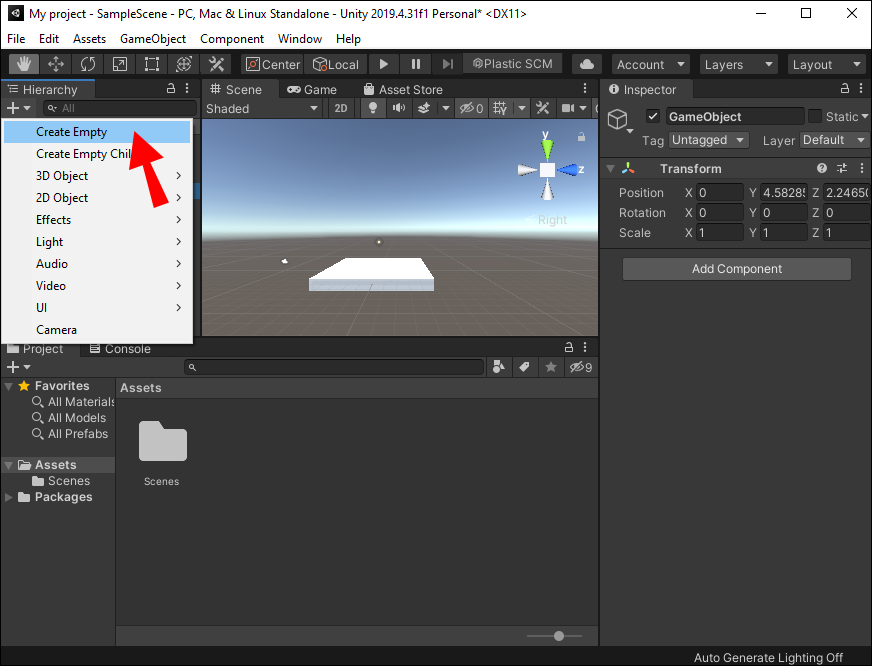
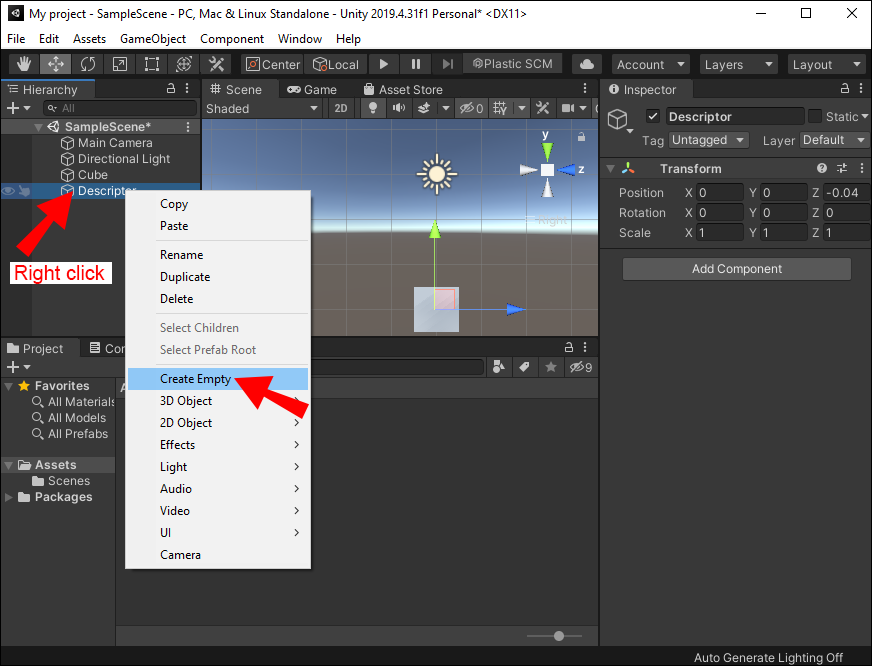
- Right-click on Hierarchy and tap “Create Empty.”
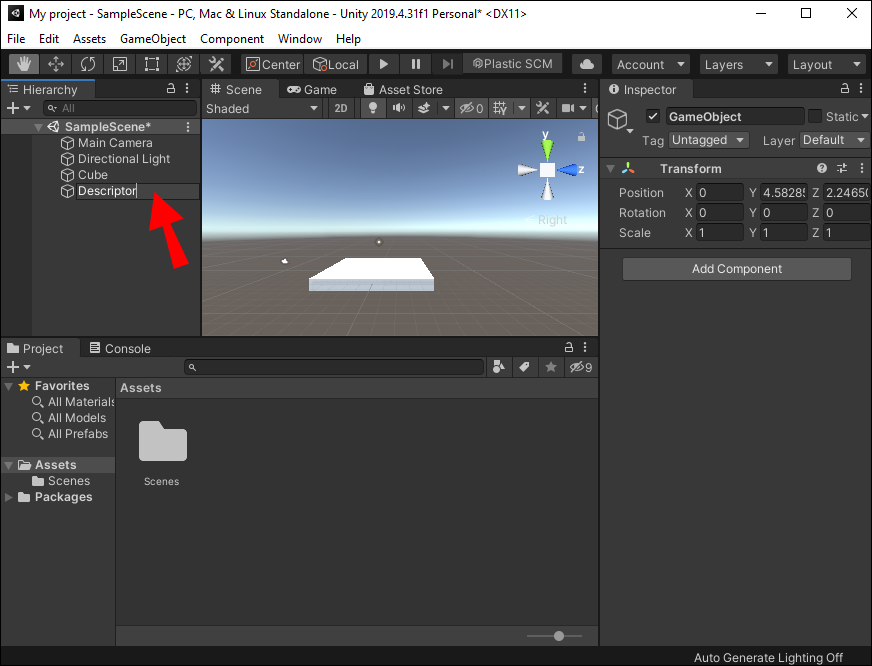
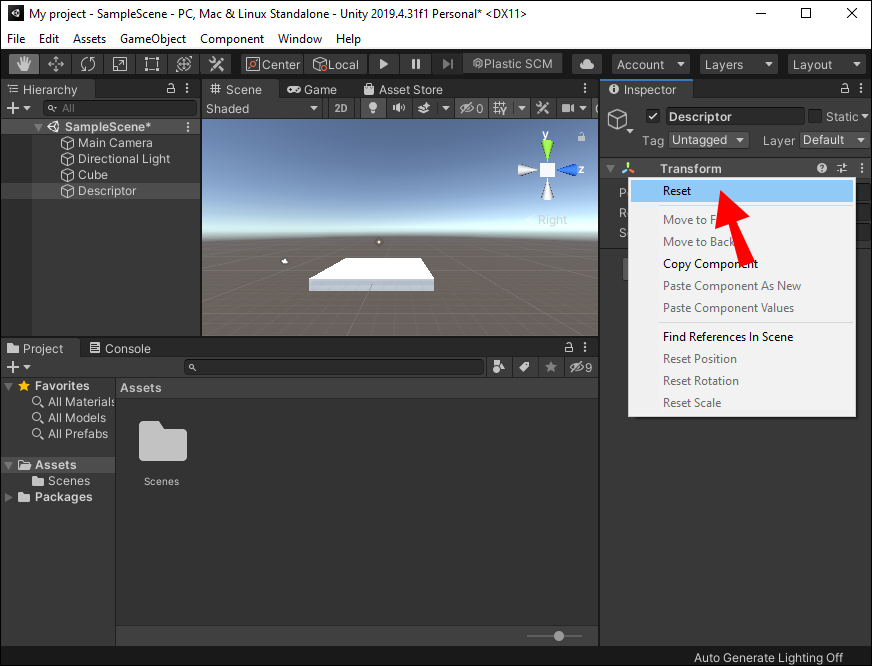
- Rename the game object “Descriptor.”
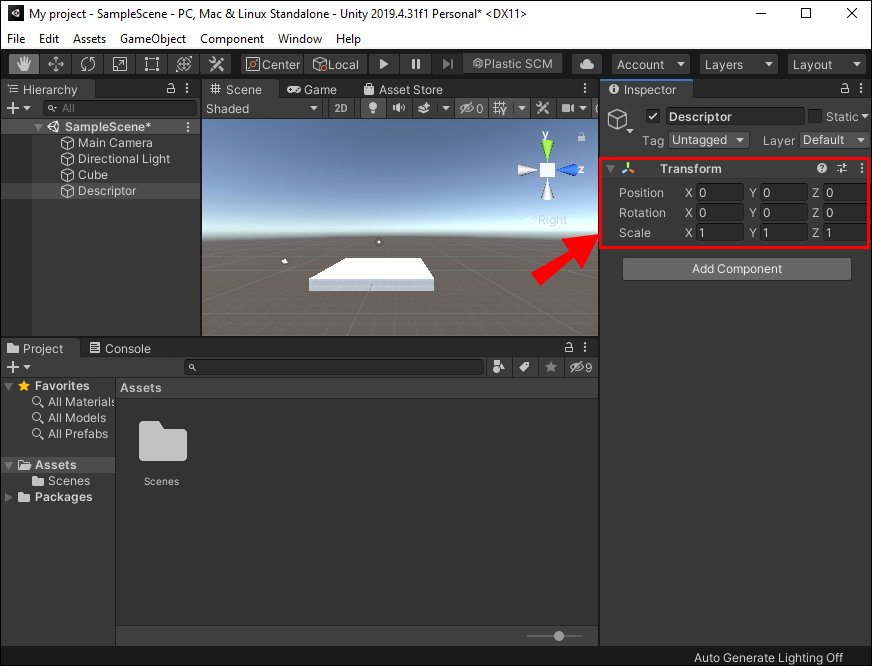
- Right-click on “Transform” and select “Reset” to shift it to a default position.
- From the Inspector, press “Add Component,” then “VRC_Scene Descriptor.”
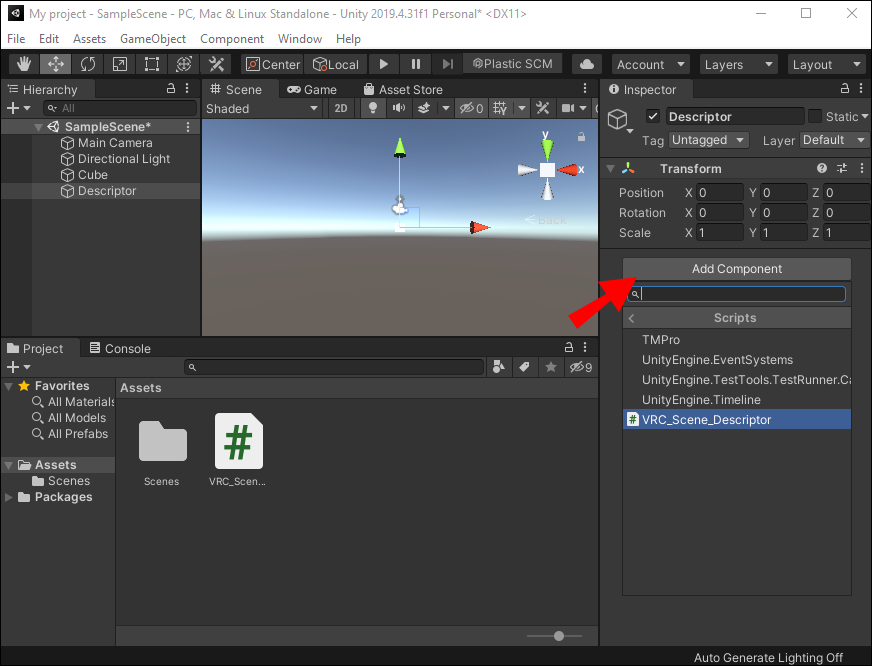
You now have a game object to anchor other parts like the spawn point.
To create a spawn location:
- Click “Descriptor” and then tap the “Spawns” segment in Inspector to expand it.
- Alter “Size” to 1 and hit “Enter.”
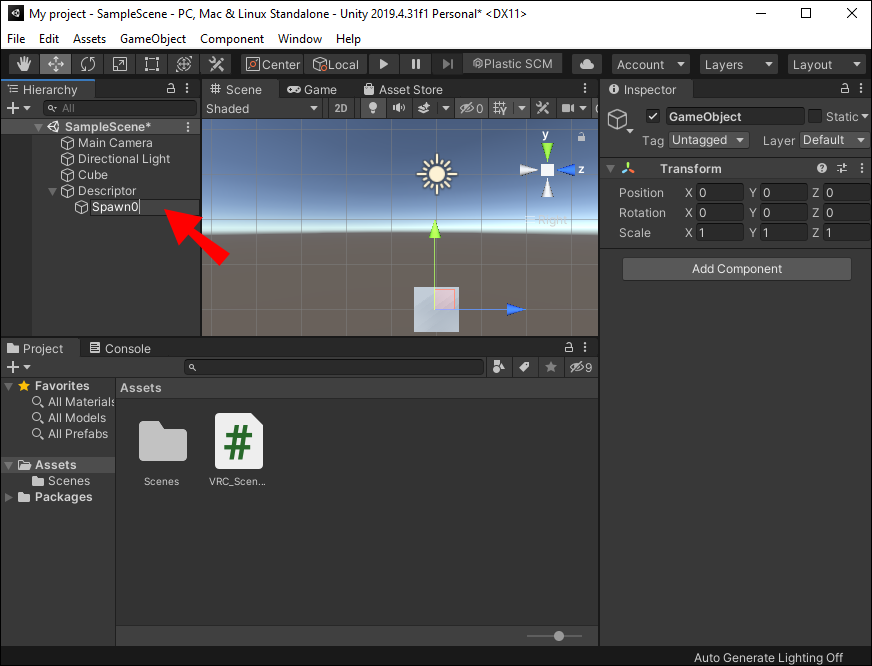
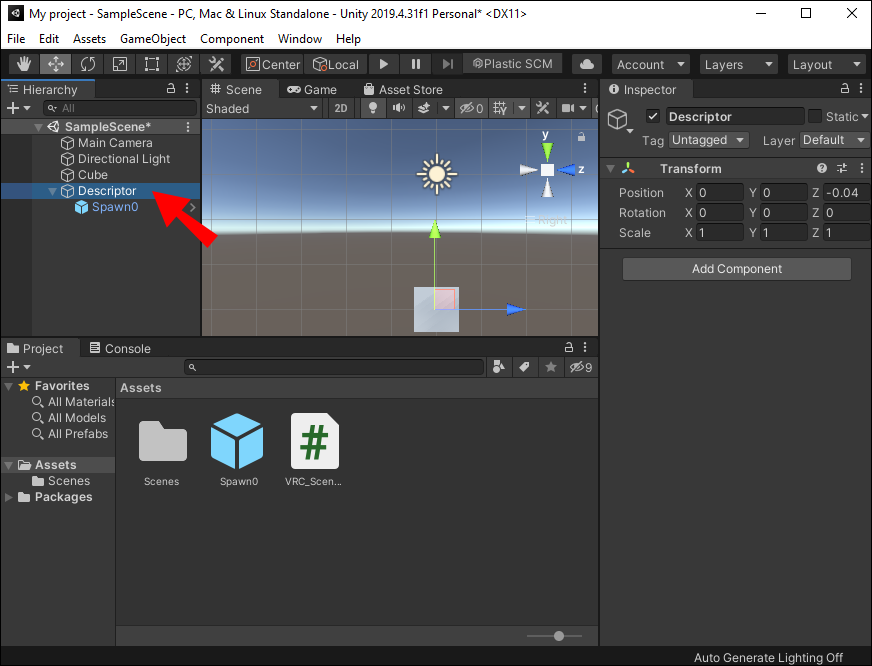
- Right-click on “Descriptor” and pick “Create Empty.”
- Rename this new object “Spawn0.”
- Tap “Descriptor” again and drag Spawn0 to the “Element 0” field within the VRC_Scene Descriptor component.

You have now created a spawn point on your map.
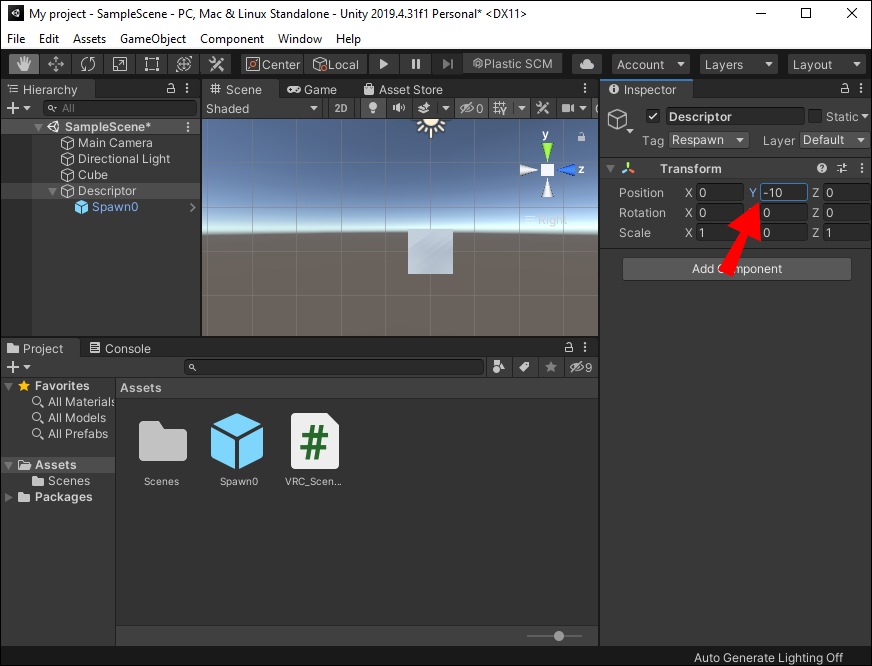
The next step is to customize the VRC_Scene Descriptor so that objects don’t fall off the side of the map permanently. Follow these steps to alleviate falls:
- Go to Hierarchy and tap “Descriptor” to open the Inspector panel.
- Change “Respawn Height Y” from -100 to -10 to respawn players quicker should they fall.
- Navigate to “Object Behaviour at Respawn” and change the field from “Destroy” to “Respawn.”
Object with VRC_Object Sync will now respawn after dropping off the map.
How to Make a VRChat World Private
With all the basic elements in place, you can now publish your world. First, you will need to decide if what you have created is a test build or one that you will publish on VRChat. In both “Test” and “Publish,” you will find the “Last Build” and “New Build” buttons. As the title suggests, Last Build will take you to your previous project, while New Build will allow you to put a new world together.
If you want to test your world, press the New Build button under “Test.” This will build it and launch it into VRChat.
To publish a new world to the platform, tap the “New Build” button in “Publish.” This will build and prepare the world for upload. Unity will enter Play mode, allowing you to input the details of your new upload. Confirm that you have the right to import the world to VRChat and then tap the “Upload” button. Your new build will now be live on VRChat.
The platform’s default setting is that the world you have created will be private. Only people you have allowed in will be able to explore your build. It’s important to note that the “soft cap determines the player capacity of the world.” If the population of your world exceeds the soft cap, then only friends of the inhabitants can join. Once the world has doubled its player capacity, no further users will be allowed to enter. This is the “hard cap” limit.
How to Make a VRChat World Public
Previously, you would have to contact VRChat support to make your world public. The platform would assess what you had created and determine if it was good enough to be published to its users.
Things have changed now, and the reins are in the hands of the Community Lab. This group of users now determines if your world will be made public. They will gather as much information as possible about the users’ experience in your world. Basically, if they enjoy being in your world, they will make it public.
How to Make a VRChat World in Blender
Blender is an open-source 3D creation suite that enables anyone to create stunning visuals with minimal effort. It works seamlessly across the 3D pipeline, including rigging, simulation, motion tracking, etc.
This program is a powerful tool that you can use to create VRChat worlds. There are plenty of videos and add-ons that can help you along the way. Another great resource would be StackExchange. This Blender community forum is ready to help you put together the world you envision.
A New Adventure Awaits
VRChat is a fun place to explore virtual worlds, hang out with old friends and make new ones. If you want to get more involved in the platform by creating a VRChat world, this tutorial will guide you as you embark on your exciting adventure. It may seem a little daunting at first, but you will soon get the hang of using Unity Editor. As you take on this project, remember to have fun with it.
Have you created a world on VRChat? Let us know how you did this in the comments below.
Disclaimer: Some pages on this site may include an affiliate link. This does not effect our editorial in any way.