OBS Studio is the go-to streaming software for many pro gamers, and for a good reason. It can seamlessly integrate with major platforms such as Twitch and YouTube Gaming and performs well with most operating systems. Another bonus is the program’s open-source nature.
However, OBS isn’t immune to glitches, and there’s one particular issue that’s plagued Windows users. We’re talking, of course, about the infamous Black Screen. The error typically occurs during live streaming, and there are several possible causes. In this article, we’ll get to the heart of the matter while showing you how to fix it with step-by-step instructions.
What Causes Black Screen in OBS?
The Black Screen is probably the most common issue Windows users experience while streaming with OBS. Several potential scenarios can provoke the error, so let’s take a look:
- Dedicated and integrated graphics interfering. Your operating system has to determine whether to use the motherboard or a dedicated graphics card to allocate the resources of a particular game or app. Sometimes the process can hinder the OBS software performance by interfering with the running mechanics.
- Lack of administrator rights. When sharing the entire screen with OBS, the PC can sometimes activate restriction mode and hide the display content.
- The app is incompatible with the OS. Since there are two OBS versions available (32-bit and 64-bit), the operating system might not support the one you installed. System updates can also lead to compatibility issues.
- Overclocking. While it can significantly improve the overall PC performance, overclocking can sometimes harm third-party software.
- Clashes with similar software. If a similar software runs in the background, OBS might clash with it and cause an overflow of metadata. The excess resources can lead to malfunctions, such as the Black Screen error.
- Inadequate capturing settings. Since OBS offers several different screen capturing options, enabling the wrong one can sometimes result in glitching.
- The computer is in an error state. If you keep your PC running for an extensive period, it might end up in an error state, hindering the overall performance.
Potential Fixes
Once you’ve determined the source of the problem, you can take the appropriate troubleshooting measures to solve it. In the following paragraphs, we’ve comprised step-by-step instructions for each scenario. Below are some potential fixes that can help you deal with the dreaded Black Screen.
Disabling Overclocking
Simply put, increasing the clock rate of your CPU until it hits the threshold temperature is referred to as “overclocking.” While it can boost the FPS and overall PC performance, there are several accompanying issues. Mainly, overclocking can lead to glitches in third-party software such as OBS. If you think this is what’s causing the Black Screen bug, you should disable the feature:
- Hold the ‘’Windows + C’’ key to access the Charm Bar.
- Go to “Settings” and then “Change PC Settings.” Select “General” from the list of options.
- Select “Advanced Startup” and then “Restart Now.”
- Open “Troubleshoot” and go to Advanced Options to select ‘’UEFI Firmware Settings.’’
- Restart your computer to automatically launch the BIOS menu.
- Open the “Advanced” tab and click “Performance.”
- Find the overclocking option and disable it. Save the change and press ‘’F10’’ to exit the BIOS menu.
Changing OBS Settings
While the default settings in OBS typically work like a charm, certain configurations may hinder online screen sharing. If the Black Screen pops up every time you try streaming, go to “Settings” and adjust the following features:
- Disable “Force scaling.”
- Disable “Transparency.”
- Disable “FPS Lock.”
- Disable “Anti-cheat.”
- Disable “Overlays.”
- Enable “Record Cursor.”
- Downscale the FPS and lower the resolution.
- Change the x264 preset.
Changing Drive Permissions
If OBS is installed onto your C drive, not all PC users are allowed to alter the software data content. The restrictions can lead to glitches during display capturing, so you’ll probably need to adjust the Drive Permission settings accordingly. Here’s what you have to do:
- Make sure you’re logged in to an account with administrative privileges.
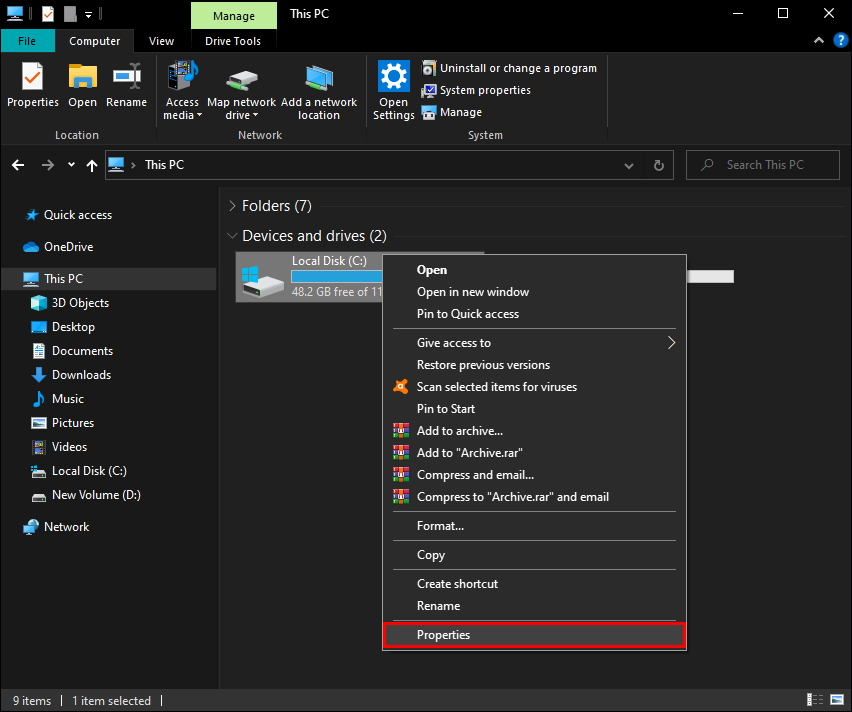
- Hold ‘’Windows + E’’ to access the “File Explorer.” Locate the primary drive and right-click to open a drop-down list. Choose “Properties.”
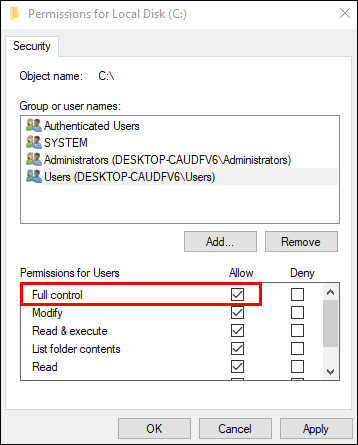
- Open the “Security” tab and click on “Edit” to change the permissions.

- From the “Group or User Name Box,” select “Authenticated User” and enable “Full Control” under “Permissions for Authenticated Users.”
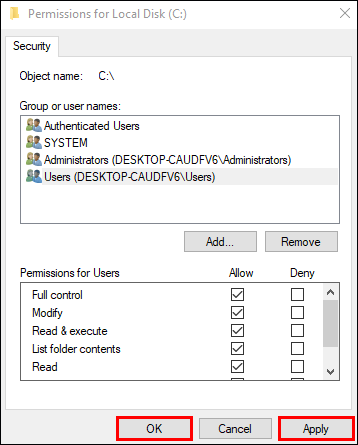
- To save the changes, select “Apply,” then “OK.”
- Restart your PC and launch OBS to check if it’s running properly.

Changing GPU Settings
Another possible fix is changing the GPU settings. Selecting the wrong processing unit for the screen capturing software is a common cause of the Black Screen error. Luckily, it can be quickly resolved with the following troubleshooting steps:
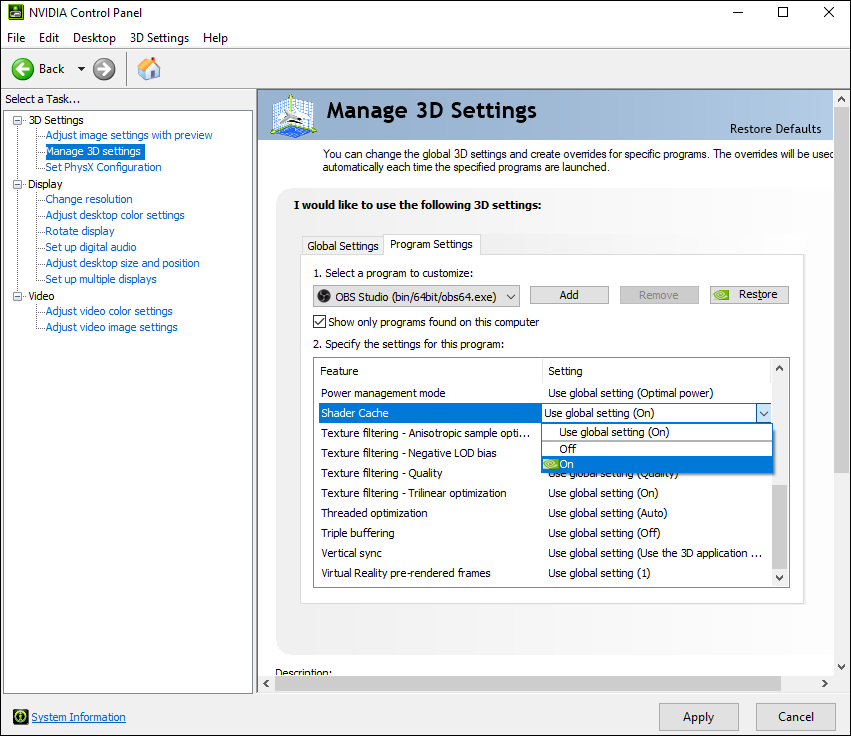
- Right-click on your display to access the NVIDIA Control Panel.
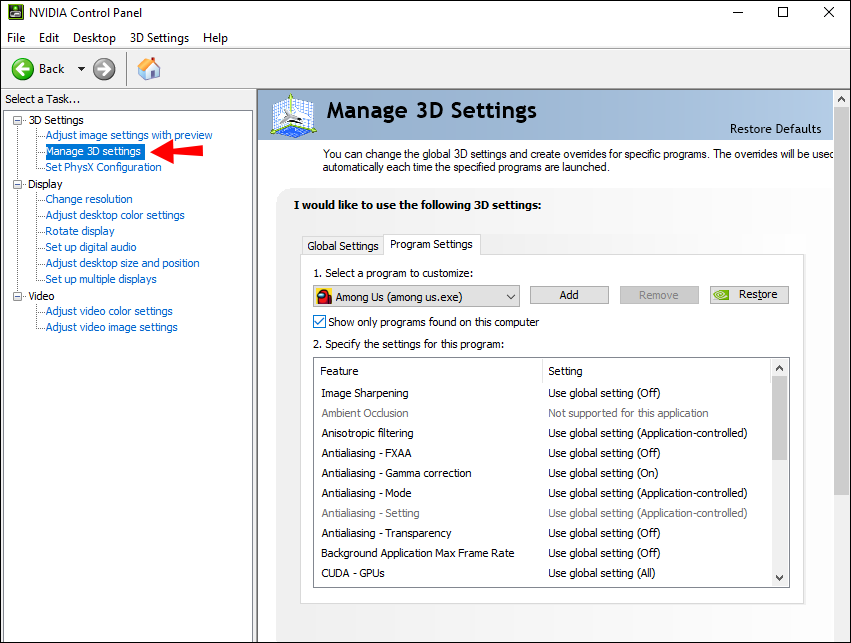
- Navigate to the “Manage 3D Settings” tab and open the “Program Settings” section.
- Scroll through the list of programs and click on the OBS screen capture feature. If you can’t find it, click the “Add” button and search for an OBS .exe file.
- Pick the right graphics processor for the screen capturing activity. The NVIDIA Processor works as the best option for streaming. The stock GPU will usually do the trick for simple screen capture.
- Once you’re done, save all the changes and restart your PC. Launch OBS to check if the Black Screen error was fixed.

Keep in mind that this method only works if your PC has a dedicated graphics card. If not, consider installing one for optimal performance.
Administrator Rights
If OBS Studio doesn’t have the appropriate administrator rights, your PC will likely prevent it from sharing display content, resulting in the Black Screen. The issue can be resolved by granting the app administrator privileges. Here’s how to do it:
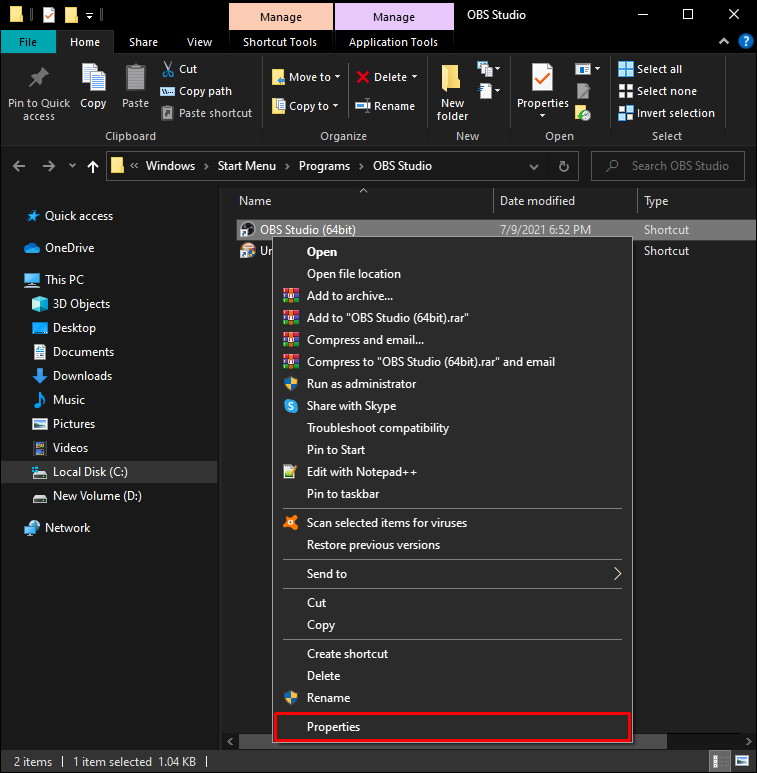
- Use the search function to find the OBS installation file. You can also use the ‘’Windows + S’’ shortcut.
- Right-click on the app icon to open a drop-down menu. Choose “Open File Location” from the list.
- A new window will open containing the file. Right-click on the file and select “Properties” from the drop-down options panel.
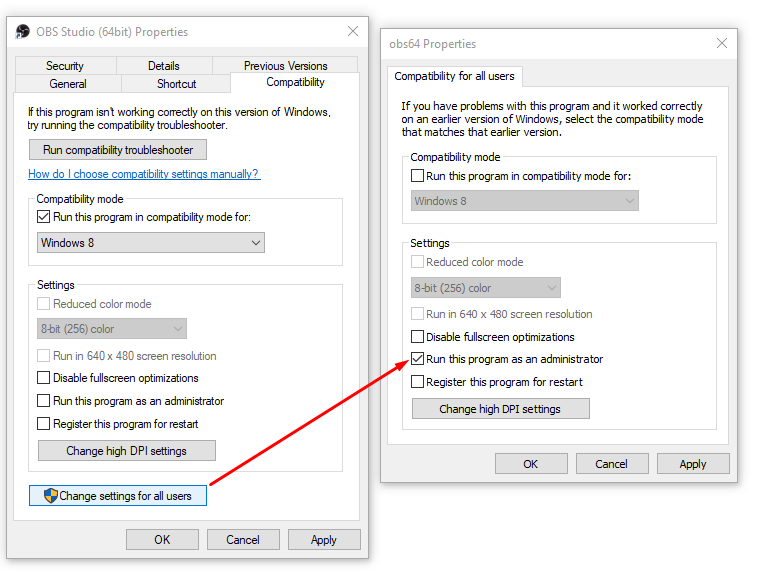
- A new window will appear. Open the “Compatibility” tab and navigate to the “Settings” box. Enable the “Run This Program as the Administrator” option by checking the little box on the left-hand side.
- To save the changes, select “Apply.” As always, restart your PC and launch OBS to see if the method worked.


Compatibility Mode
Installing the latest framework can sometimes lead to compatibility issues. OBS seems to have trouble supporting the latest Windows OS version, which can mess with screen sharing and the overall software performance. If you think that’s what’s causing the bug, try tweaking the compatibility settings. Here’s how to do it:
- Use the ‘’Windows + S’’ keys to locate the OBS installation file. Right-click on the app and choose “Open File Location” from the drop-down list.
- You’ll be redirected to the destination folder. Right-click on the OBS file and hit “Properties.”
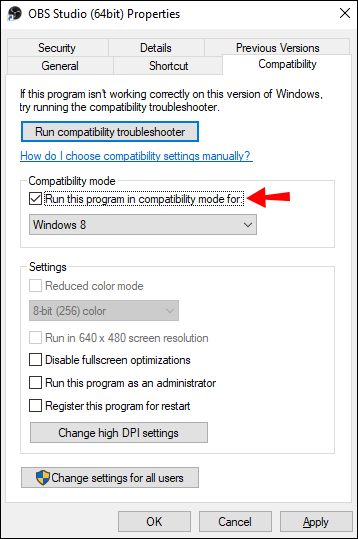
- A pop-up box will appear. Open the “Compatibility” tab and find the “Compatibility Mode” section.
- Check the box that reads “Run This Program in Compatibility Mode For:” and choose the current Windows OS version. Select “Apply” and restart your PC.

Updating OBS
Of course, sometimes, the source of the problem is the software itself. If none of the fixes mentioned above worked out, you could always try reinstalling the app to get the latest framework. Since OBS is an open-source program, it’s entirely free to download. Instead of being stuck with an outdated version, try the following method:
- Launch the Control Panel app. The quickest way to do it is by using the search function or the ‘’Windows + S’’ command.
- Click on “Programs” to access a list of apps.
- Scroll until you find OBS. Right-click on the installation file and click “Uninstall.” Restart your PC.
- Open your browser and go to the official OBS website to download the latest version.

Power Cycling
Sometimes the simplest solution is the answer. Before turning to high-tech troubleshooting actions that didn’t help, consider power cycling. In other words, have you tried turning it off and on again?
When your PC stays active for way too long, it can get overheated and end up in an error state. By completely removing the power source, you can kick start the device and resolve most temporary issues. In case you’ve never tried this before, here are the steps for power cycling:
- Start by shutting down your computer.
- Wait until it’s completely turned off, and then unplug the power outlet for the desktop computer. Laptop users will have to remove the battery.
- Hold the power button for a few seconds to make sure all power is unloaded.
- Leave it be for the next 5-10 minutes and then restart.
Bye-Bye Blackouts
While certainly annoying, the Black Screen is perfectly manageable. If you notice any glitches, start with the simpler solutions, such as power cycling or playing around with the settings. Also, the OBS version you installed may not be compatible with your OS, so make sure to double-check the app specification.
If that doesn’t work, there’s a slew of advanced troubleshooting actions that can fix the problem. Make sure to follow the steps carefully, especially when adjusting the CPU configuration.
What’s your experience with OBS? Do you often run into glitches and bugs? Comment below and tell us if there’s another way to fix the Black screen error.
Disclaimer: Some pages on this site may include an affiliate link. This does not effect our editorial in any way.