Compressing files is a common way to not only save space on your computer but also to safely keep files together in a folder. Within seconds, you can make large files much smaller and easier to store or share. Sometimes this could include sensitive data, something you don’t want everyone to have access to.
To add a layer of security to your zip files, you may want to password-protect them. This is especially important if others have access to your computer or for files you need to share with someone. In this article, we’ll cover how to encrypt and password-protect zip files.
Windows 11
If you zip files on your computer with Windows 11, a good practice is to password-protect the file. By doing so, you’ll ensure that only you and those you give the password to can unlock the file. This will prevent unwanted eyes on the file or the files within a zip archive.
Windows 11 doesn’t have a built-in resource for password protection. Fortunately, it’s easy to password-protect your zip files by downloading and installing a free app. We’ll discuss how to do this using two different ones. If this is something that interests you, continue reading.
To password protect a zip file using the free 7-Zip app, do the following:
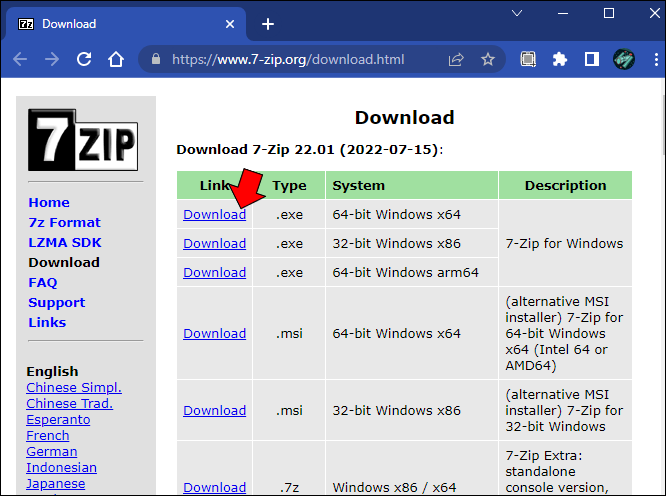
- Download and install 7-Zip on your Windows PC.

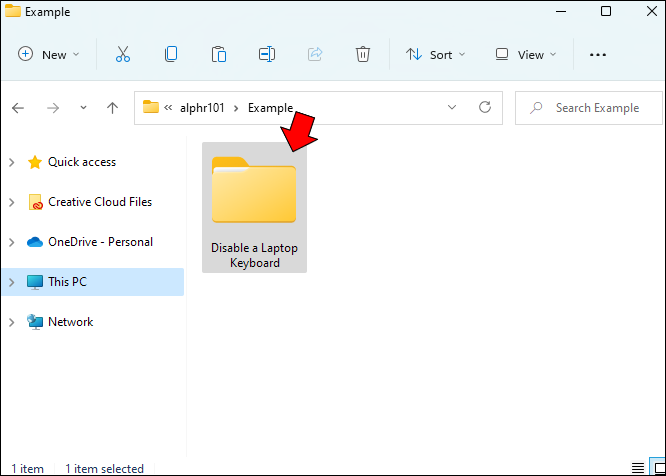
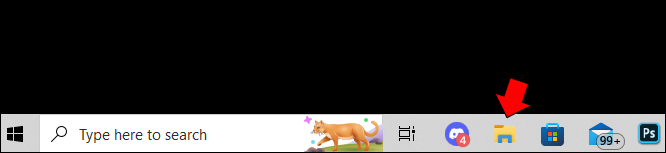
- From the Windows taskbar, click on the “File Explorer” app.

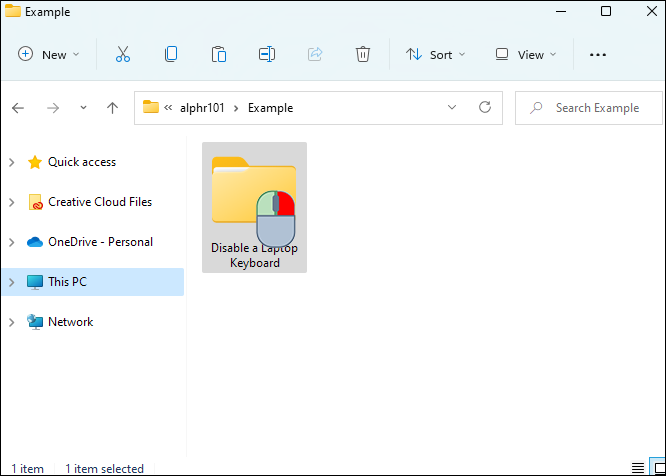
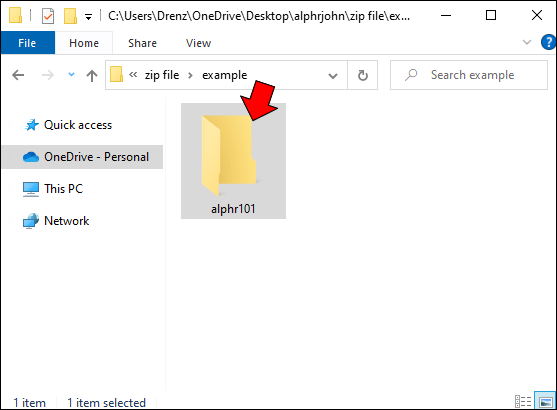
- Locate and select the file or files you’d like to zip.
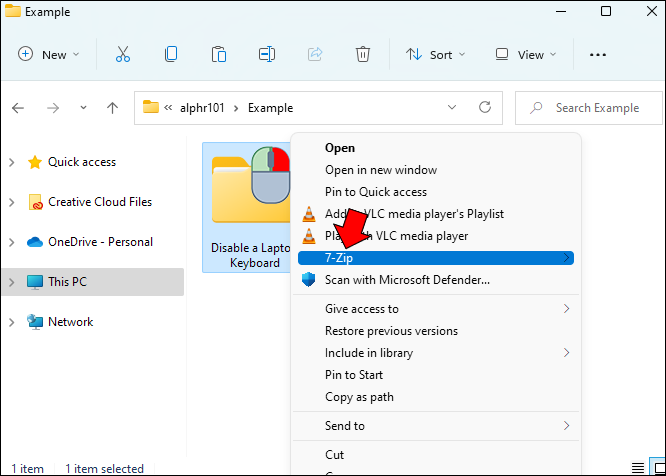
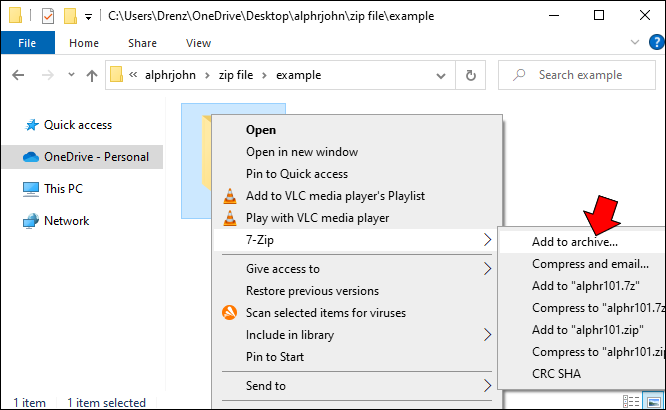
- Right-click the file (or any that you’ve selected if more than one) and from the drop-down menu, choose “7-Zip.”
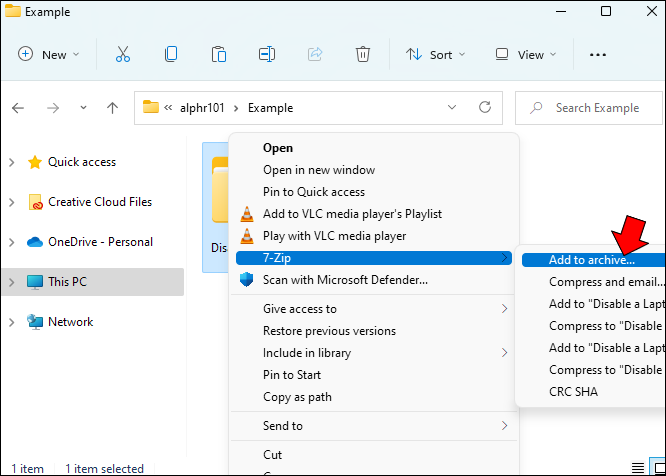
- From the new drop-down menu, pick “Add to Archive.”
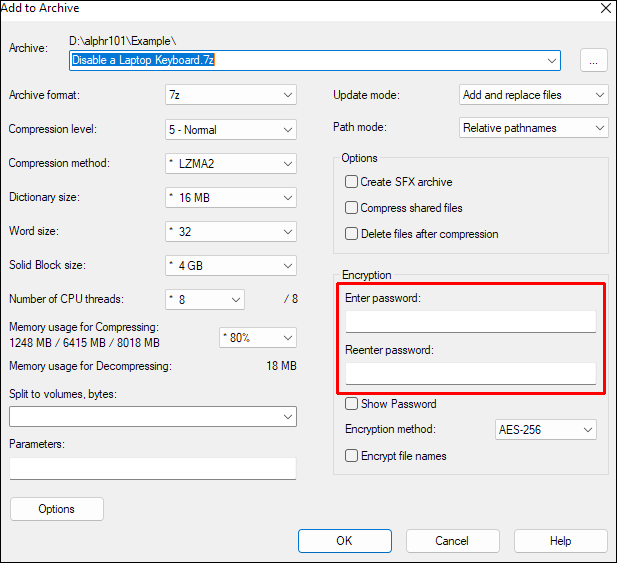
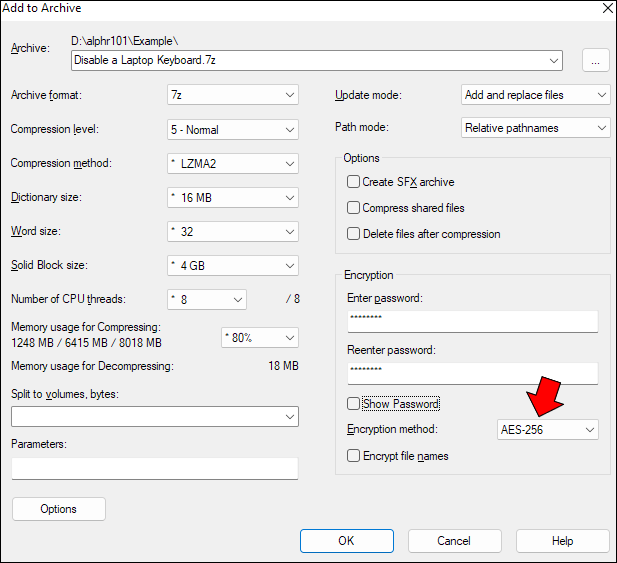
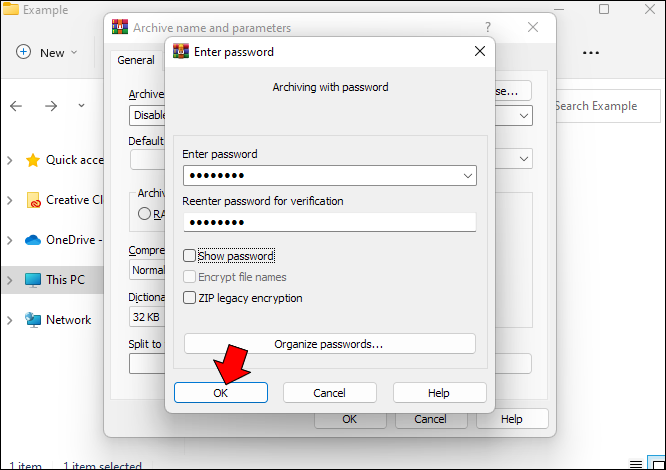
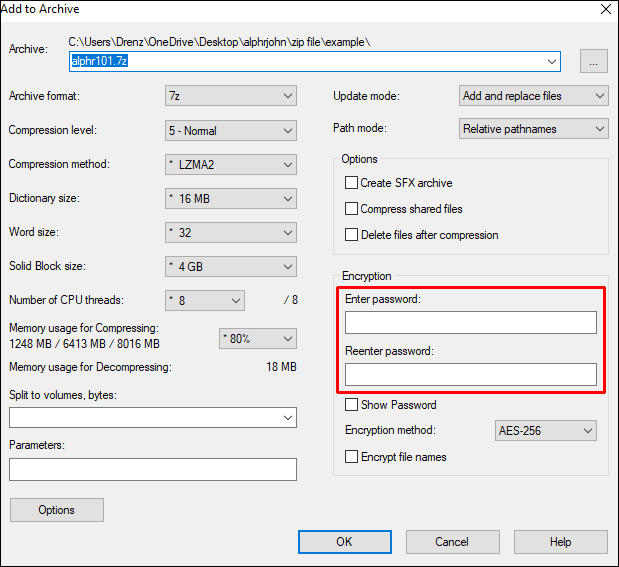
- In the popup window, under the heading “Encryption,” type in a password and then reenter it to confirm.
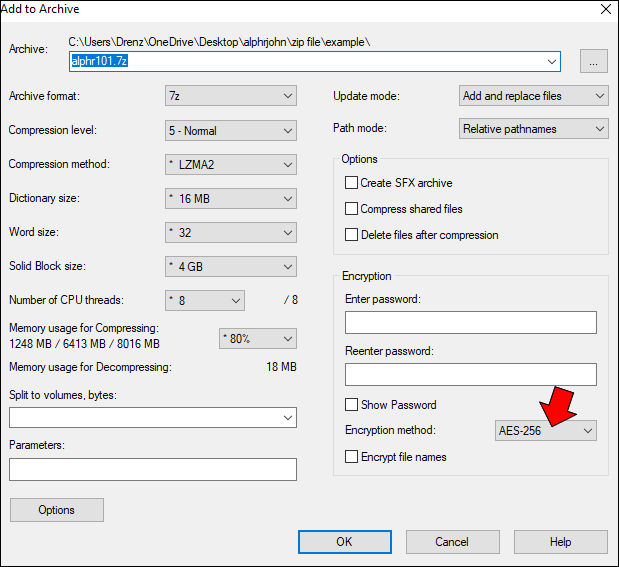
- For “Encryption method,” pick “AES-256.”
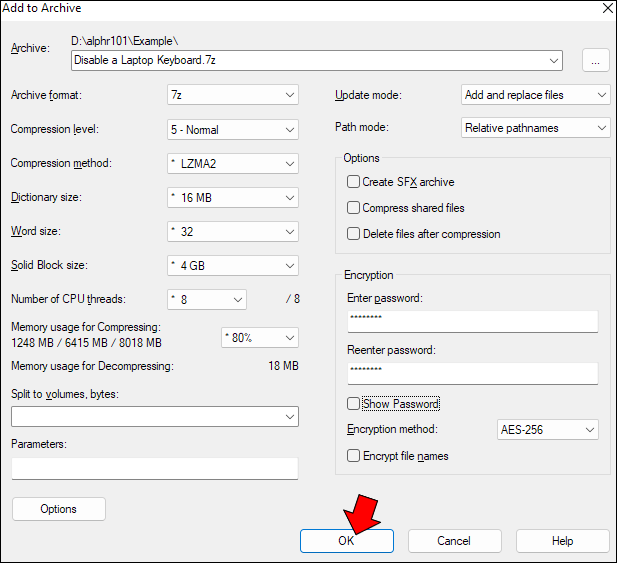
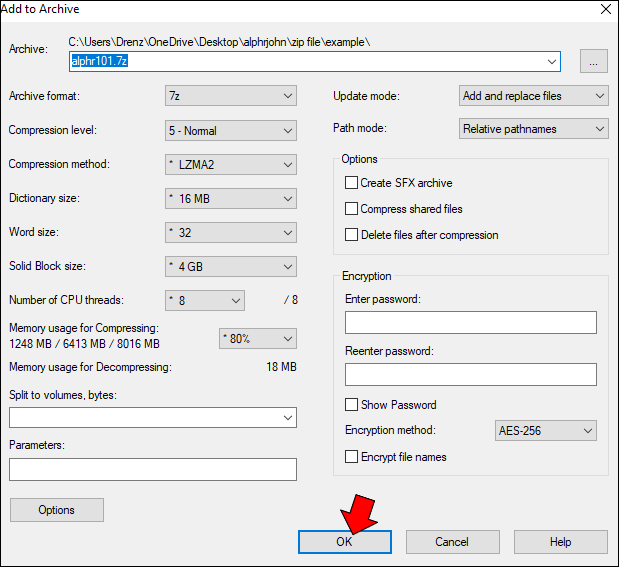
- Tap “OK” to confirm your selections.

The zip archive will be created in the folder where your source file or files are located. Be sure to write down the password in a secure location as you’ll need it to extract the files. If you send someone the zip archive, they’ll also need the password to see the file or files.
To password protect a zip file using the free WinRAR app, follow these steps:
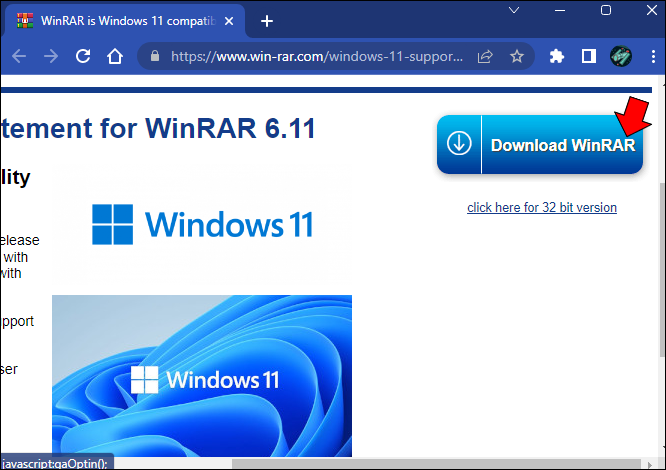
- Download and install WinRAR on your PC.
- Open “File Explorer” by tapping on its icon in the Windows taskbar.
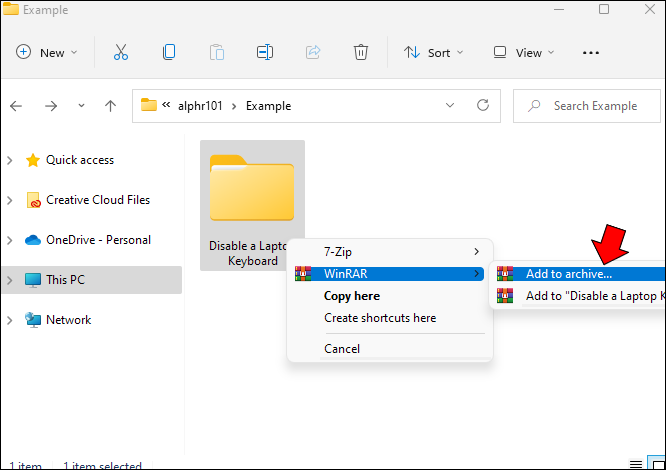
- Choose your file or files and right-click with a light-drag on any of them.
- Using the drop-down menu, select “WinRAR” and then “Add to archive.”
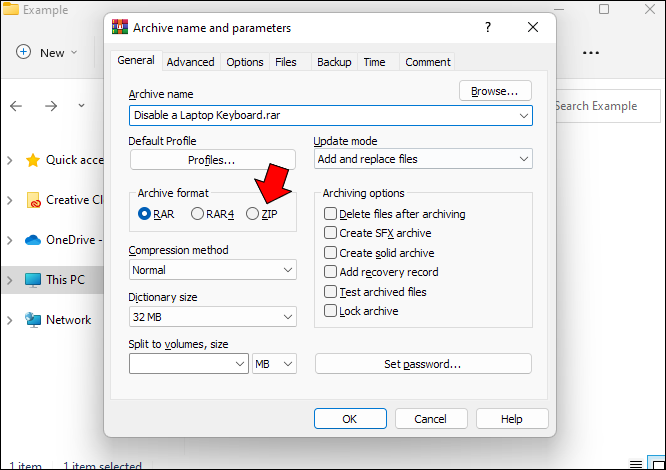
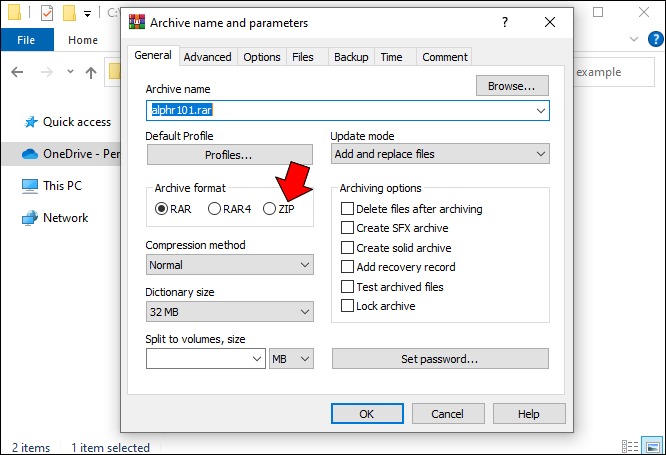
- A new window will open. Under the “Archive format” heading, select “ZIP.”
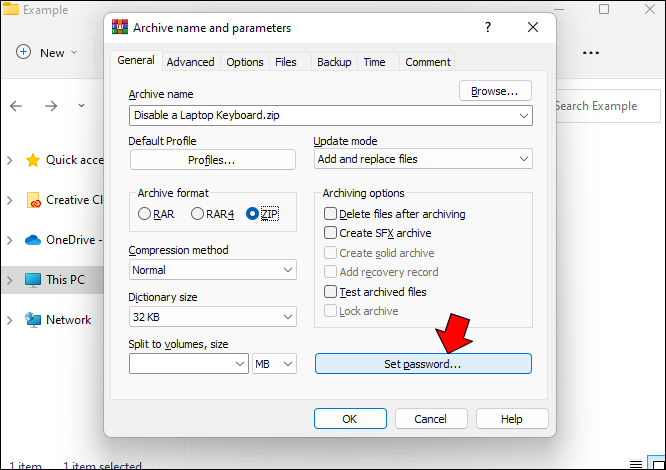
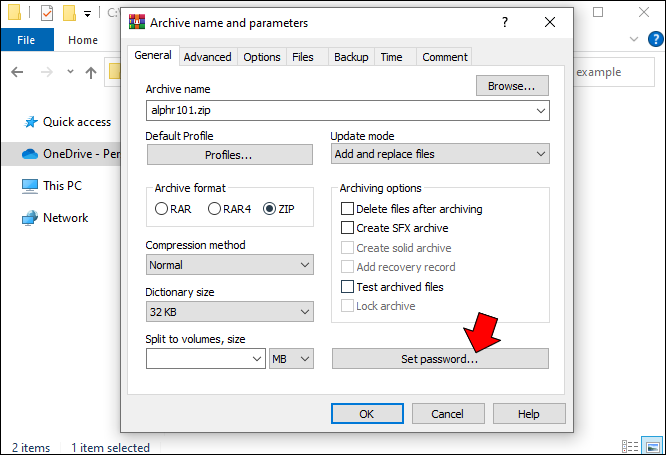
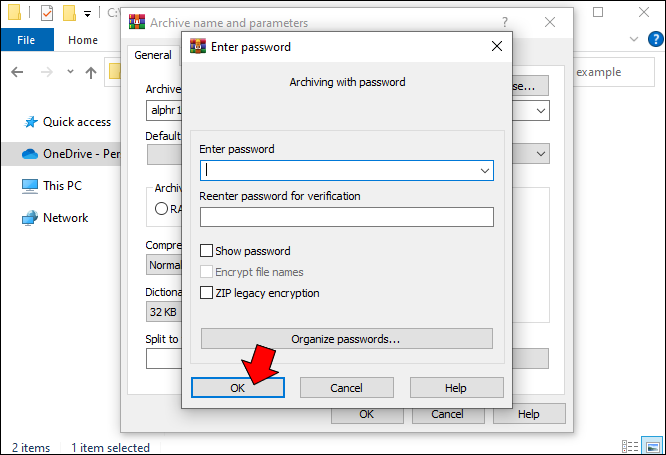
- Tap the “Set password” button.
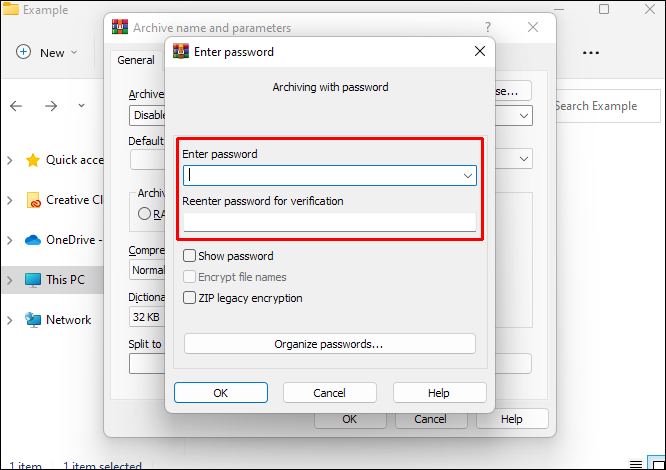
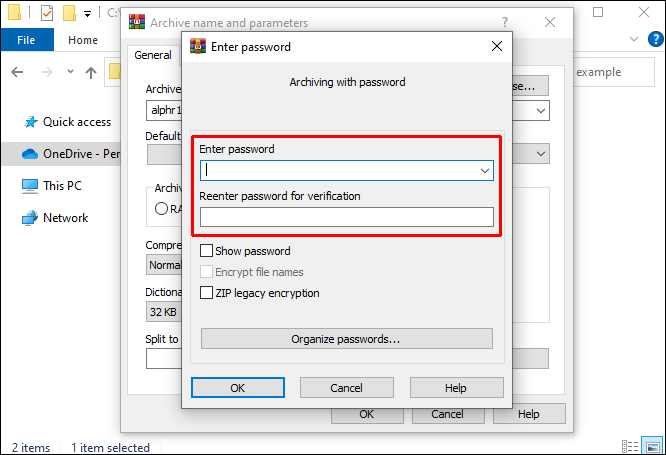
- Type in a password and then reenter it to confirm.
- Hit the “OK” button.
WinRAR will create the zip file and place it in the same folder as the source files. It’s important to write down the password and store it in a safe location. You’ll need it to extract the files. By adding a layer of security to your zip files, you can rest easy knowing that only you and those you’ve entrusted the password to can extract and view them.
Windows 10
It’s a good practice to not only zip your large files on your Windows 10 PC but to also password protect them. This will ensure that only you and those you entrust the password to can extract and view them.
Windows 10 doesn’t have a resource for password-protecting zip files. Thankfully, you can still protect them by using a free app. The process is straightforward and once you’ve downloaded and installed one of these apps, you can easily secure your zip files. Here we’ll cover how it’s done.
To create a password-protected zip archive using the free 7-Zip app, follow these instructions:
- Download and install the 7-Zip app.
- Launch “File Explorer” by clicking on its icon in the Windows taskbar.
- Find and select the file or files you’d like to zip and password-protect.
- Right-click on the file or files and using the drop-down menu, choose “7-Zip.”
- Tap on “Add to Archive.”
- A popup window will open. Under the “Encryption” heading, type in a unique password and then reenter it to confirm.
- Select “AES-256” as the encryption method.
- Press “OK” to confirm your selections.

7-Zip will create your zip archive and save it in the same location as the source file or files. Don’t forget to write down the password and store it in a secure location. You’ll need the password to extract the zip files. Adding a layer of security will help to ensure that only those who know the password will be about to view the files.
If you’d like to create a password-protected zip archive using the free WinRAR app, here’s how it’s done:
- Down and install WinRAR.
- Launch “Windows Explorer” by tapping on its icon in the Windows taskbar.
- Locate and select the file or files you’d like to zip and password-protect.
- Right-click on the file (or one of the files if you’ve selected more than one) and using the drop-down menu, pick “Add to archive.”
- Find the “Archive format” heading and choose “ZIP.”
- Press the “Set password” button.
- Type in a password and then enter it again to confirm.
- Click on “OK.”

The WinRAR app will zip your selected file or files and save them in the same location as the source files. It’s important to write down the password and put it in a safe location as you’ll need it to extract and view these files. Adding a password to your zip files is a good way to ensure that only those who know the password can view them.
FAQs
How do I extract a password-protected zip file?
So long as you know the password for the protected zip file, the extraction process is straightforward. The method to do so with both apps featured in this article is similar. Here’s how to do it:
1. Locate and right-click on the zip folder.
2. Depending on which app you used, select “7-Zip” or “Extract files.”
3. Choose “Open archive.”
4. A new window will open. Type in the password and click the “OK” button.
I’ve forgotten my password on a password-protected zip file. What can I do?
Unfortunately, the password is required to extract the files. Without it, you won’t be able to view them. If you were the creator of the zip, your only option is to create a new one with the free app you used to make it. If you aren’t the creator of the zip archive and you’ve forgotten the password, you’ll need to ask for it from the creator of the file.
Password Protecting Zip Files Ensures Their Safety
Adding a layer of security to your zip files is a great way to ensure that only those who know the password can extract and view them. This is especially important if they contain sensitive information. Doing so is easy by using one of the many available free apps. With just a few clicks or taps, your large files can be compressed and password protected, giving you the peace of mind that they can’t be easily viewed.
Have you added password protection to a zip file? Did you use the same methods described in this article? Let us know in the comment section below.
Disclaimer: Some pages on this site may include an affiliate link. This does not effect our editorial in any way.