Pressure sensitivity is what makes the drawing experience in Procreate incomparable. If you use an Apple Pencil to create illustrations and digital paintings in Procreate, you can draw lines as thick or thin as you want by pushing your stylus against the screen with more or less force.
However, default settings might not fit all projects, and you might need to adjust pressure sensitivity to your particular physical abilities or preferences. Fortunately, you can change these settings like everything else in Procreate, for all tools or only for individual brushes. Read on to learn how.
How to Turn Off Pressure Sensitivity in Procreate For All Tools
Changing pressure sensitivity settings in Procreate entails adjusting the tool called Pressure Curve. It contains the x-axis and y-axis. The x-axis represents the input pressure. In other words, changing the x-axis changes how hard you press your pencil against the screen. The y-axis is the brush output, i.e., what the brush draws based on your pressure. Depending on the pressure you apply, it can change thickness, opacity, and other dynamic properties.
For a more sensitive brush, the Pressure Curve needs to be steeper. If you want to create thick lines by only lightly pressing your Apple Pencil, the lower end of the x-axis should be flatter. However, if you want to turn off pressure sensitivity completely, you can do so by following these steps:
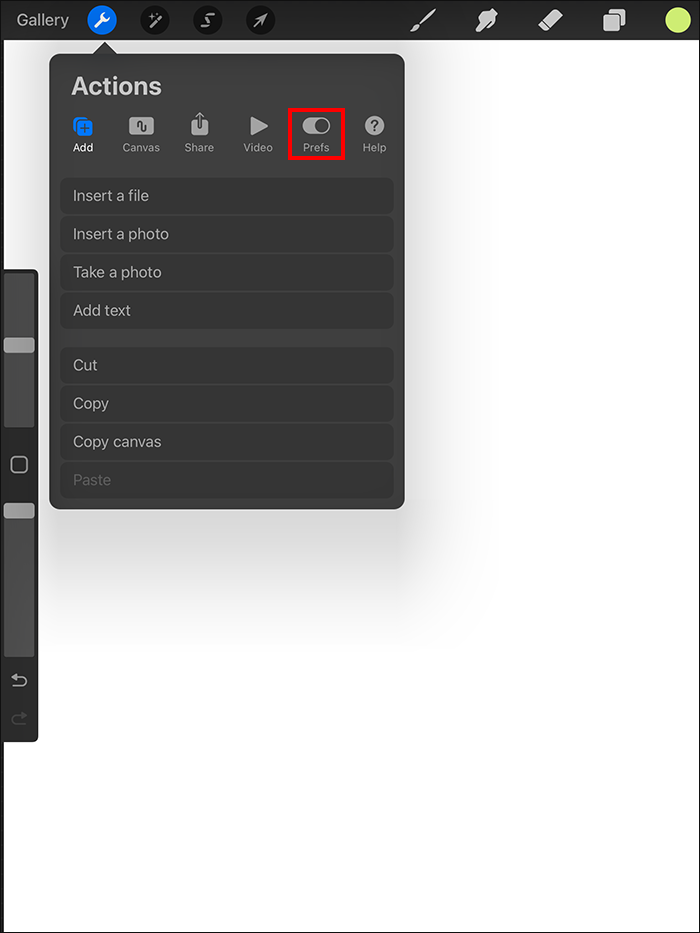
- Select the Actions icon.

- Press the Prefs tab.

- Tap Pressure and Smoothening.
- Under App Pressure Sensitivity, drag the top of the Pressure Curve down or to the left until the Curve turns into a straight line.

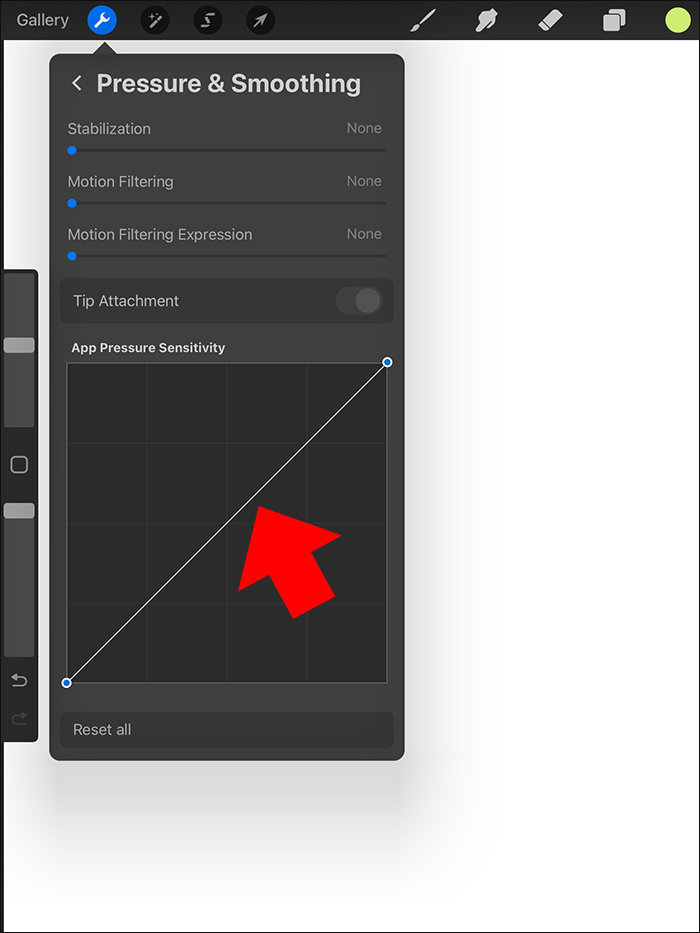
Now, try out your brushes and see whether the lines you make are entirely equal. To undo what you just did and allow some pressure sensitivity to your stylus, you can go to the same settings and press Reset all at the bottom.
Although playing with pressure sensitivity is fun and can be used to create various captivating designs, it can become annoying really fast. Plus, you might find the default setting too sensitive.
Besides changing the pressure sensitivity, you should also learn how to add text in Procreate to up your creativity level.
How to Turn Off Pressure Sensitivity in Procreate for Individual Brushes
While some designs require zero pressure sensitivity, you might want to utilize only a few of the brushes to draw even and straight lines. Or maybe you want to go back and forth while adding text. Fortunately, you don’t have to turn the Pressure Curve on and off as you work to get the desired strokes. You can just choose the individual brushes for which you want zero or different pressure sensitivity and duplicate them.
That also allows you to have the original brush with its original pressure sensitivity in addition to the duplicate brushes with the specific pressure sensitivity you’ve selected. If you love playing with different brush settings, you can save the settings and quickly access them at all times.
Here’s how to change pressure sensitivity for individual brushes in Procreate:
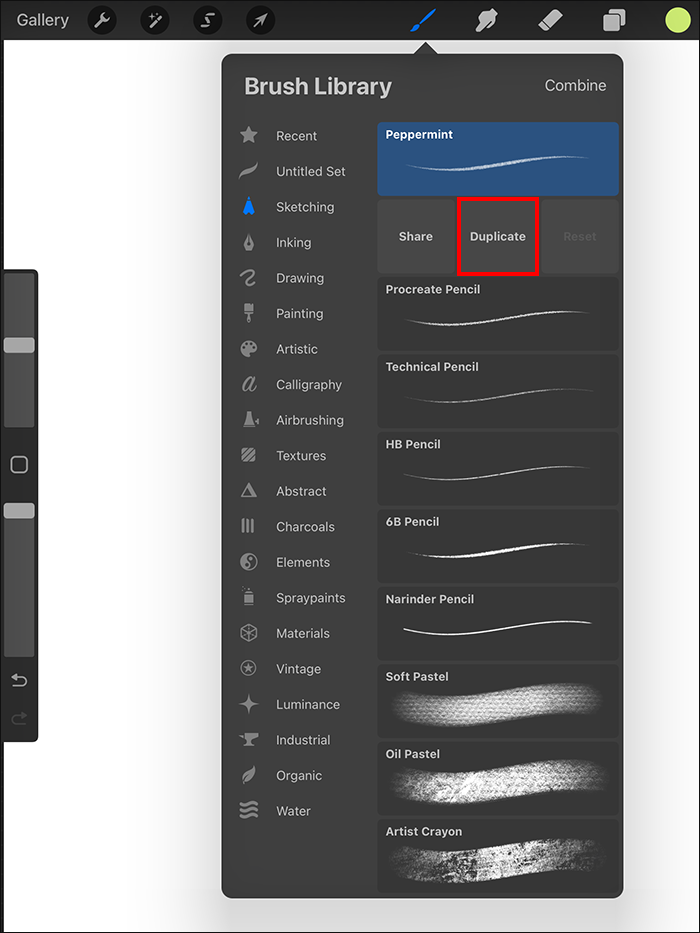
- Swipe left on the brush for which you want to change pressure sensitivity.
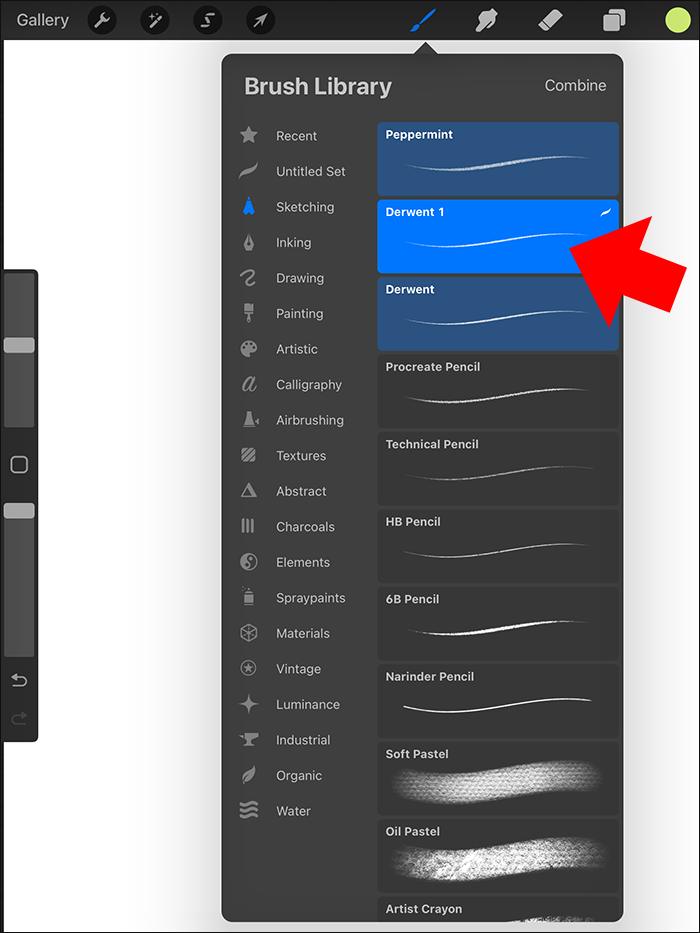
- Press Duplicate.
- Double-tap the duplicated brush to access its settings.
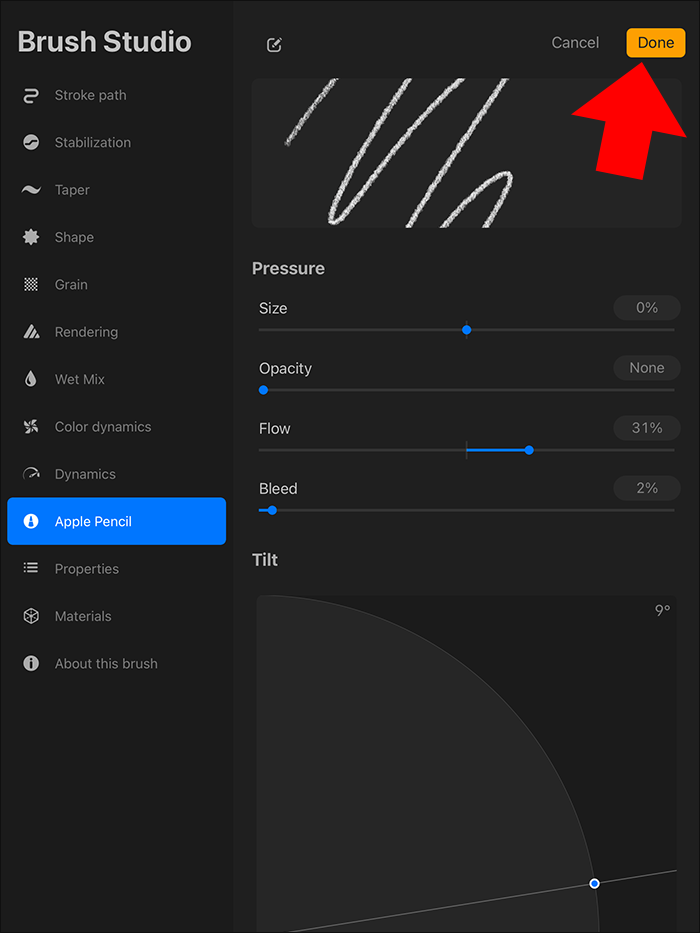
- Go to the Apple Pencil tab in the left panel.
- In the Pressure section, drag the Size scale to 0%.
- Select Done to save the changes.


Now, no matter what the pressure sensitivity settings are for the rest of the tools in Procreate, this duplicate brush will work independently on them. You can also set a new name for your duplicate brush to distinguish it from the original one better. Go to About This Brush, tap the brush name at the top, and write the name you want.
How to Adjust Pressure Sensitivity Minimum and Maximum Value
Your brush’s highest and lowest pressure sensitivity will depend on other settings in Procreate. Maybe you’ve only applied a little pressure to your lines, but once you turn it off, you’re surprised that the line is too thick for your illustrating needs.
You can change your brush pressure sensitivity’s maximum and minimum values in the Brush Settings. Here’s how it’s done:
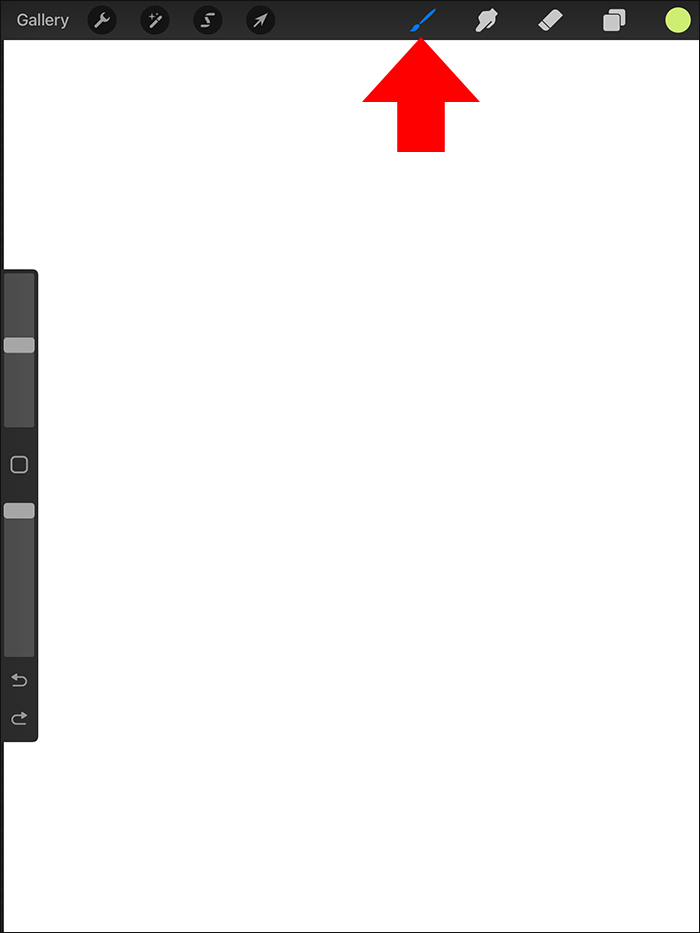
- Locate the Brush tool in the top right toolbar.
- Double-tap the brush with the pressure sensitivity values you want to adjust to open its settings.
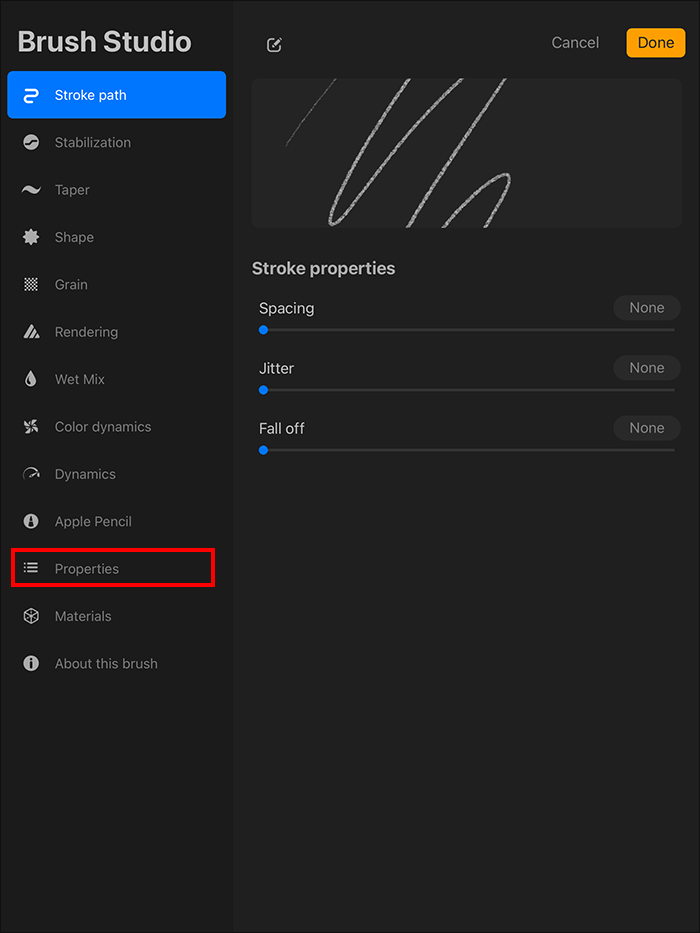
- Go to Properties in the left side panel.
- Under Brush Behavior, slide the Maximum Size and Minimum Size dots to adjust the values.
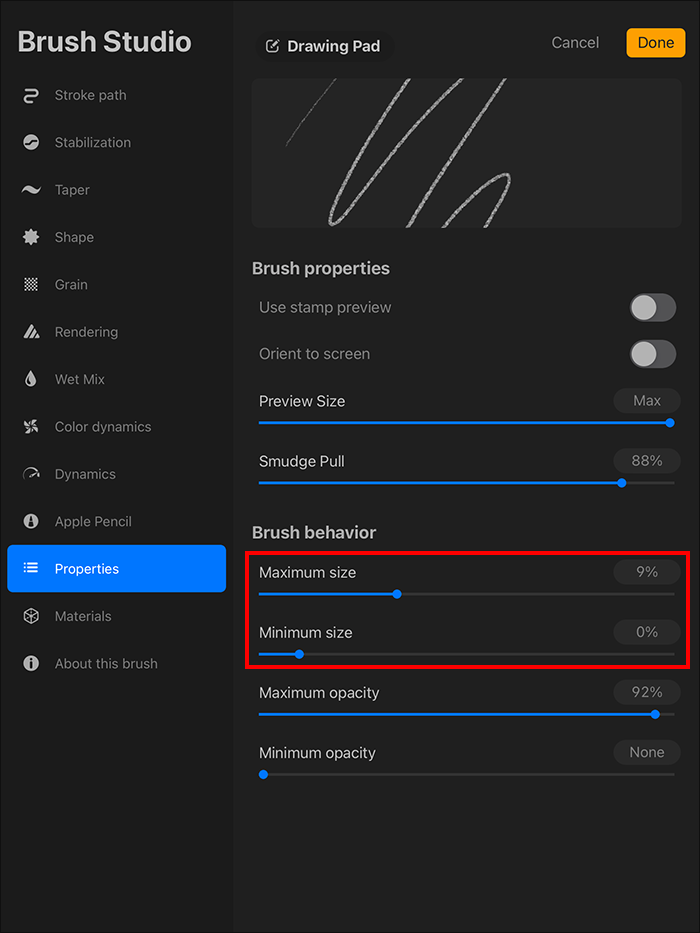
You can adjust maximum and minimum opacity in Procreate using these settings and have your lines be more or less transparent depending on how much pressure you apply with your Apple Pencil.
How to Change Pressure Sensitivity for Brushes That Don’t Allow It
Some brushes in Procreate don’t have pressure sensitivity settings, so they always go in a straight and even line. This means you can’t create a thin and subtle beginning or end of your line, and no matter how much pressure you put on the brush, the stroke stays the same.
Still, there’s a workaround available. You can change your brush size as you draw by sliding the Size button. This solution depends on your skill level and can be tricky to master. But once you get the hang of it, you might also be able to apply it to different tools.
Get Rid of Pressure in Procreate
Pressure sensitivity can be a valuable setting for your many projects. However, you can easily turn it off if you don’t need it. You can even turn it off for only some brushes by creating a duplicate of them. And even if the brush doesn’t come with pressure sensitivity settings, you can still recreate the effect by combining the brush with the size tool. The options are endless.
Next, you should learn how to make your background transparent using Procreate.
FAQs
A: Although the Procreate Pocket app shares some settings with Procreate for your iPad, it doesn’t have pressure sensitivity. Procreate Pocket works on iPhone and iPod touch that doesn’t have 3D touch, which allows pressure sensitivity to work on your iPad. Instead, it has a software-based haptic touch and something directly built into your iPhone and iPod touch.
A: Although Apple Pencil is the best stylus for iPad and Procreate, you can also use other stylus options. Adonit Note+ is the second-best stylus you can use for your iPad. Zspeed is the best iPad and iPhone stylus for beginners, while JAMJAKE is the most budget-friendly one that works on iPad Air 2, iPad Air 3, and iPad Pro.
A: You don’t need to buy a stylus to achieve lines with pressure sensitivity in Procreate. However, you might struggle without it. The iPad screen might not detect other items or a specific stylus.
A: Your pressure sensitivity is suddenly off because the Opacity settings are at zero or the Pressure Curve is off. If both settings are fine, the problem might be caused by a recent Procreate update.
Disclaimer: Some pages on this site may include an affiliate link. This does not effect our editorial in any way.