Perhaps there’s a Zoom meeting you want to videotape for future reference or a funny video clip you want to save. If so, recording the screen of your Android device is the way to go.
Fortunately, it’s a relatively straightforward process. In this guide, we’ll look at how to record your screen using the device itself and with the help of a few apps.
How to Record the Screen on an Android Device
The latest Android devices (Android 10 and up) have a built-in screen recorder. If you have an older device, you will need to use a third-party app to screen record, which we’ll discuss later.
Recording the screen on your newer Android device gives you the option to record your screen with or without sound. These steps show you how:
- Open your Android device.

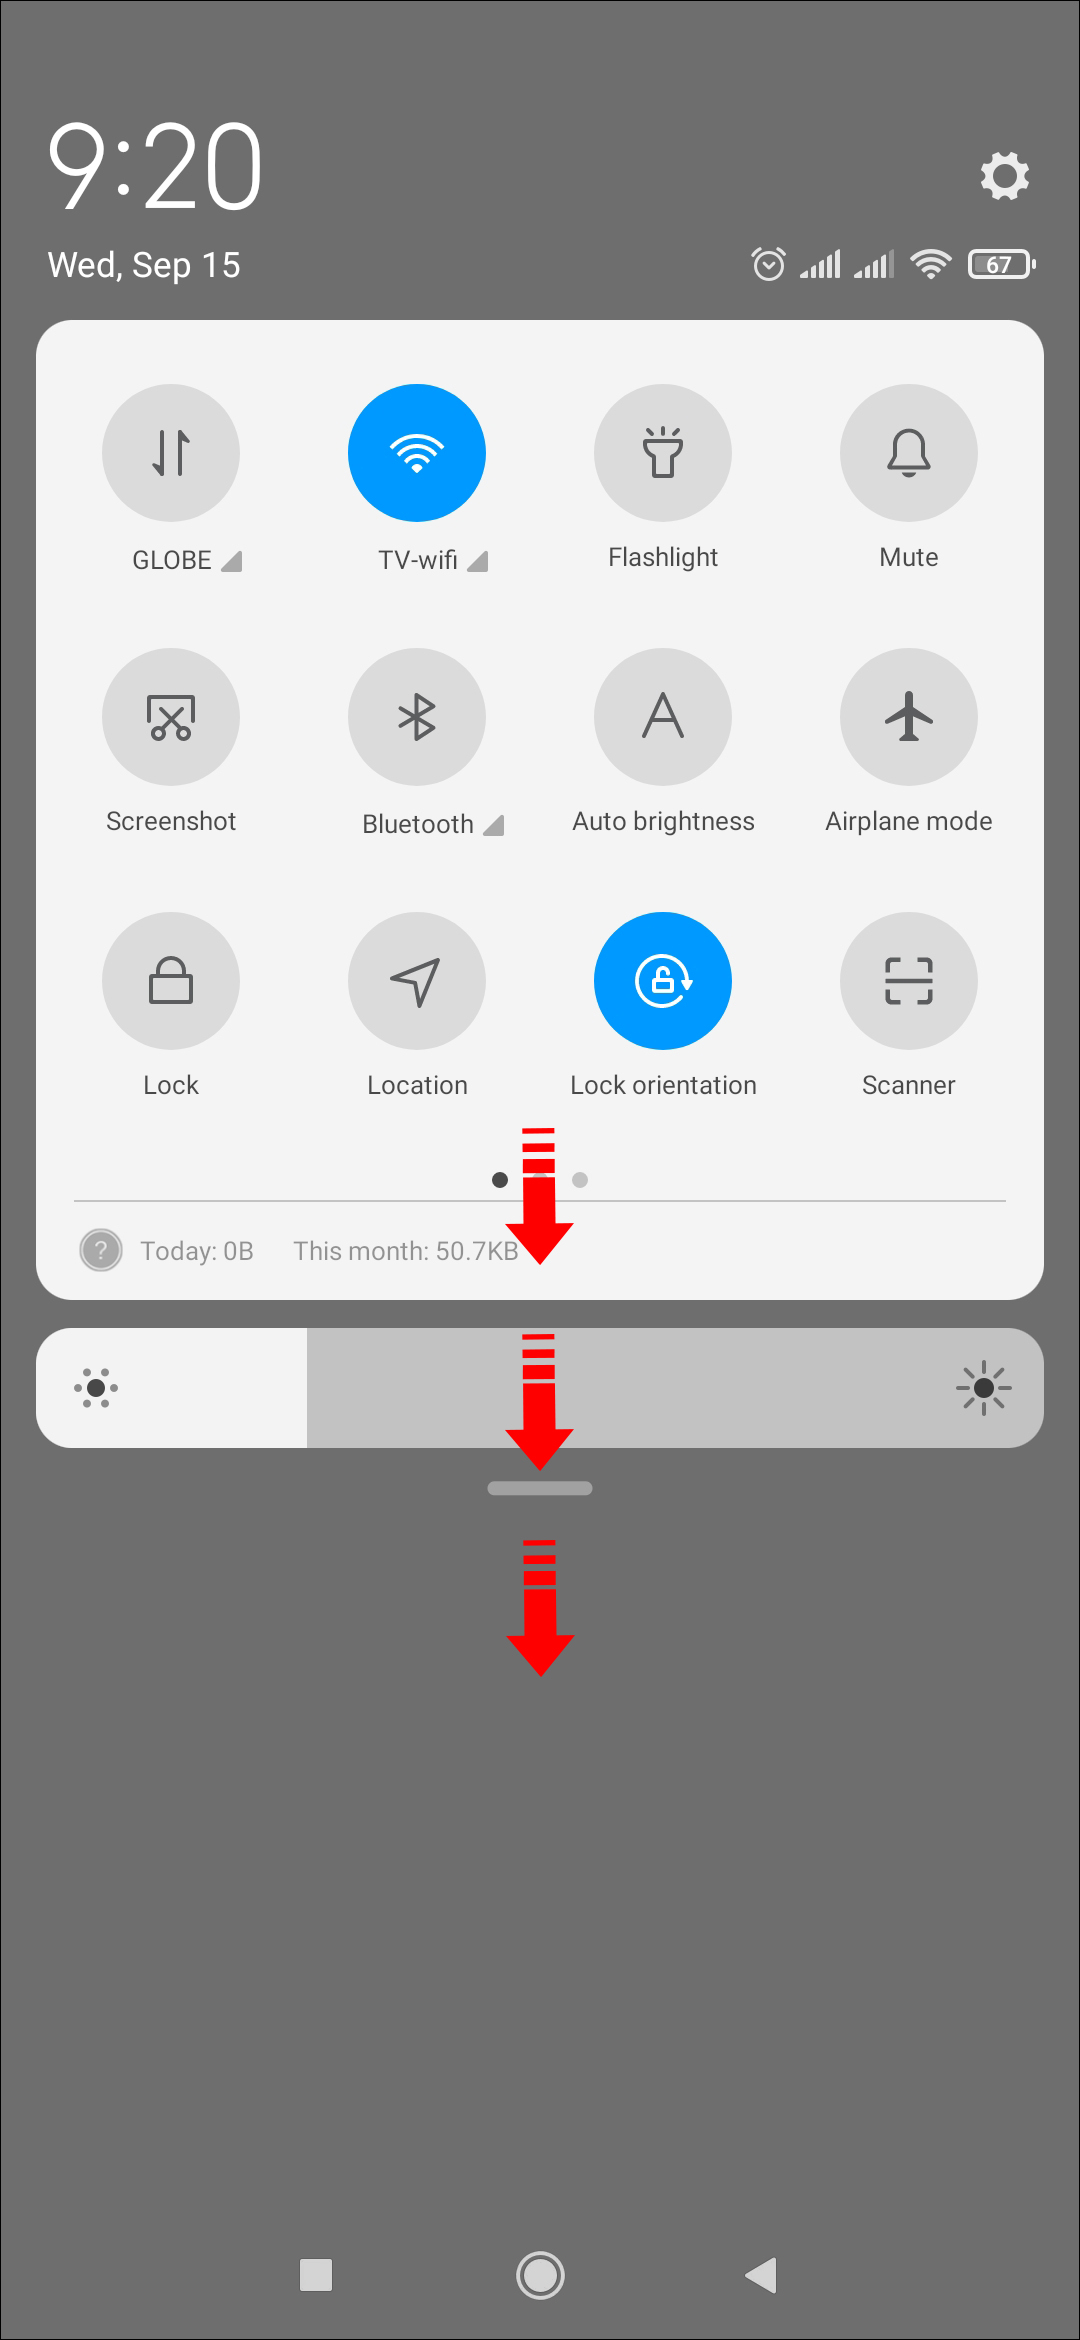
- The screen recording app is located in the notification panel. Swipe this panel downwards to bring up the “Quick Settings” menu.

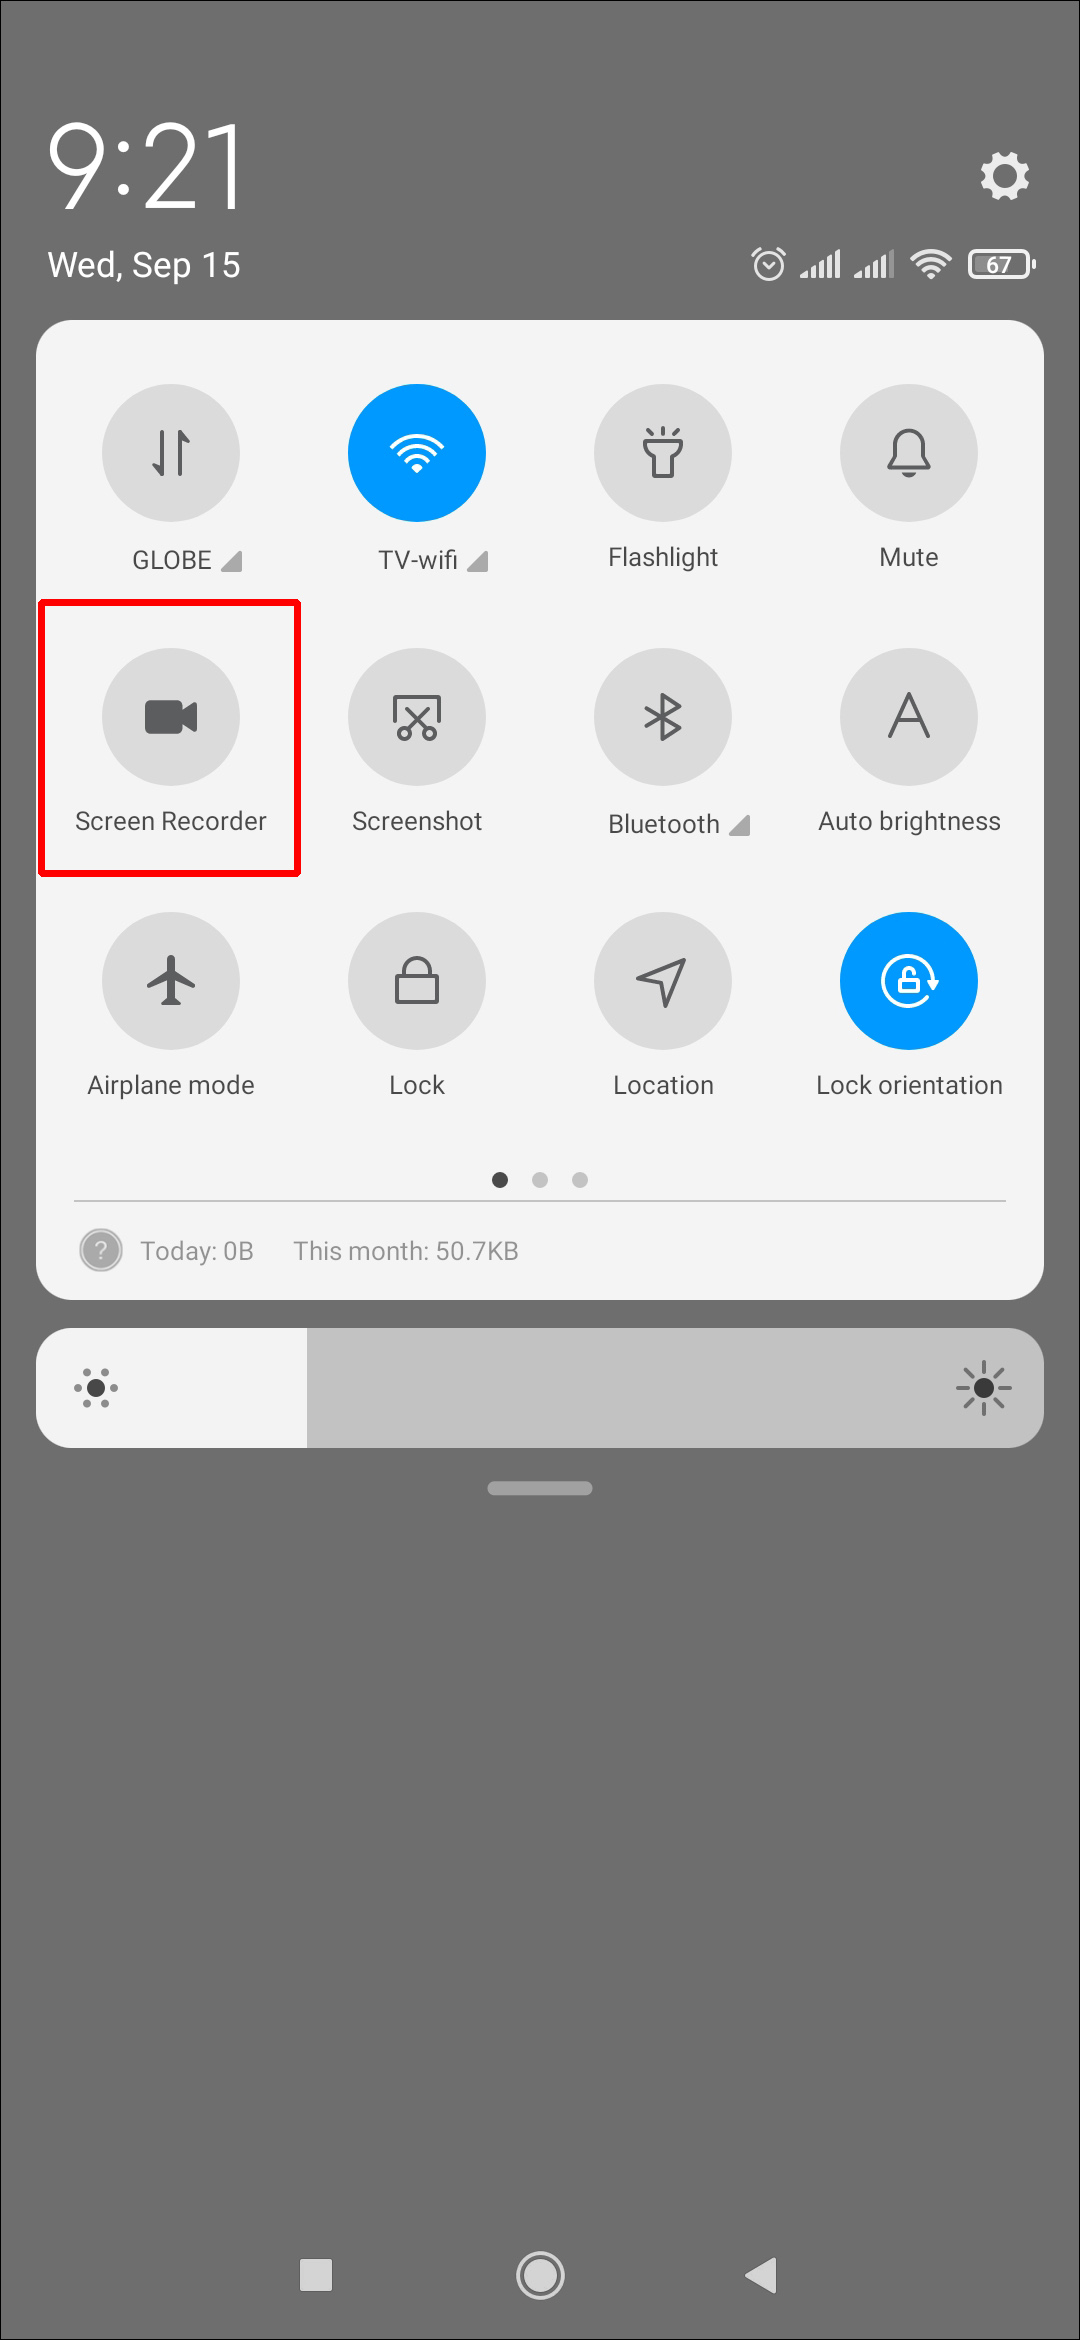
- Swipe the top notifications bar down twice (the first time reveals the menu, the second time opens it up) to access the “Quick Settings.” Next, select the “Screen Record” icon.
- Decide if you want to record with the audio on and whether you would like the app to show where you touch the screen while recording. To enable one or both functions, slide their respective toggles to the right.
- To begin recording, tap “Start.”
- When you’ve finished recording, swipe down from the top of the screen and press the red Screen Recorder notification labeled “Tap to Stop.”

Your Android device will store these recordings in your media files or the default camera roll or gallery.
Note: If you can’t find the Screen Record function in the menu, follow these steps to add it:
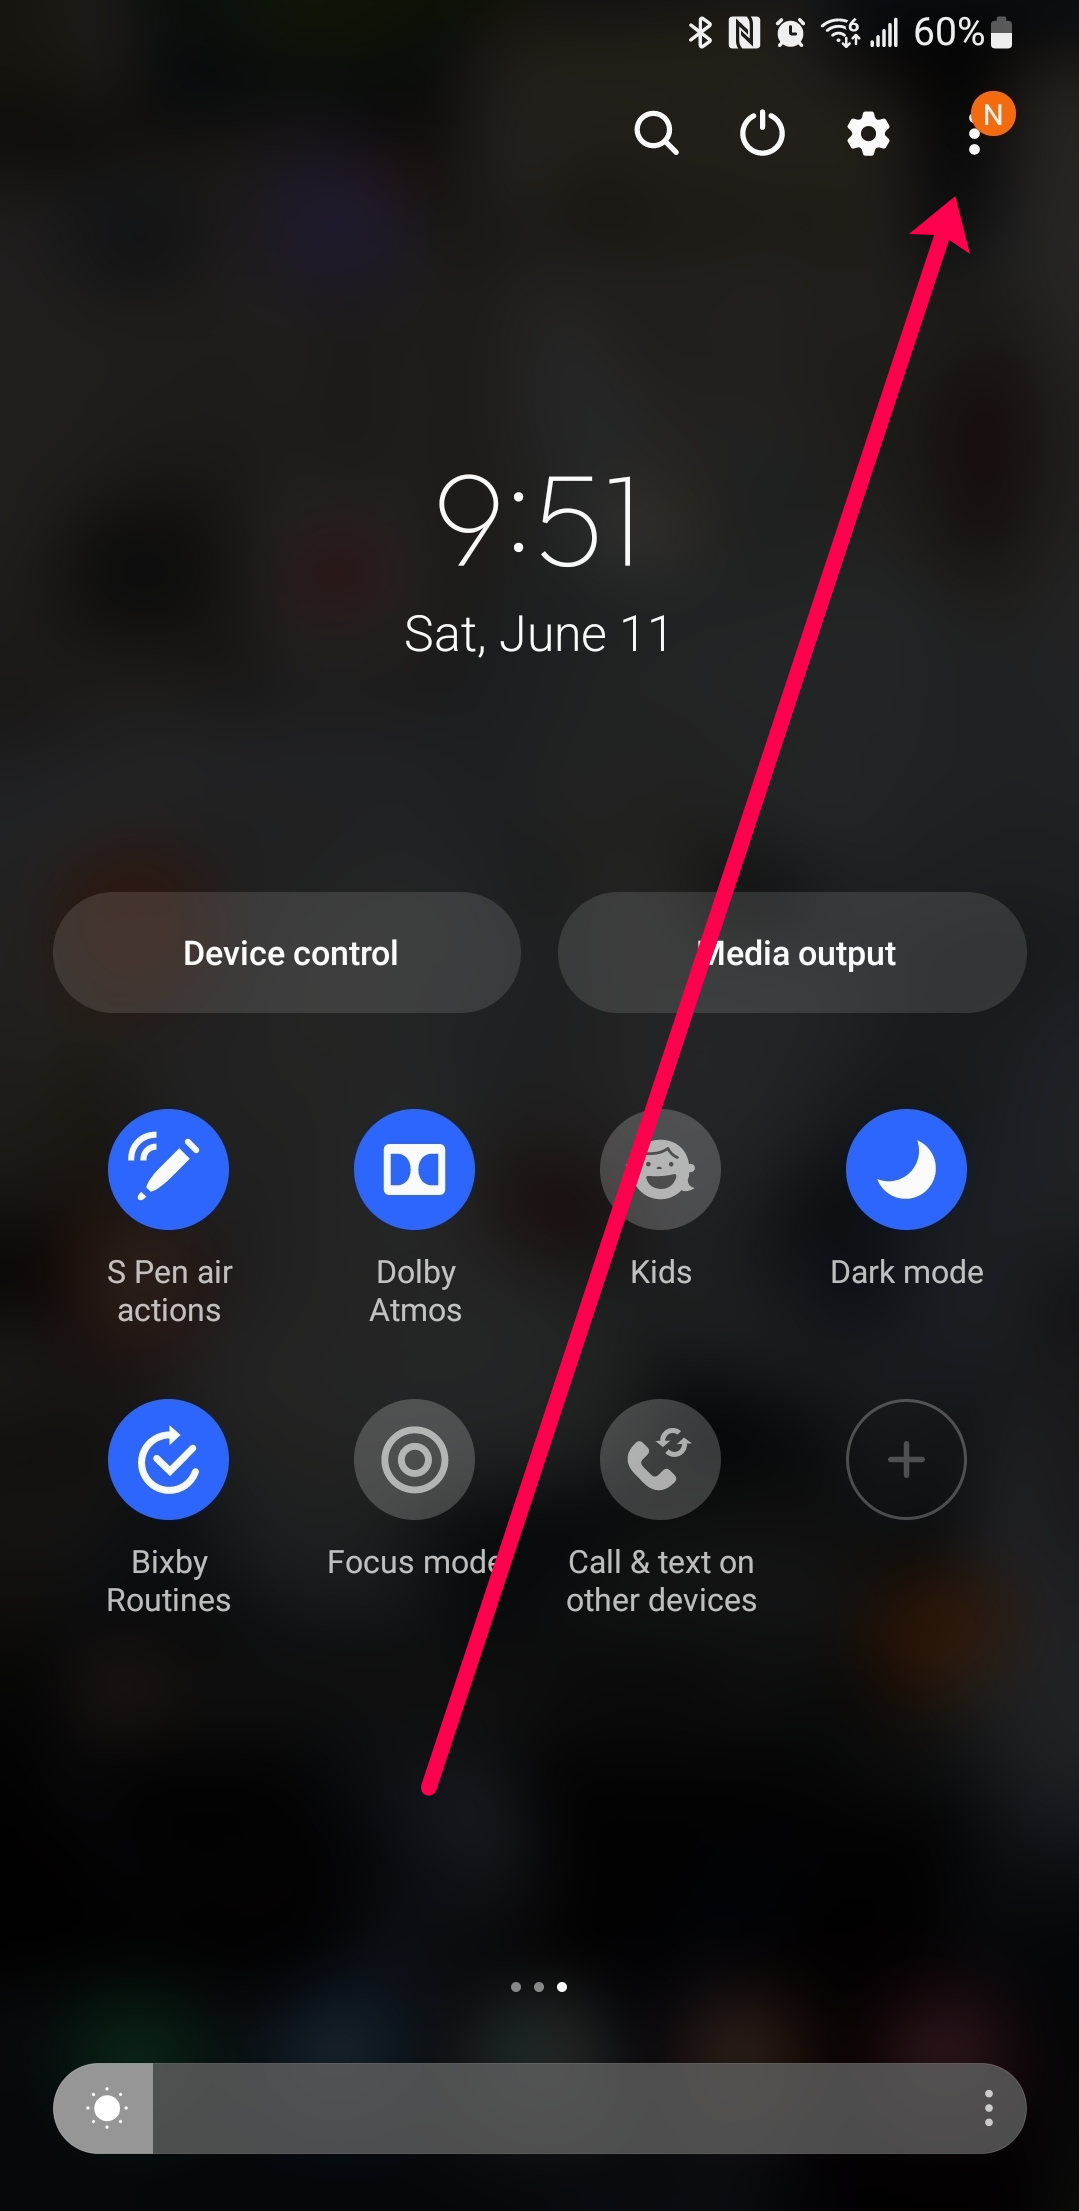
- Swipe down from the top of the screen and tap on the More menu icon in the upper right corner (this may vary depending on the manufacturer).
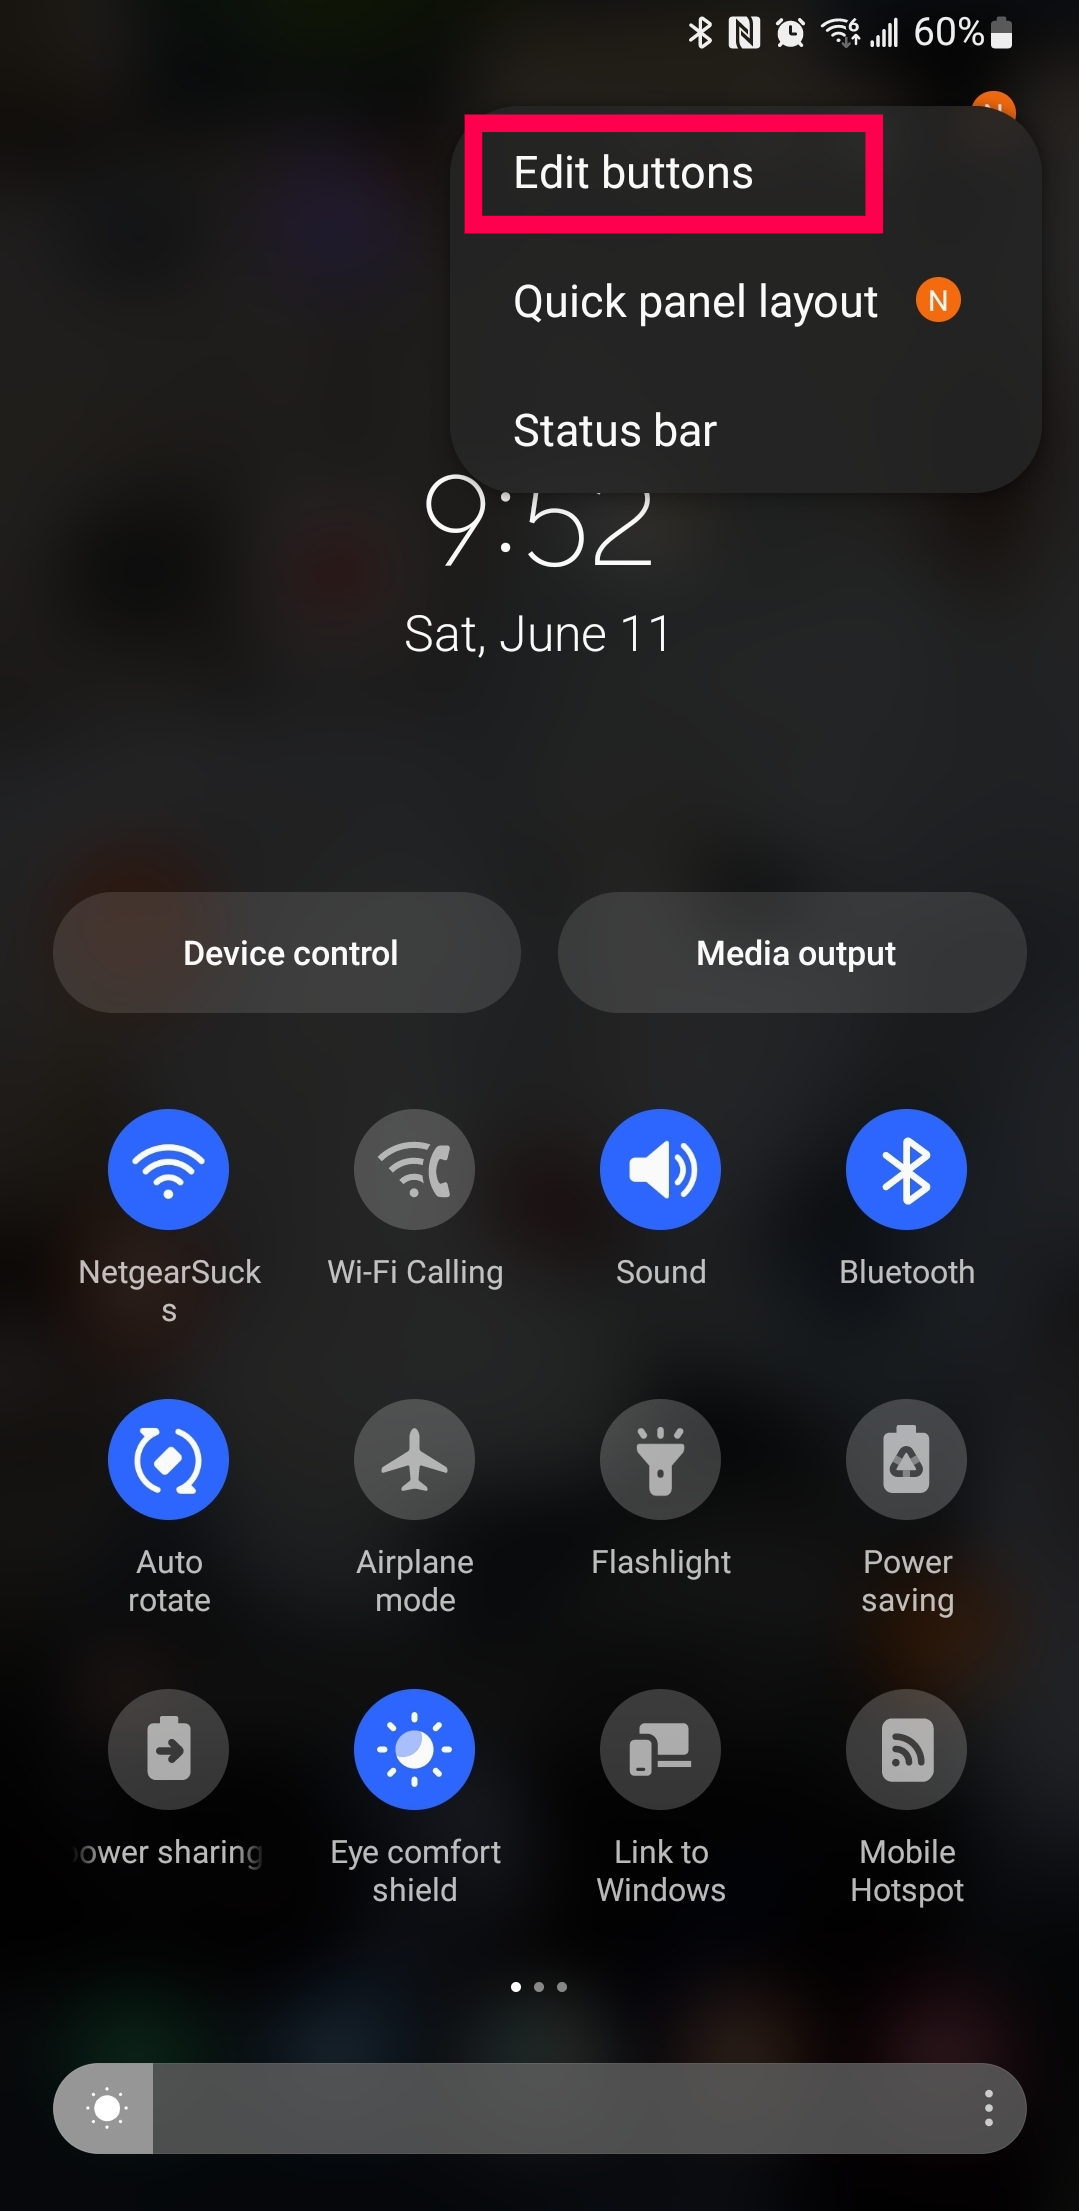
- Tap Edit Buttons.
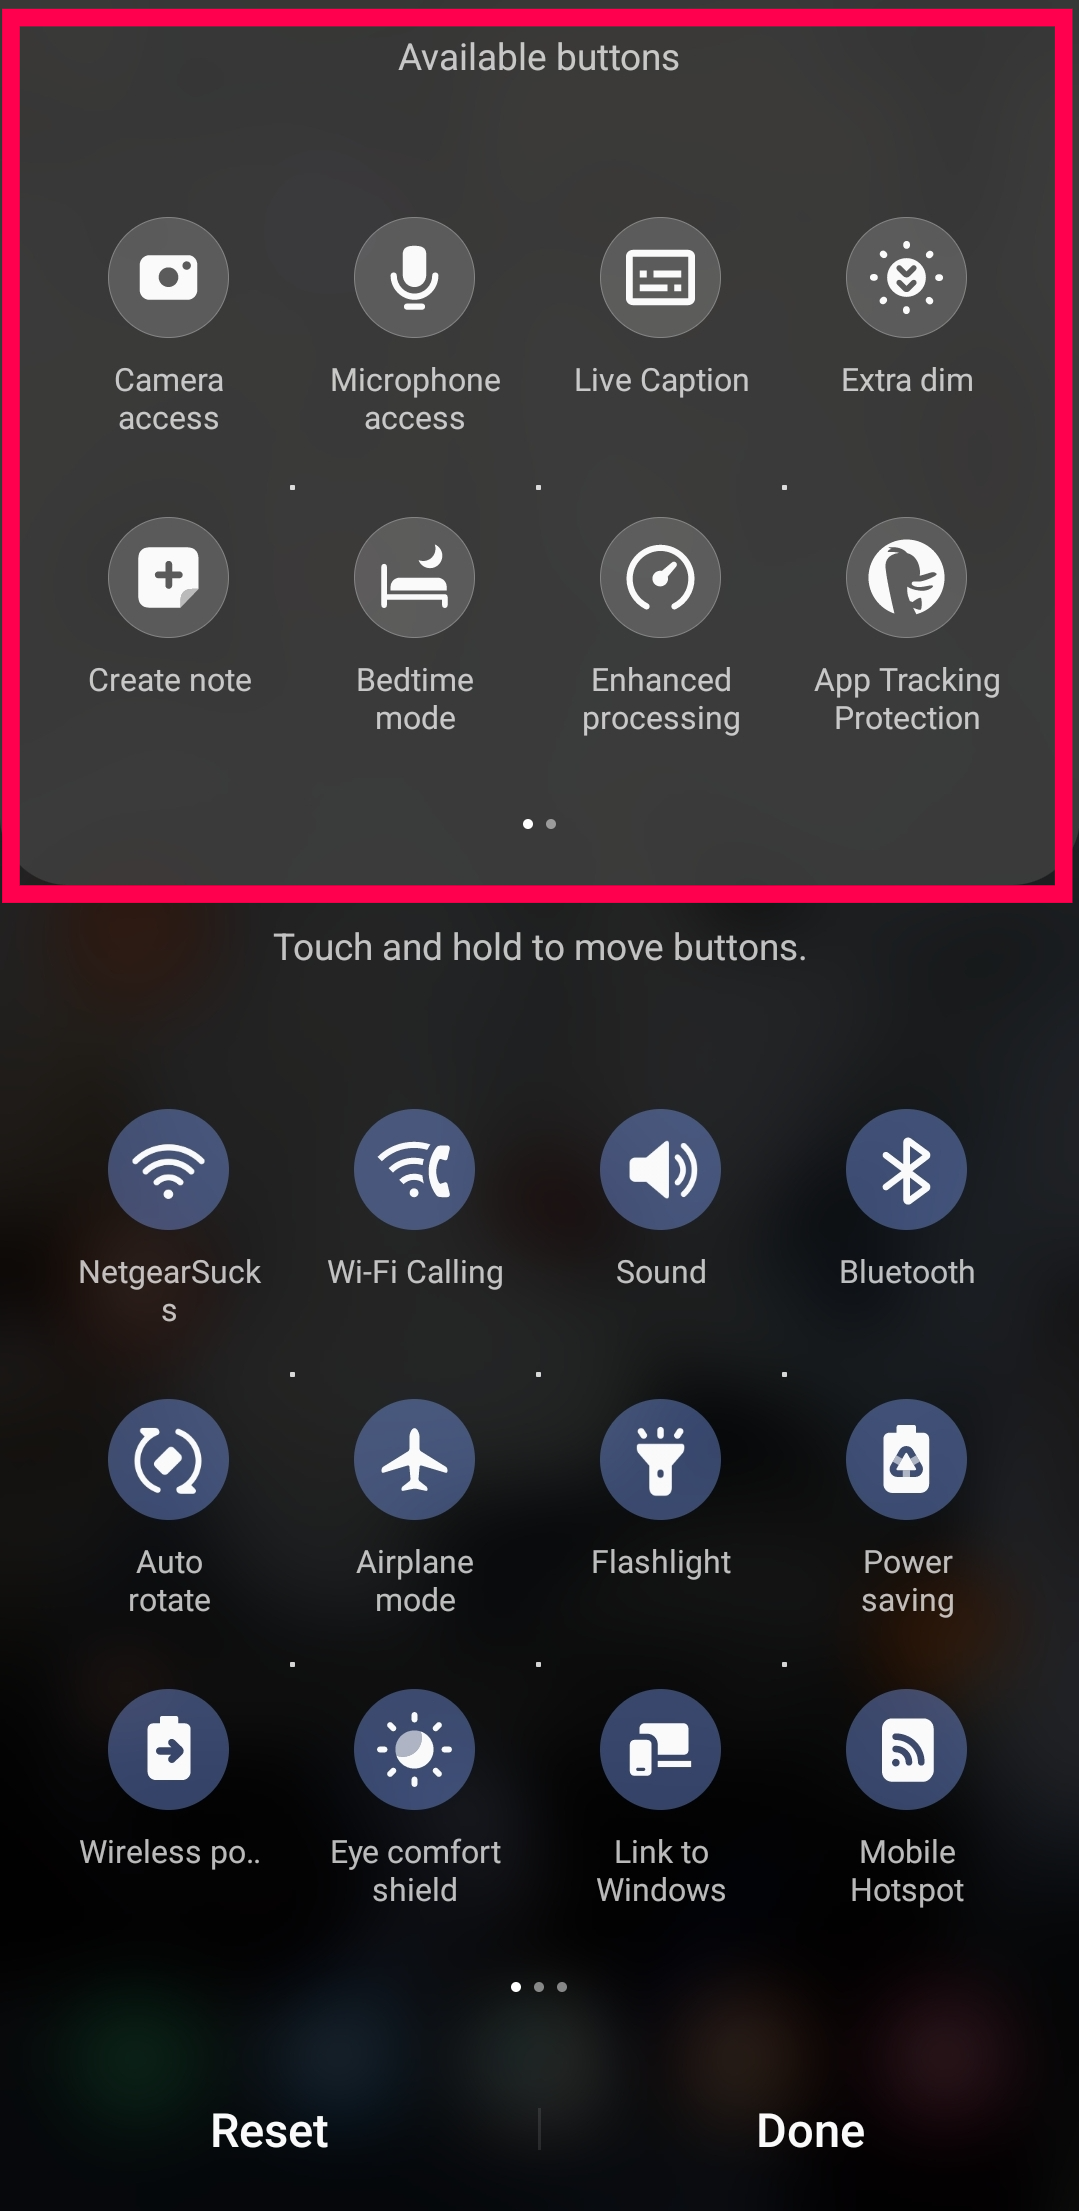
- Scroll to the right until you see the Screen Record icon. Tap it to add it to your notification panel.
Some models have a “Customize” icon in the menu’s bottom left corner. (This is the pencil-shaped icon.) Locate the “Screen Recorder” icon and drag it to the top of the screen. It will now show up in the Quick Settings menu. Tap the small arrow to close this screen.
Recording Using AZ Screen Recorder
If you have an Android device that does not come with a Screen Recorder, there are various apps that you can download that will help you do this.
AZ Screen Recorder is one such app. Note that it’s free to download but contains in-app adverts. You can upgrade to an ad-free version for a small fee. It offers a range of other functions, including taking screenshots and starting live videos. The app is compatible with Android 5.0 and up. Here is how you use it to record your screen:
- Download the AZ Screen Recorder app from Google Play Store. Once you have installed it, launch the app. Follow the on-screen instructions that allow the Screen Recorder to display over other apps.
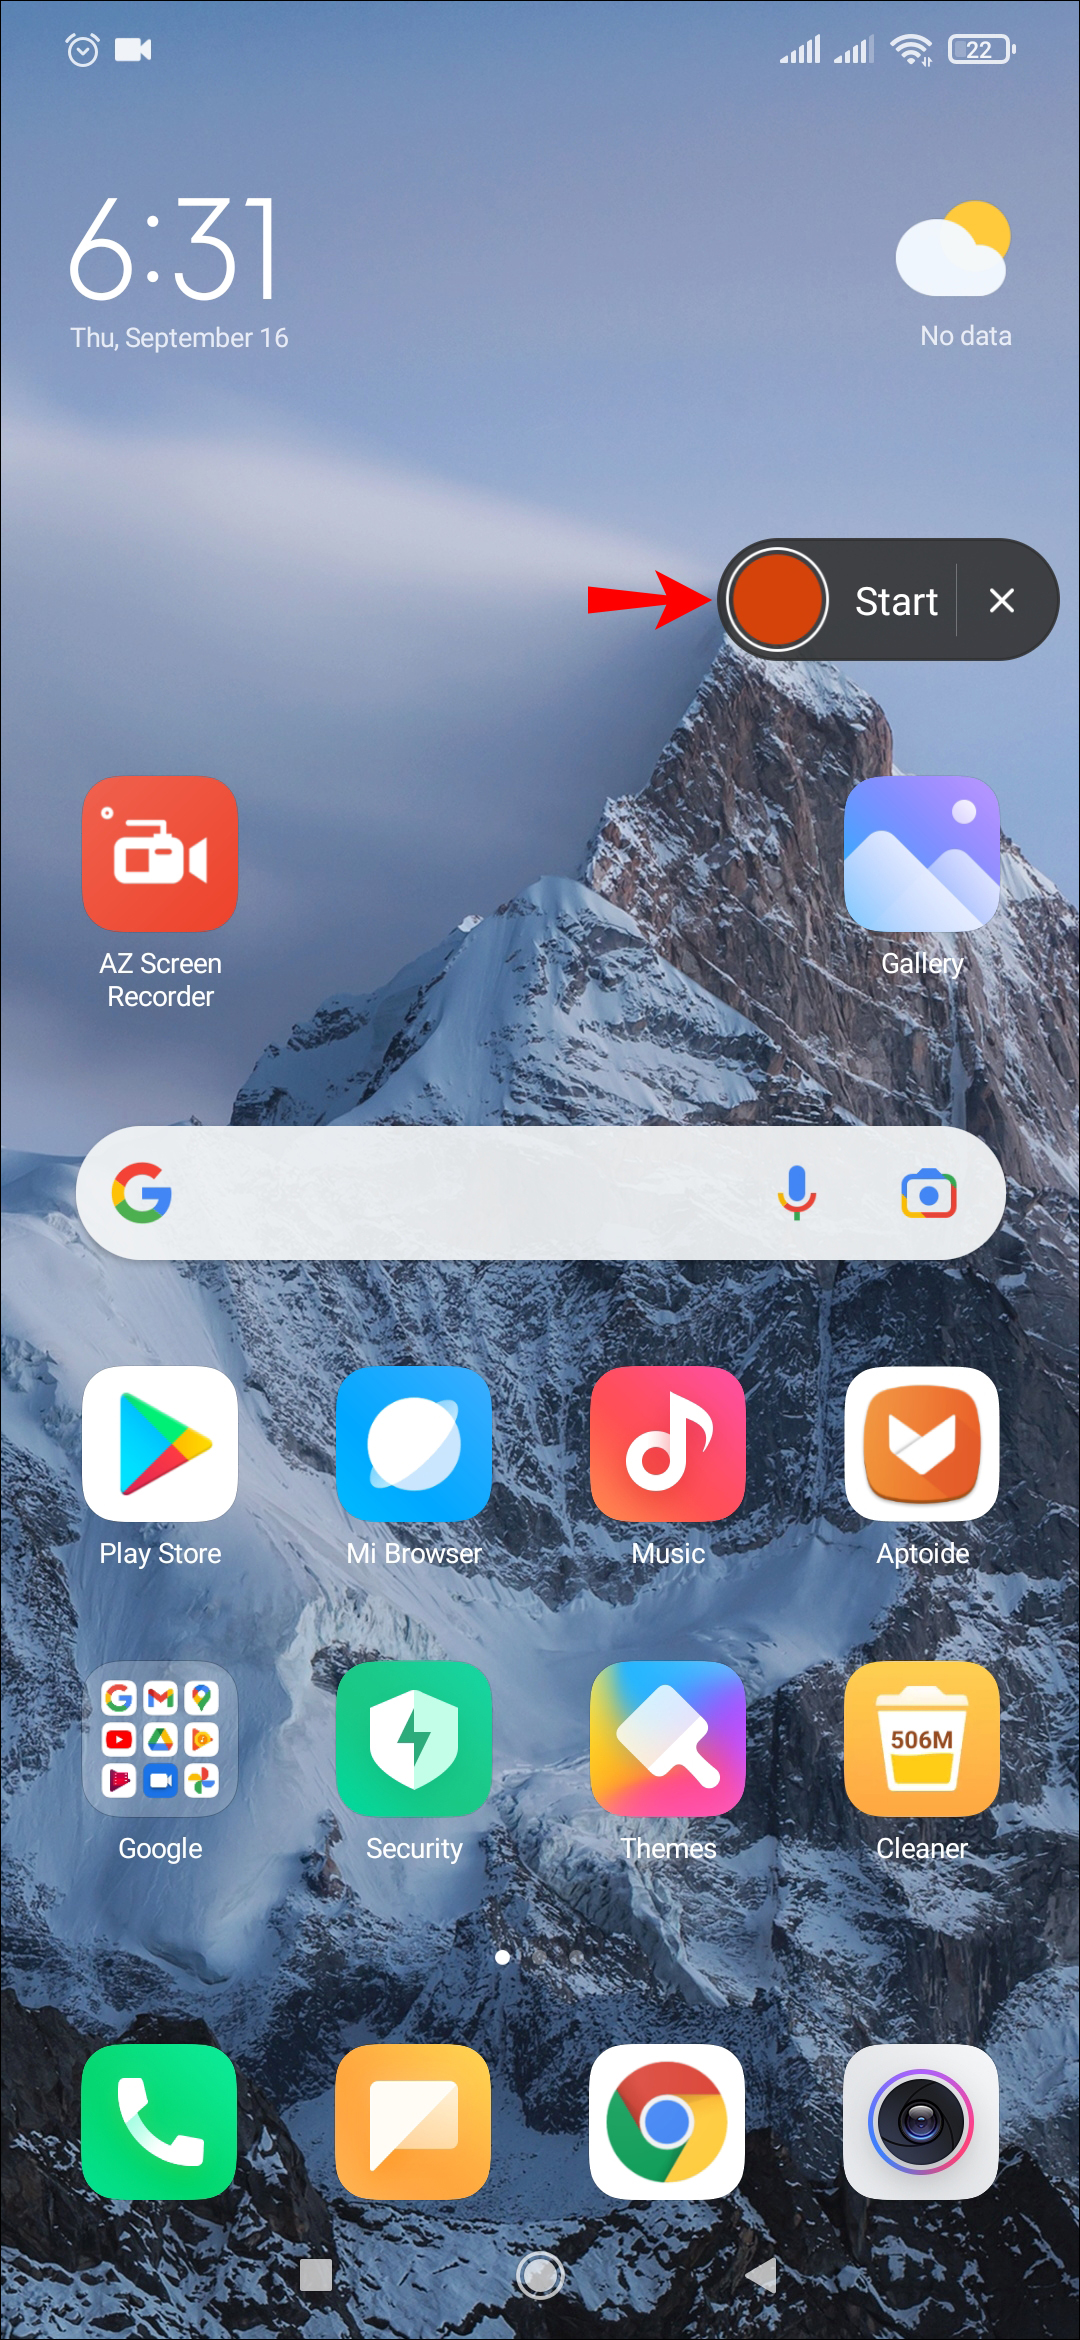
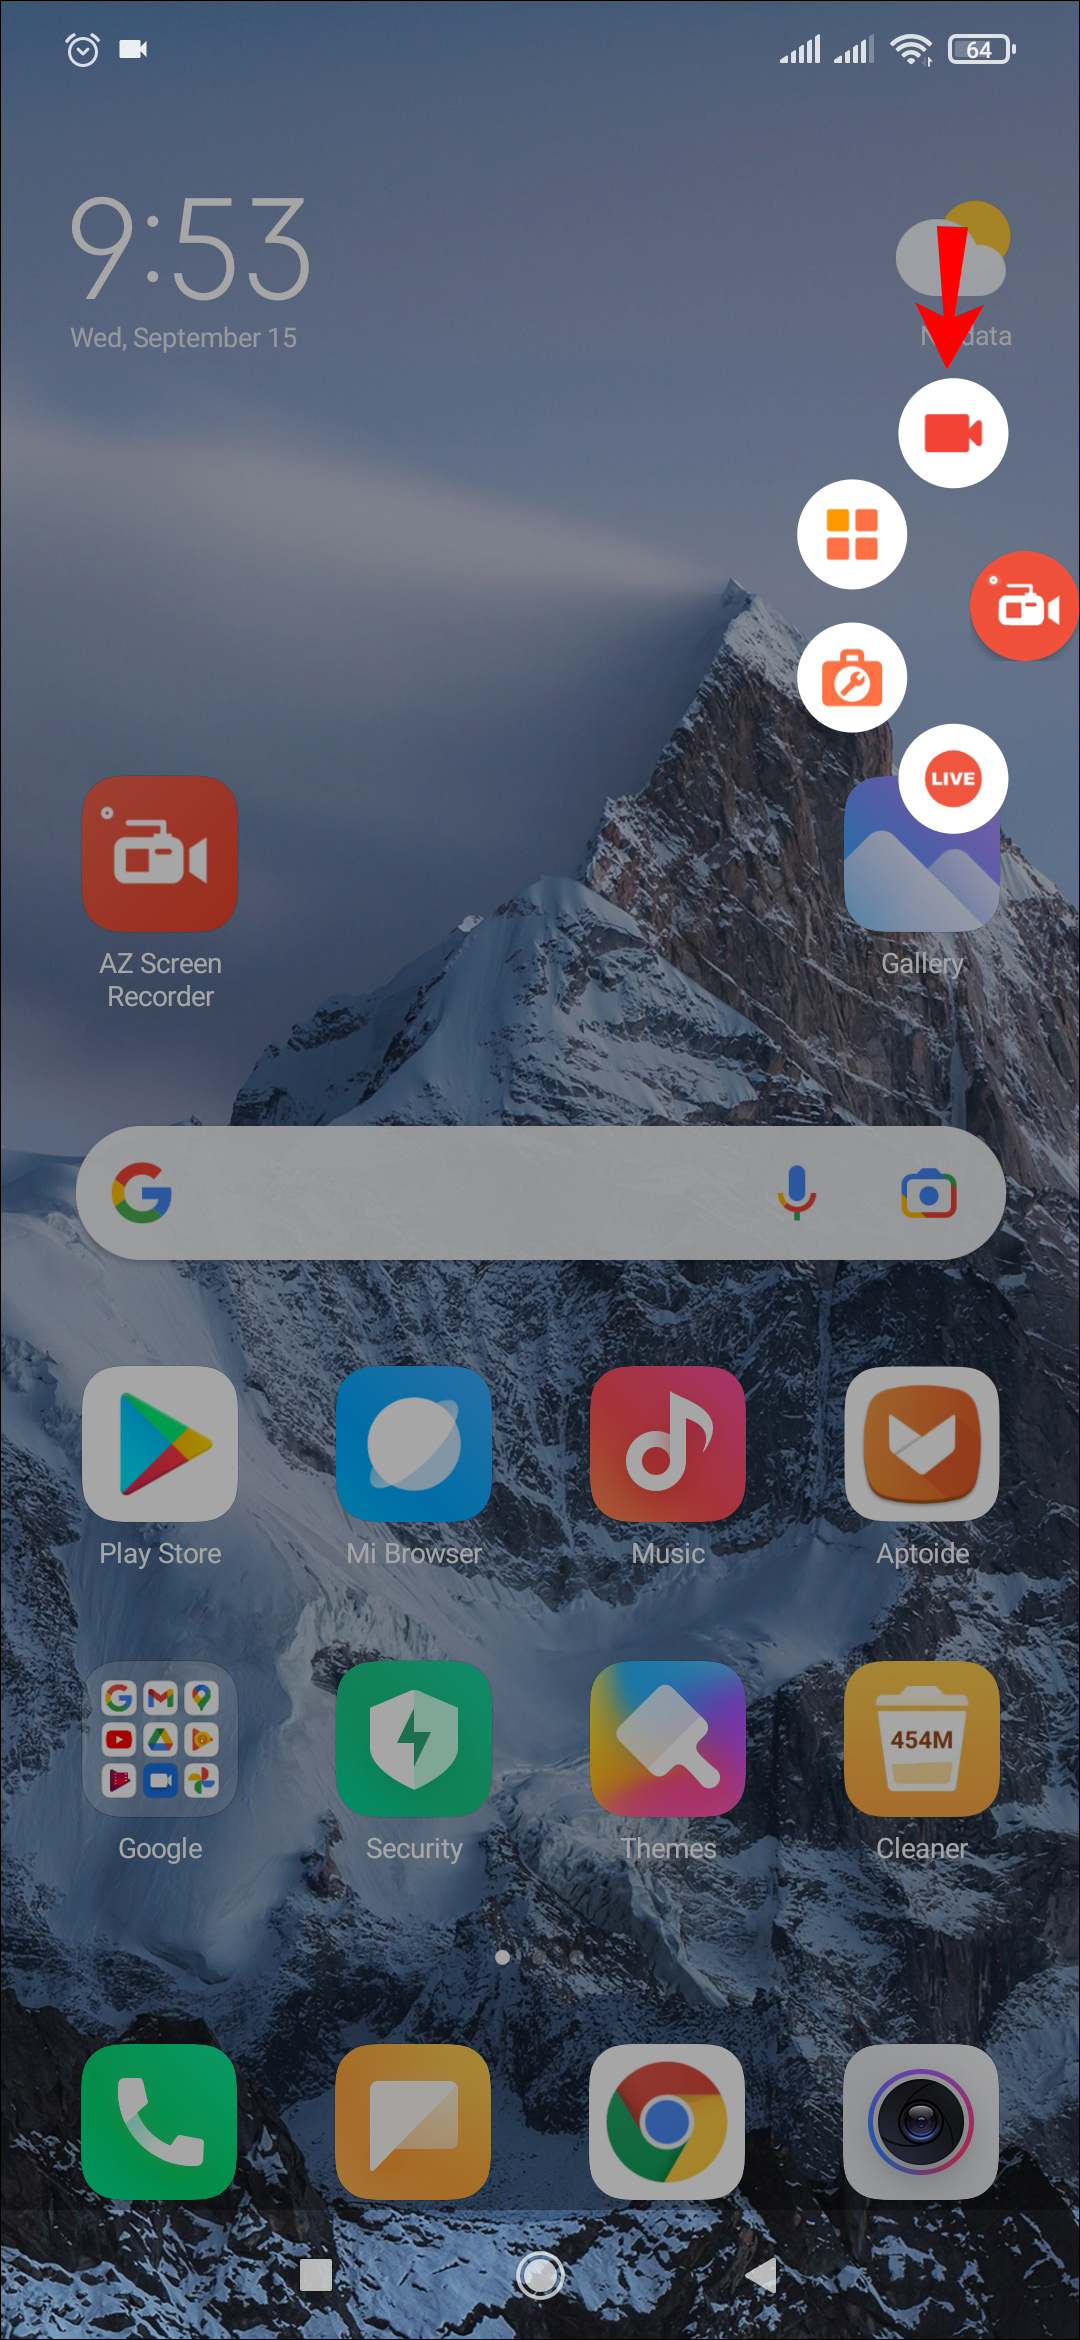
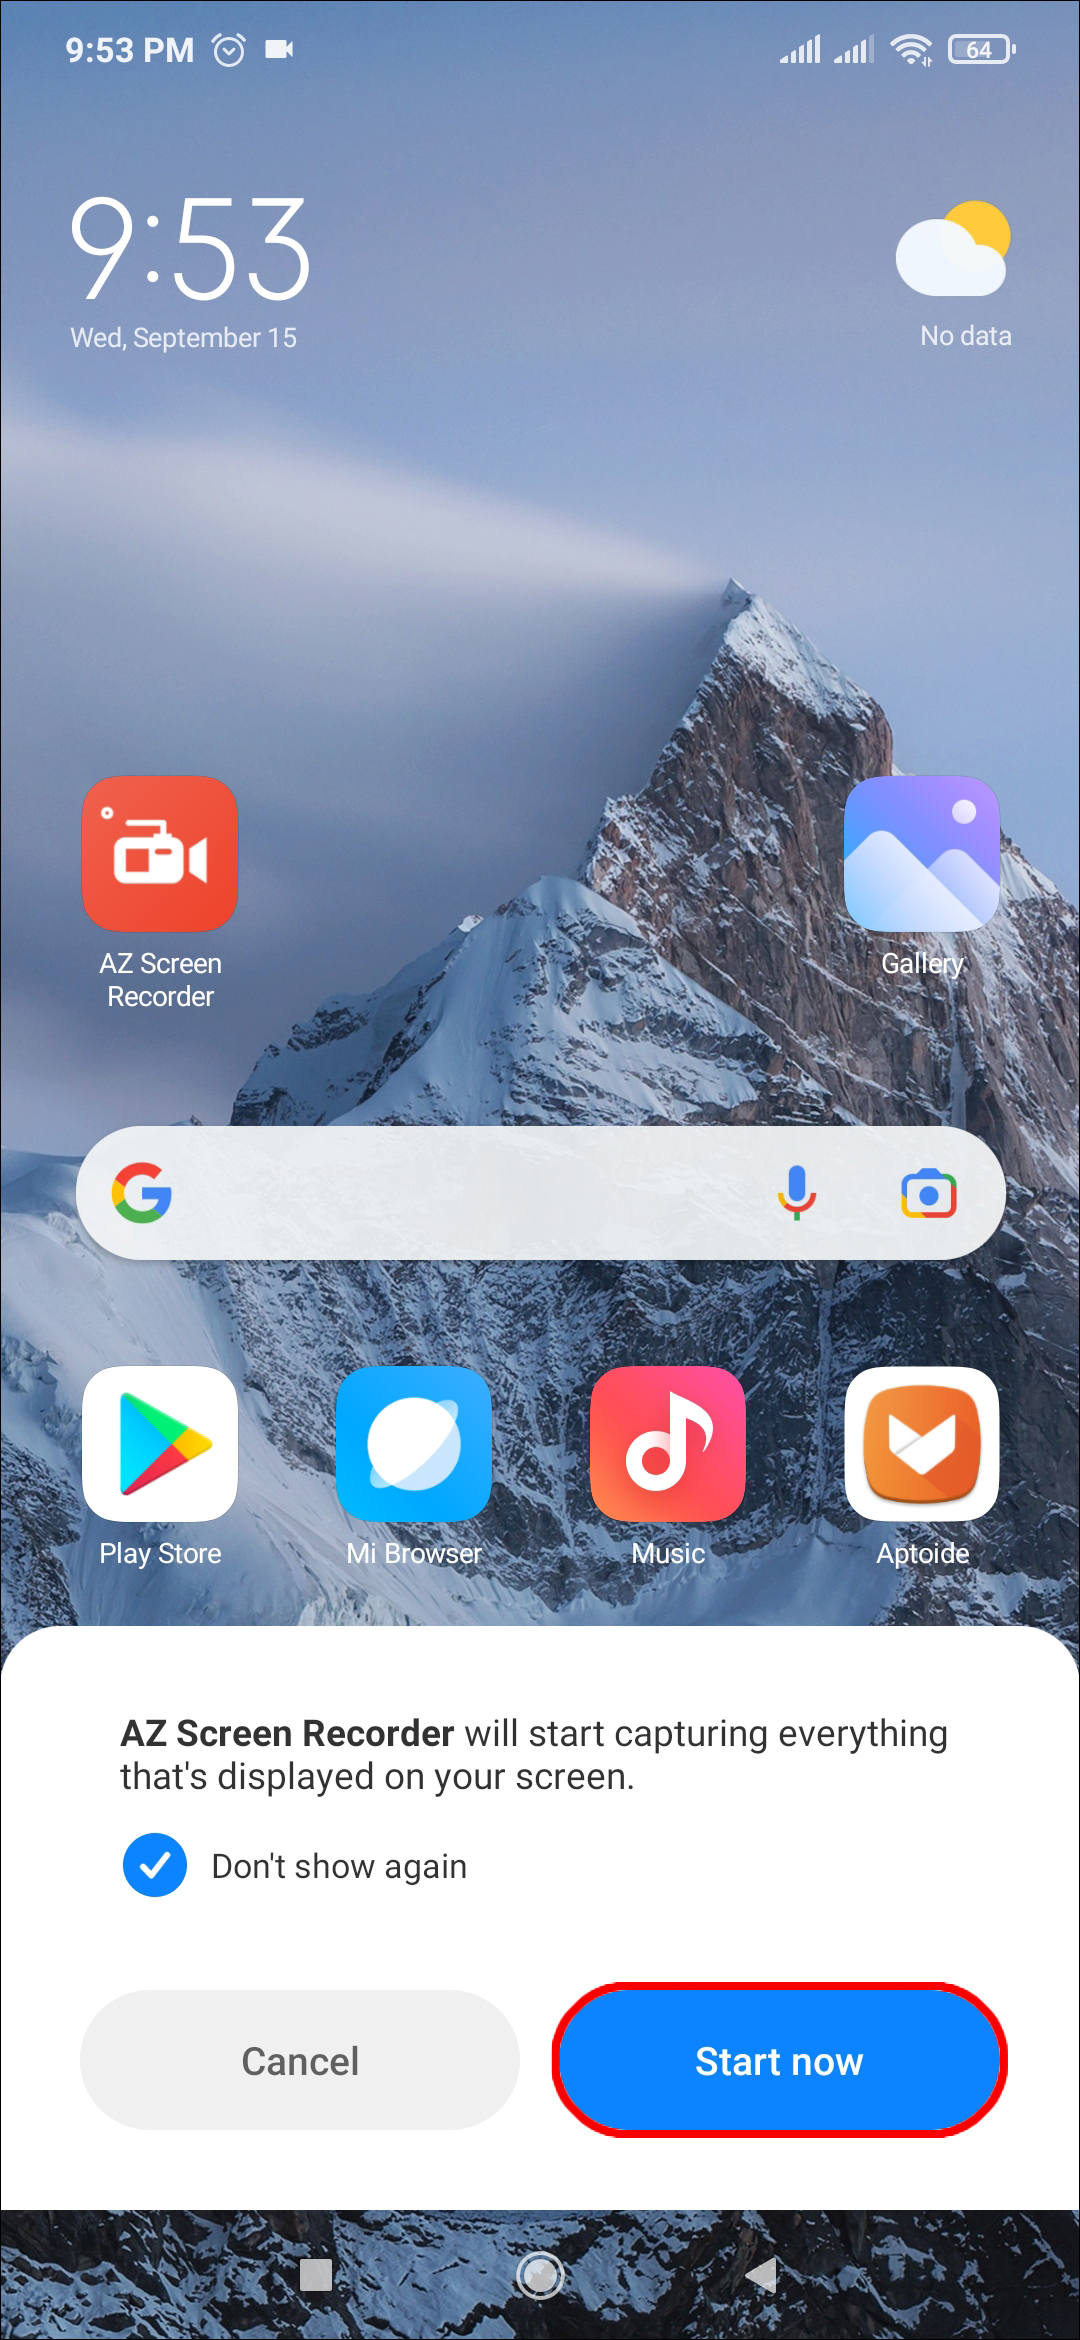
- A series of icons will appear on your screen, one red, and five smaller white icons. Tap the white icon with the red camera depicted inside it.
- Press “Start Now.” You are now recording your screen.
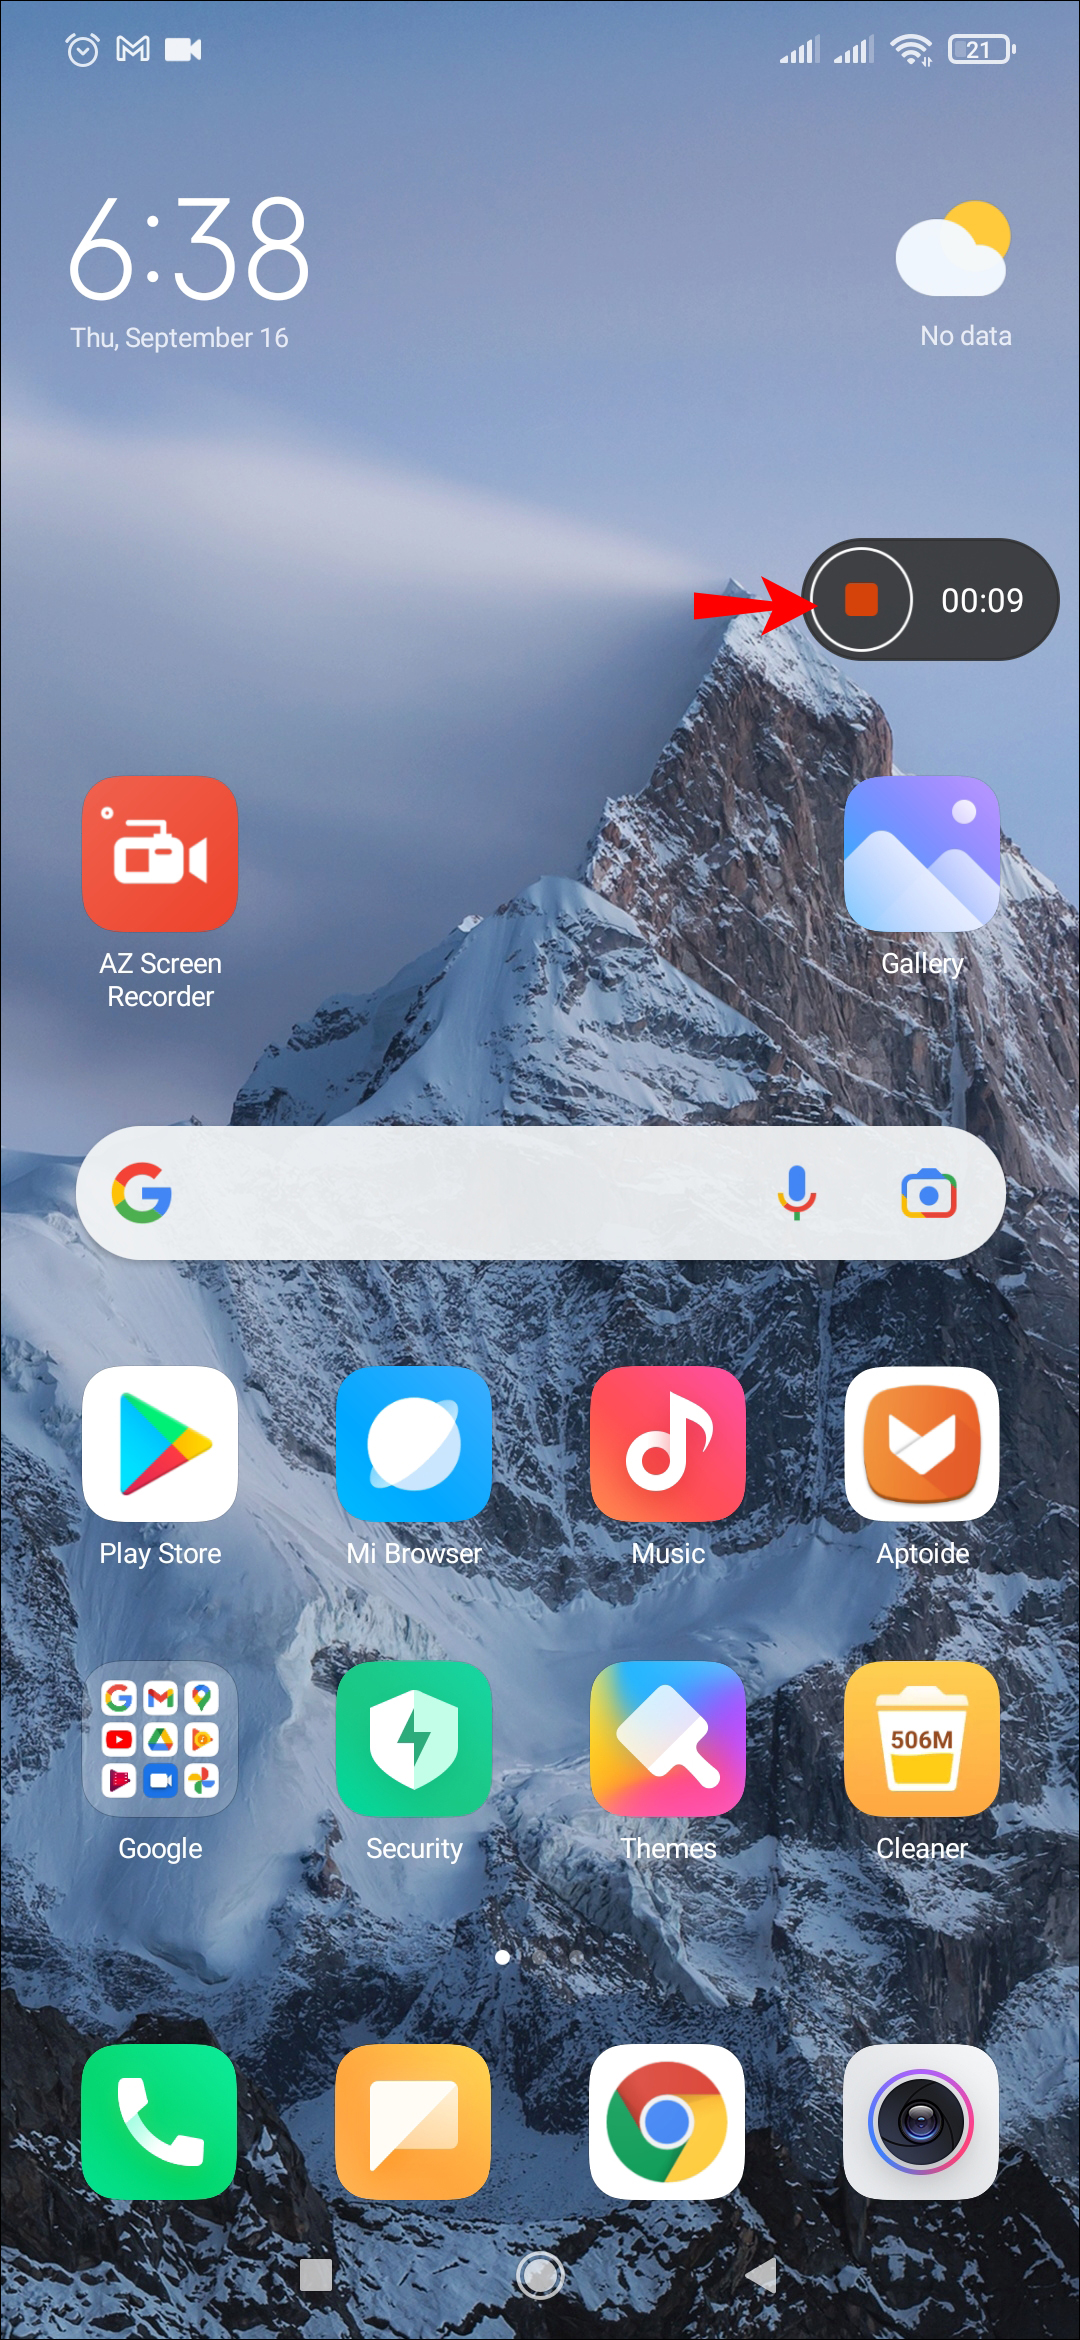
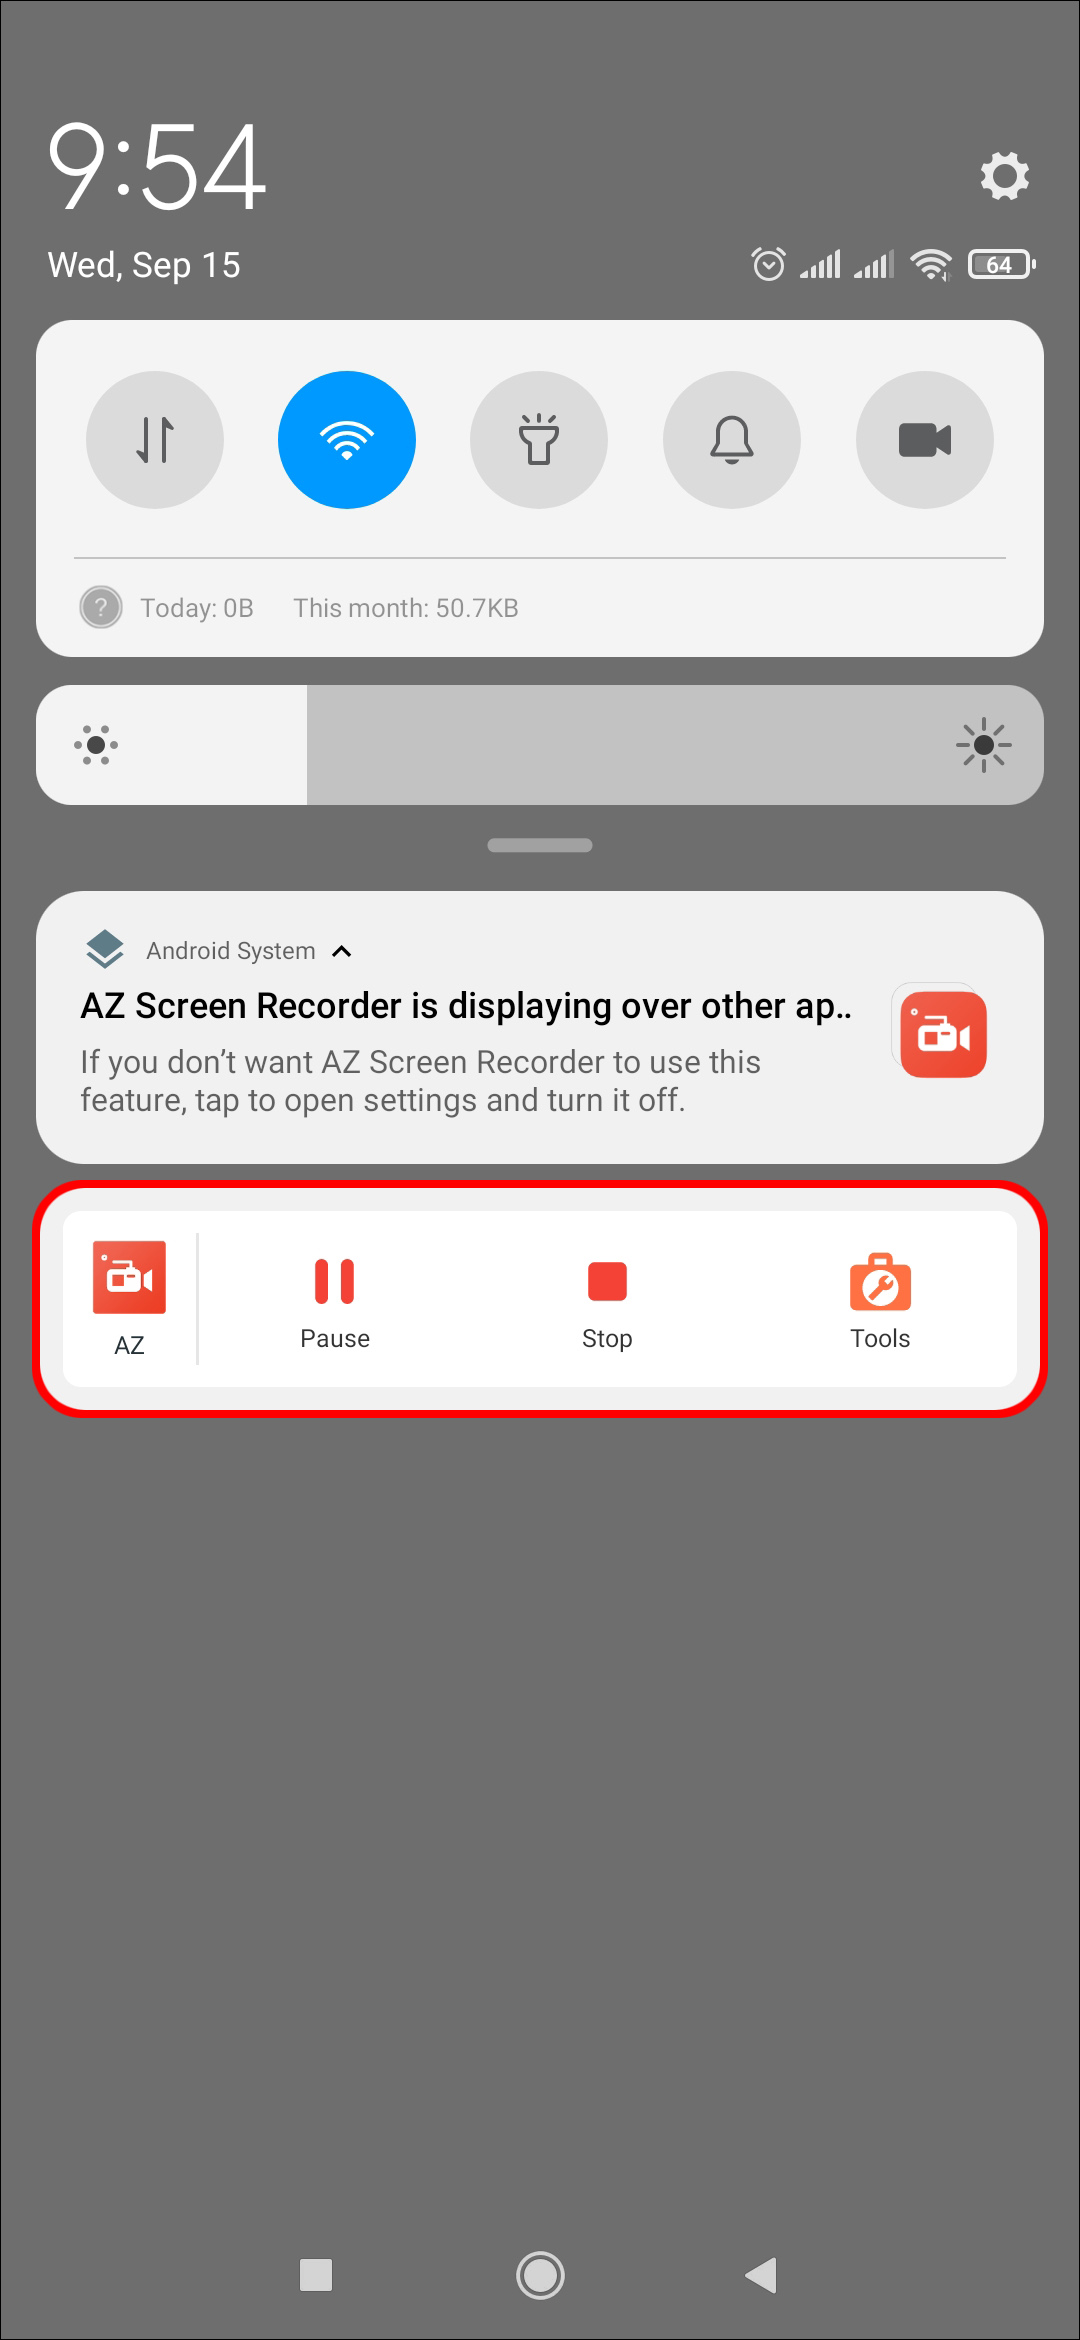
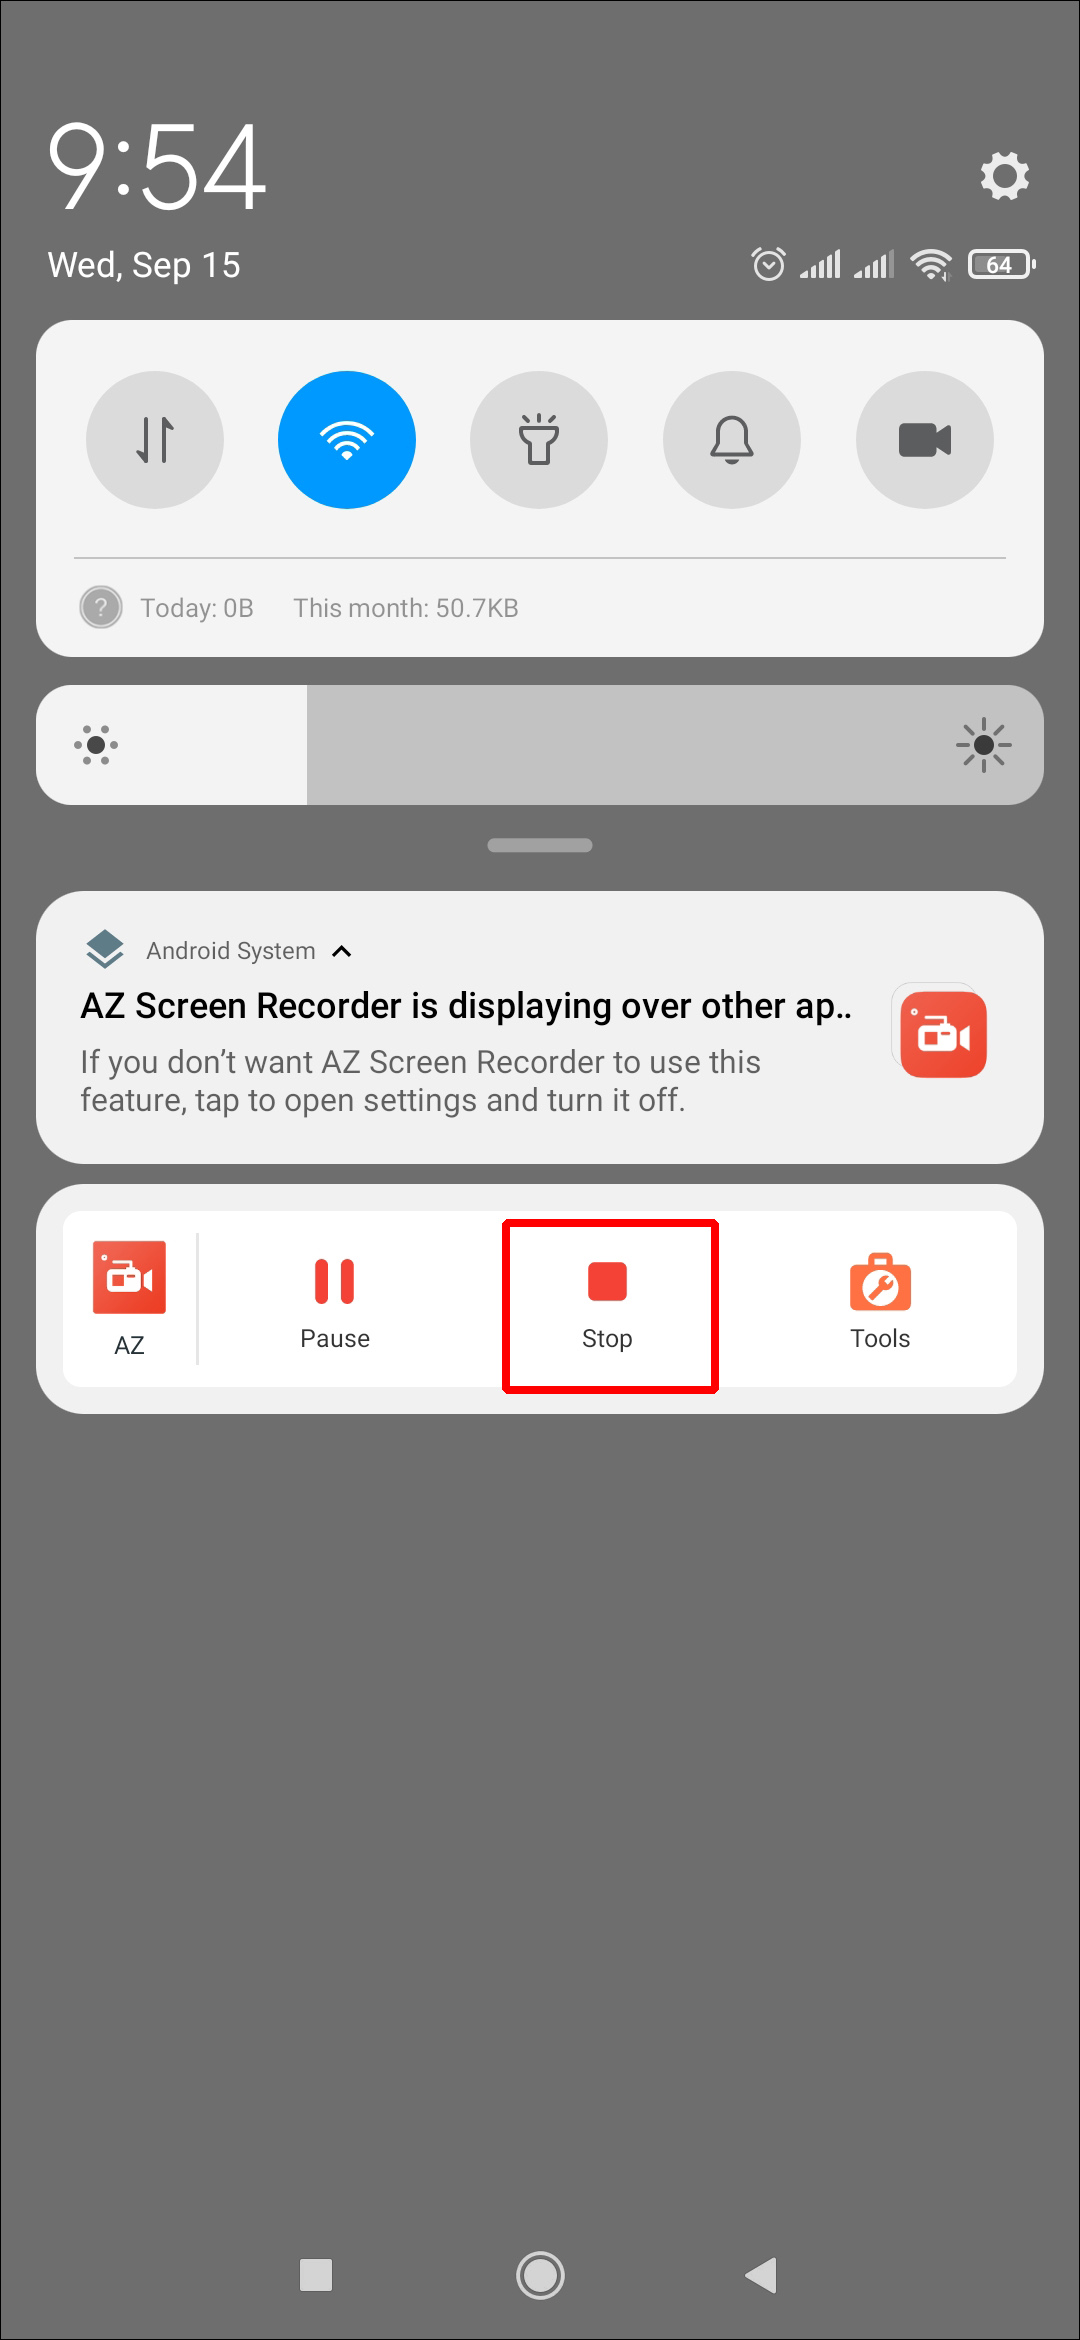
- When you are finished recording, swipe down from the top of the screen. A small AZ Recorder menu bar will become visible. Tap the two vertical lines to pause or the square icon to stop recording.
- Your video will save to your gallery once you click “Stop.”

Recording Using XRecorder
XRecorder is another Screen Recording app you can try if AZ Recorder isn’t to your liking. It offers similar functionality, but some people find the interface a little more user-friendly. Download the app free from the Google Play Store, or pay a small fee to remove the in-app ads. Here is how to use XRecorder to record your screen:
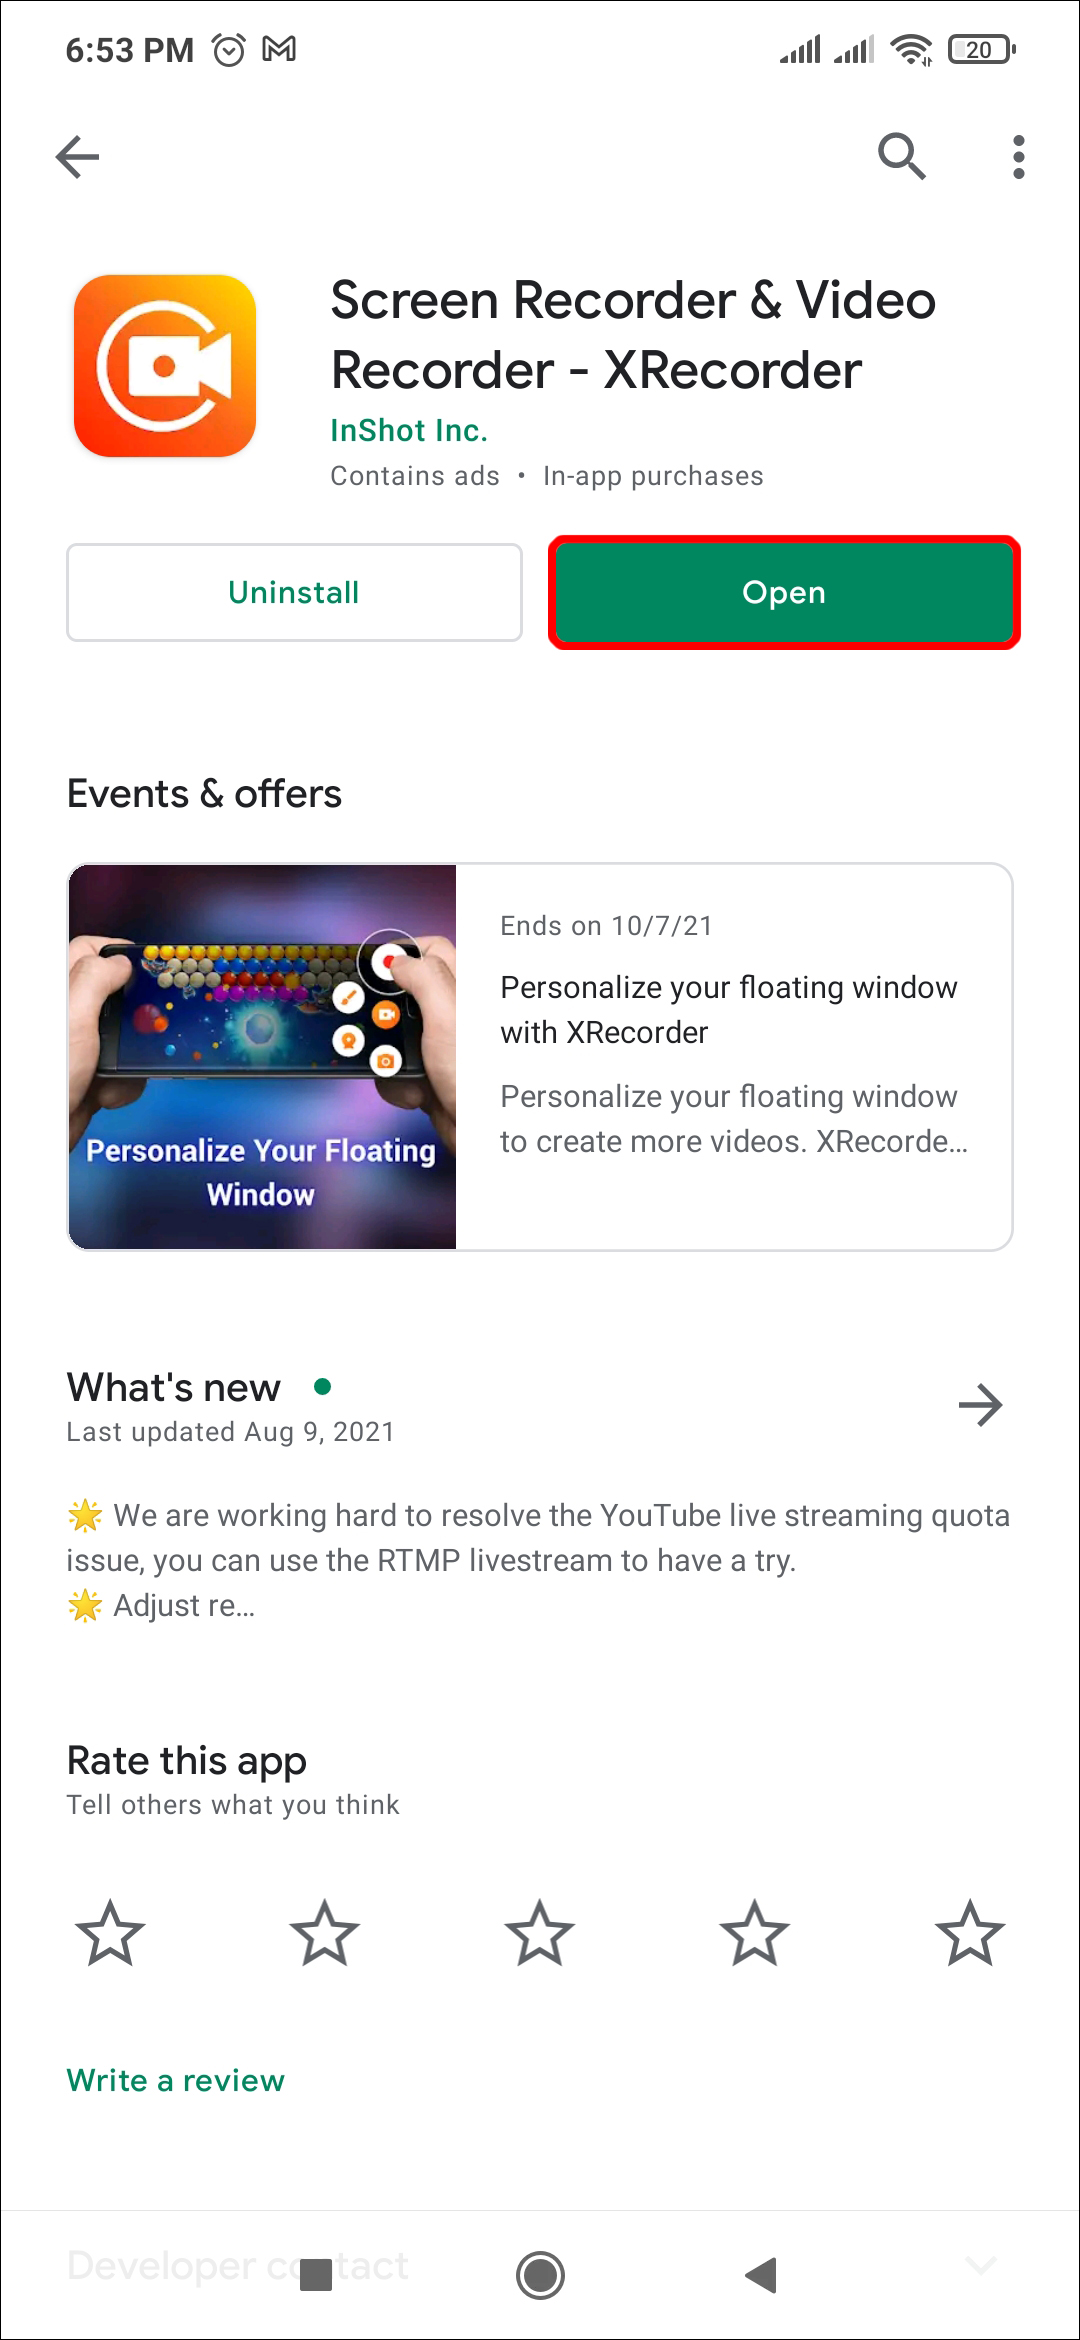
- Download the app from Google Play Store and install it. Once installed, launch the app.
- At the bottom of the screen, click on “Video” and then hit “Record” to start recording your screen.
- Pulling down the “Notification Shade” at the top of your screen will enable you to pause or stop recording altogether.

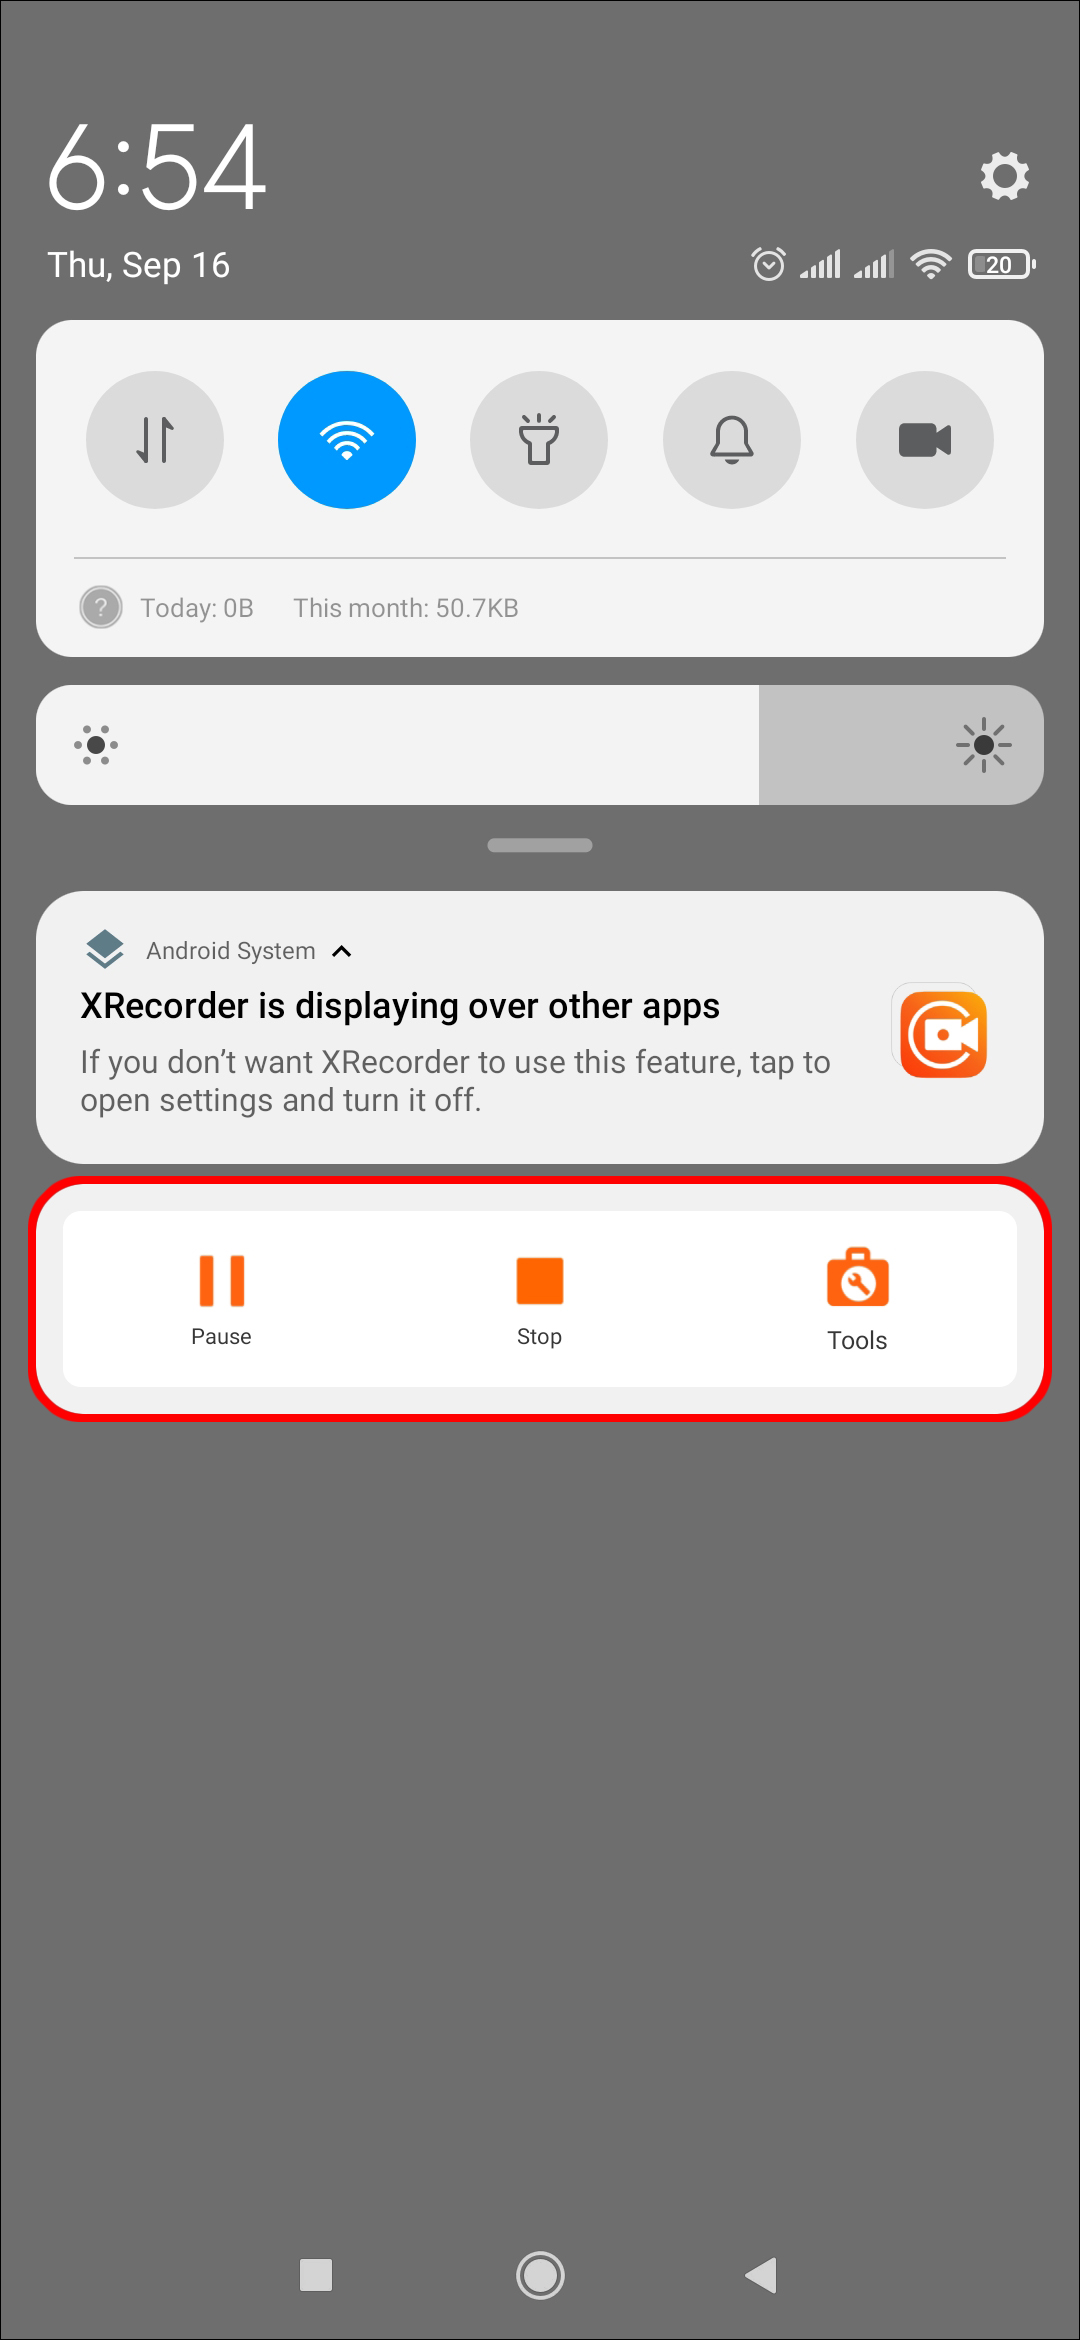
The app also allows you to choose a variety of settings, including enabling or disabling audio and changing the orientation of the recording. You can also use XRecorder to take screenshots.
Recording Using Google Play Games
As a gamer, you may want to record your screen while playing a game, which you can later upload to YouTube. Google Play Games is a free app designed specifically for this purpose. While the app can only record in 420p or 720p, it allows you to add in any video captured from your front-facing camera. Here’s how to use Google Play Games to record your Android screen:
- Download Google Play Games from the Google Play Store and install it on your Android device.
- Open the app and select the game you want to play. (You can choose a pre-installed game or one you have downloaded yourself.) Next, click the game’s thumbnail to view the details and press the “Record” button at the top of the screen.
- You can then select the video quality before tapping “Launch” to begin your game. A moveable video bubble will pop up. This allows you to choose your settings for the video, including your microphone and recording. Move the bubble around the screen to position it where it suits you best.
- Tap the red record button. A three-second timer will play before Google Play Games starts recording your screen. Tapping this same button will stop the recording. You can also swipe the floating bubble over the “X” in the center of the screen to end the recording.


Frequently Asked Questions
Here are the answers to more of your questions about screen recording on an Android phone.
Where do my recordings save?
Depending on your device’s settings and the method you used to screen record, your finished product is typically found in your phone’s Gallery or Photo app. Most Android 10 or newer models have a specific folder labled Screen Recordings. But you may find it in screenshots or another folder.
What is the difference between a screen recording and a screen shot?
A screenshot is simply a still image. A screen recording is video footage of your screen. While the former is helpful for saving pictures, recipes, websites, etc., the latter is a great tool for saving videos, making tutorials, etc.
Recording Complete
Recording the screen on your Android device is relatively straightforward once you have the correct steps to follow. Whether you use a built-in app on a newer Android device or you download a third-party app, you will soon get the hang of it.
The only thing you’ll need to worry about is what recording you upload to YouTube!
Have you recorded your Android screen using a built-in or third-party app? Did you use a method similar to those shown in this guide? Let us know in the comments section below.
Disclaimer: Some pages on this site may include an affiliate link. This does not effect our editorial in any way.