There may be many reasons why you’d want to prevent other users from accessing particular apps on a computer using Windows 10. For instance, knowing how to restrict app access can be especially useful if you share your computer with family members or coworkers.
Whether you want to restrict app permissions or block app access entirely, there are a few ways to do it. In this article, we’ll show you how to restrict access to apps in Windows 10. We’ll also go through the process of restricting internet access to specific apps in Windows 10.
How to Restrict Access to Specific Apps in Windows 10
You don’t need to download a third-party app to limit access to a specific app in Windows 10. You can do it within the system’s settings. This is what you need to do:
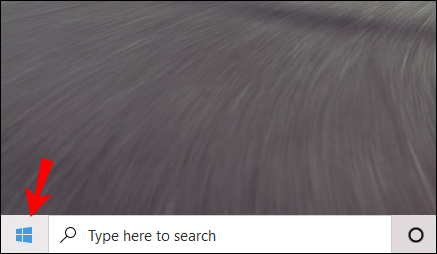
- Go to “Start” in the bottom-left corner of your screen.
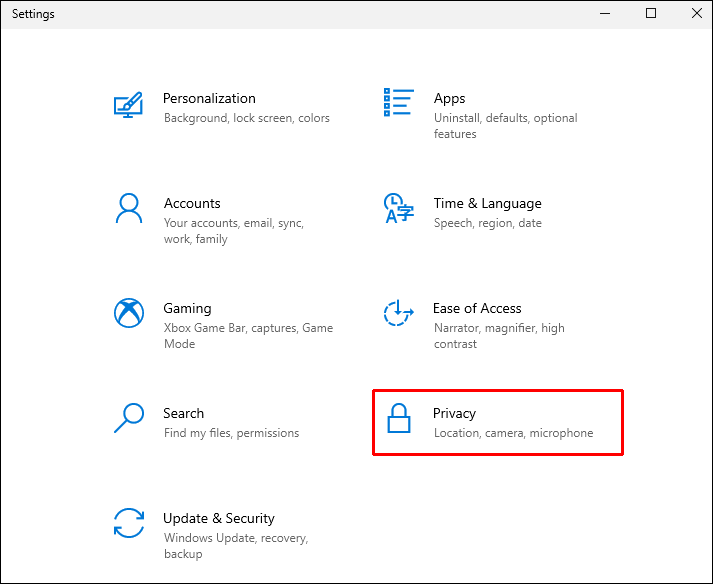
- Click on the Settings icon on the left sidebar.

- Scroll down until you find “Privacy.”
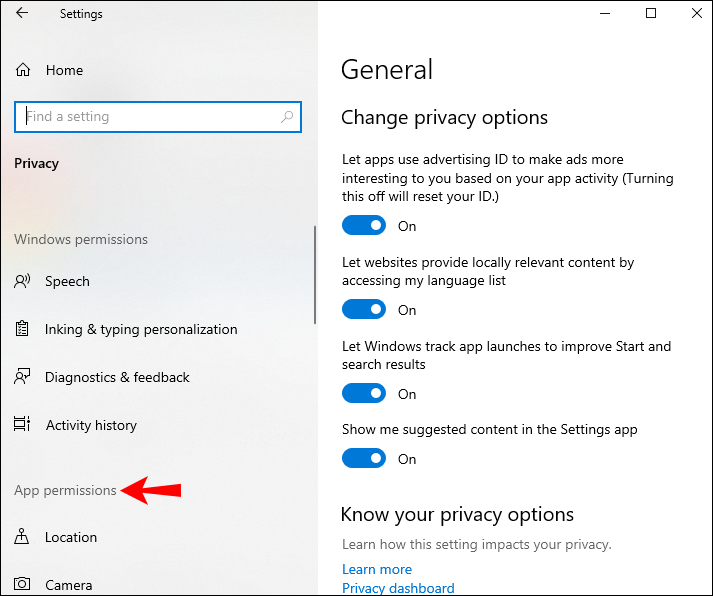
- Go to “App Permissions” on the left sidebar.
- Scroll down until you find the app you want to restrict access to. As an example, we’ll use the “Camera” app.
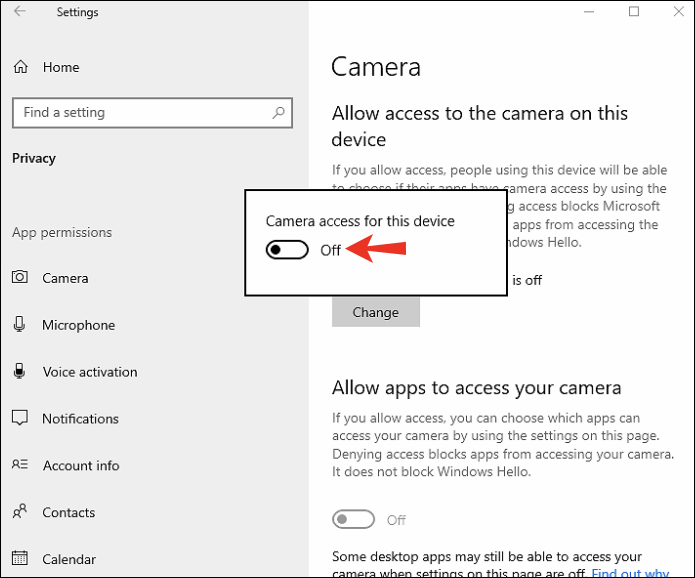
- Under “Allow access to the camera on this device,” click on “Change.”
- Toggle the switch to “Off.”
- Under “Allow apps to access your camera,” toggle the switch.


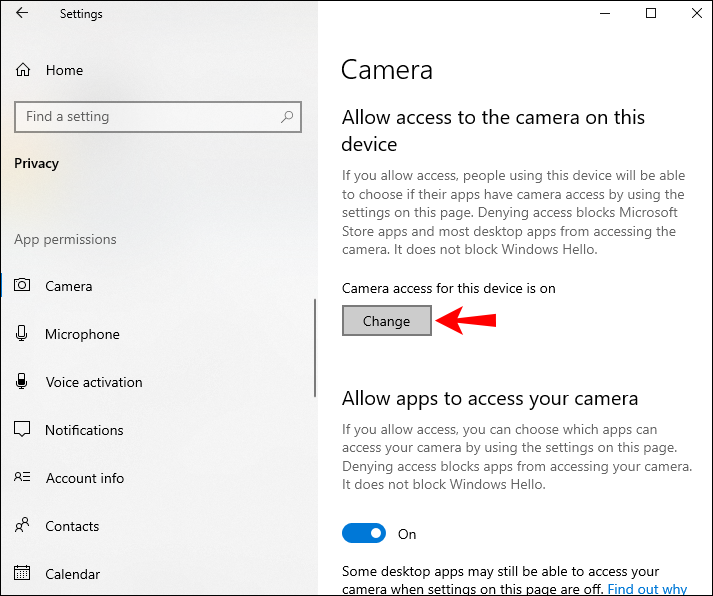
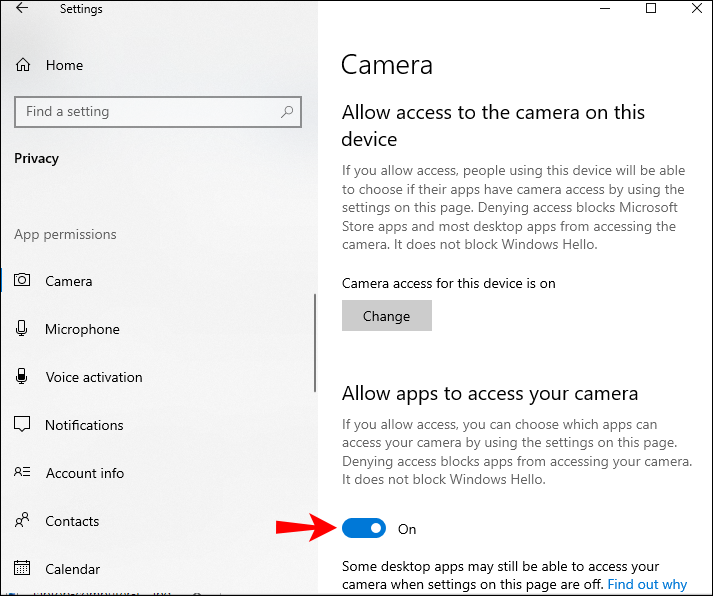
To go a step further, you can choose to block desktop apps from using your camera, and you can also select which Microsoft Store apps can have access to your camera.
Also, keep in mind that apps that have permission to use all system resources won’t be listed in the Privacy settings. Instead, you can only restrict specific permissions for the apps that are listed. Although, you’ll notice that the desktop apps are all there in the Privacy settings.
Every app has access to different types of files, and you can adjust them manually. Once you’re done, just turn off the Privacy window. The next time you try to launch the app you restricted access to, you’ll notice that your access has been limited.
Restrict Access to Apps via Group Policy Editor
Another way to restrict access to apps is with the Group Policy Editor. However, this method is only possible if you have Windows 10 Pro or Enterprise. This is how it’s done:
- Go to the magnifying glass icon in the bottom-left corner of the screen.
- Type in “
Run” to open the Run app. - In the search box, type in “
gpedit.msc,” and select “OK.” - Click on “User Configuration” on the left sidebar.
- Proceed to the “Administrative Templates” folder.
- Go to the “System” folder.
- Locate the “Don’t run specified Windows applications” file on the right pane.
- Double-click on it. This will open a new window.
- On the left side of the window, check the “Enabled” circle.
- Under “Options,” go to “Show.”
- Type in the name of the app you want to restrict access to. Don’t forget to add the “
.exe” extension after the name of the app. - Go to the “Apply” button.
- Choose “OK.”
Once you close the Group Policy Editor, access to that app should already be limited. If not, restart your computer.
If you change your mind, you can remove the limitations by repeating the same steps until step nine. Instead of “Enabled,” click on “Not Configured.”
Restrict Access to Apps by Editing the Registry
Editing the Registry is another way to restrict access to your apps. When using the Registry, you should always be careful that you don’t lose any data in the process. That’s why it’s always a good idea to back up all your files and keep a copy of them in a safe place. The backup will also come in handy if you change your mind and you wish to restore access to your apps.
To restrict access to an app using the Registry Editor, follow the steps below:
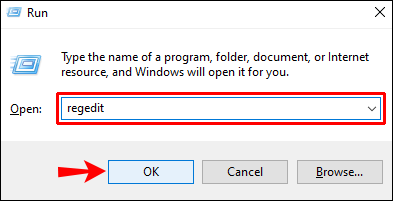
- Search for the Run app, or press the Windows key and the “R” key at once.
- Type in “
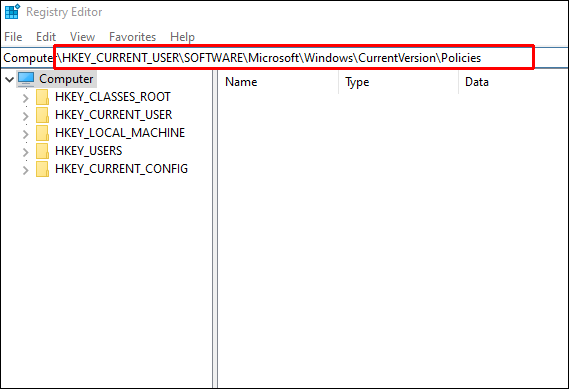
regedit” in the search bar and click on “OK.” This will open the Registry Editor. - Copy this key:
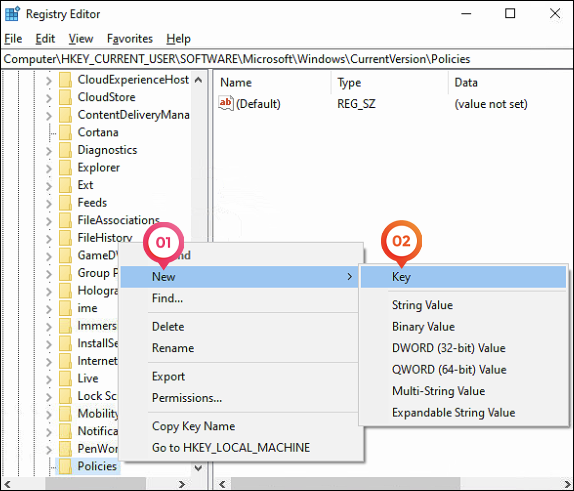
“\HKEY_CURRENT_USER\SOFTWARE\Microsoft\Windows\CurrentVersion\Policies” - Paste it into the Registry. This will take you to the “Policies” folder.
- Right-click on it, and go to “New,” and then “Key.”
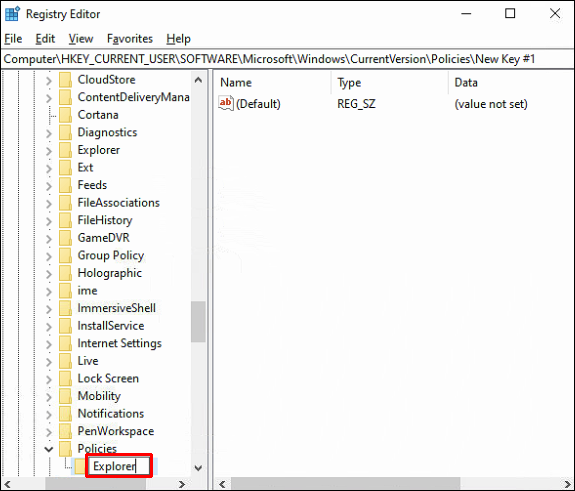
- Type in “
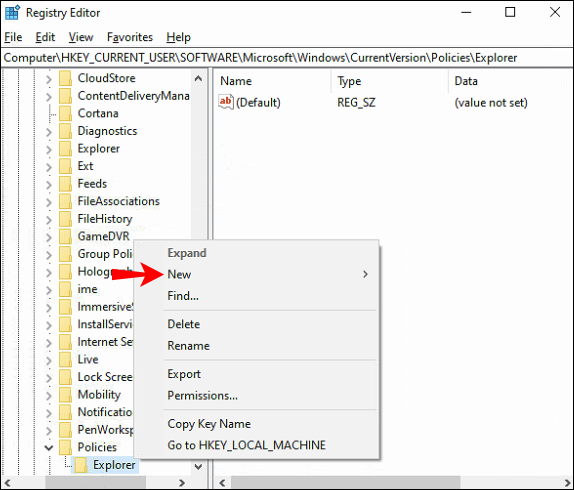
Explorer” for the new key. - Right-click on the “Explorer” folder and choose “New” from the drop-down menu.
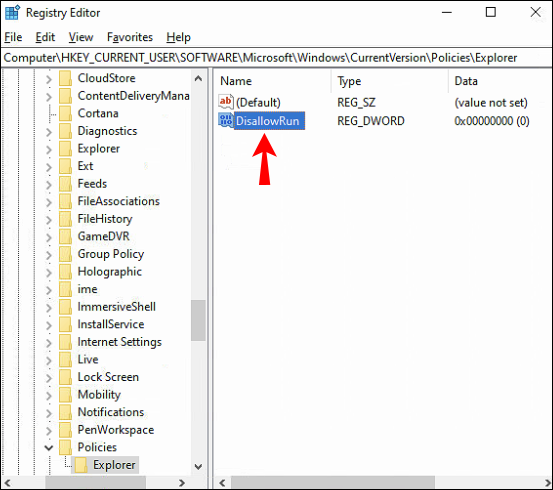
- Select “DWORD (32-bit).”
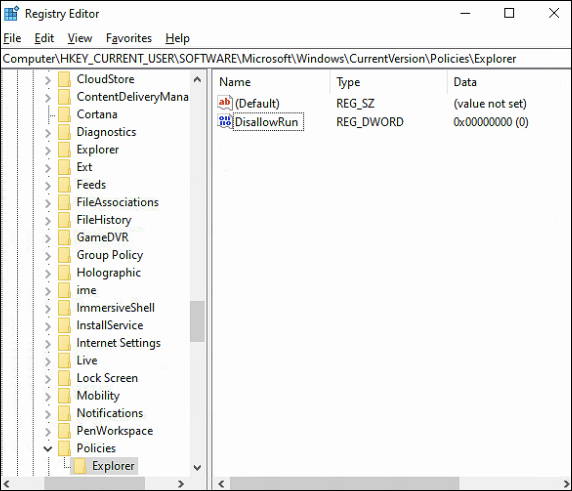
- This value should be named “DisallowRun.”
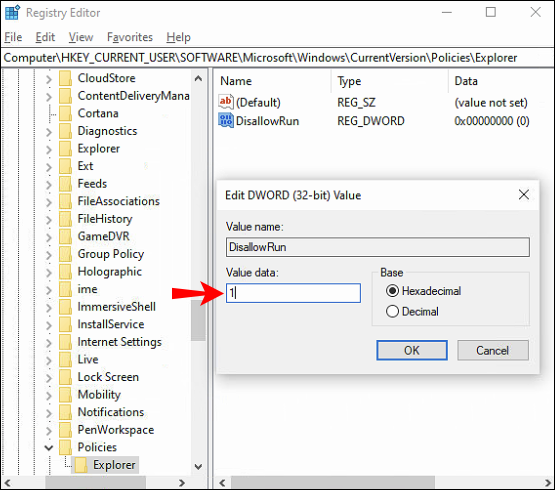
- Double-click on the value. This will take you to the Properties window.
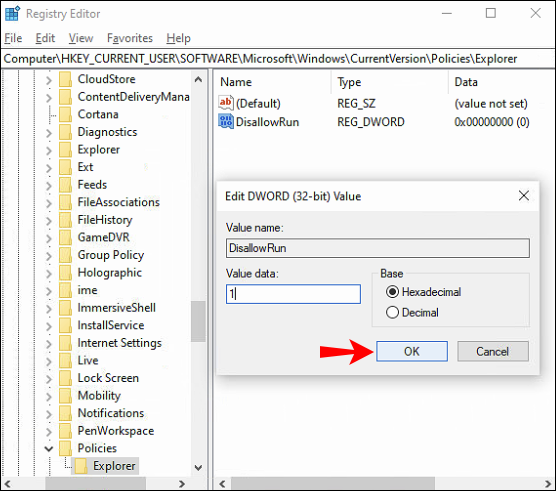
- Under “Value data,” type in “1.”
- Select “OK.”
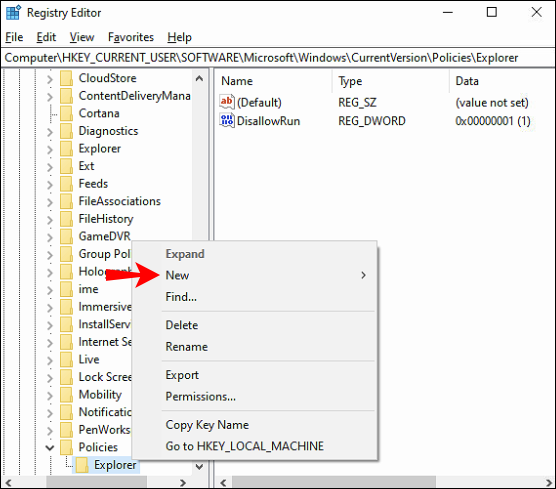
- Go back to the main Registry Editor window.
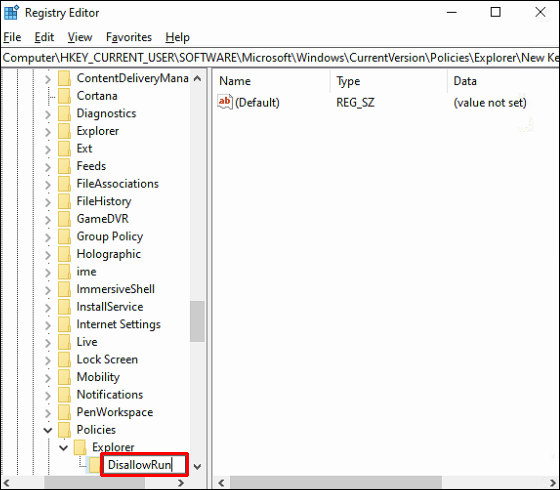
- Right-click on the “Explorer” folder and choose “New.”
- Select “Key.”
- Type in “
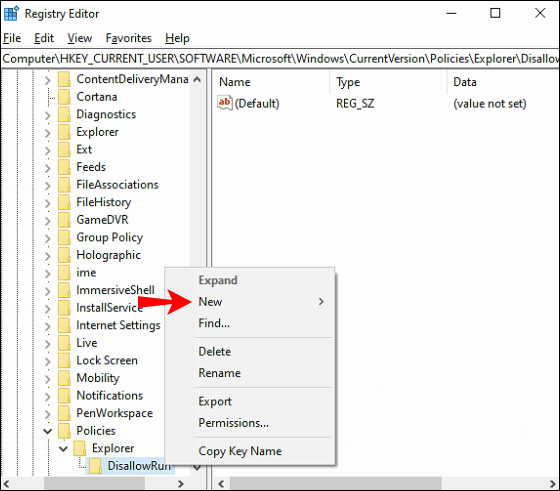
DisallowRun” as the name for the subkey. - Right-Click on the DisallowRun key and select “New” from the drop-down menu.
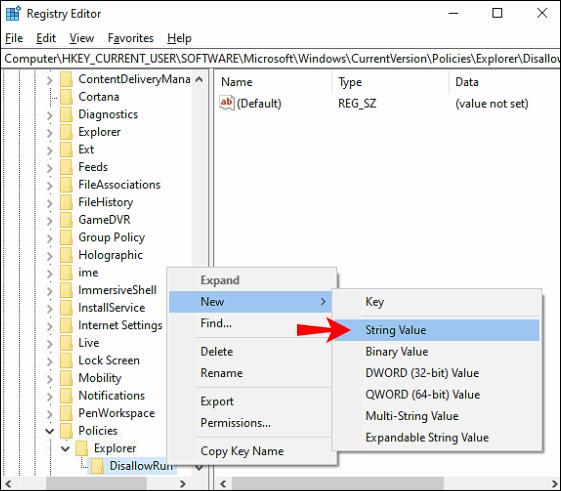
- Choose “String Value.”
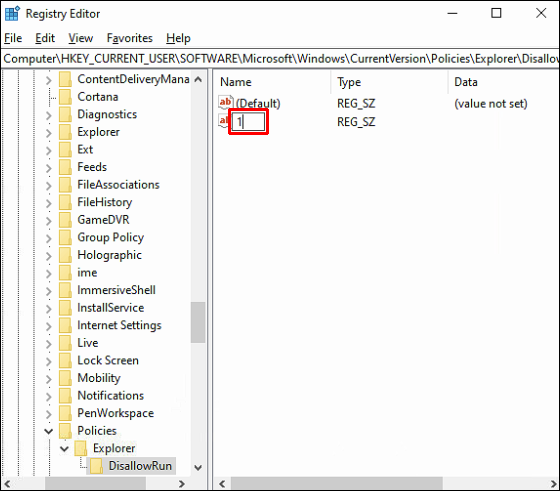
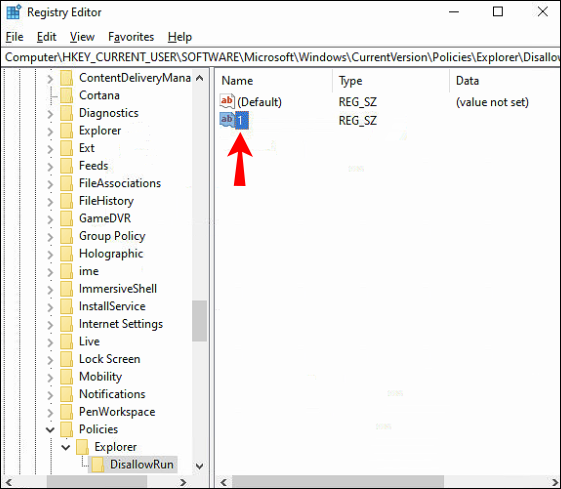
- Enter “
1” for that string value in the Value Data box. Select “OK.” - Double-click on the “1” string value.
- Under “Value Data” in the Properties window, type in the name of the app you want to restrict access to.
- After the name of the app, add the “.exe” and click “OK” when you’re done.


If you want to restrict access to multiple apps, you’ll have to repeat steps 17 to 22 for each of them. For each app, right-click on the DisallowRun key, choose “New,” and then “String Value.” Name the string value for the second app “2,” for the third “3,” and so on.
This method might take up some of your time, but if you do it properly, it will be worth it. When you’re done, you’ll need to restart your device. The next time you try to access one of these apps, you’ll get a restriction message, informing you that your access has been denied.
Keep in mind that if you have more than one user account, and you want to restrict access to apps on all of them, you’ll have to repeat the entire Registry process for all of them.
If you change your mind, there is a way to restore the apps you blocked. You can do this by simply deleting the “Explorer” key in the “Policies” folder. However, do this only if you want to allow access to all the apps you blocked. To do it for an individual app, you’ll need to change the value data from “1” to “0” in the properties dialog.
How to Restrict Internet Access to Specific Apps in Windows 10
There is a simple way to restrict internet access to specific apps in Windows 10, and it’s with the Windows Defender Firewall. Knowing how to do this can be particularly useful when you don’t want certain apps to be automatically updated, or if you don’t want an app to overuse your data. However, you should only restrict internet access to apps that don’t need the internet to function properly. Here’s how it’s done:
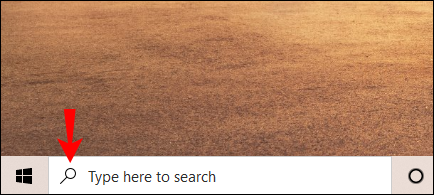
- Go to the magnifying glass icon in the bottom-left corner of the screen.
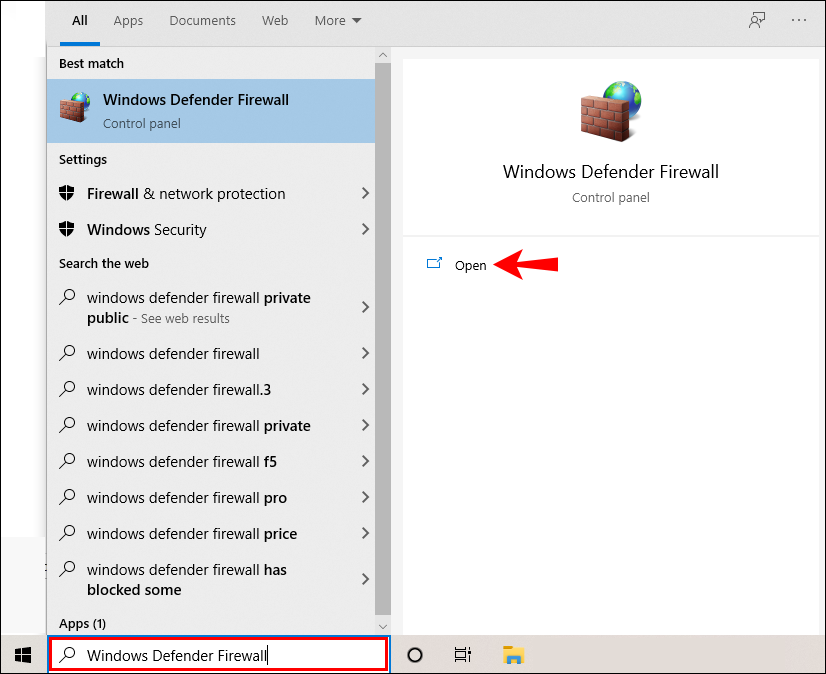
- Type in “
Windows Defender Firewall” and open it. - Proceed to “Advanced Settings” on the left sidebar. This will open a new window.
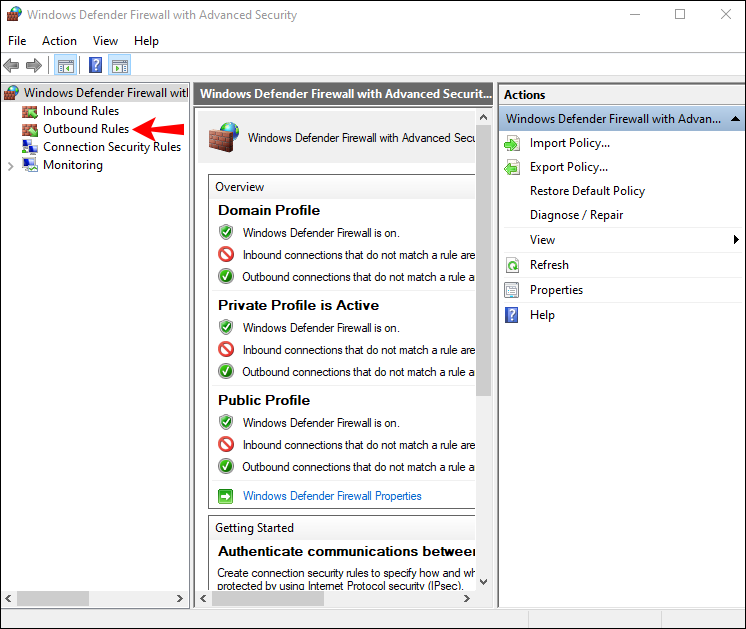
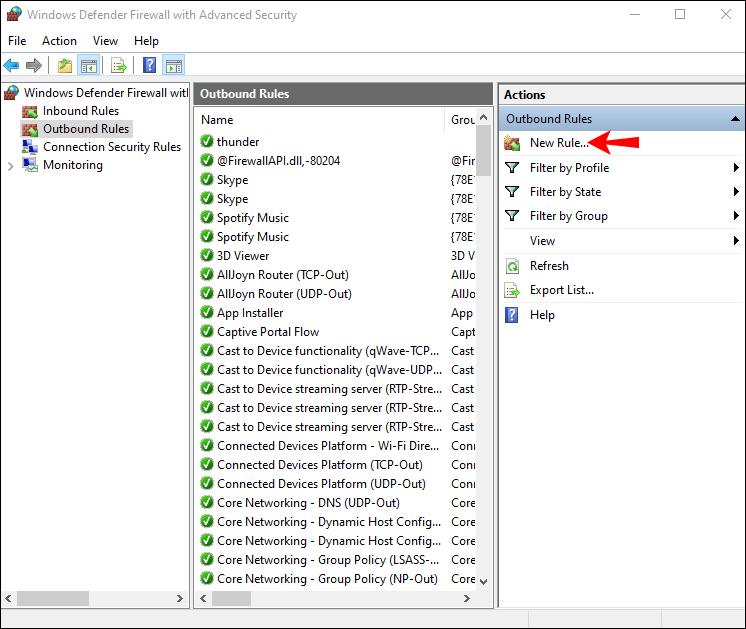
- Select “Outbound Rules” on the left sidebar.
- Go to “New Rule” on the right side of the window.
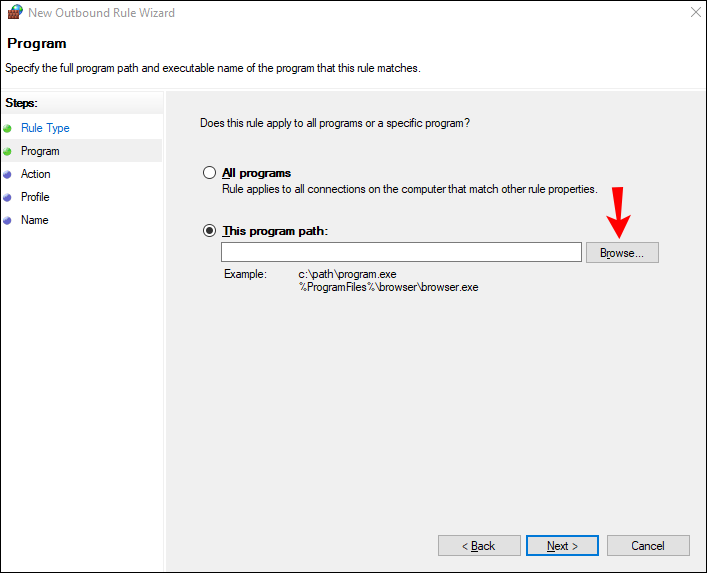
- Choose “Program” on the new window, and then click on “Next.”
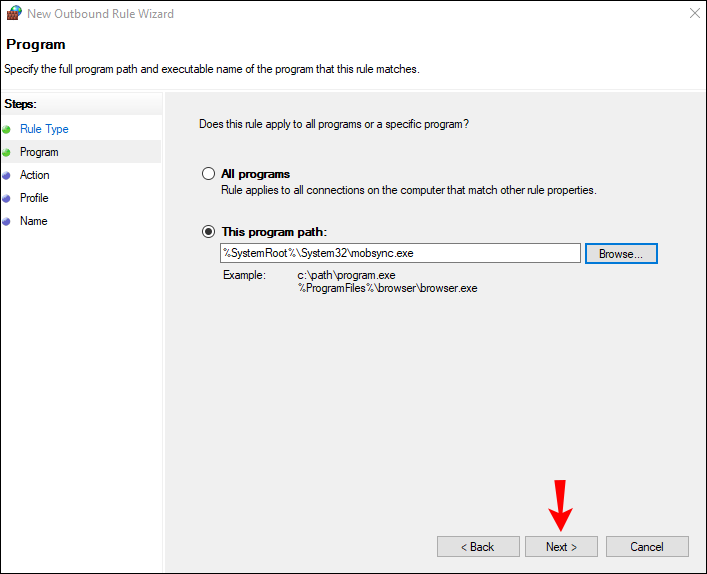
- Next to “This Program Path,” click on the “Browse” button.
- Find the app you want to restrict internet access for.
- Click on “Next” again.
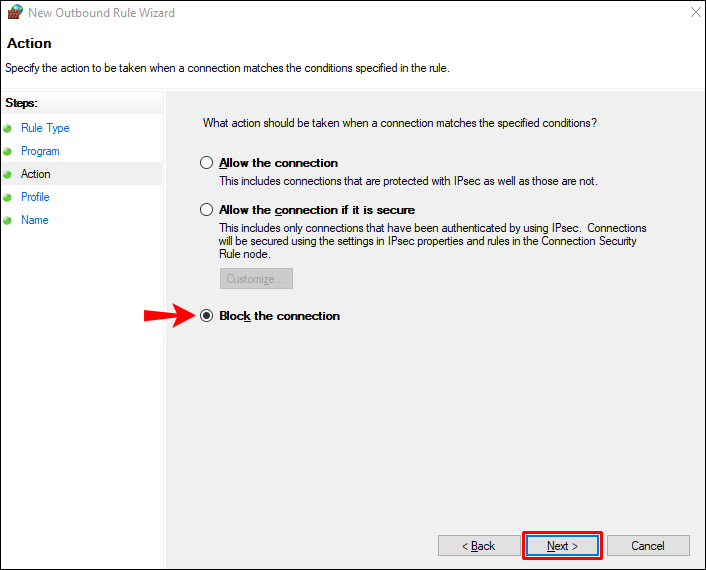
- Click on the “Block the Connection” circle, and then “Next.”
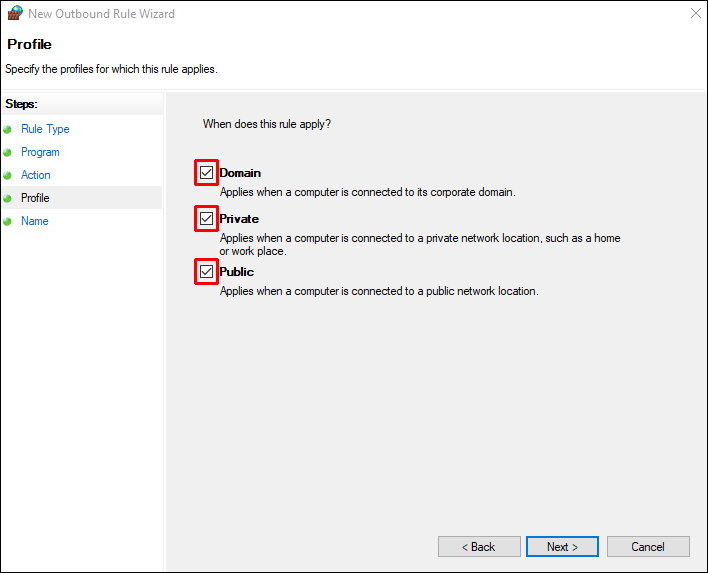
- Check the “Domain,” “Private,” and “Public” boxes.
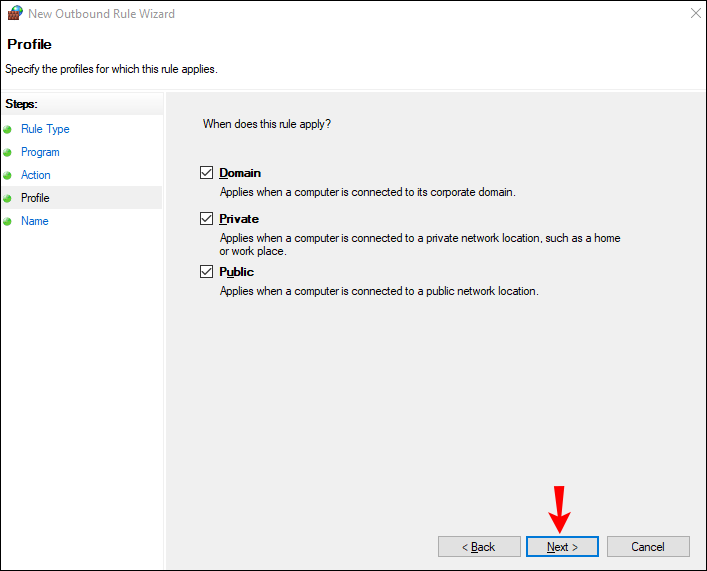
- Go to “Next.”
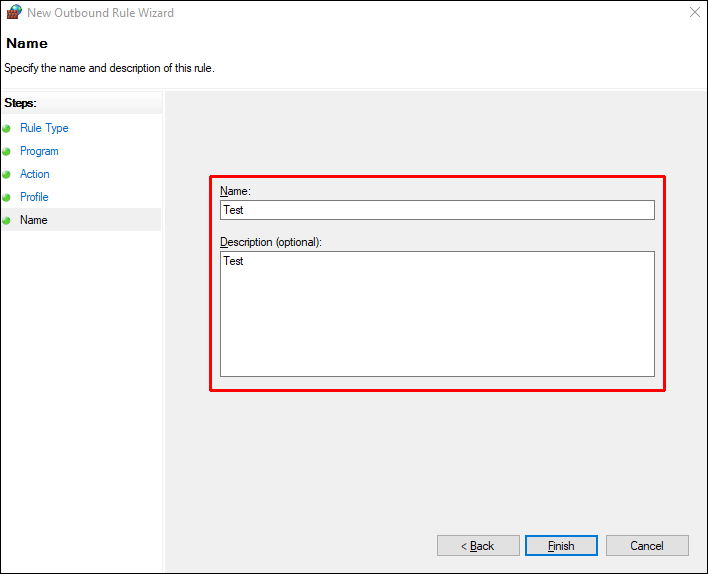
- Type in the name of the rule, as well as a description.
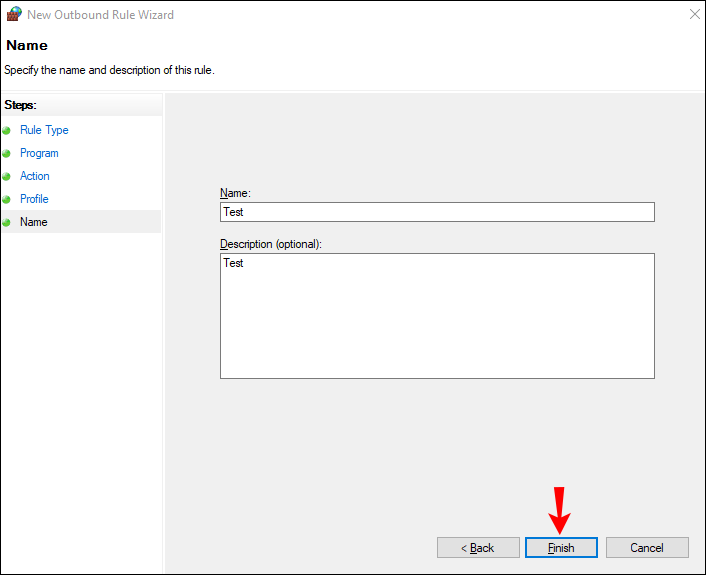
- Select “Finish.”


That’s about it. This method is quick and easy, and it will allow you to restrict internet access from any app you want.
Control Who Has Access to All Your Apps
Once you’ve figured out how to restrict access to apps in Windows 10, you can make sure that no one but you have access to certain apps. You also have the option to restrict internet access for some apps, which can be very useful.
Have you ever restricted access to an app in Windows 10 before? Did you try any of the methods explained in this guide? Let us know in the comments section below.
Disclaimer: Some pages on this site may include an affiliate link. This does not effect our editorial in any way.


