Performing a safe wipe on your solid-state drive (SSD) is relatively straightforward when done with the necessary software. Securely erasing an SSD largely depends on the type of drive, and other factors, such as the driver’s age.
A solid-state drive can only be written a limited number of times, making it difficult to clean the drive thoroughly. It is possible to harm the SSD by using a standard tool. And because your SSD is such a crucial part of your computer, you should approach this task cautiously. If you don’t, you run the risk of causing damage to your hard drive or losing important data.
Luckily, in this article, you can find instructions on securely erasing an SSD drive without losing any data or harming your drive.
How to Securely Wipe an SSD
The formatting process may be familiar to most people who have worked with HDDs or new SSDs. But why can’t you just reformat your SSD? There is one key difference between formatting and secure erasing methods, and that is completeness.
For the most part, formatting a disk is used to get a new one up and running. The best approach to ensure that your PC will operate with your new hard drive is to format it before installing the operating system.
Most data recovery programs can still recover bits and pieces of data. Therefore, you’re not wiping out the drive. That is why reselling, or recycling items that have been formatted isn’t the best option.
So, to completely erase an SSD securely, there are a couple of different methods.
Using BIOS/UEFI to Securely Wipe an SSD
A secure wipe is not a typical BIOS/UEFI function on most systems. However, a relatively common motherboard or familiarity with the device’s interface may make this option viable.
If you possess a gaming PC, you may be in luck because it is more likely to provide additional choices for better component management.
There is a good chance that the procedure will go smoothly if your computer’s bios or UEFI supports it. It’s best to consult your user guide if you’re utilizing anything other than a basic setup. An SSD may be securely erased following these steps:
- Enter the BIOS or UEFI settings of your computer.
- Locate and pick your SSD. Whether it’s in the device index or a different tab is entirely up to your manufacturer’s interface settings.
- Look for a data wipe or Secure Erase option. Keep an eye out for alternative keywords because some programs go by several names.
- Follow any relevant prompts or instructions that may appear when doing the Secure Erase or wipe operation.
Driver Software
In terms of driver management, most customers choose to utilize either their own manufacturer’s software or a third-party choice. Identifying your device’s specs and finding driver support on the manufacturer’s site are good places to start.
A growing variety of third-party solutions are becoming available as SSDs become more widespread. Most major manufacturers also provide erasure solutions. It’s recommended to use the latest software from your device’s manufacturers if possible.
Before starting the erasing process, take the time to learn your drive’s characteristics and whether the software you’re contemplating is compatible. That said, it’s also critical that you back up any data that may be of interest, as secure wipe features are meant to be thorough. In other words, assuming all goes according to plan, any erased data will be completely unrecoverable.
Here are some of the most popular software tools for securely erasing an SSD drive.
Wiping an SSD Securely with Intel Memory and Storage Tool

If you have an Intel SSD, the Intel Memory and Storage Tool is a must-have tool for Windows users. The “Secure Erase” tab may be found on the left-hand side of the program’s primary screen. Select “Secure Erase” and follow the on-screen instructions.
Designed as a replacement for the Intel SSD Toolbox, you can securely optimize your disk for better performance because of TRIM capability and growing technology. Just as you can choose the timeline for other PC upgrades, you can do the same for your drive optimizer.
Intel Memory and Storage Tool’s extensive support options are another bonus. Installation instructions, warranty information, and step-by-step guidance on a wide range of common maintenance concerns are all included in this manual. In general, Intel’s SSDs are convenient and straightforward to operate.
Securely Wiping an SSD using GParted
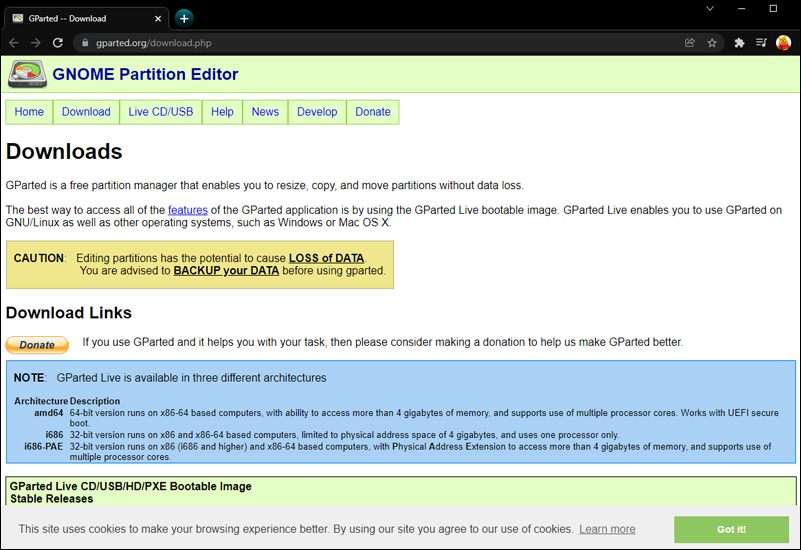
GParted or GNOME Partition Editor is a well-known and trustworthy software. It includes several disk functions, like the recently added partition administration. For Linux SSD users, it’s an excellent solution because it’s open-source and works with a wide range of operating systems.
To get the most out of GParted, you’ll need to boot from a disc instead of the internet. A “Live CD” or “Live USB” must be created, and then the application may be loaded using any physical media that your computer supports.
As a result of the difficulty of setting up GParted, there are several helpful articles, user evaluations, and instructions available online.
Erasing an SSD Securely using Samsung Magician

Samsung Magician may be a little easier to use for those new to the process. Even if your screen has a little bit more information than you need, the clean design stops things from getting too crowded looking. This program can also help you diagnose problems and monitor the health of your drive if you’re seeking to extend the lifespan of your device.
Although Samsung does not provide special support for the Magician tool, having a more current and user-friendly interface is beneficial in this scenario. However, their SSD web page has a multitude of other software info.
Securely Erasing an SSD with Parted Magic
Partition management and disk erasing tools are included in a complete Linux distribution called Parted Magic. Although you’ll have to pay a fee to use it, you’ll always have entry to the suite and be able to delete an SSD with it safely.

Parted Magic may be installed on a USB stick and used to start a computer. To get you started, here’s a quick rundown:
- Set up a USB device that can be mounted with the program.
- Connect to the device and restart it.
- When the drive reboots, select Option 1 and then Default Settings.
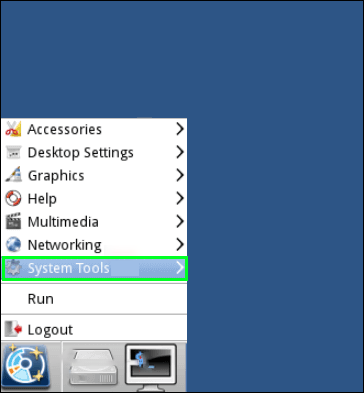
- Go to Start in the bottom-left, then System Tools.

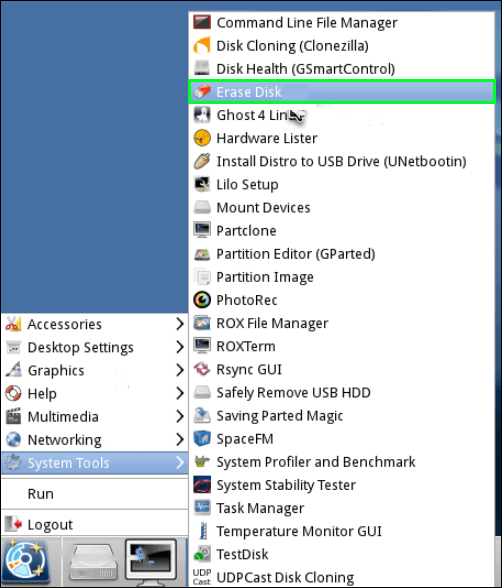
- Navigate to Erase Disk once the computer has booted.
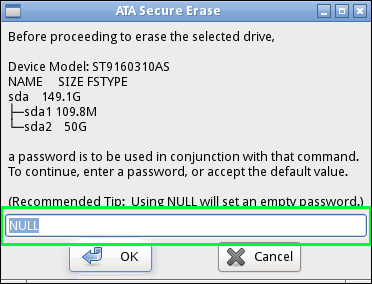
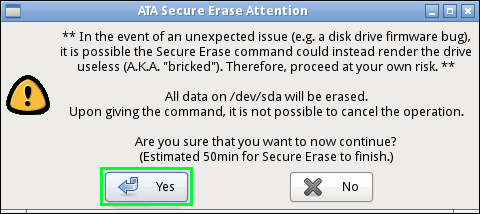
- Pick the Internal Option. You must first validate the disk you wish to delete before using the “Secure Erase command,” which writes a string of zeros to the whole data area. It is necessary to repeatedly press the Sleep button until you can proceed further if you are told that the drive is “frozen.” If your drive asks for a password, enter “NULL” as the answer.
- To delete your SSD drive, just click Yes to confirm that you’ve read and understood the warnings.
The Hands-On Approach (Physically Erasing an SSD)
The SSD can be destroyed with a hammer if the drive is dead, or you just don’t want a working drive at the end of it.Considering that SSDs use little flash storage chips instead of platters to store their data; to remove the data safely, you must shatter the chips. You should remove the cover from the drive before you begin swinging.
If you choose this method, remember to wear safety glasses to avoid eye injury from flying debris.
Have a Clean SSD
If you follow one of these methods carefully and do your research, you’ll have a clean SSD in no time. As a reminder, it is essential to keep in mind that older programs and outdated SSDs might be more sensitive than the most recent versions of these products. Because certain older devices may not be compatible with newer software, you may want to seek the help of an expert.
Additionally, it’s crucial to back up any data you wish to keep if your disk fails. If you overlook something, odds are you won’t be able to retrieve it using any standard sort of recovery software if you use a secure wipe technique.
Have you ever erased an SSD? Have you ever experienced any trouble erasing an SSD? Let us know in the comment section below!
Disclaimer: Some pages on this site may include an affiliate link. This does not effect our editorial in any way.


