Device Links
Having all your contacts accessible from your Gmail account is convenient. It removes the hassle of needing to refer to your Android-saved contacts whenever you want to send an email to one of them. It also serves as an additional backup.
In this article, you’ll learn how to sync your Android and iPhone contacts to your Gmail account. In addition, we’ve got eight troubleshooting tips to try if you experience problems synching your Android contacts.
Sync Contacts From Android to Gmail
To sync the contacts from your Android device to your Gmail account, your Gmail account should be installed with synchronization enabled:
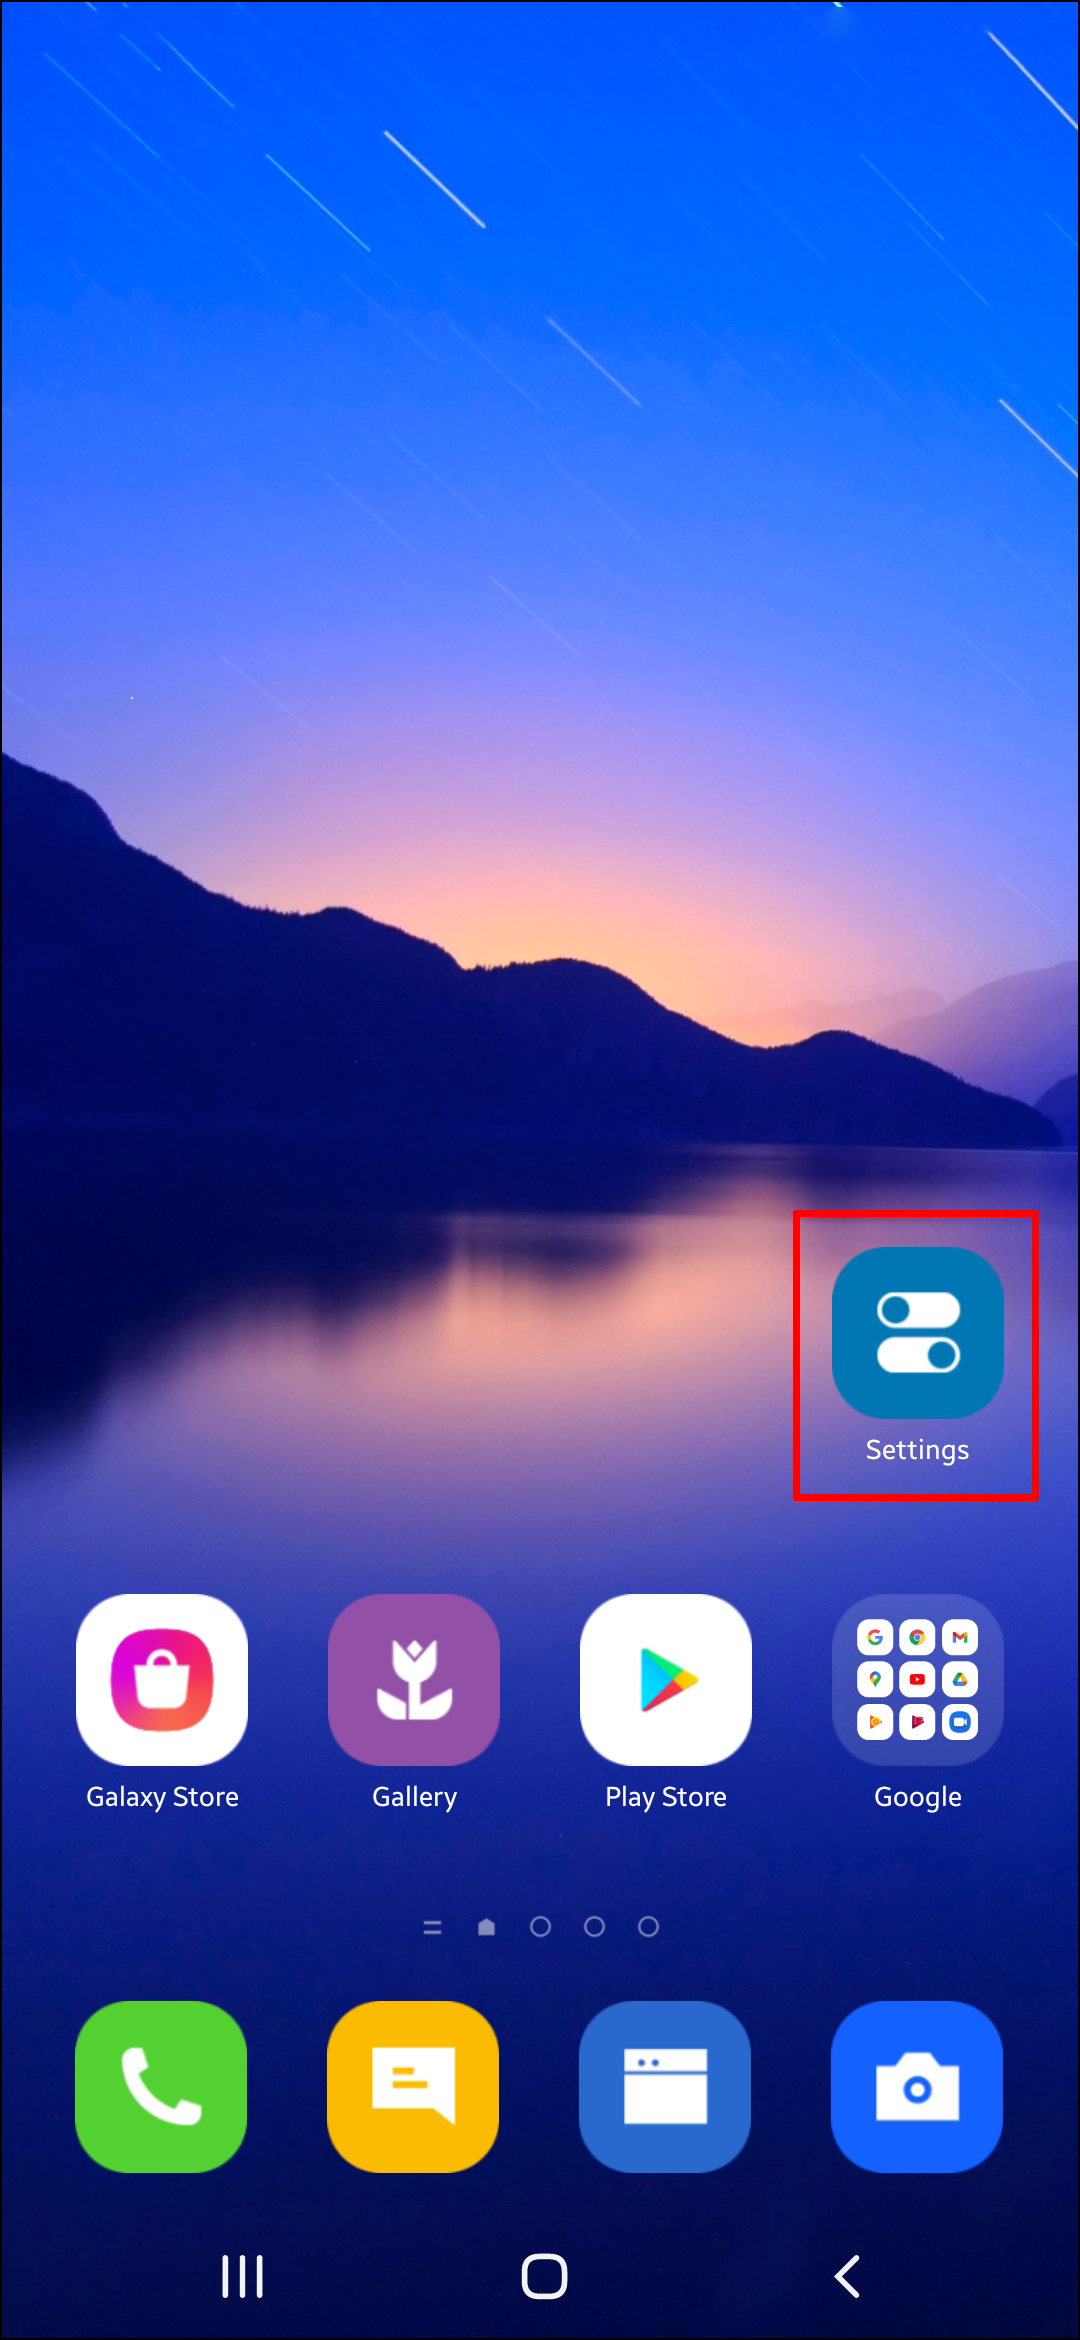
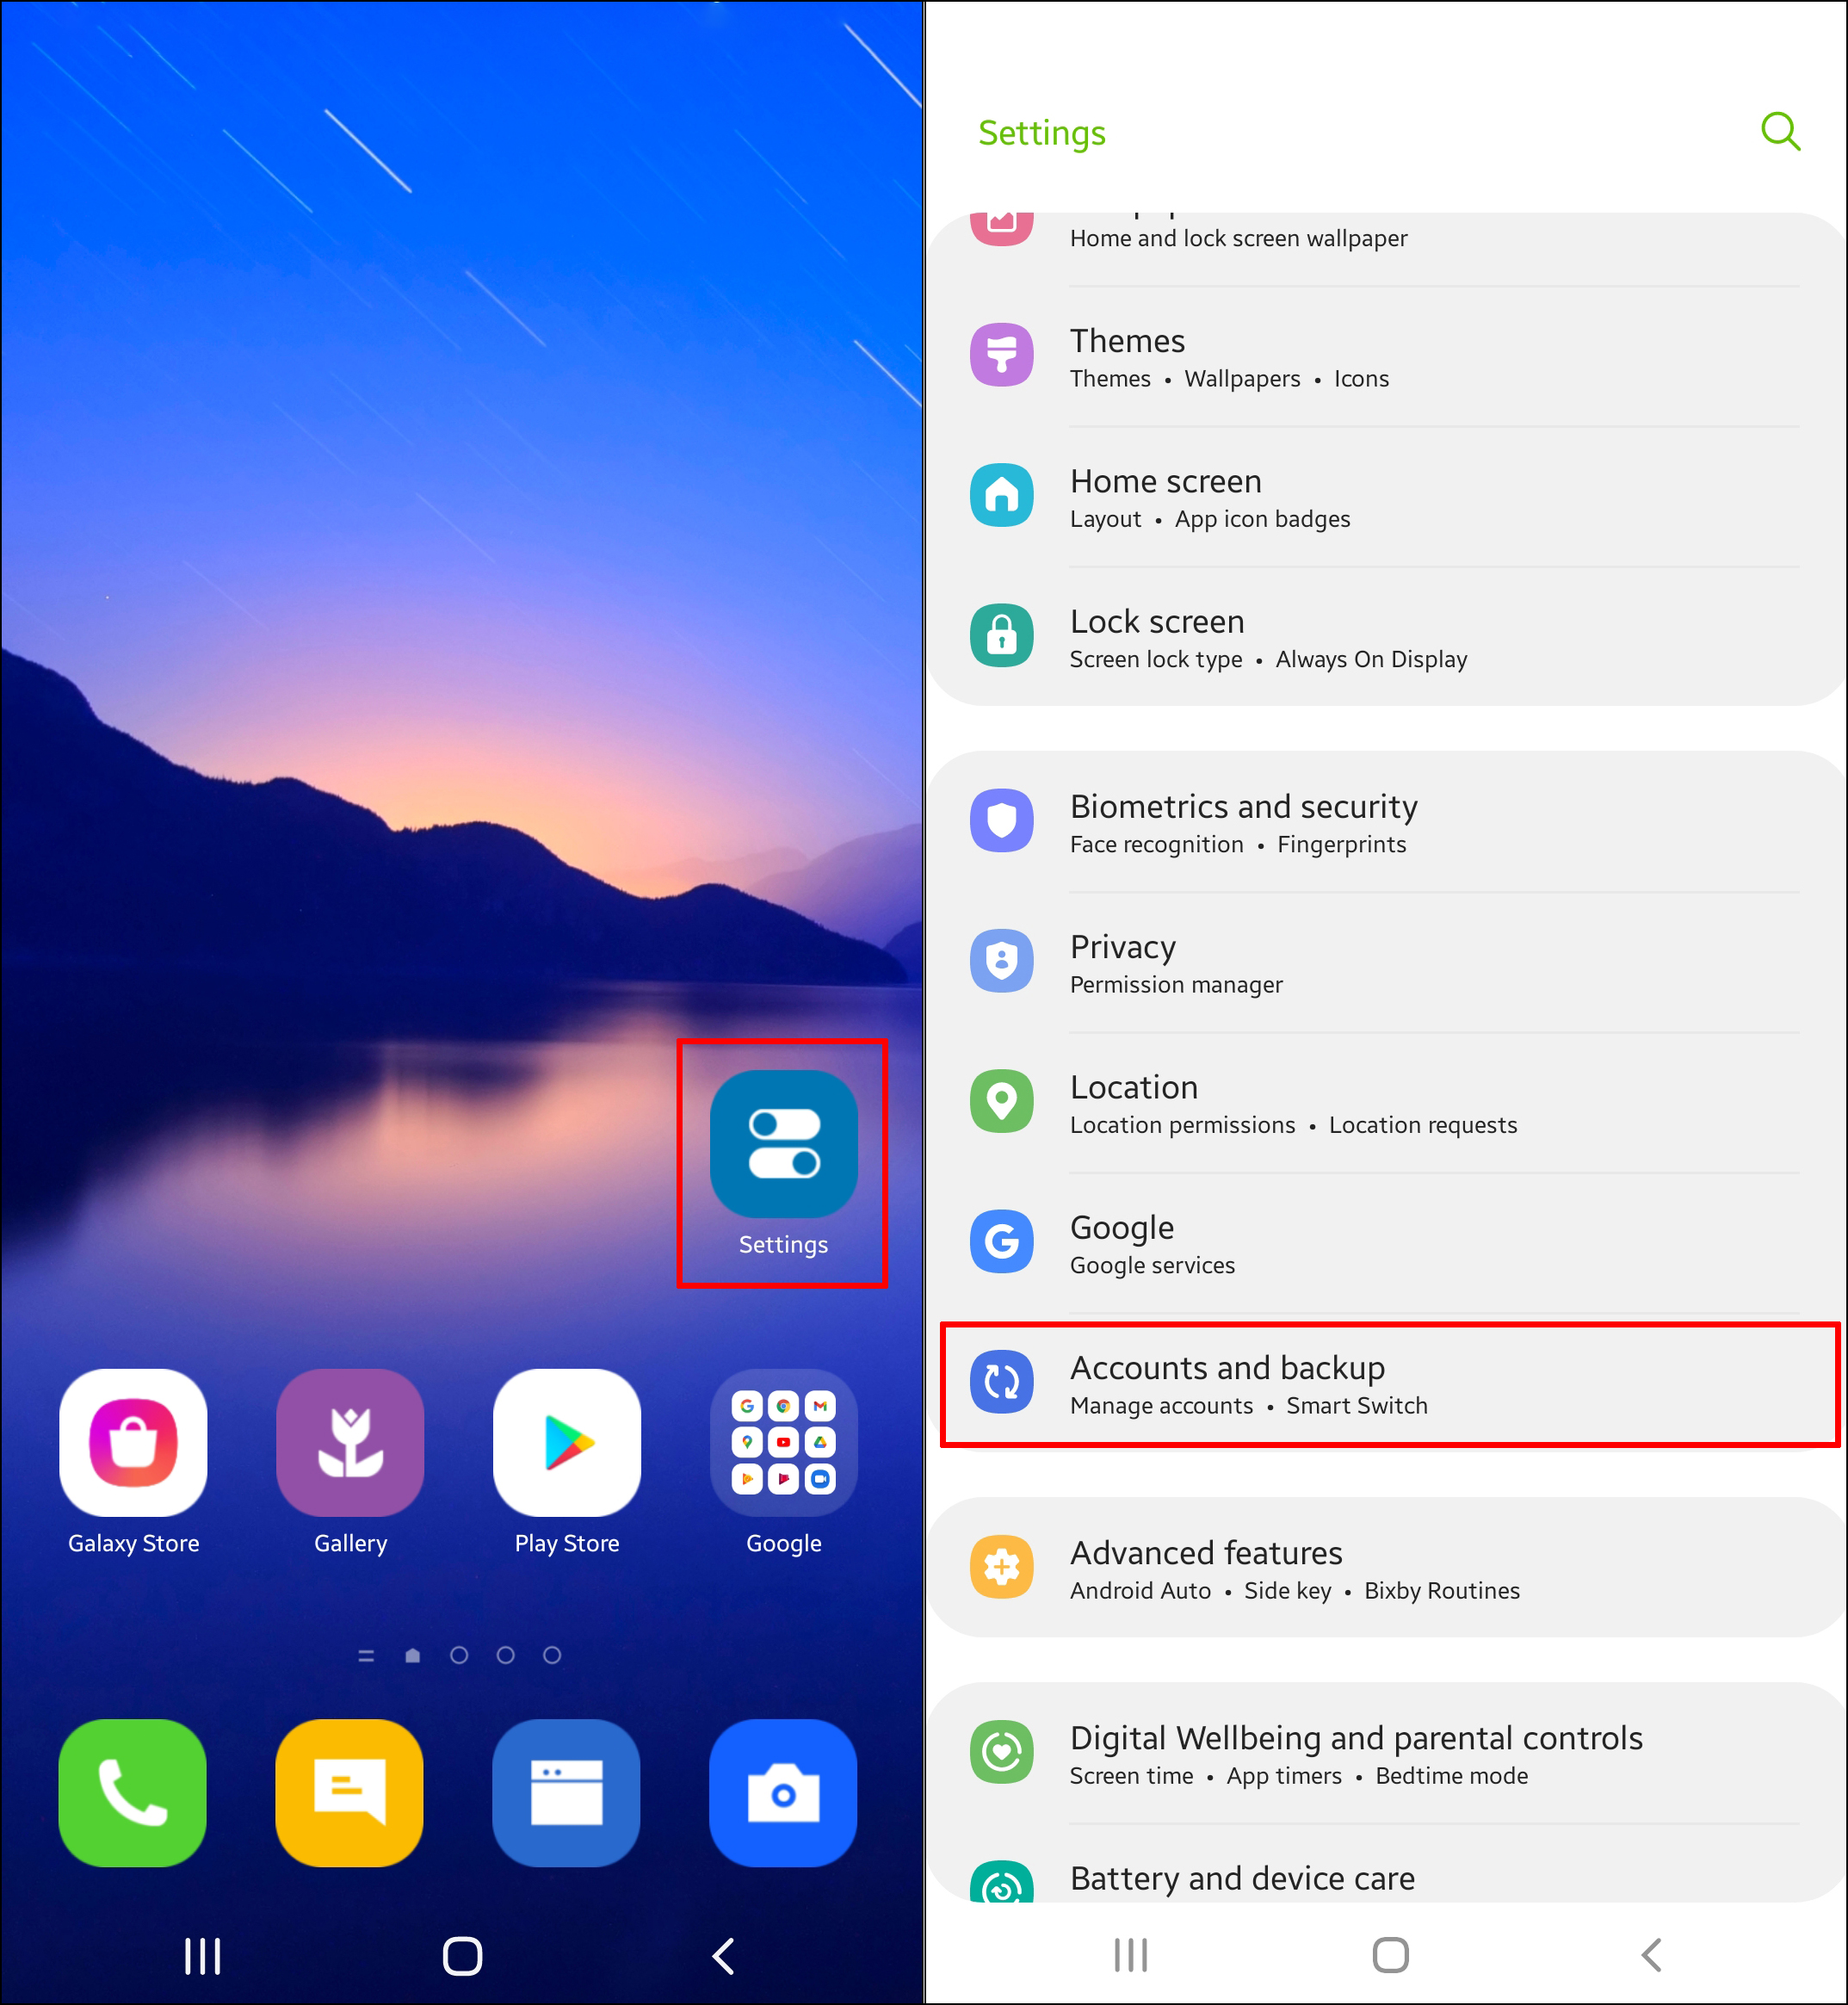
- Open the “Settings” application.
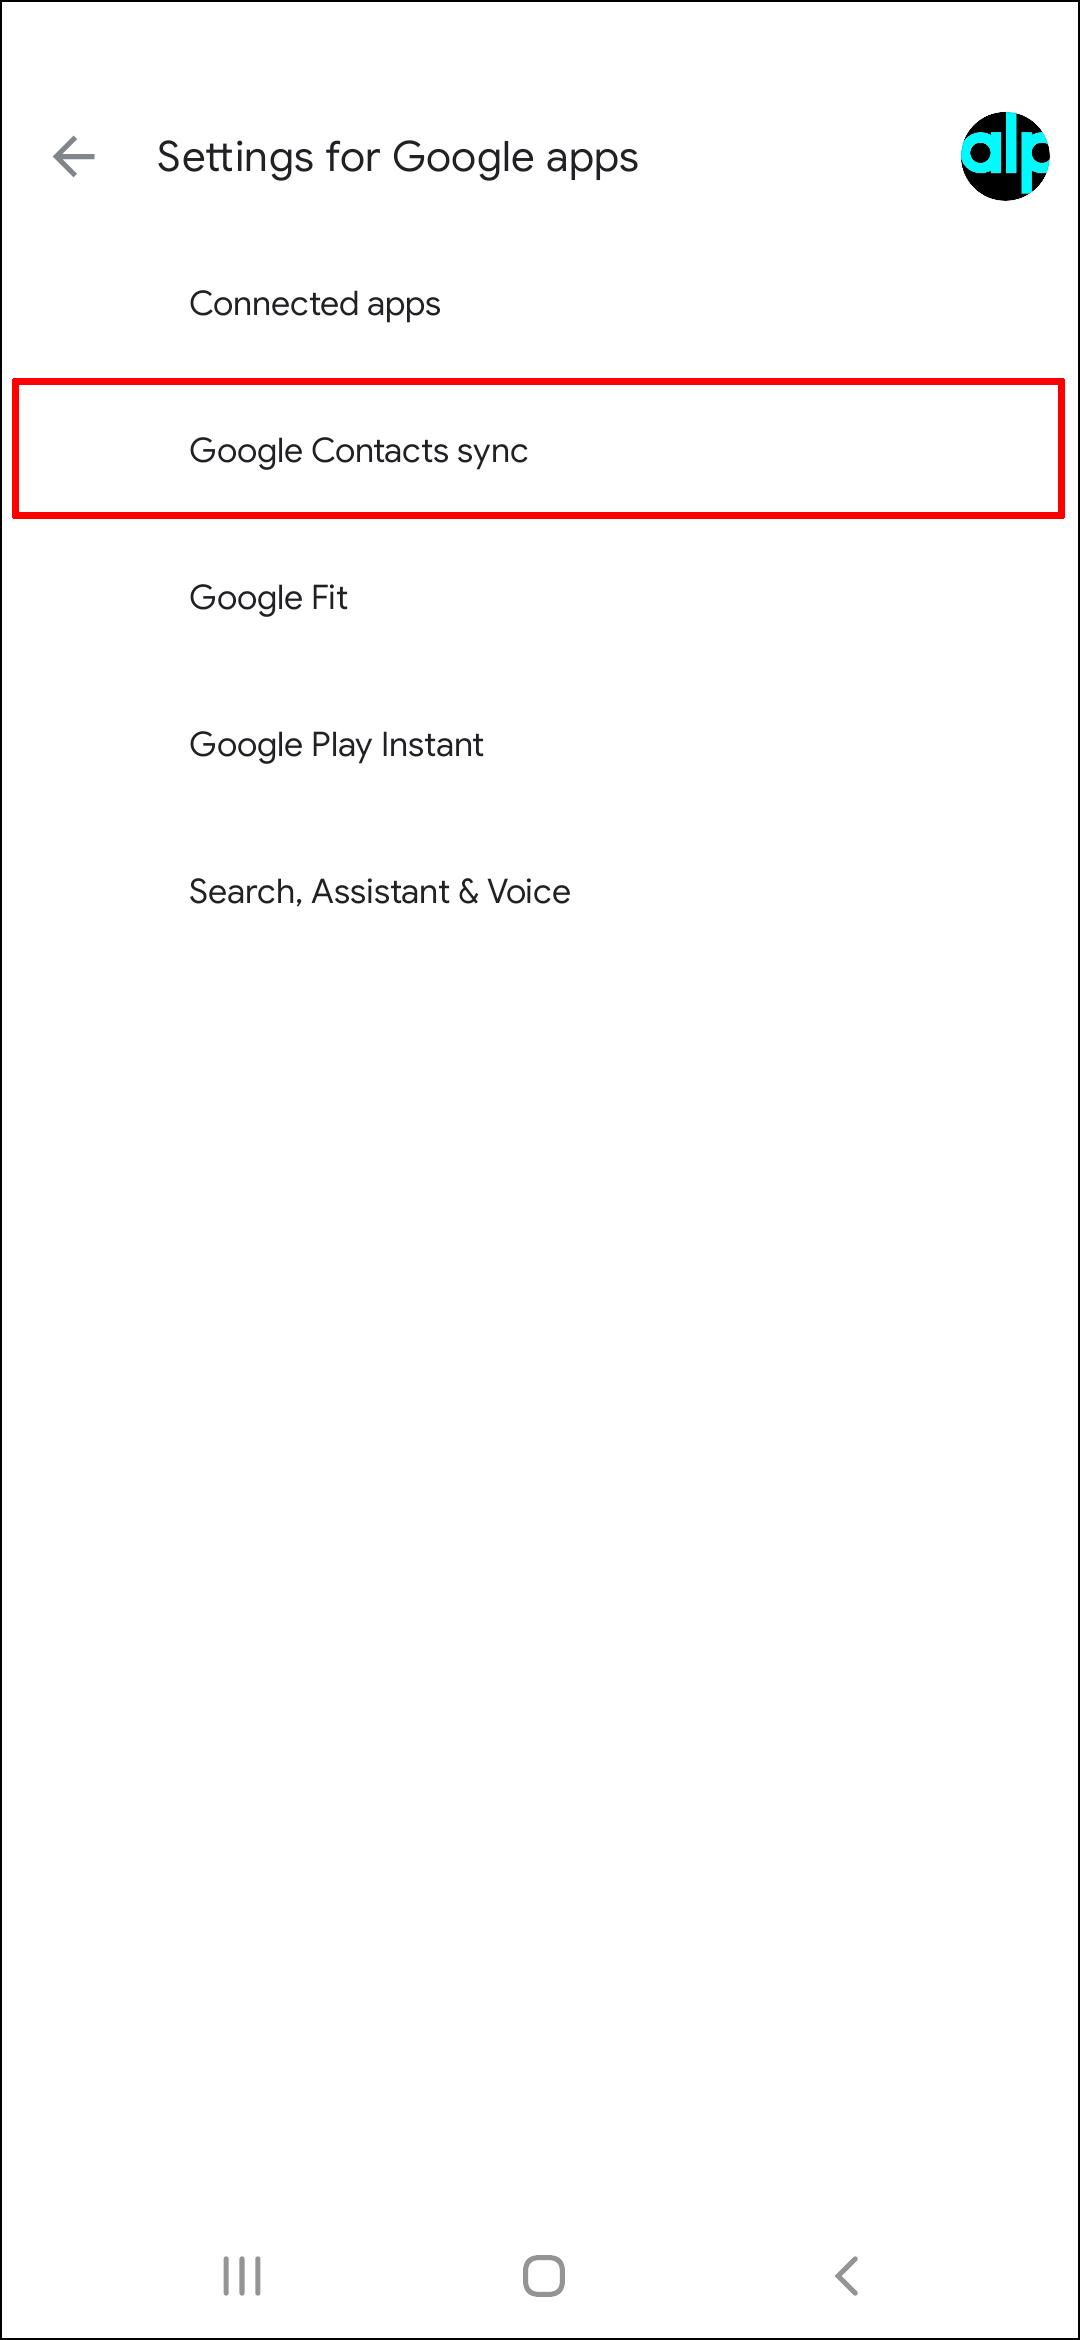
- Select “Google,” “Settings for Google Apps,” then “Google Contacts sync.”

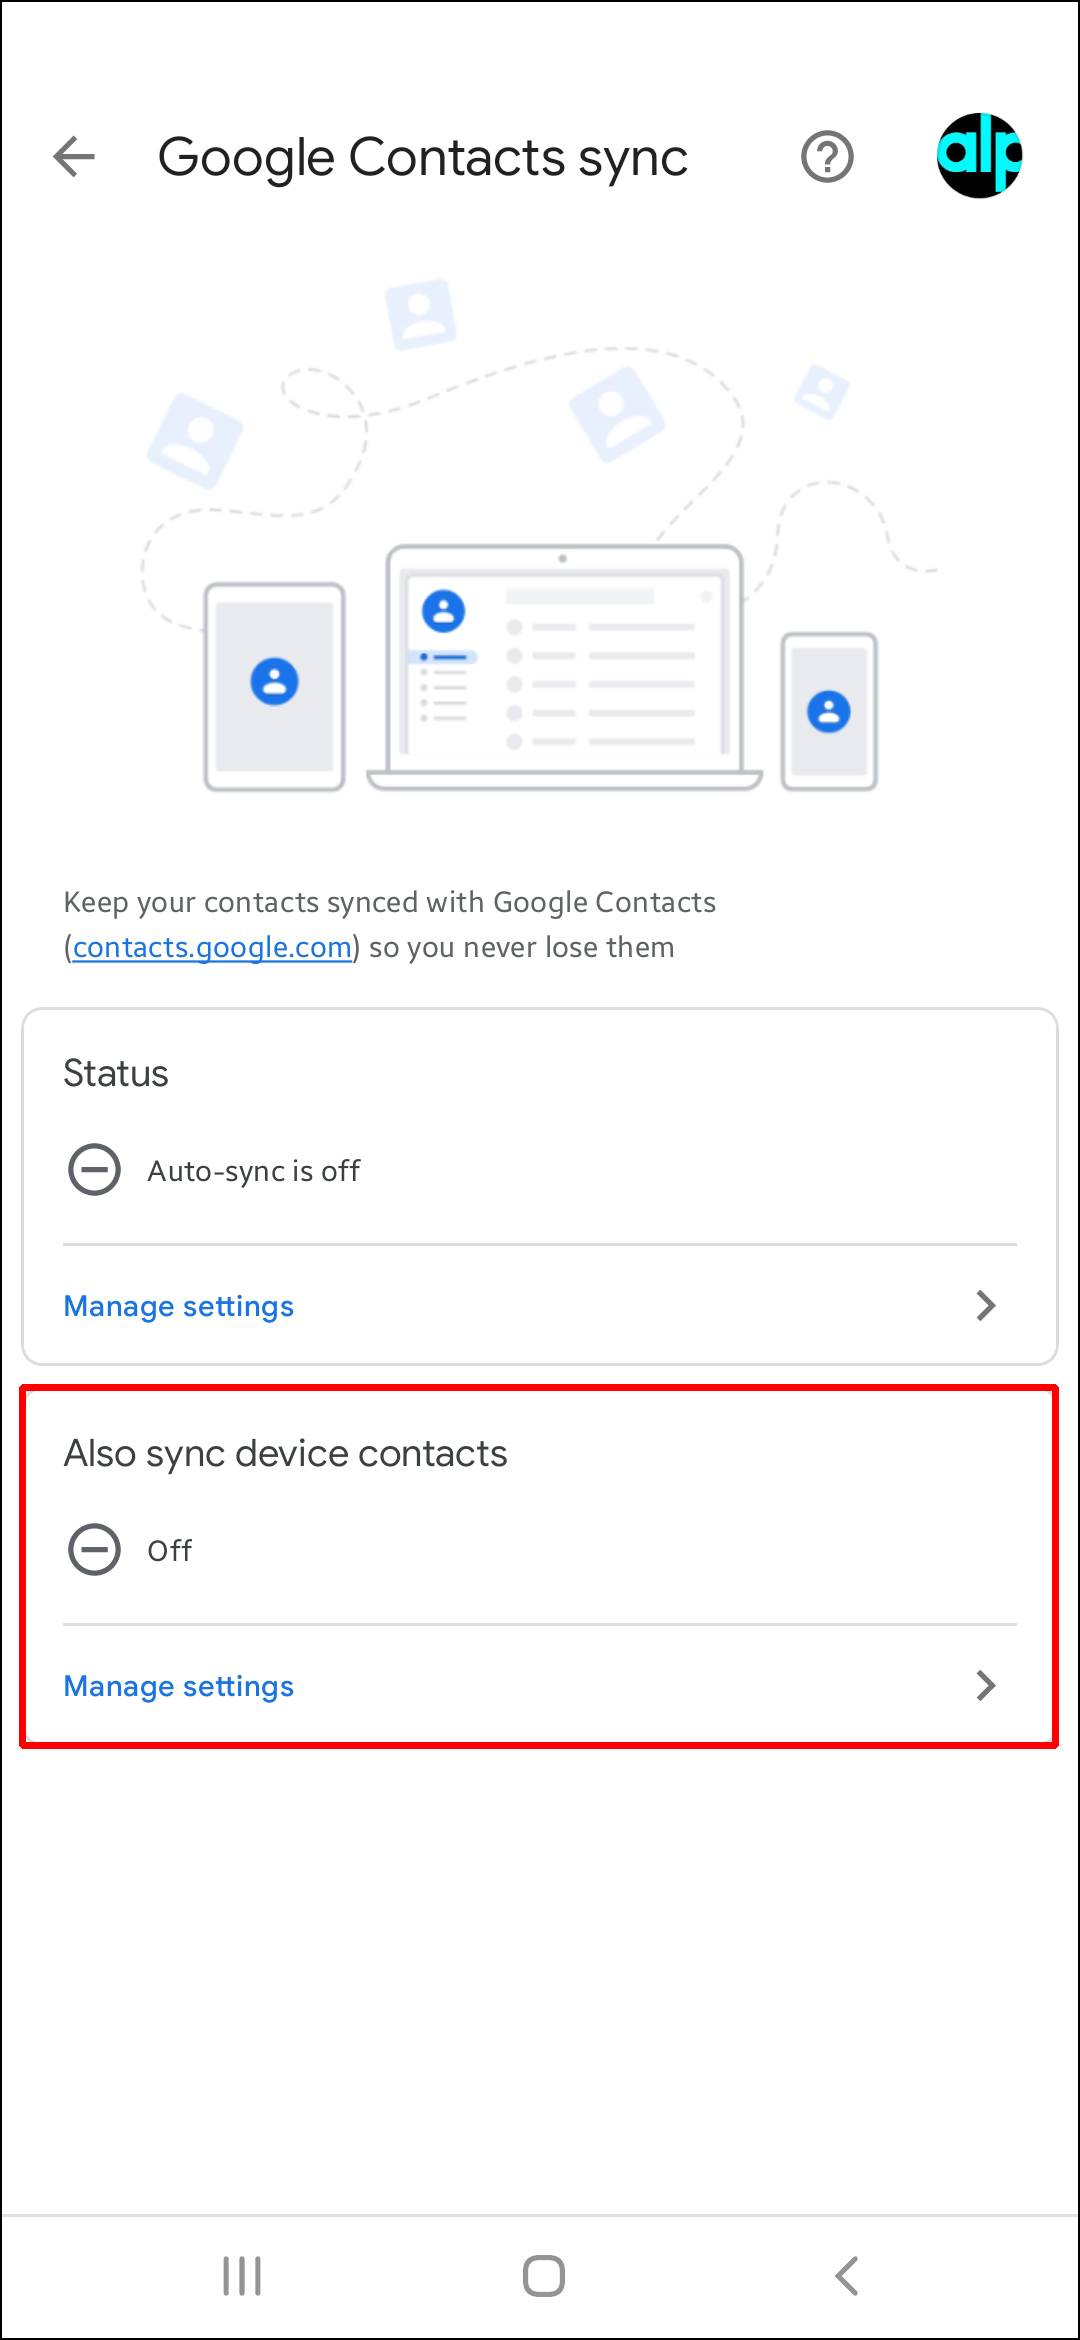
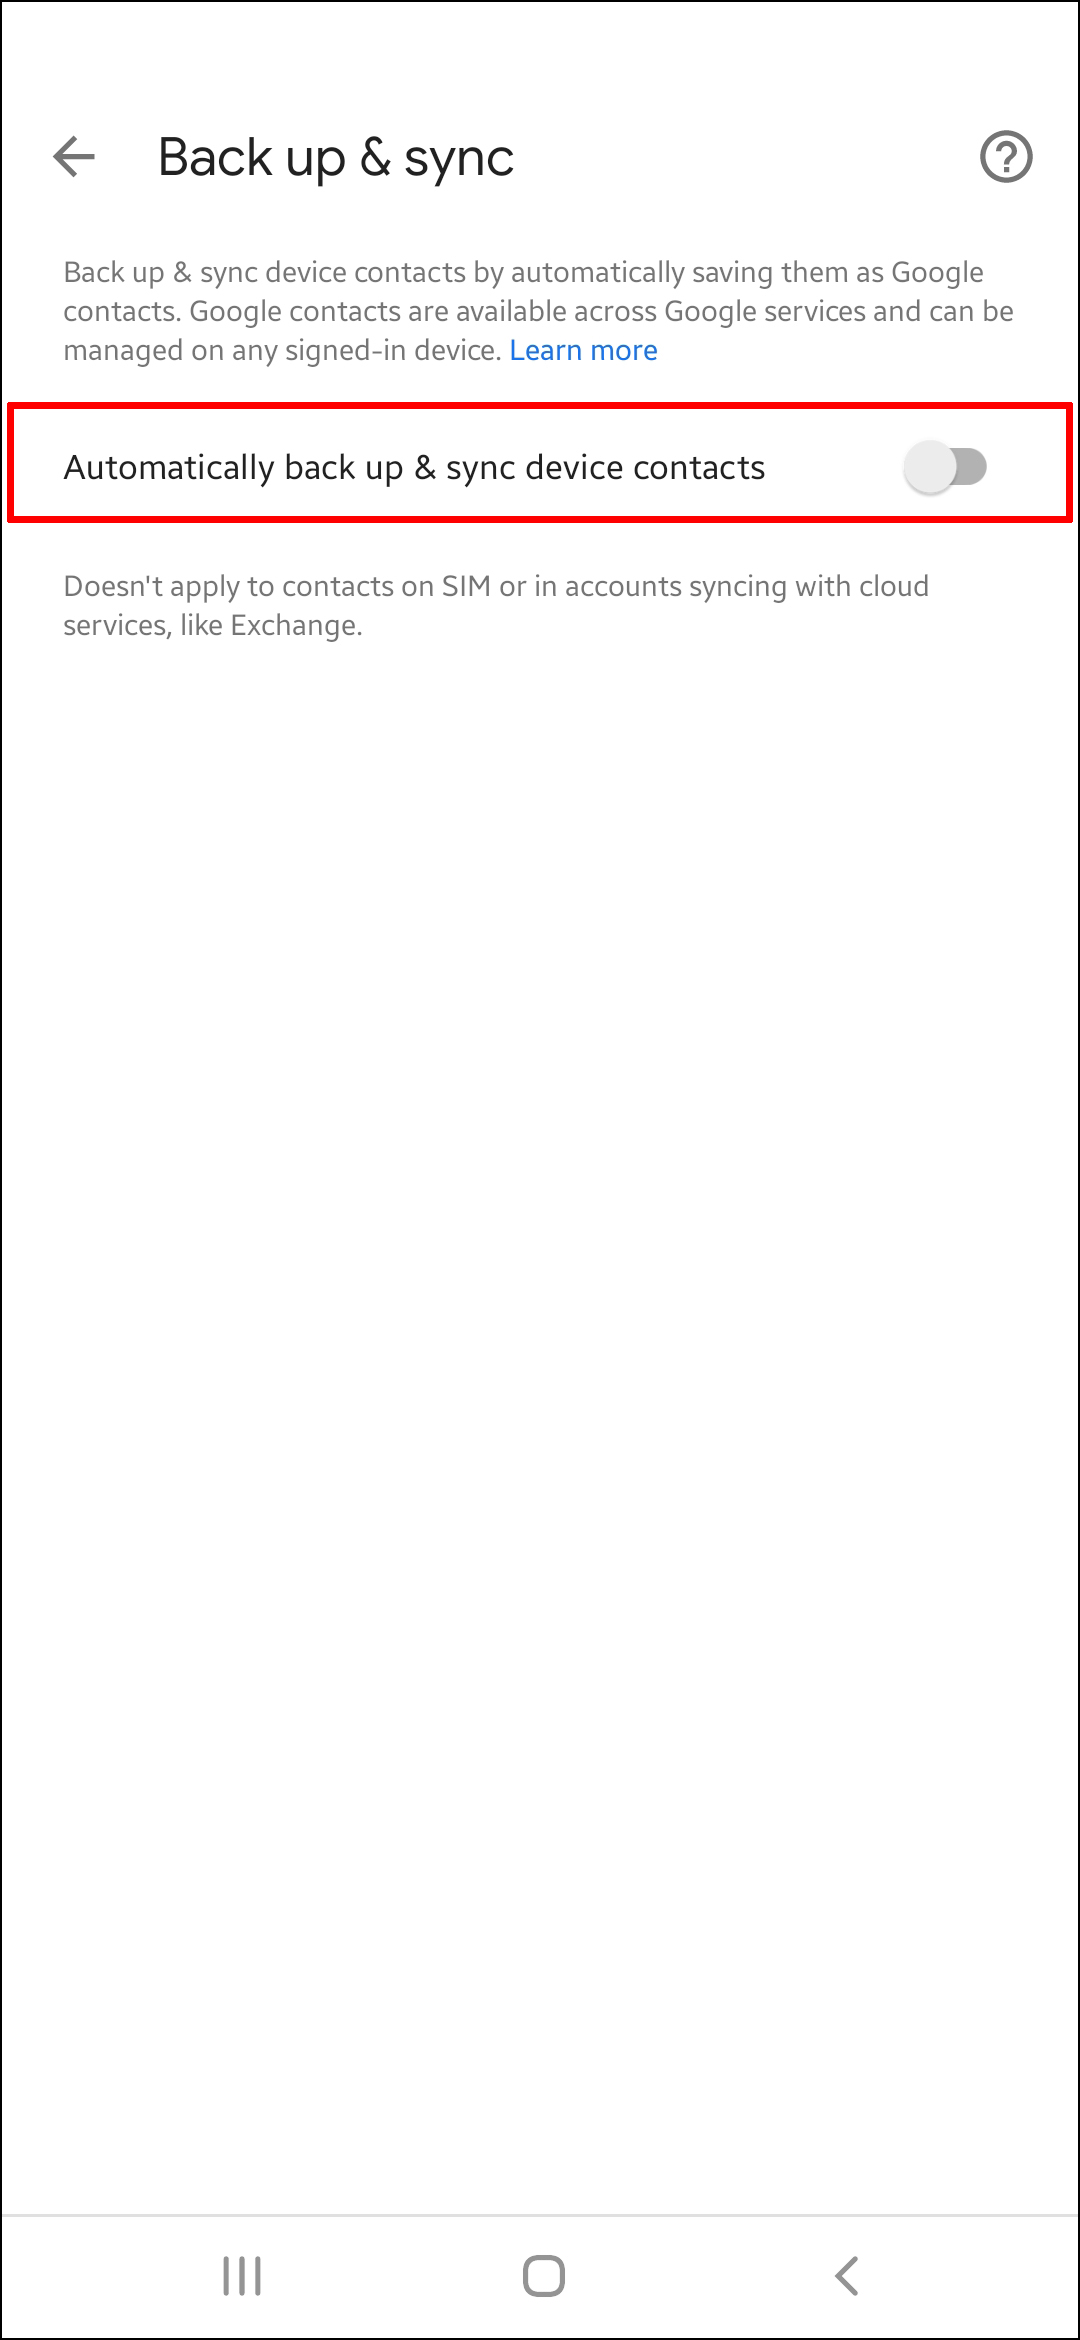
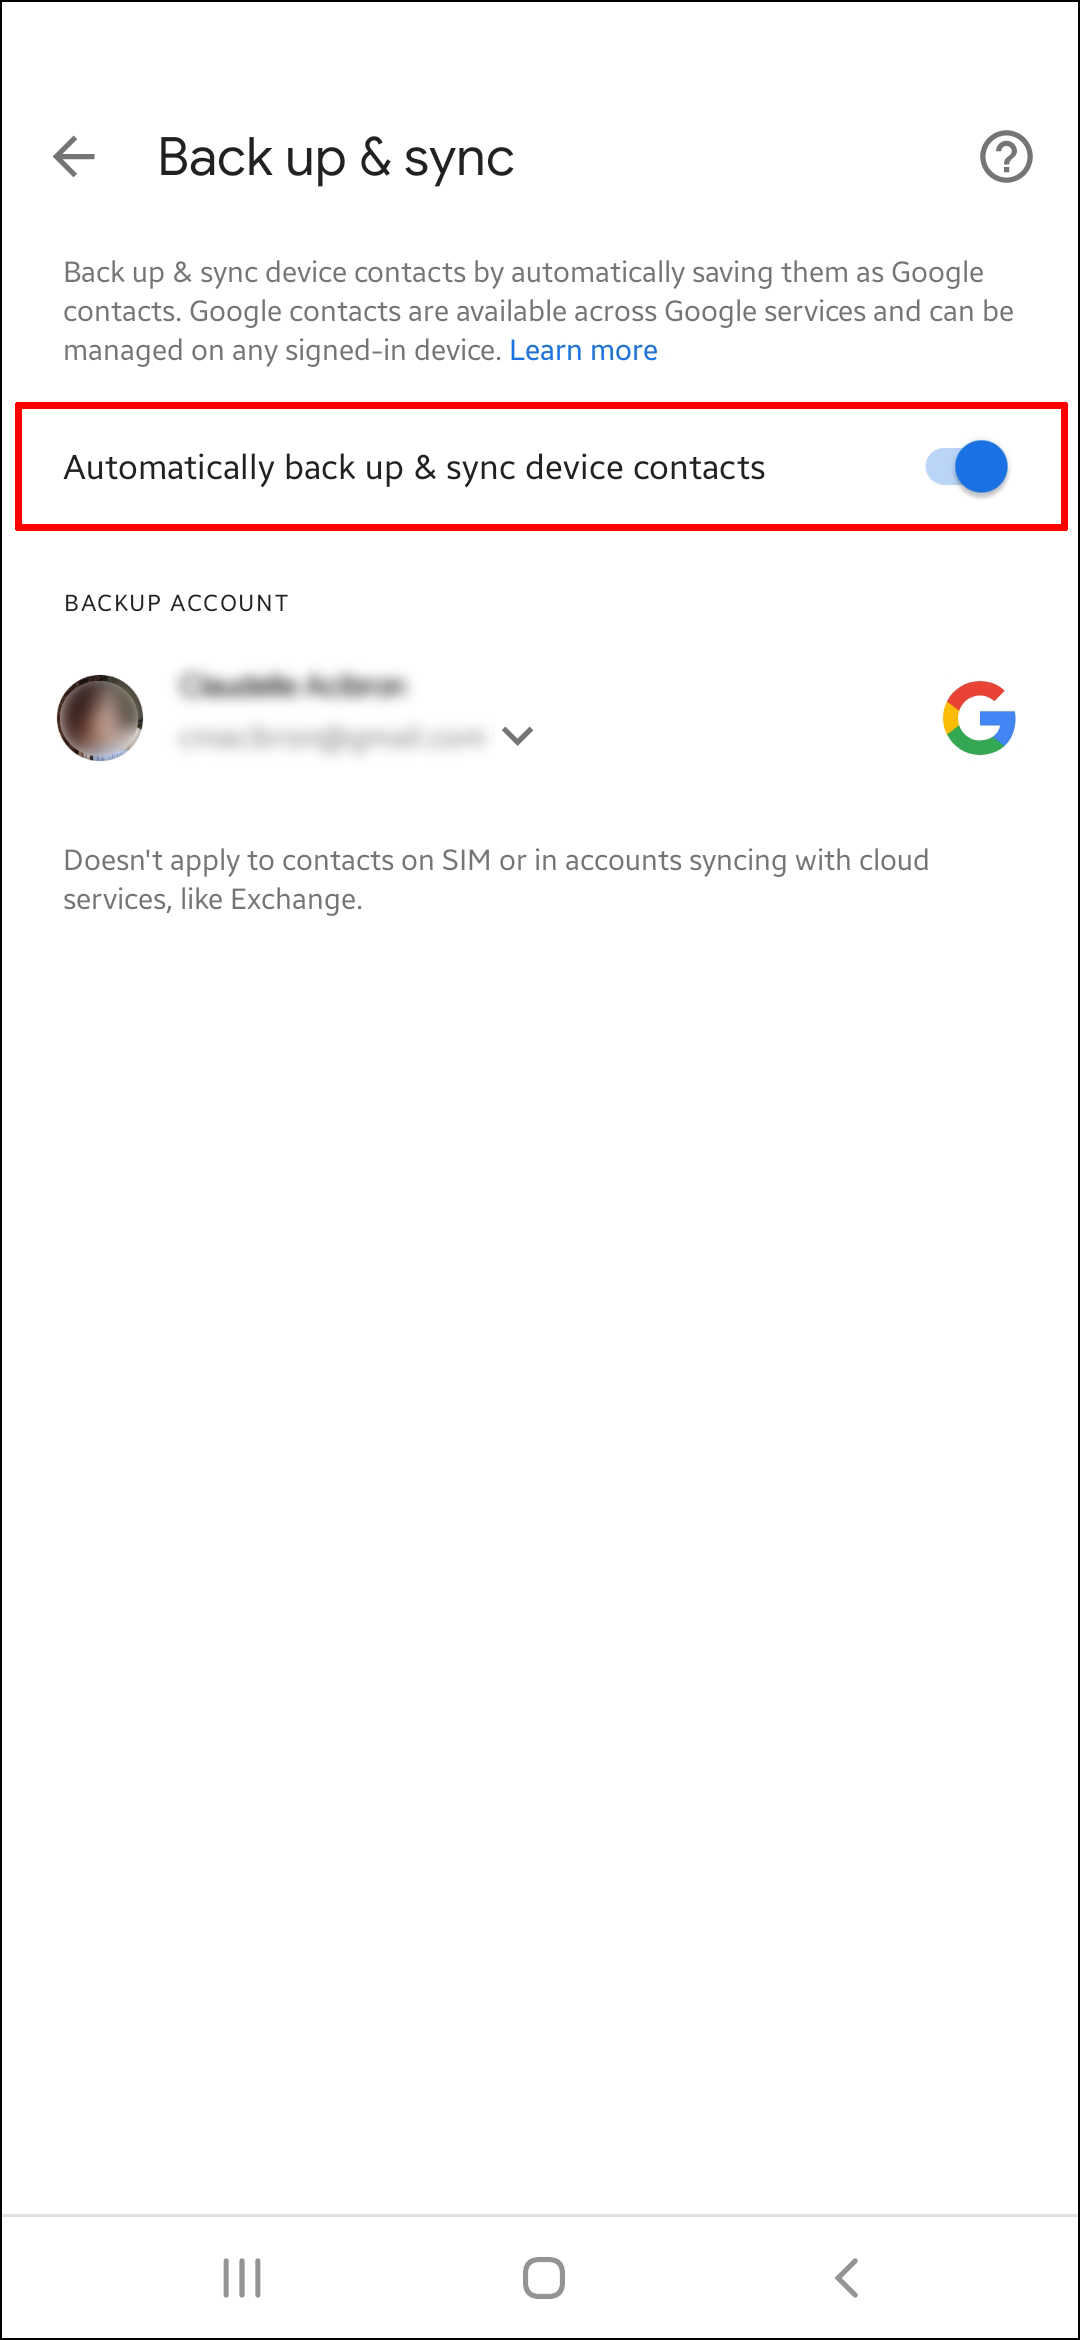
- Tap “Also sync device contacts” then “Automatically back up & sync device contacts.”
- Enable “Automatically back up & sync device contacts.”
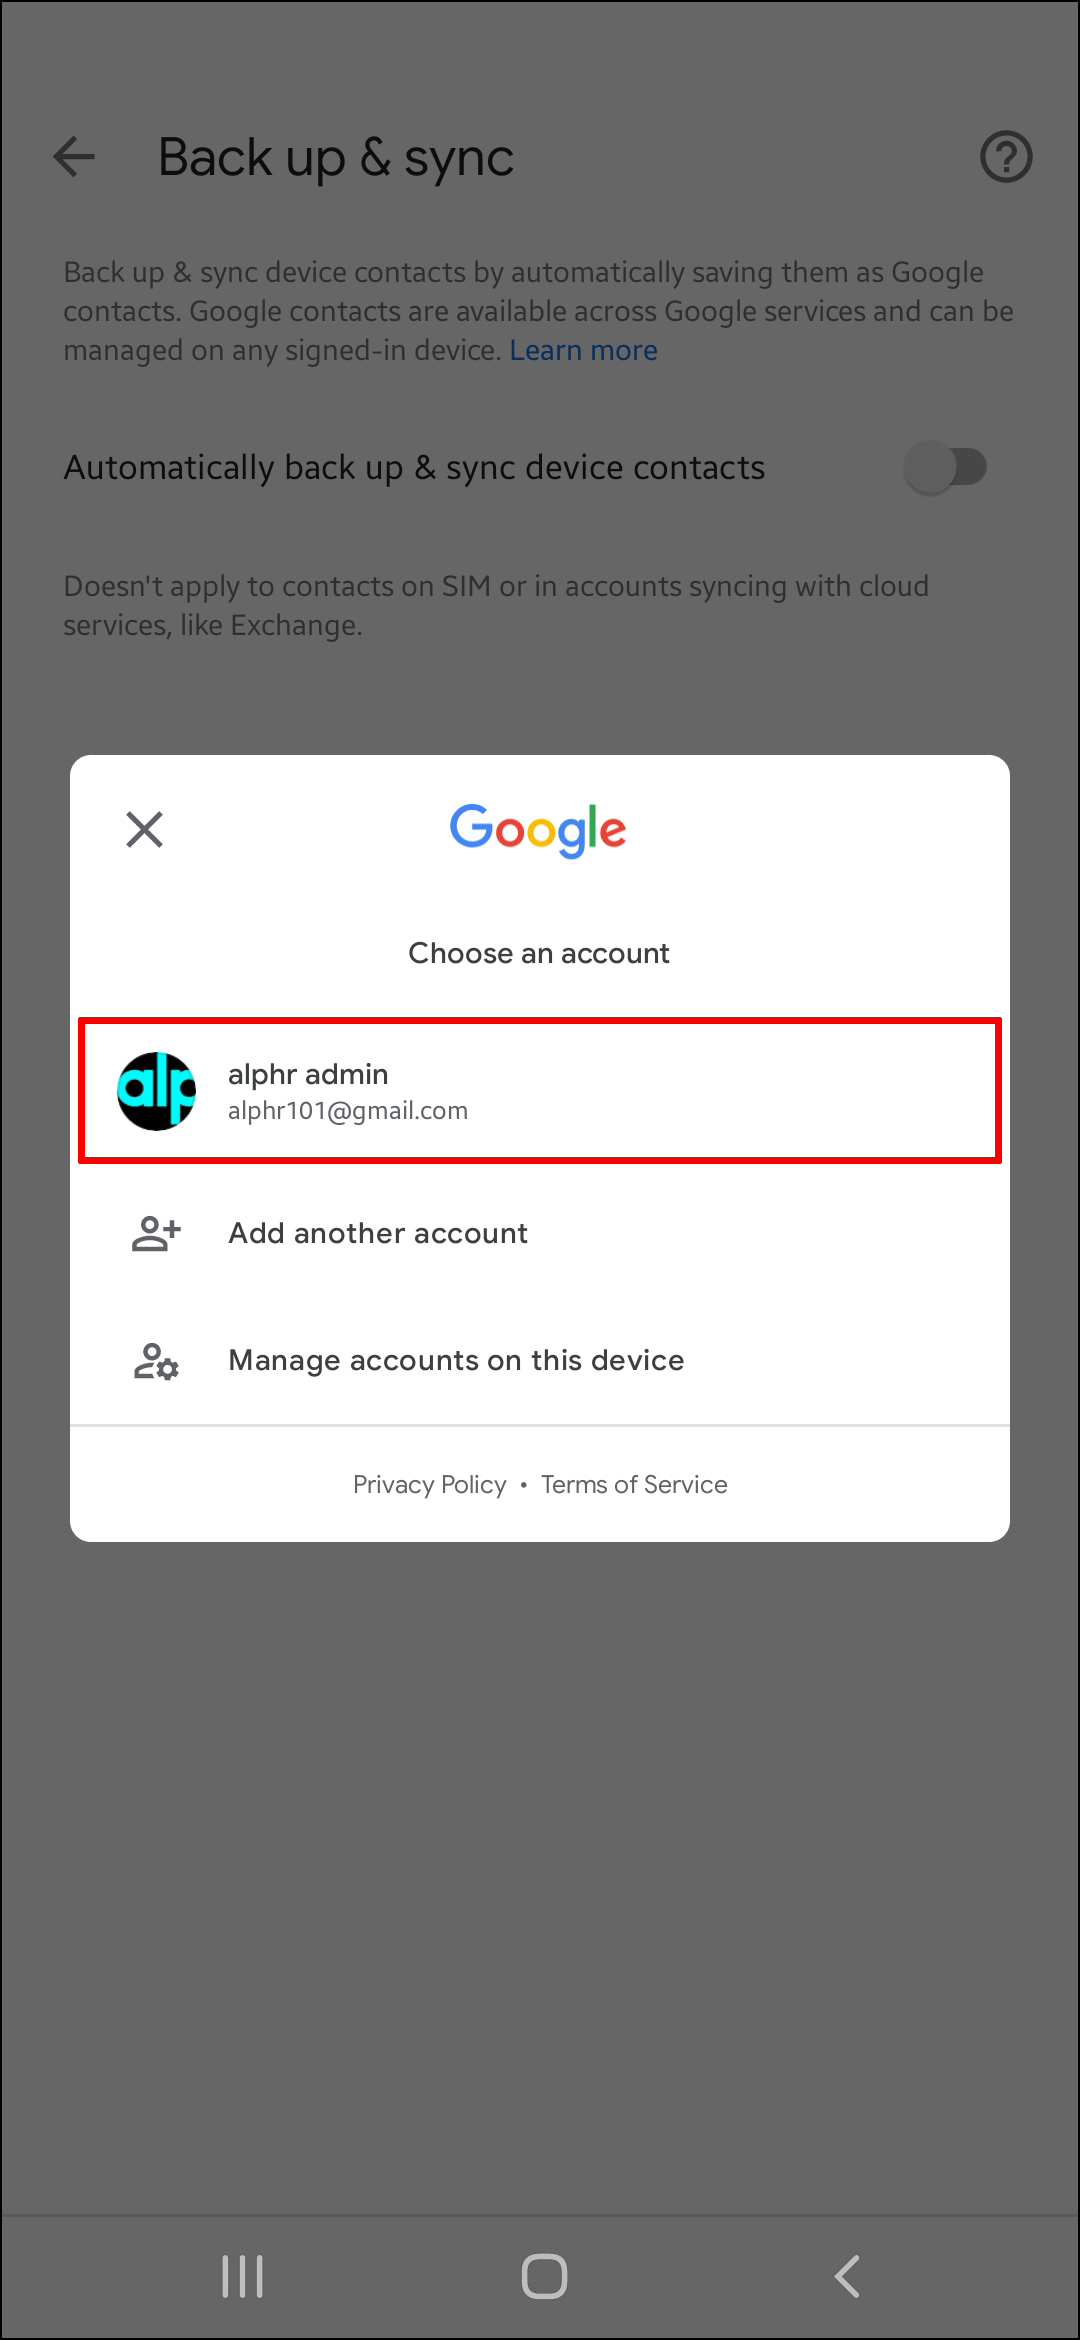
- Select your Gmail account.
Your contacts will now sync to your Gmail account. And moving forward, any additional contacts you save to your Android device will automatically sync to your Gmail account. To stop contacts from saving, disable “Automatically back up & sync device contacts.”
To import the contacts saved on your Android device’s SIM card to your Gmail account, follow these steps:
- Ensure the SIM card you wish to import the contacts from is inserted in your phone.
- Tap the “Contacts” application.
- At the right corner, tap on the three horizontal dot menu.
- Select “Manage” then “Import Contacts.”
- Select “SIM card” then select the Gmail account to import the contacts to.


Sync Contacts From iPhone to Gmail
To transfer your iPhone contacts to your Gmail account, follow these steps:
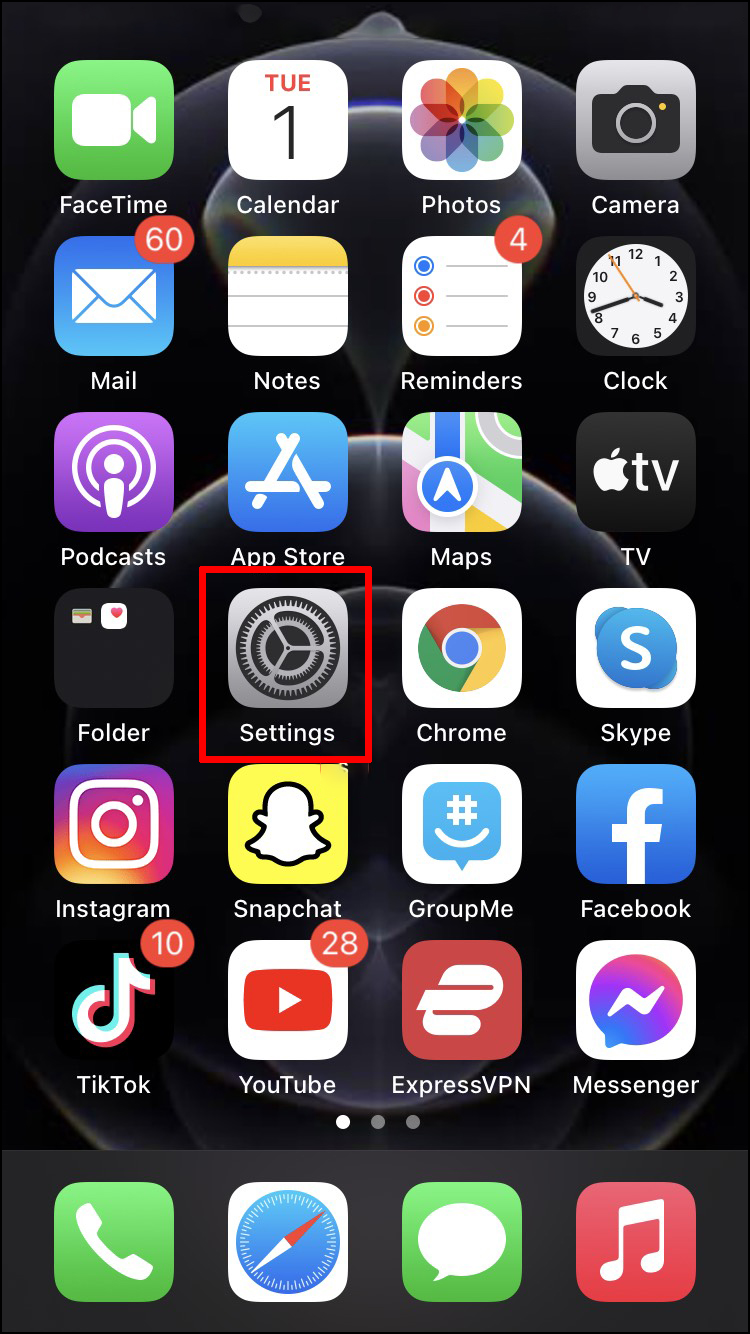
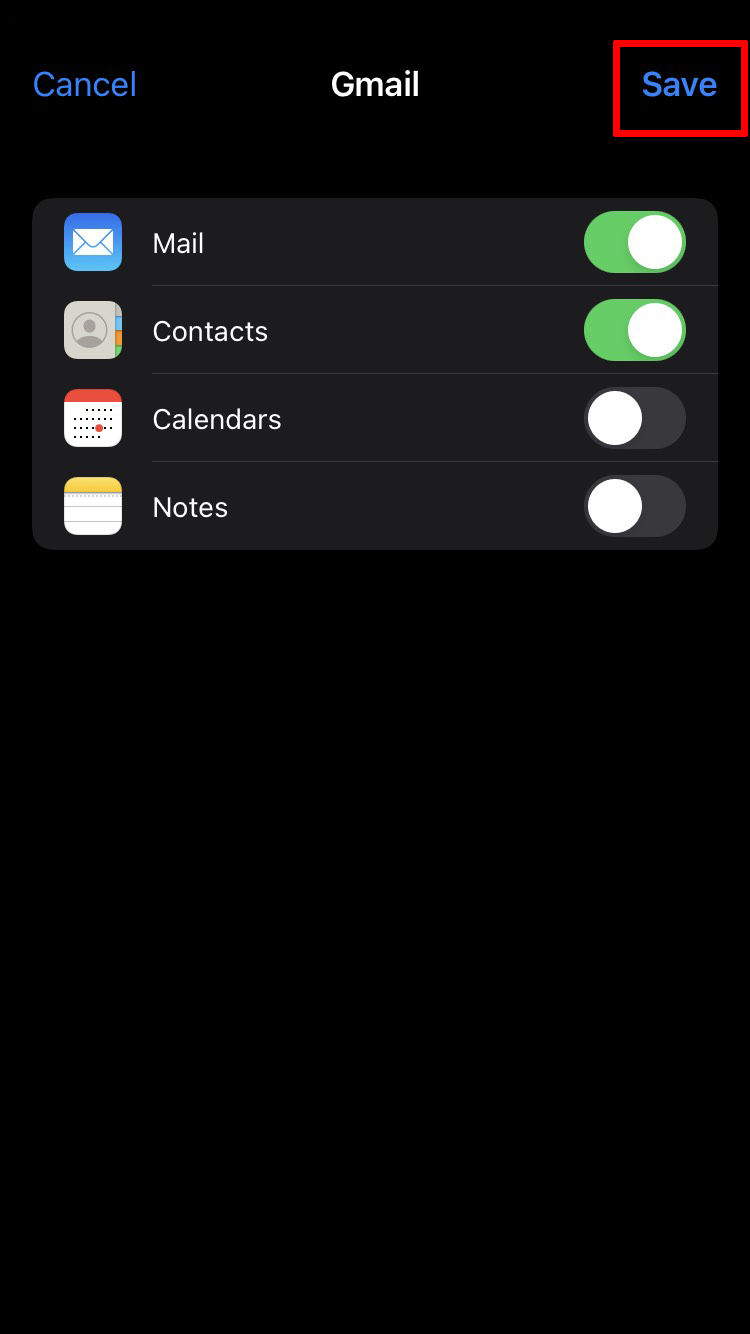
- Launch the “Settings” application.
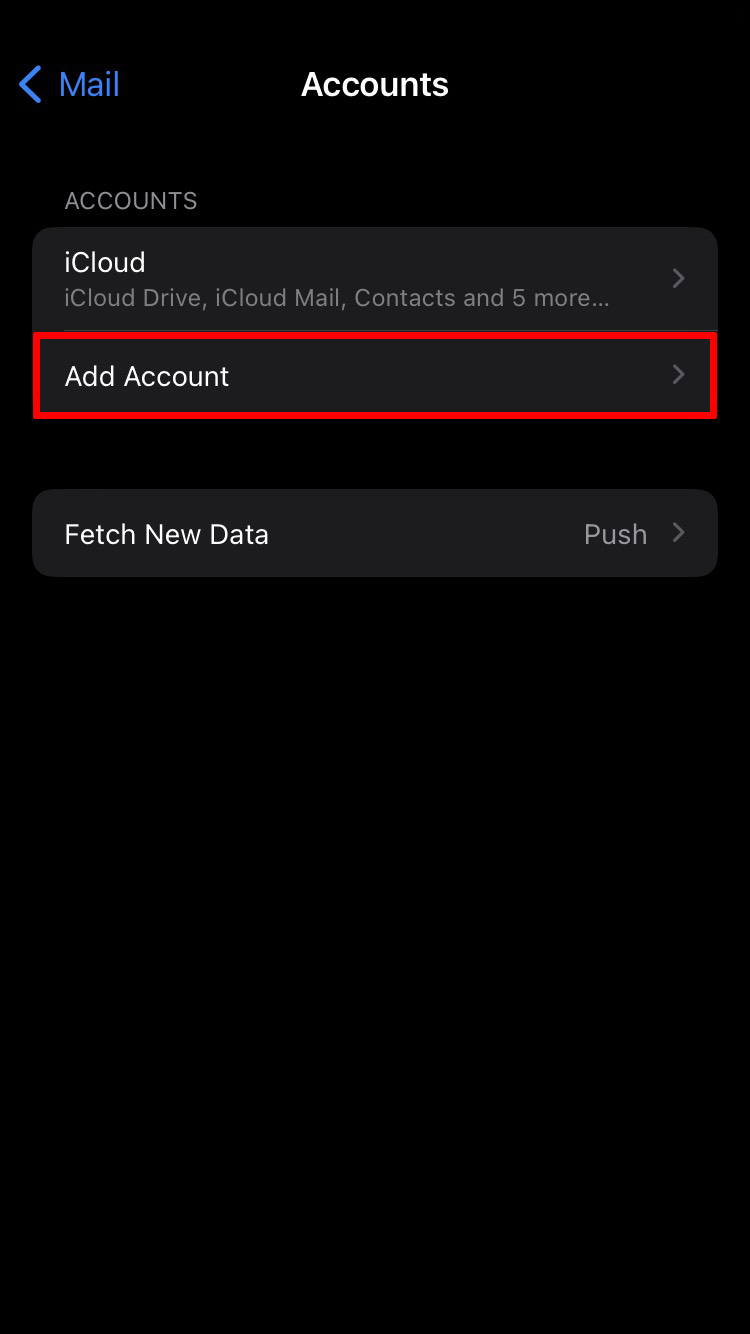
- Tap “Mail” then go to “Accounts”.
- Select “Add Account” then “Google.”
- Enter your Gmail account information then “Next.”
- After your account verification is successful, tap “Save.”
- To sync your iPhone contacts to Gmail, enable “Contacts” then “Save.”

Alternatively, you can sync your iPhone contacts using iCloud, here’s how:
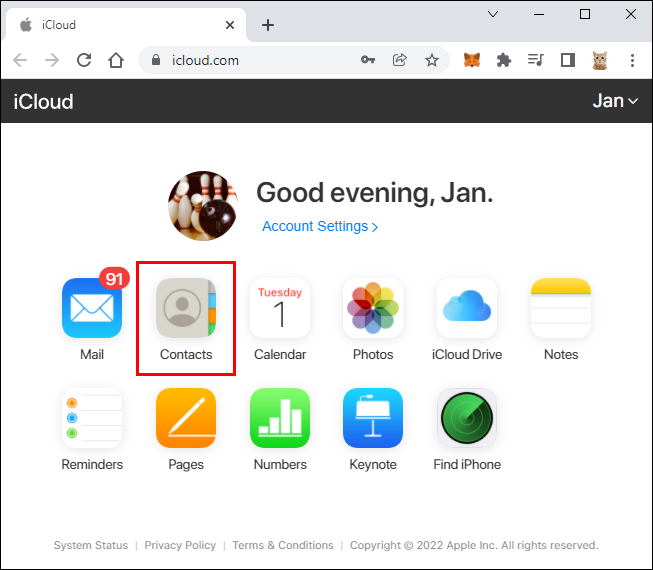
- Open “Settings,” tap on your name, then “iCloud” and enable “Contacts.”
- On your laptop or PC visit iCloud.com and enter your Apple ID credentials.
- Select “Contacts” then choose the contacts you wish to sync from your iPhone to Gmail.
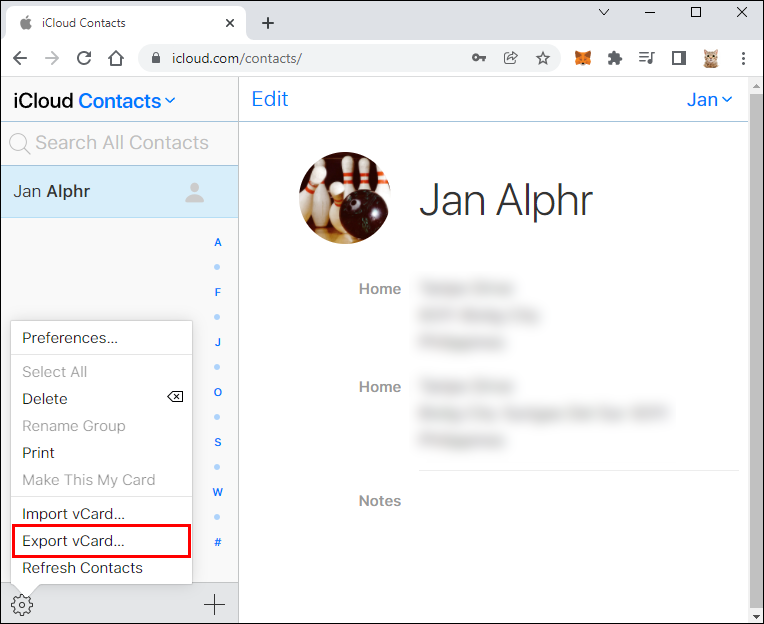
- Select the gear icon then tap “Export vCard.”
- Sign in to Google Contacts.
- In the left pane, choose “Import Contacts…” then in the new window, select “Choose File.”
- Select the vCard you exported from iCloud, then select “Import.”


Transfer Contacts From Android to iPhone Through Gmail
To transfer your Android contacts to iPhone via Gmail you must first have your Android contacts synced to your Gmail account. To do this:
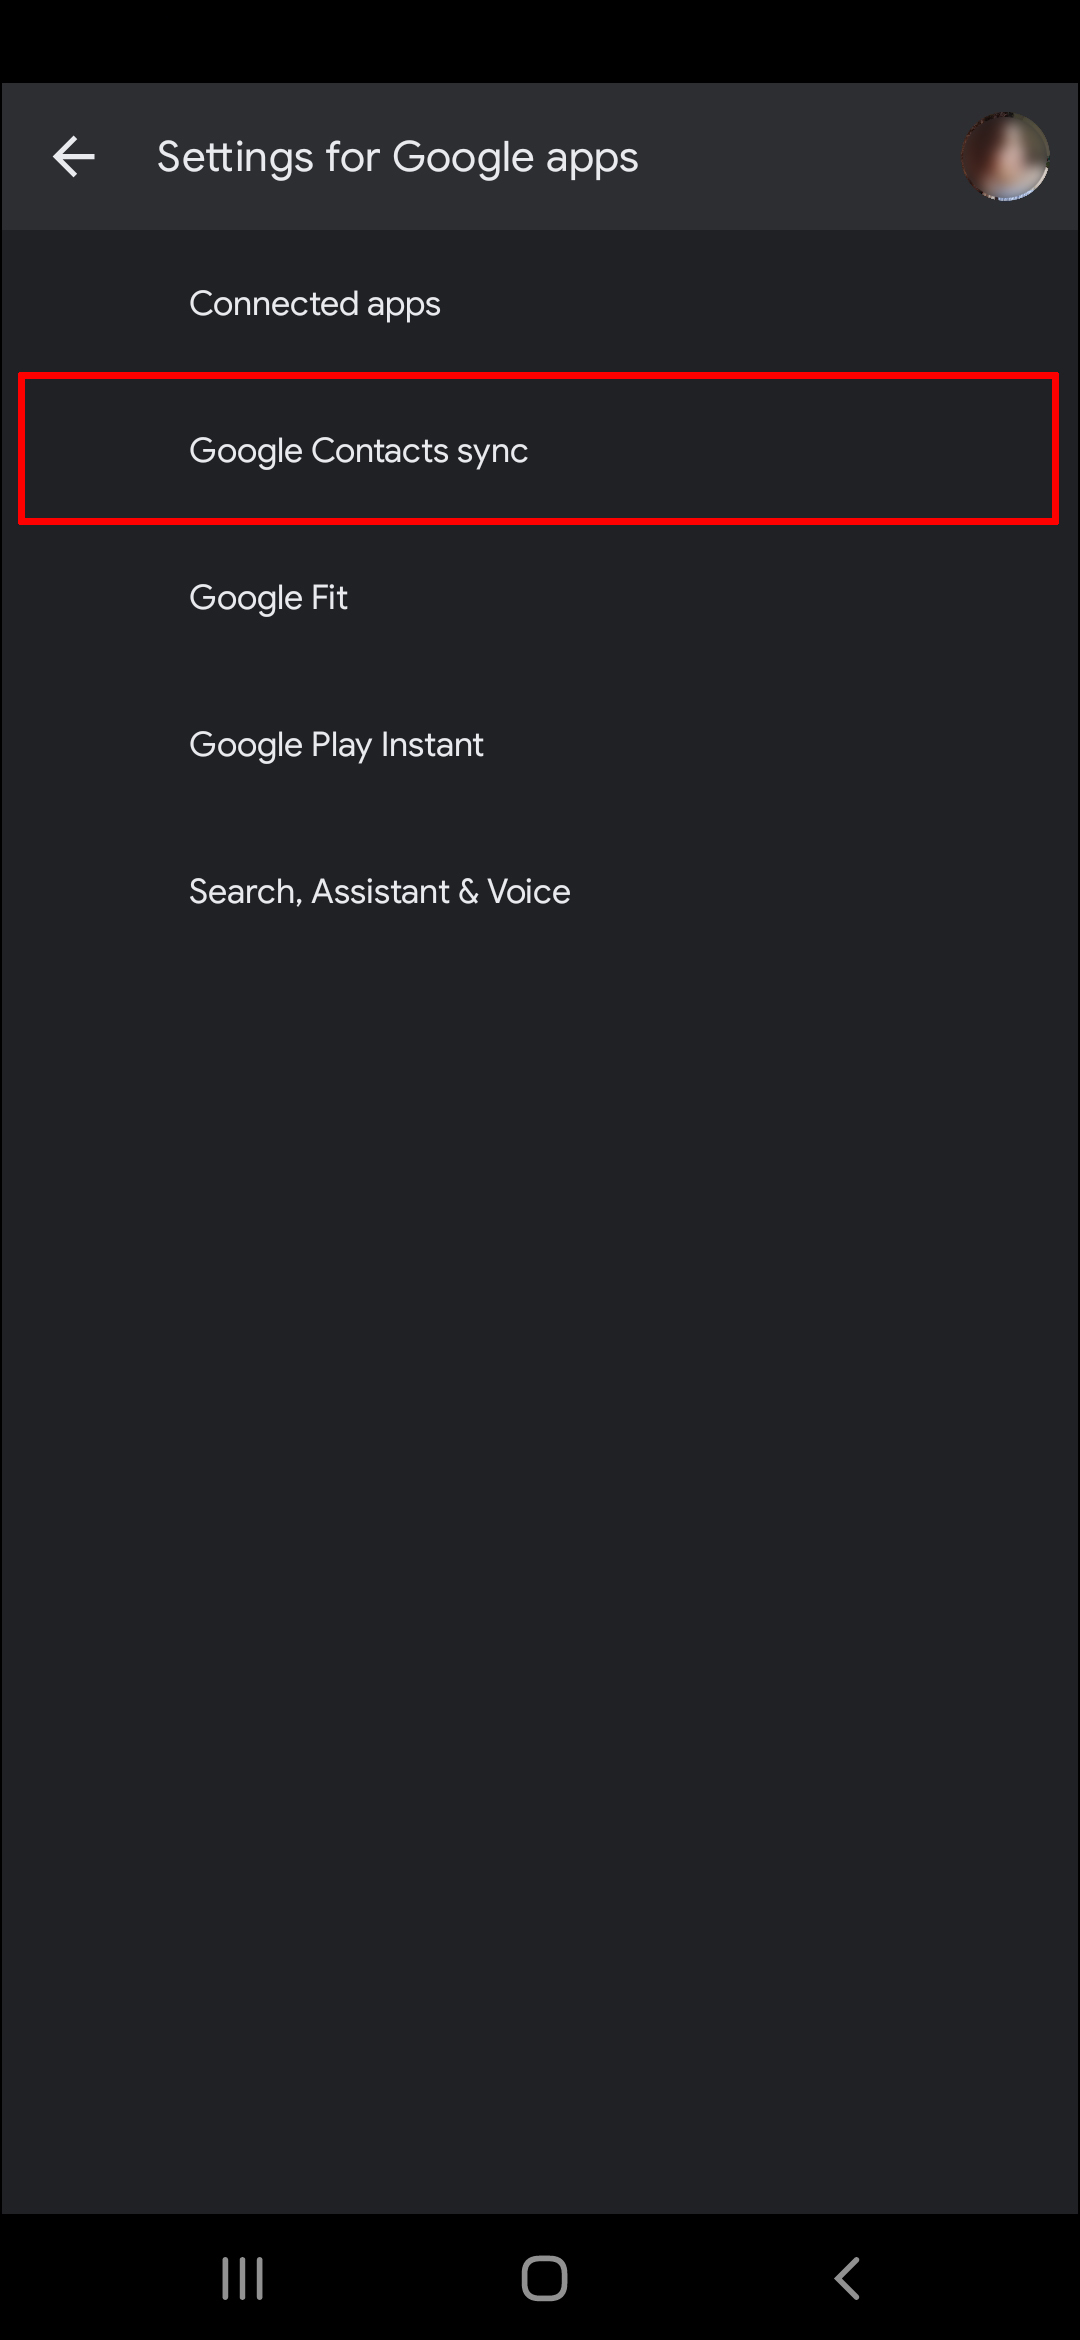
- Open the “Settings” application.
- Select “Google,” “Settings for Google apps,” then Google Contacts sync.”
- Choose “Also sync device contacts,” then “Automatically back up & sync device contacts.”
- Enable “Automatically back up & sync device contacts.”
- Choose the Gmail account you wish to transfer the contacts to.


Next, to transfer the contacts to your iPhone:
- Tap the “Settings” application.
- Select “Passwords & Accounts.”
- Choose “Add Account” then “Google.”
- Complete the instructions to add your Gmail account to your iPhone. All your Google info will synchronize, including contacts.
Troubleshoot Google Contacts Not Syncing With Android
Contact syncing issues between Google and Android are common. Try these quick fixes via your Android device to resolve the problem:
Note: Some steps may vary depending on the make and model of your device.
1. Reboot Your Phone
Start with a basic phone restart to clear/fix any temporary glitches that might be causing a problem for Google contacts to sync.

2. Disable and Re-Enable Contacts Sync
Here you can check that the auto-sync option is enabled. If so, disable then re-enable it, here’s how:
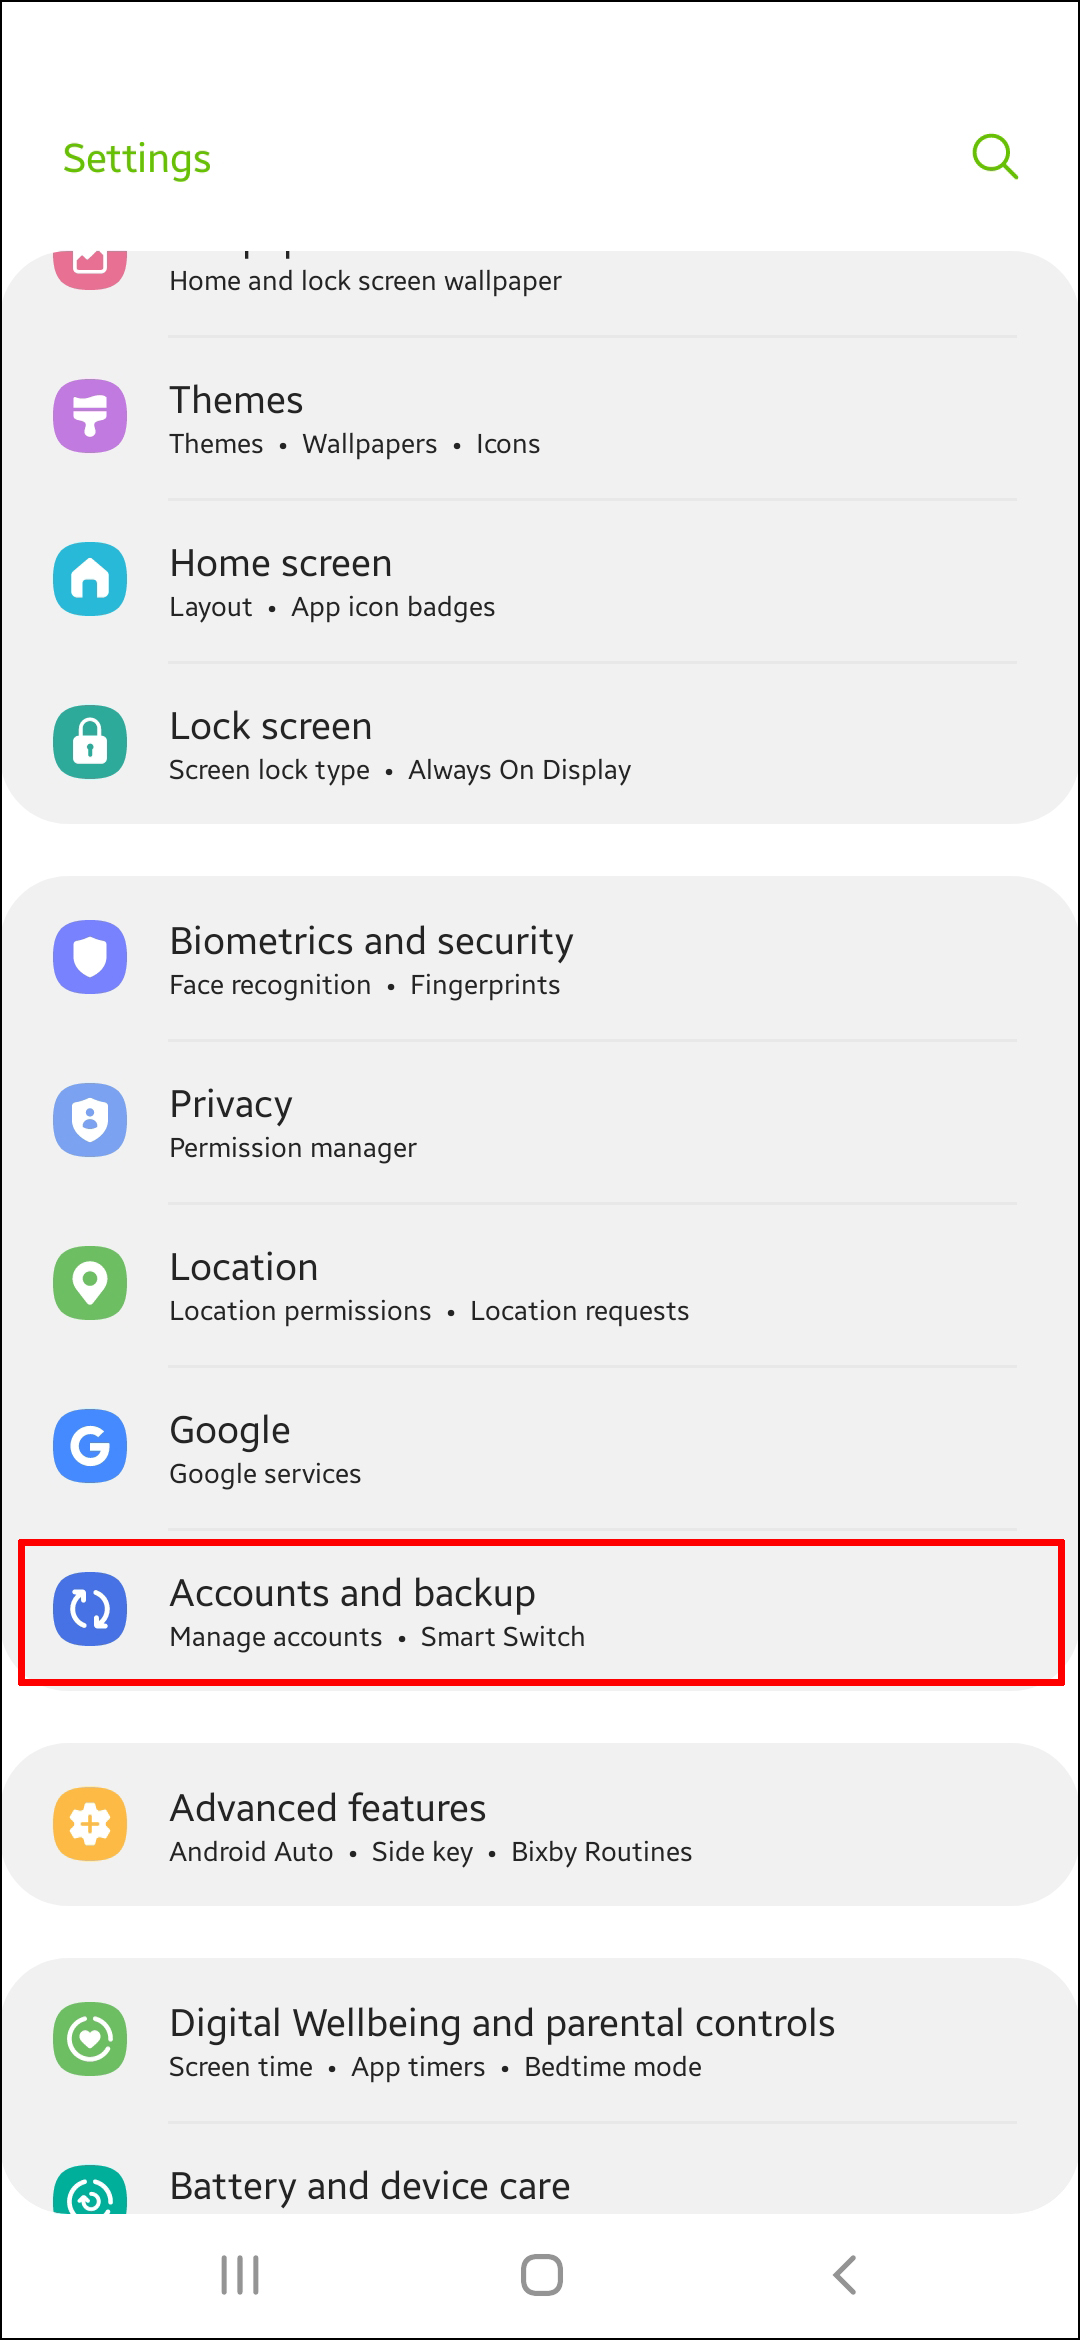
- Open “Settings.”
- Click on “Accounts.”
- Select “Google” then choose your Google account.
- Select “Account Sync” then disable “Sync Contacts.”
- Tap the switch to re-enable it.


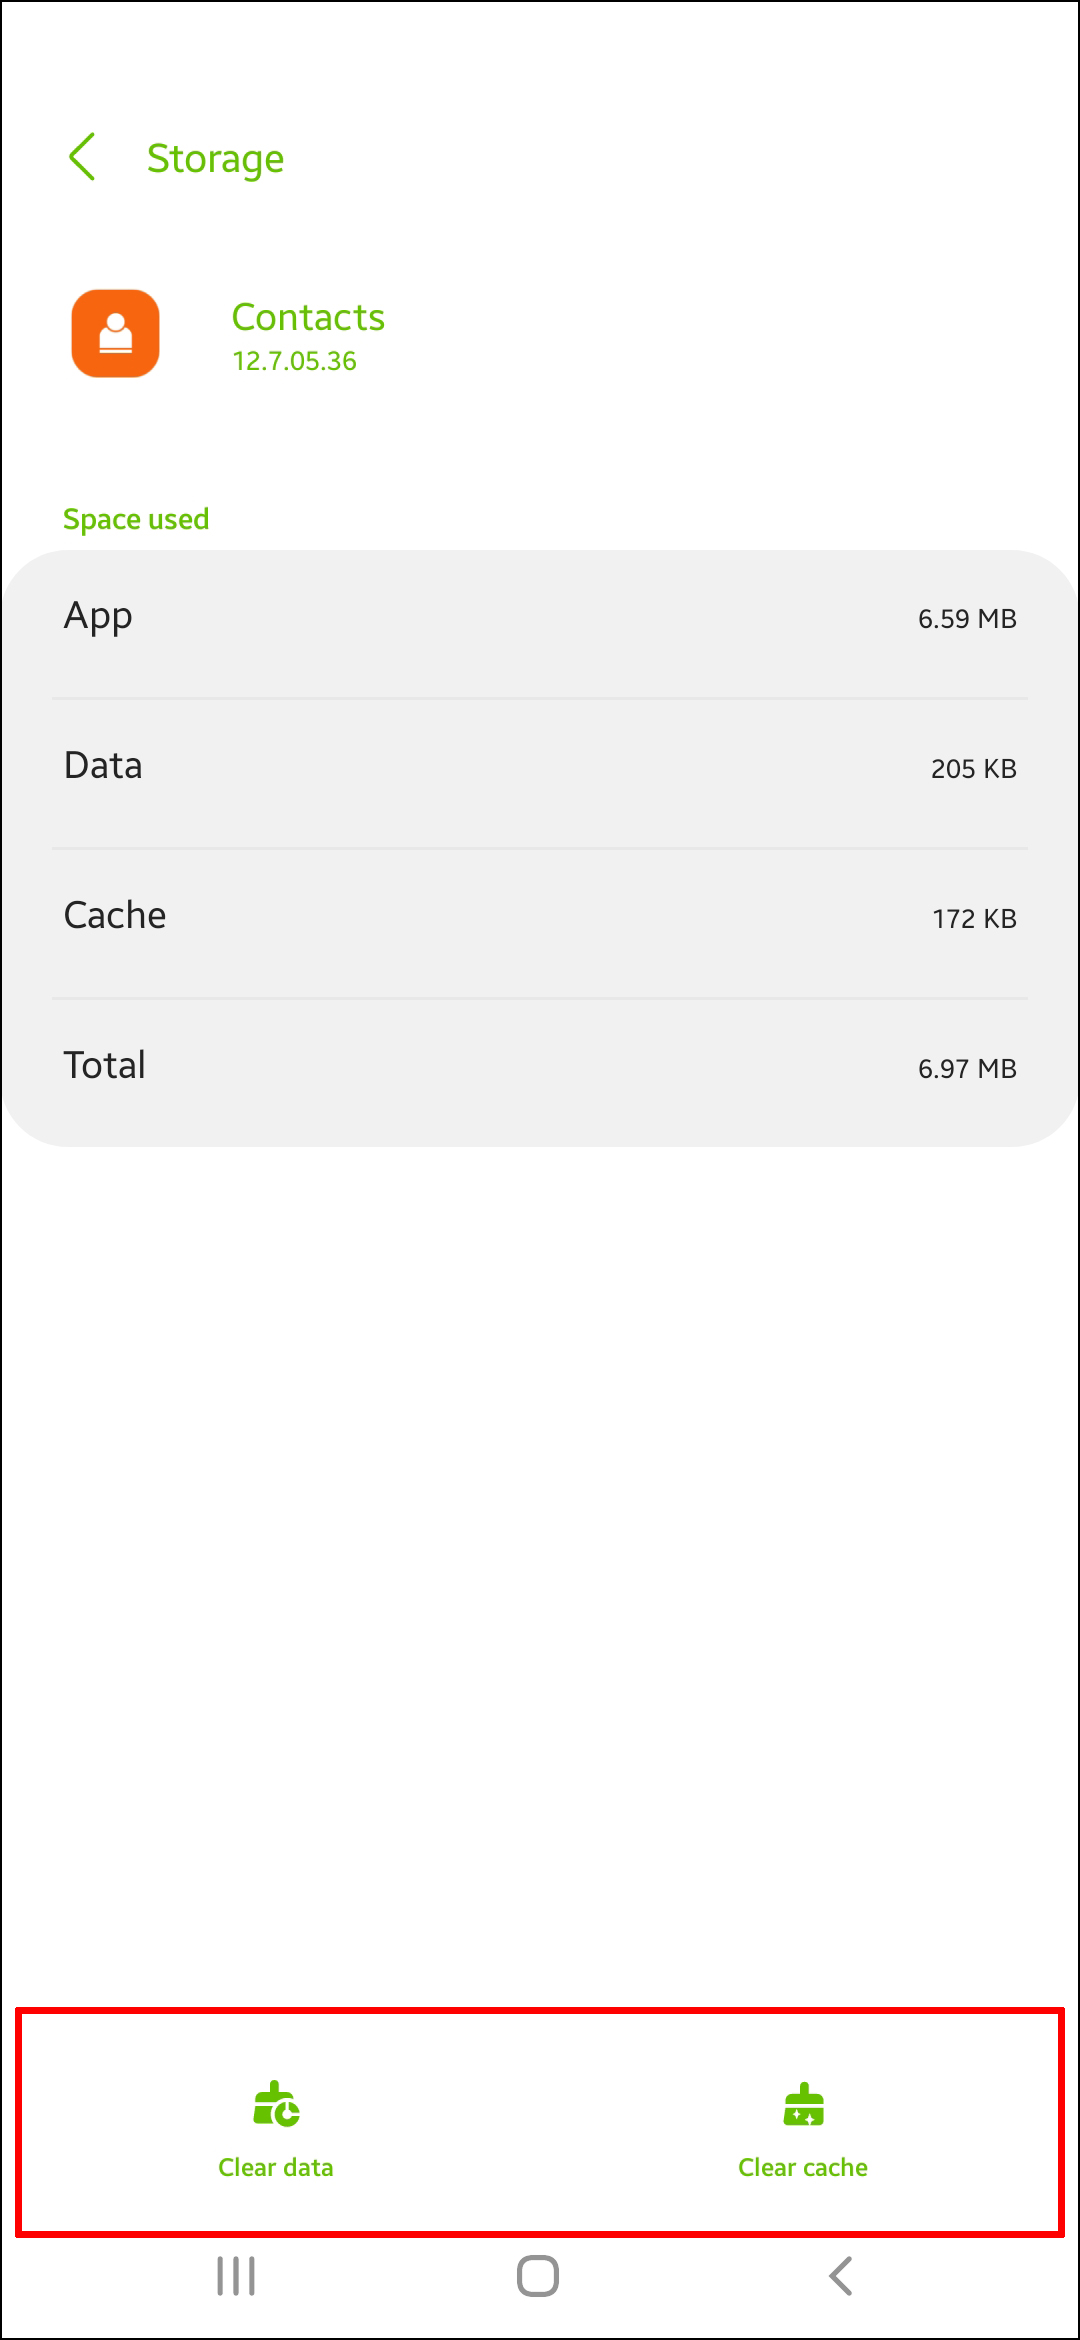
3. Clear Your Cache and Data
Cached data could also be the culprit. Here’s how to clear your cache and data:
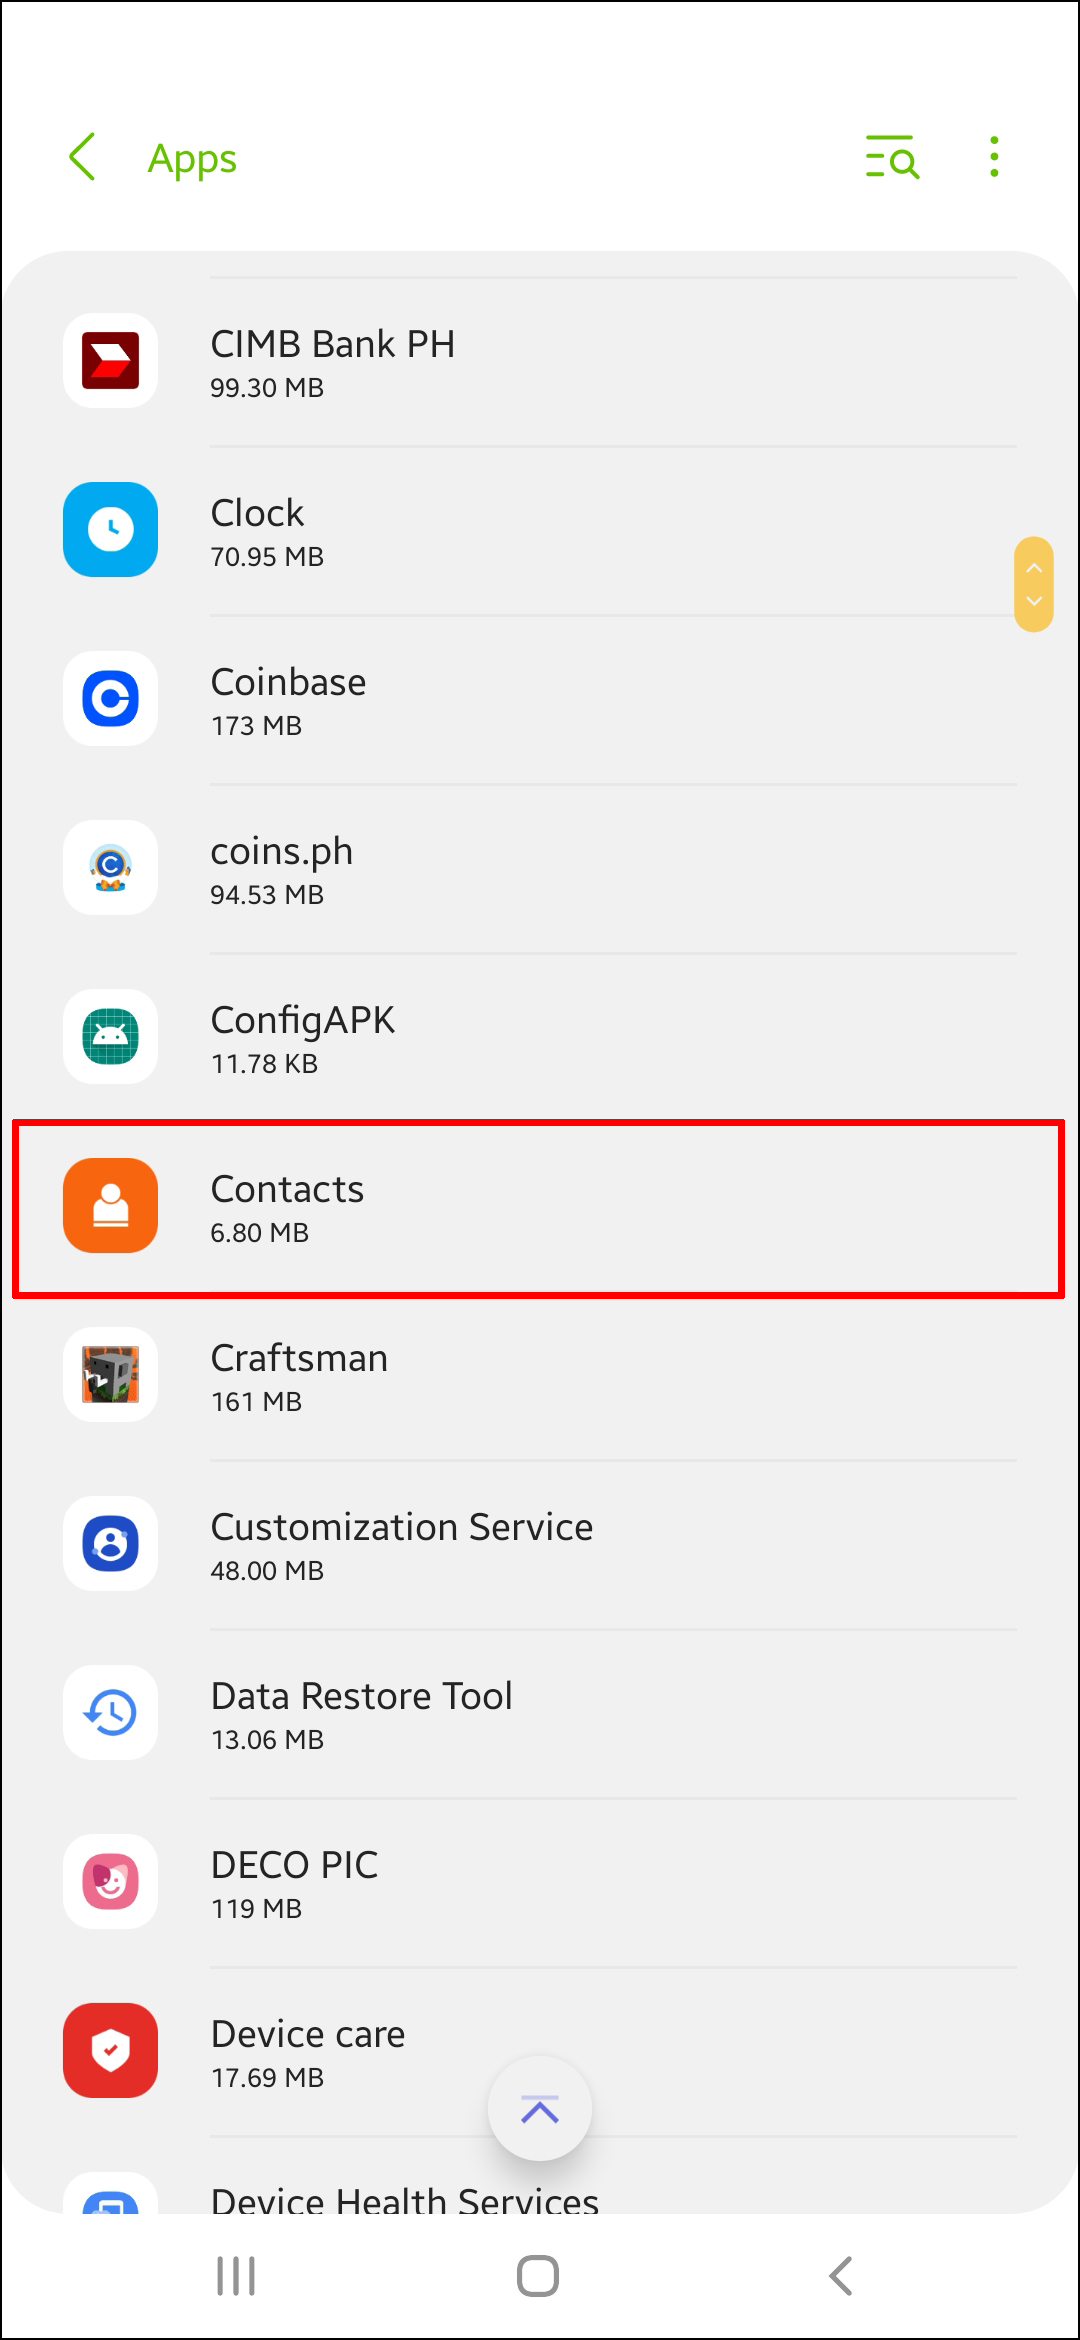
- Launch “Settings.”
- Navigate to the “Apps” section.
- Select the “Contacts” application.
- Tap “Storage” then “Clear Cache” and “Data.”

4. Force Contacts to Sync
Due to temporary issues, the Google account sync feature may stop. Do the following to force it to restart:
- Tap “Settings” then “Accounts.”
- Use the toggle switch to re-enable the “Automatically Sync App Data” option.

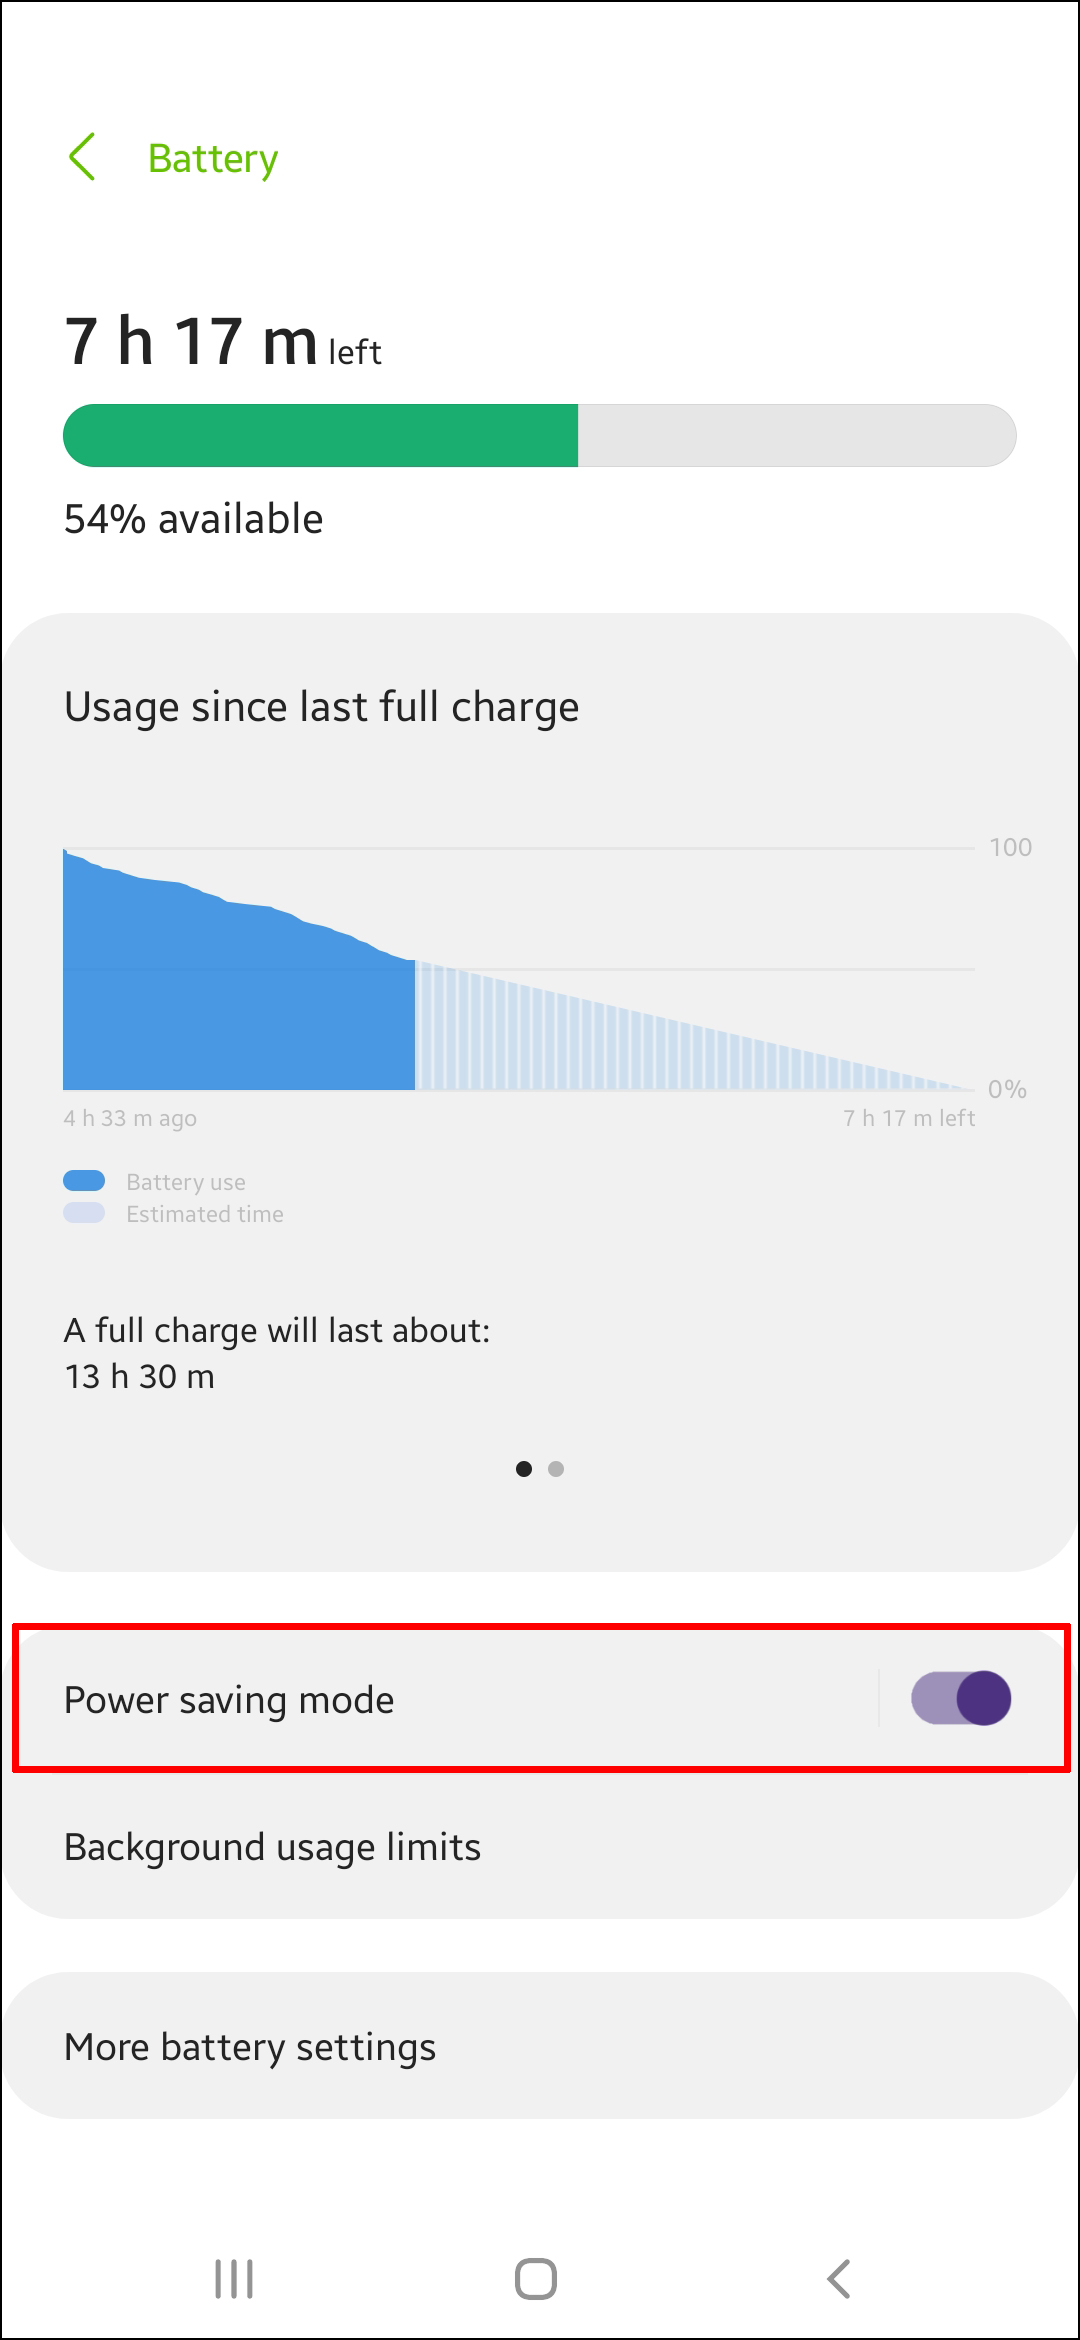
5. Disable Saver Mode
On most Android devices, once the power or battery saving mode is enabled, to conserve energy the sync feature will be temporarily disabled. Disable “Battery Saver” to see whether that solves it:
- Tap “Settings,” “Battery,” then “Battery Saver.”
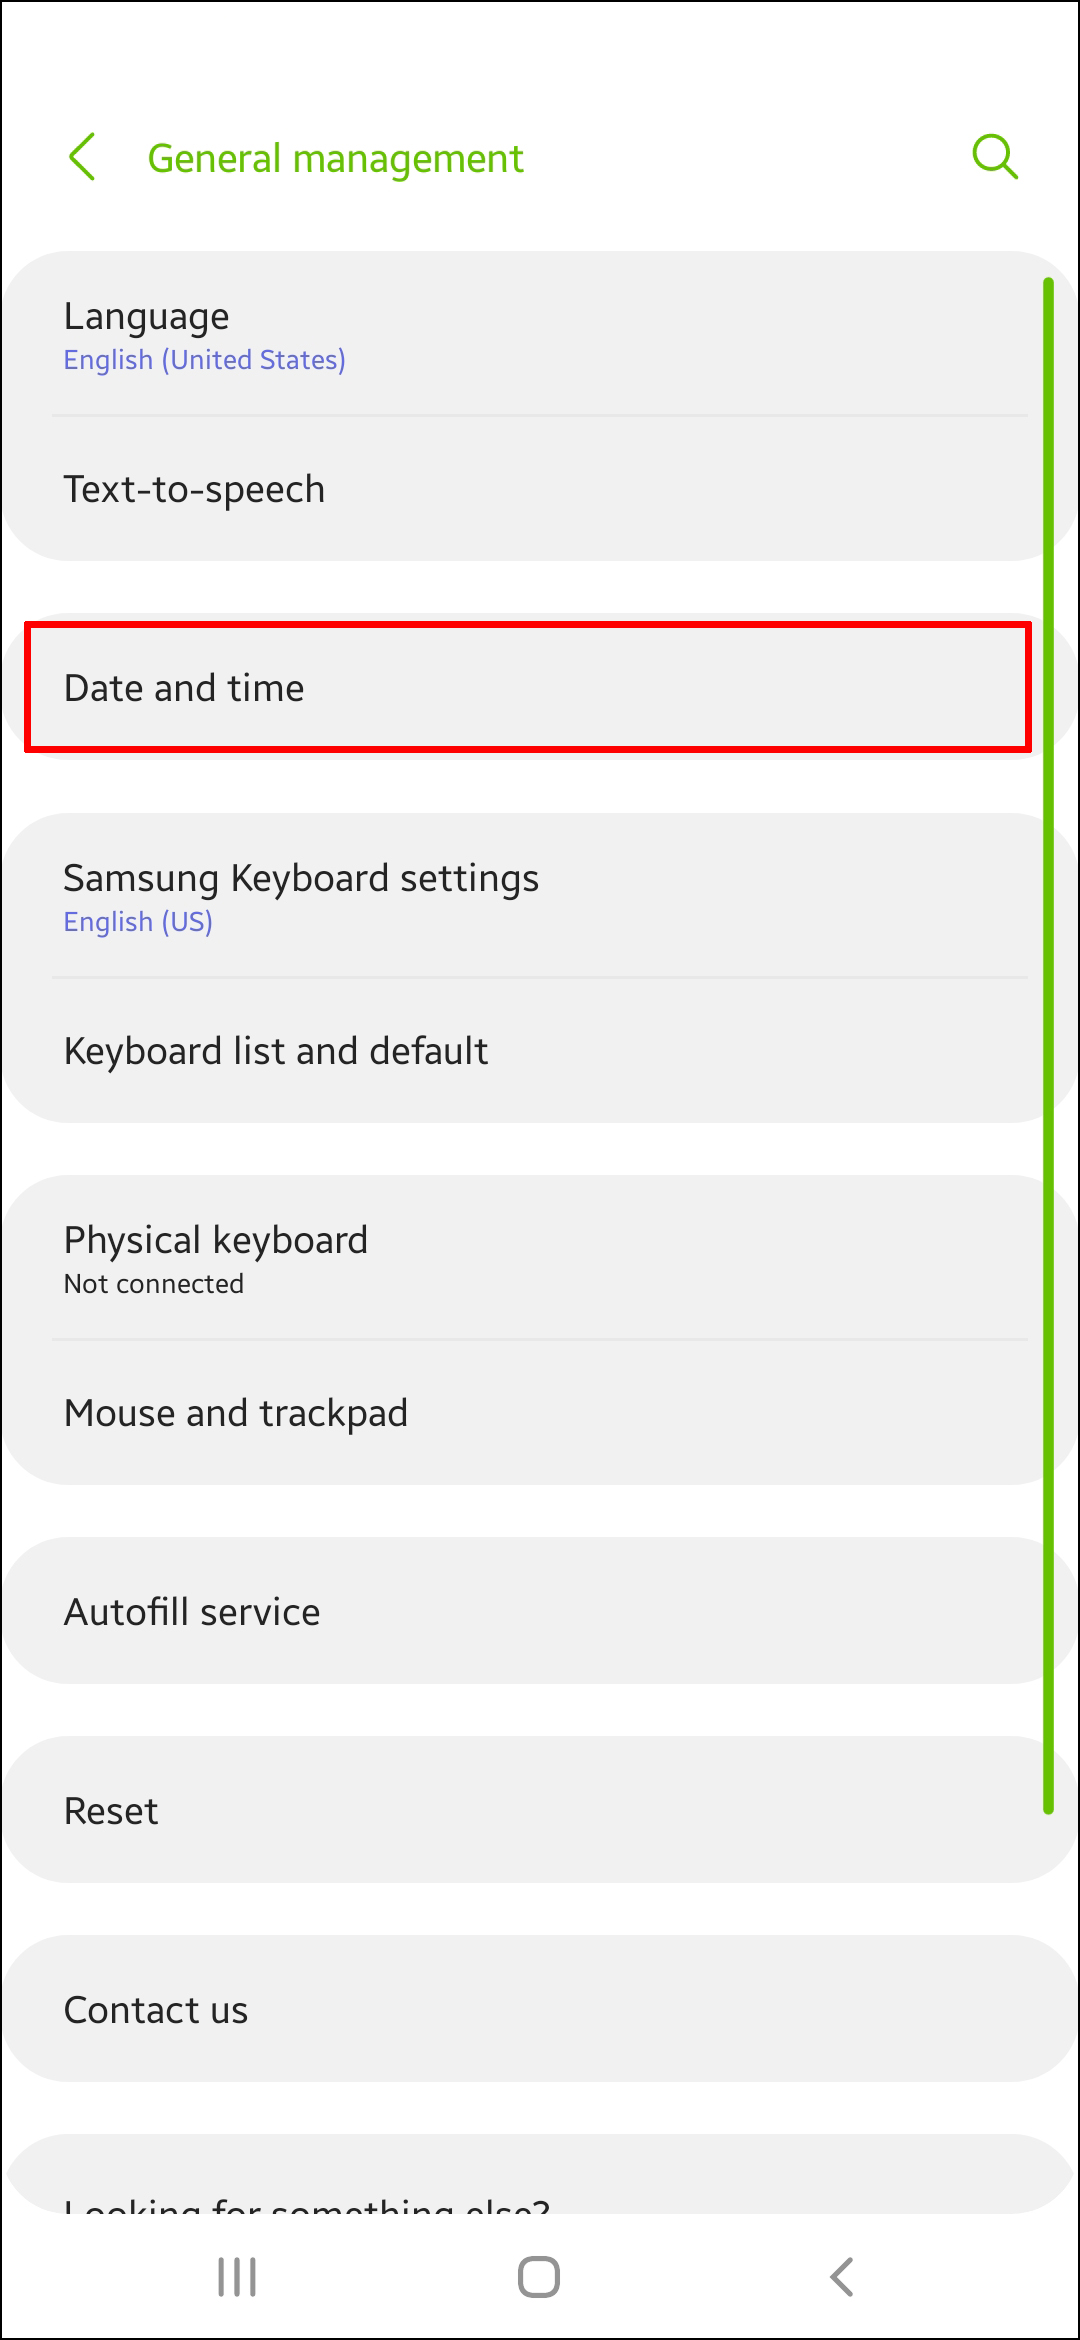
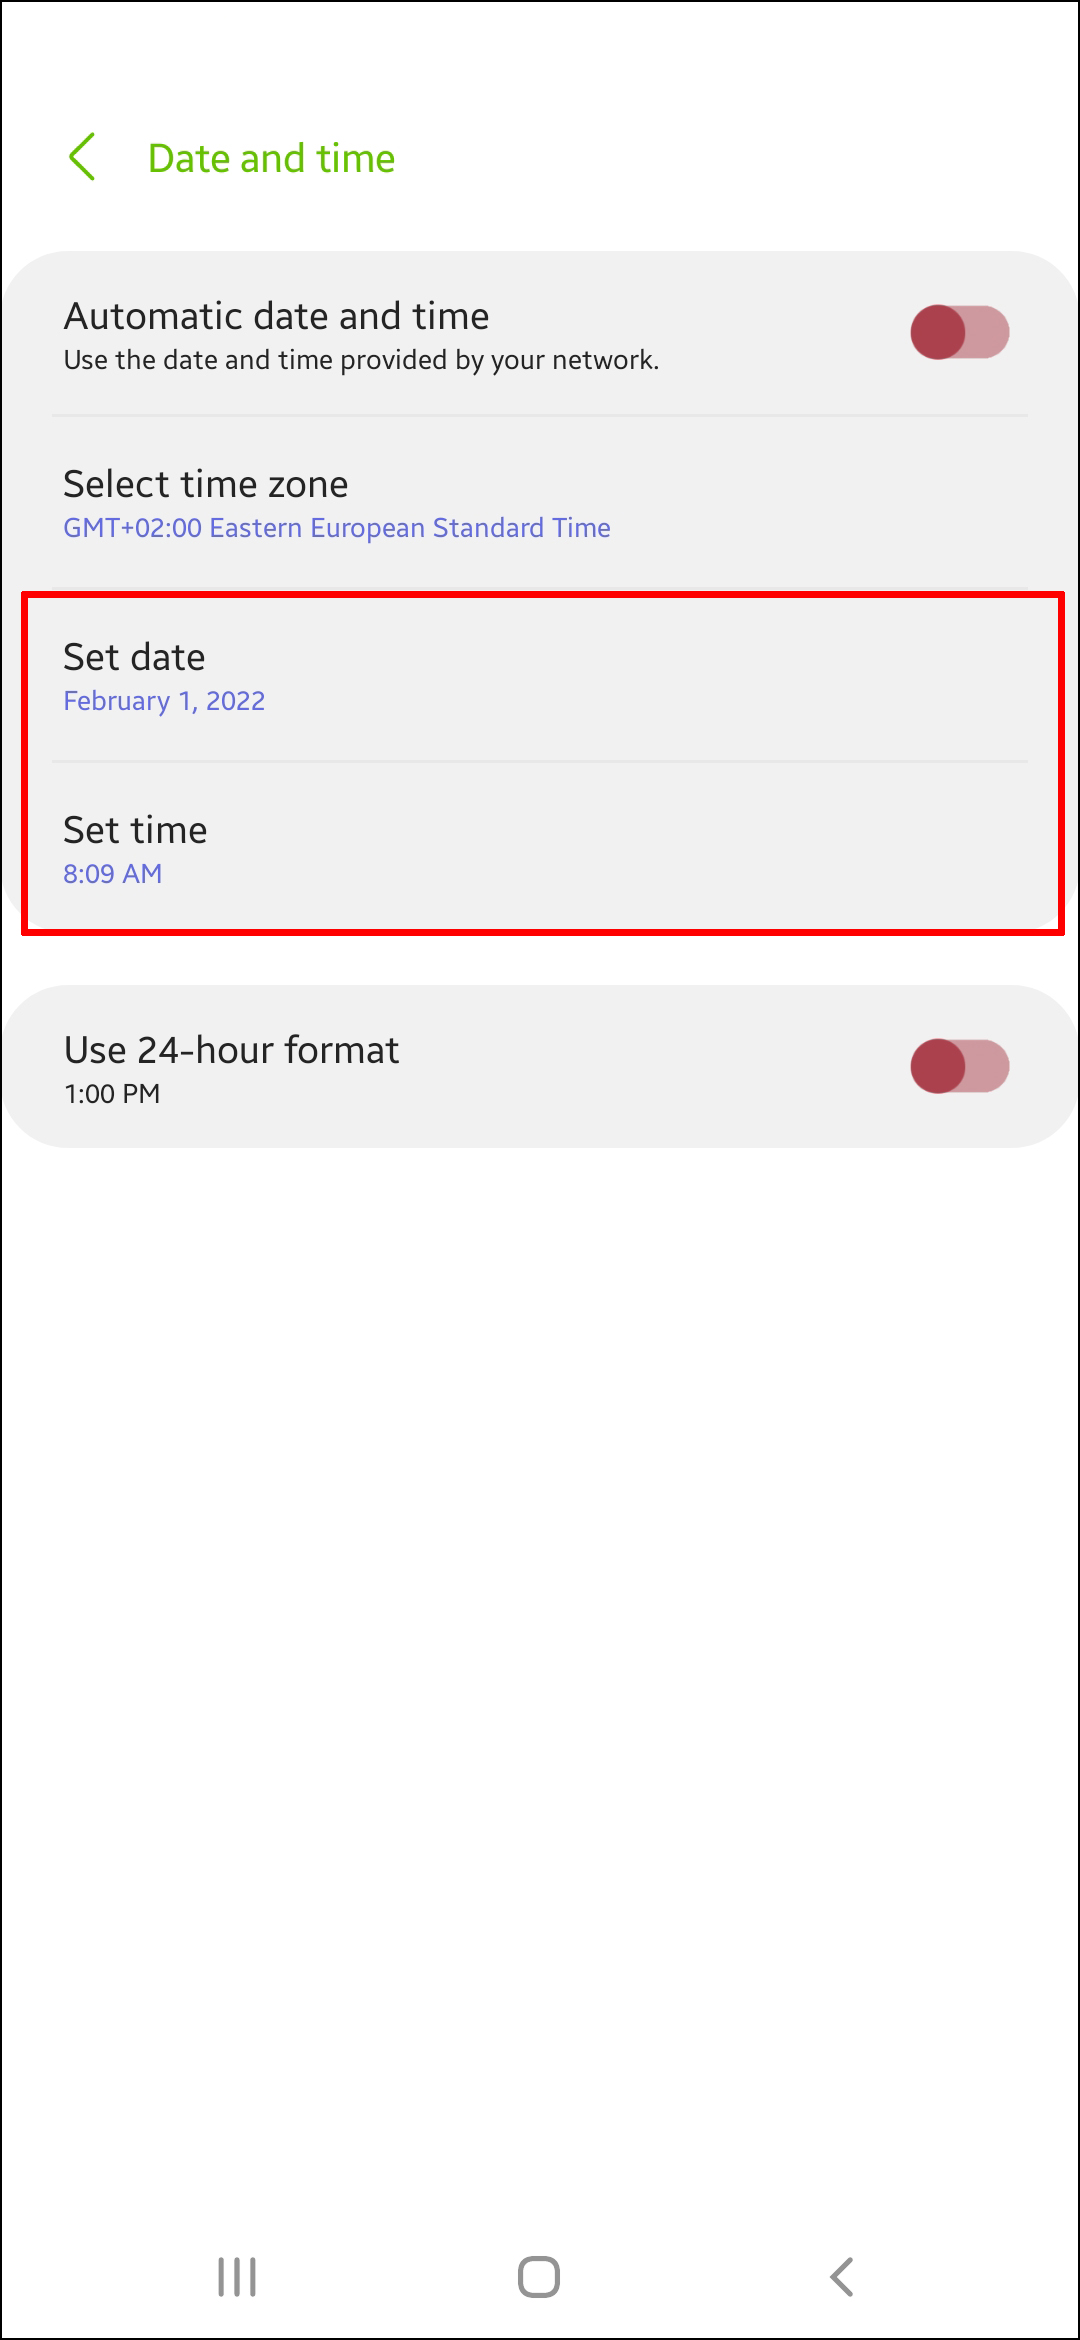
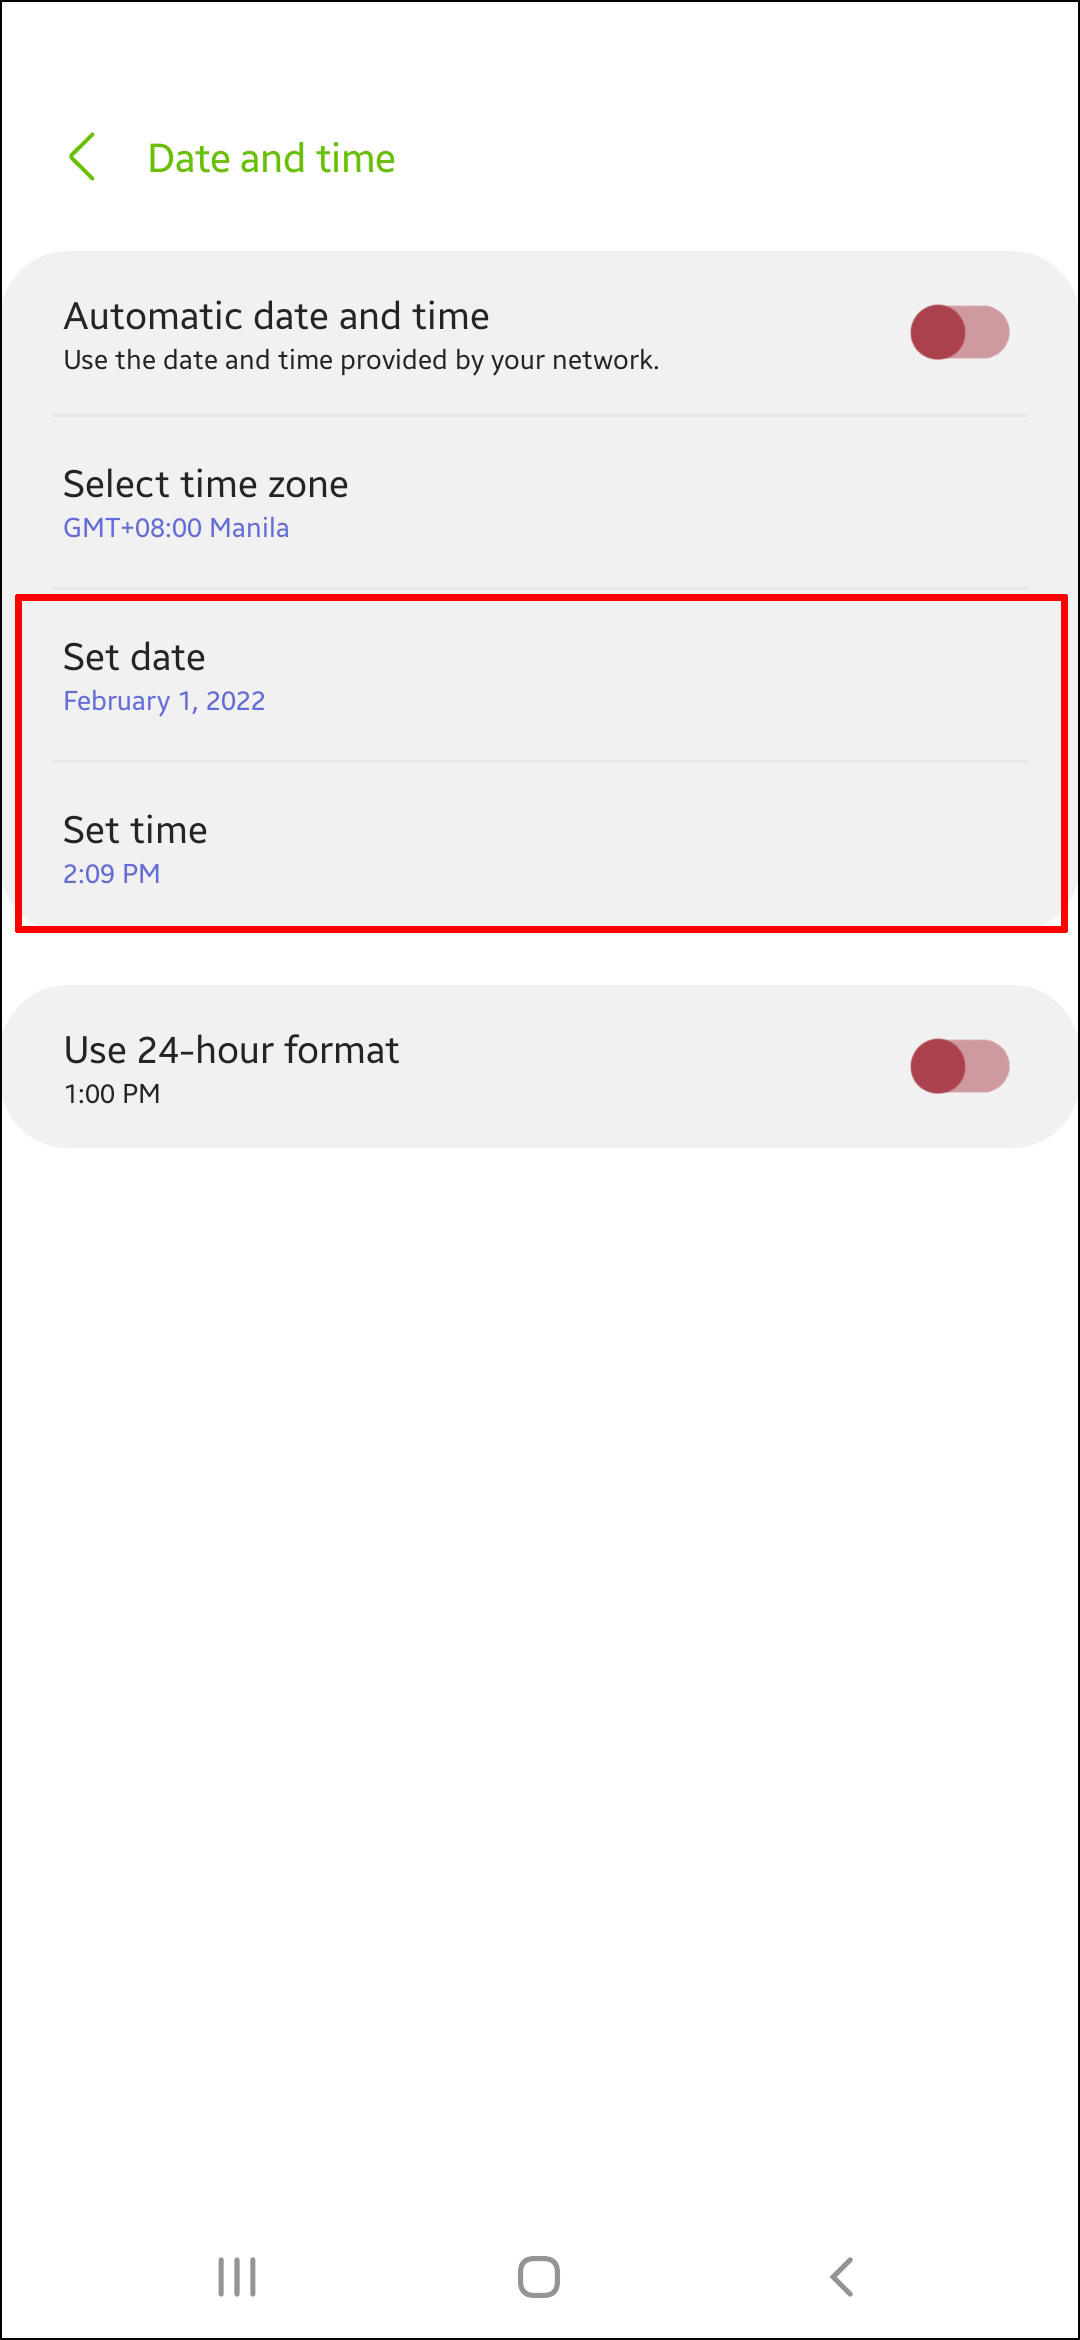
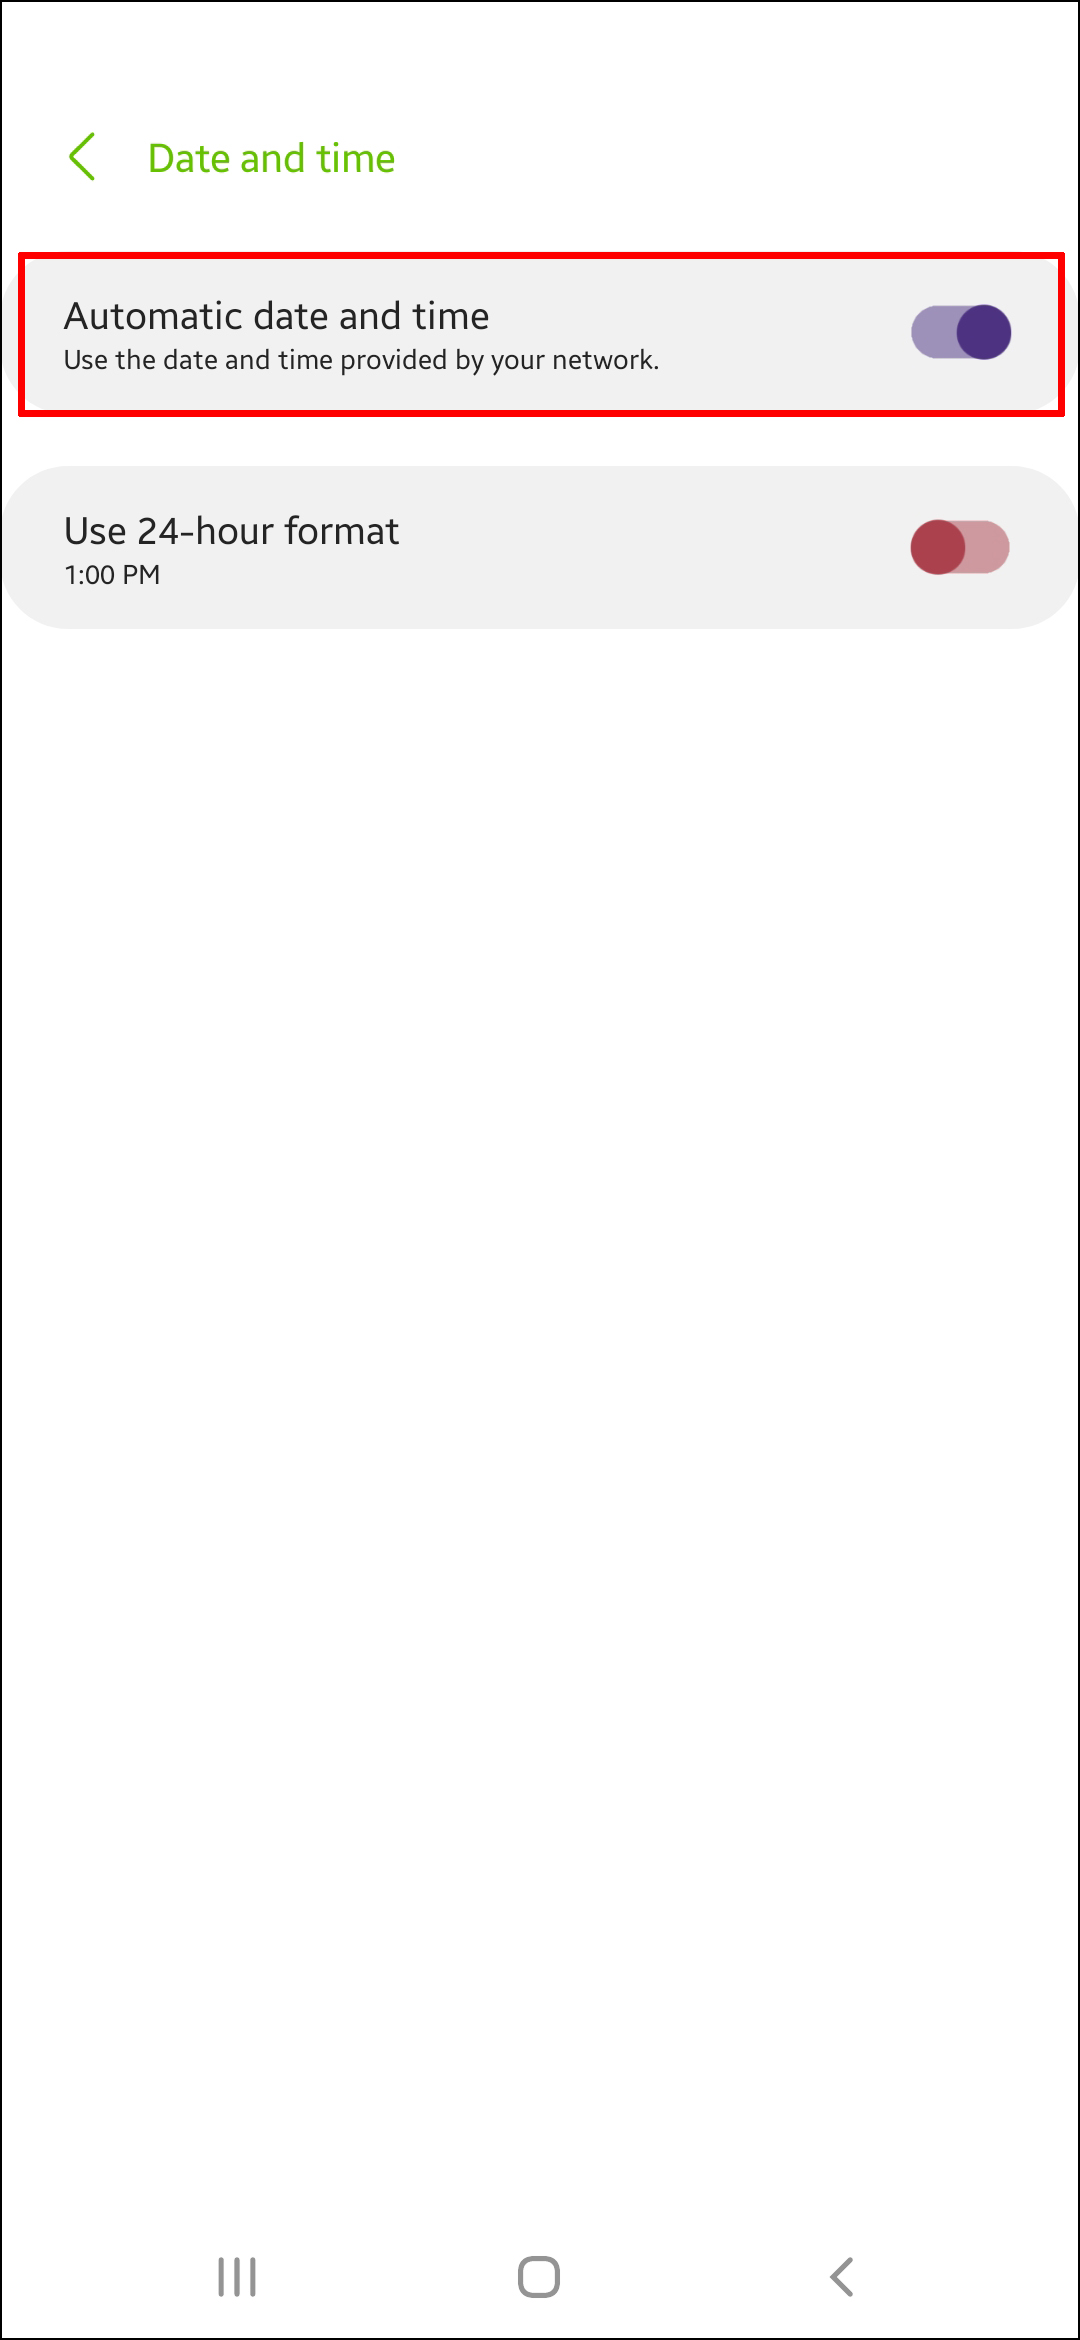
6. Verify Date and Time
Having the wrong date and time settings on your device can also cause Google contacts to stop synching. Even if the settings are correct, Google recommends changing them to force synchronization. Here’s how:
- Open “Settings.”
- Go to “Date and Time.”
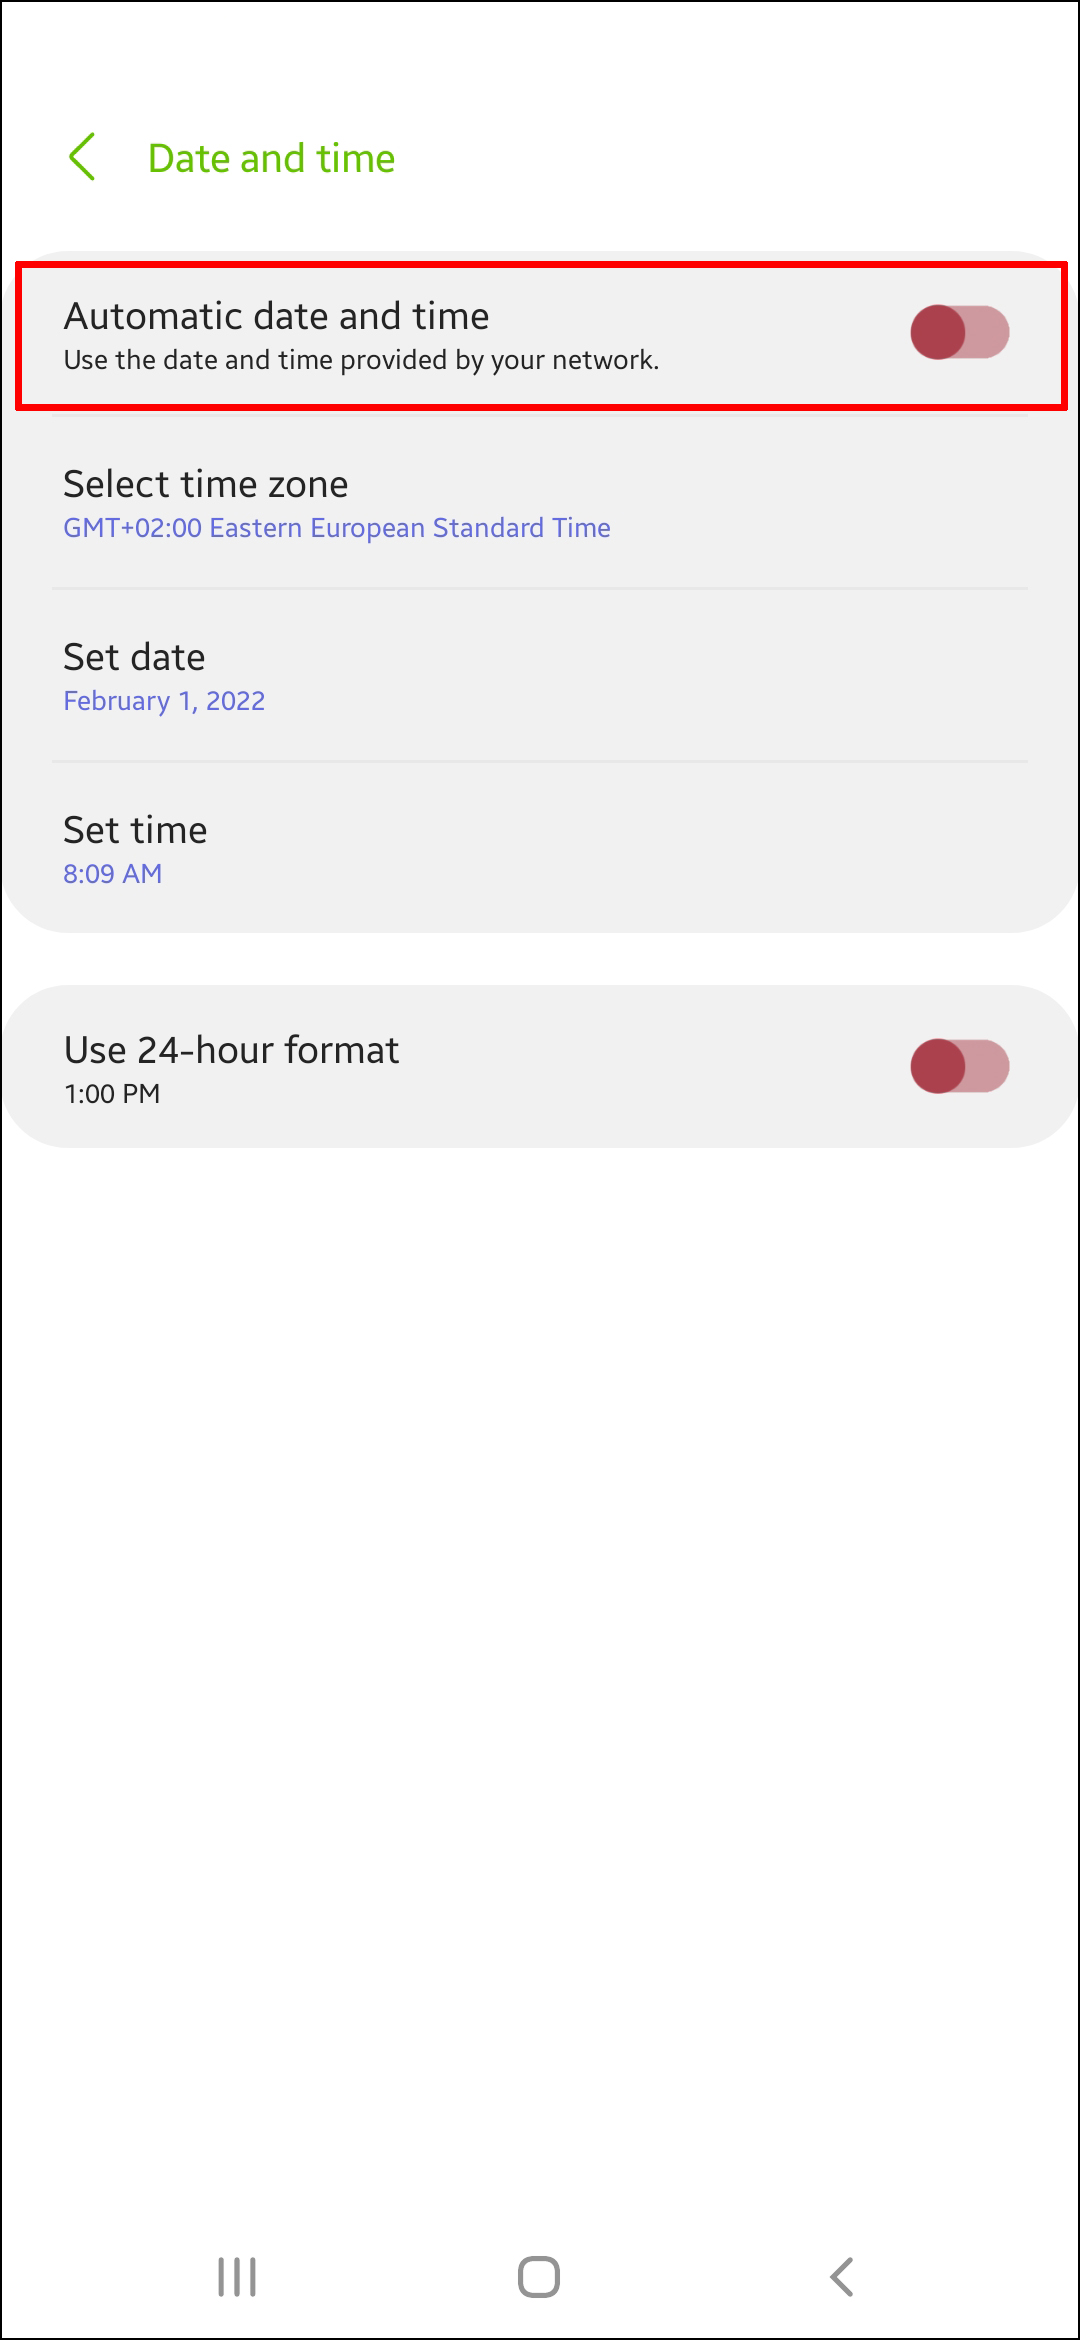
- Disable “Automatic date & time” and “Automatic time zone.”
- Set the date and time incorrectly.
- Close “Settings” and go to the home screen.
- Go back to the “Date and Time” settings.
- Change the settings to the correct date and time.
- Enable “Automatic date & time” and “Automatic time zone.”
7. Update Google Contacts
If Google Contacts is your phone’s default phonebook app, then try updating it to the latest version by visiting the Google Play Store.
If your phone uses another contacts app, check that it has the latest version installed. Alternatively, try using Google Contacts as your default contacts.
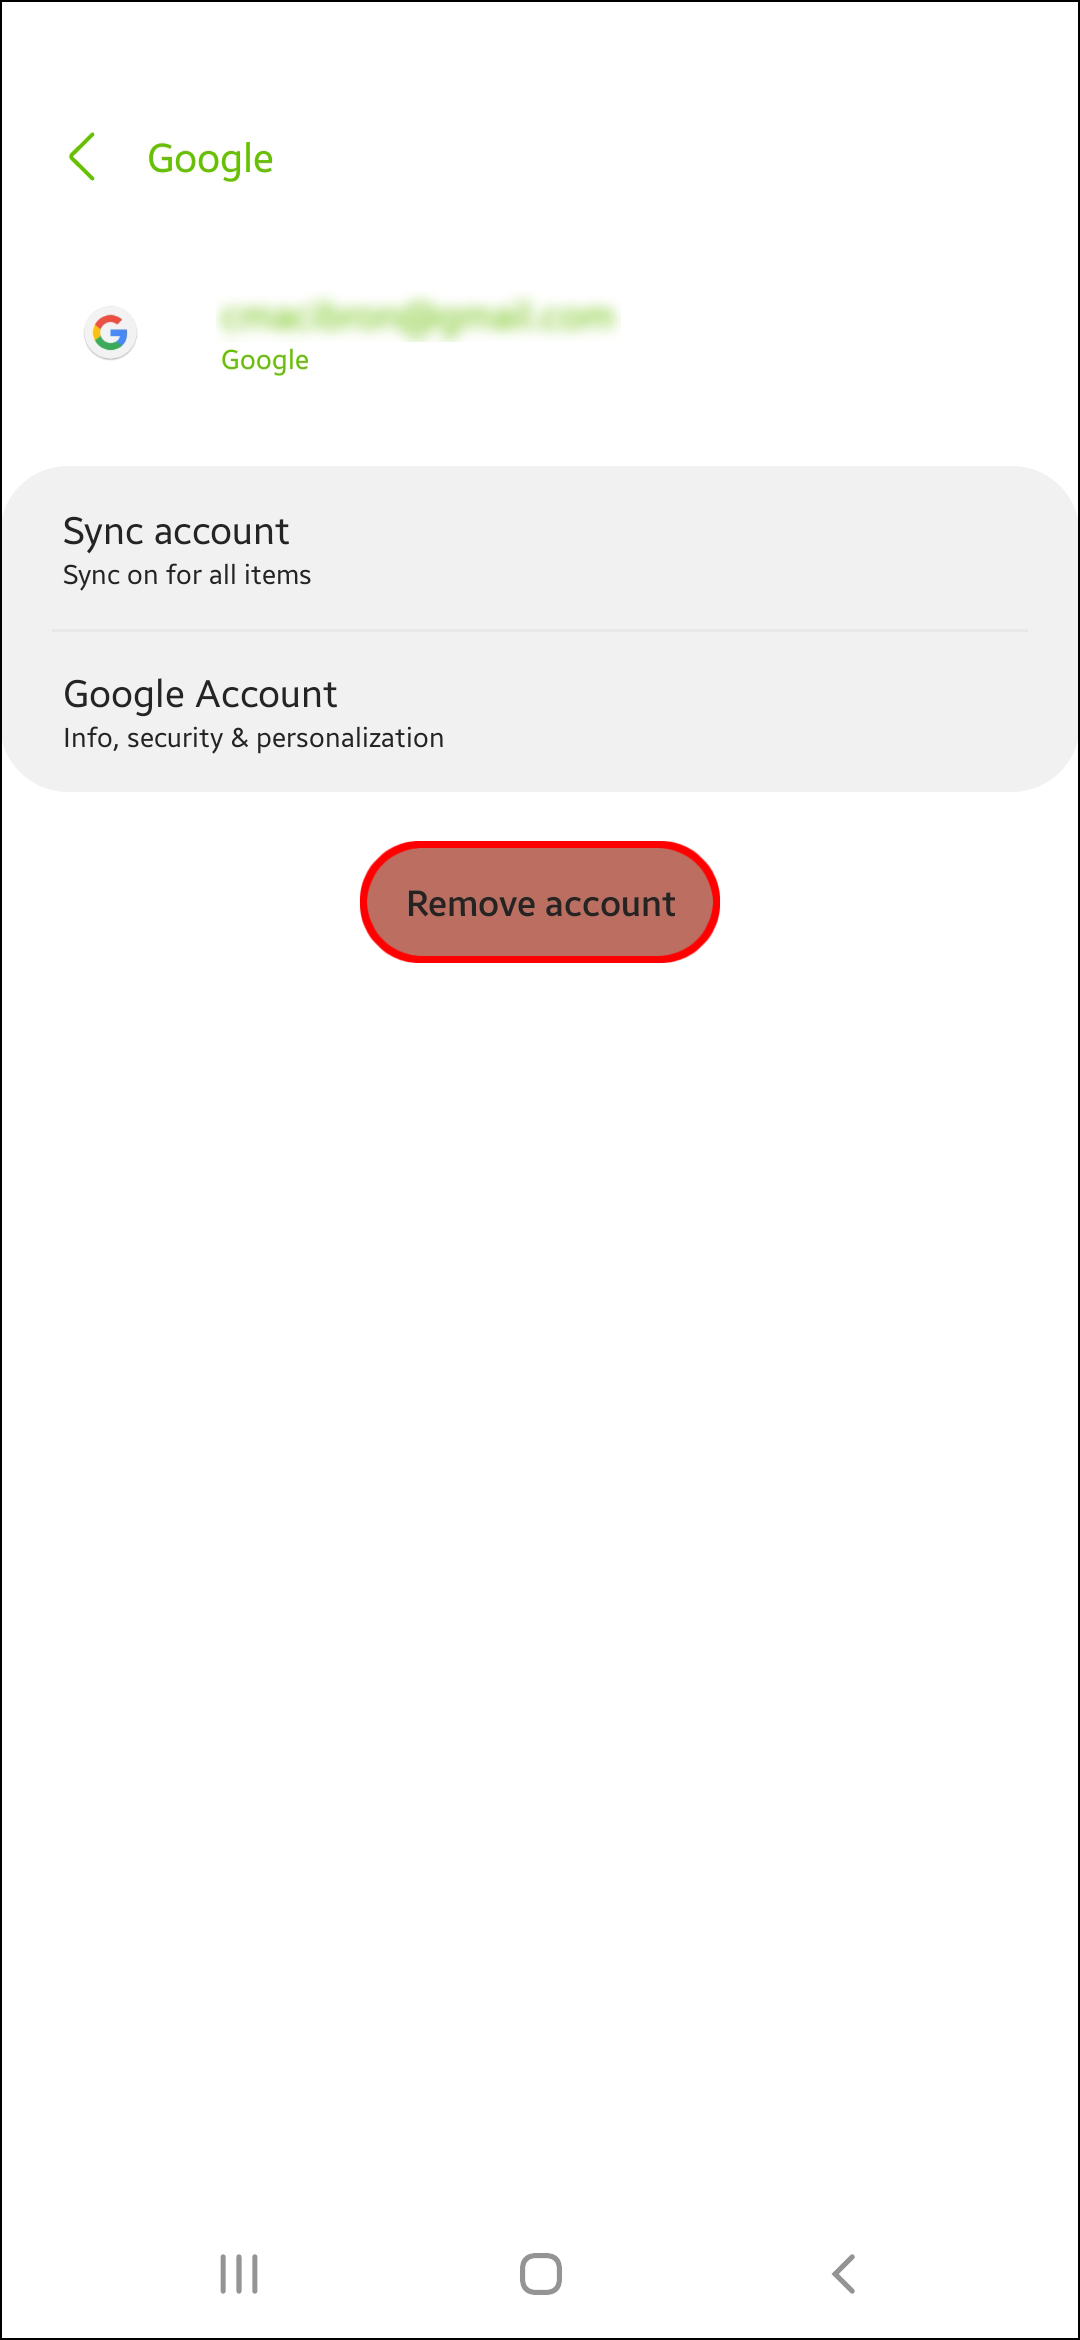
8. Remove and Re-Add Your Google Account
Follow these steps to remove your Google account:
- Open “Settings.”
- Go to “Accounts,” “Google,” then select your Google account.
- Select “Remove” then confirm.
- Once your account has been removed, re-add it then enable contacts sync.

Android Contacts Synchronized
Google’s automatic backup and sync feature, lets you conveniently synchronize the contacts saved on your phone or SIM to your Gmail account. Once the setting is enabled in Google, after the initial sync, new contacts will automatically sync to your Gmail account. This setting can be disabled at any time.
Once all your contacts are in one place, you’ll save time looking for contact information via additional apps and also have a backup of your phone’s contacts.
Tell us what you think about Google’s automatic backup and sync features in the comments section below.
Disclaimer: Some pages on this site may include an affiliate link. This does not effect our editorial in any way.