Gaining access to someone’s Google account essentially means gaining access to the entirety of their online presence. Although the most commonly used form of online protection, a password alone isn’t enough to keep your account safe. After all, a password can be guessed, hacked, or phished. It’s imperative to add an extra layer of security, known as two-factor authentication (2FA).
If you’re unsure how to go about this, you’ve come to the right place. Keep reading to learn how to turn 2FA on or off using your Android device.
How to Enable 2FA on an Android Device
Enabling two-factor authentication is essential for online security. You’ll be happy to know that the process is pretty straightforward, and will take you no longer than a few minutes. After that, unauthorized people won’t be able to access your Gmail, saved bookmarks, or internet history, even if they have your password.
Follow these steps to turn on 2FA on your Android device.
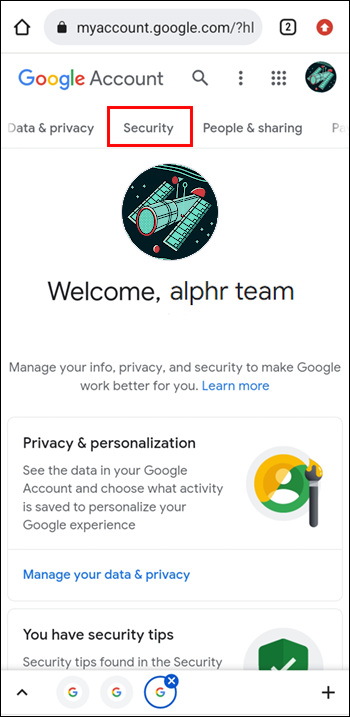
- Go to your Google Account.

- Tap the “Security” tab in the navigation panel at the top.

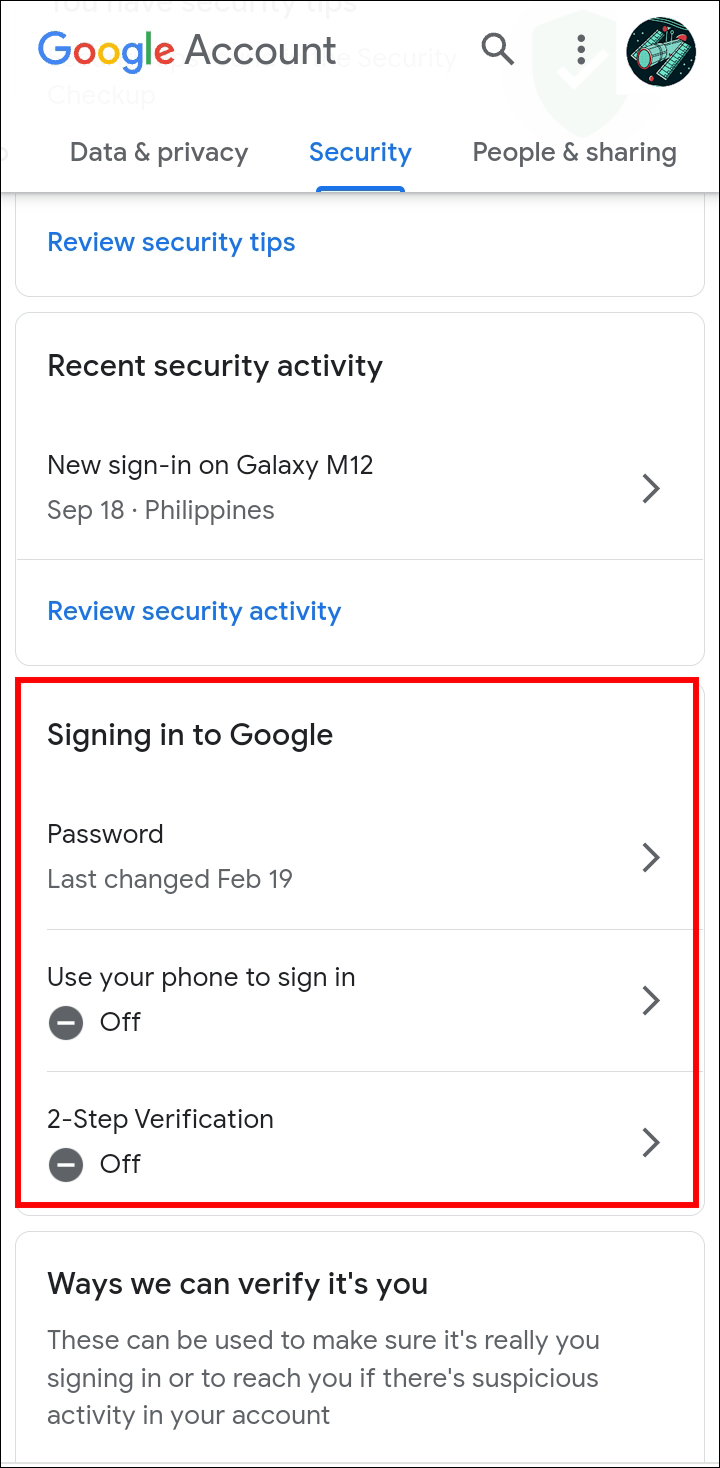
- Scroll to the “Signing in to Google” section.
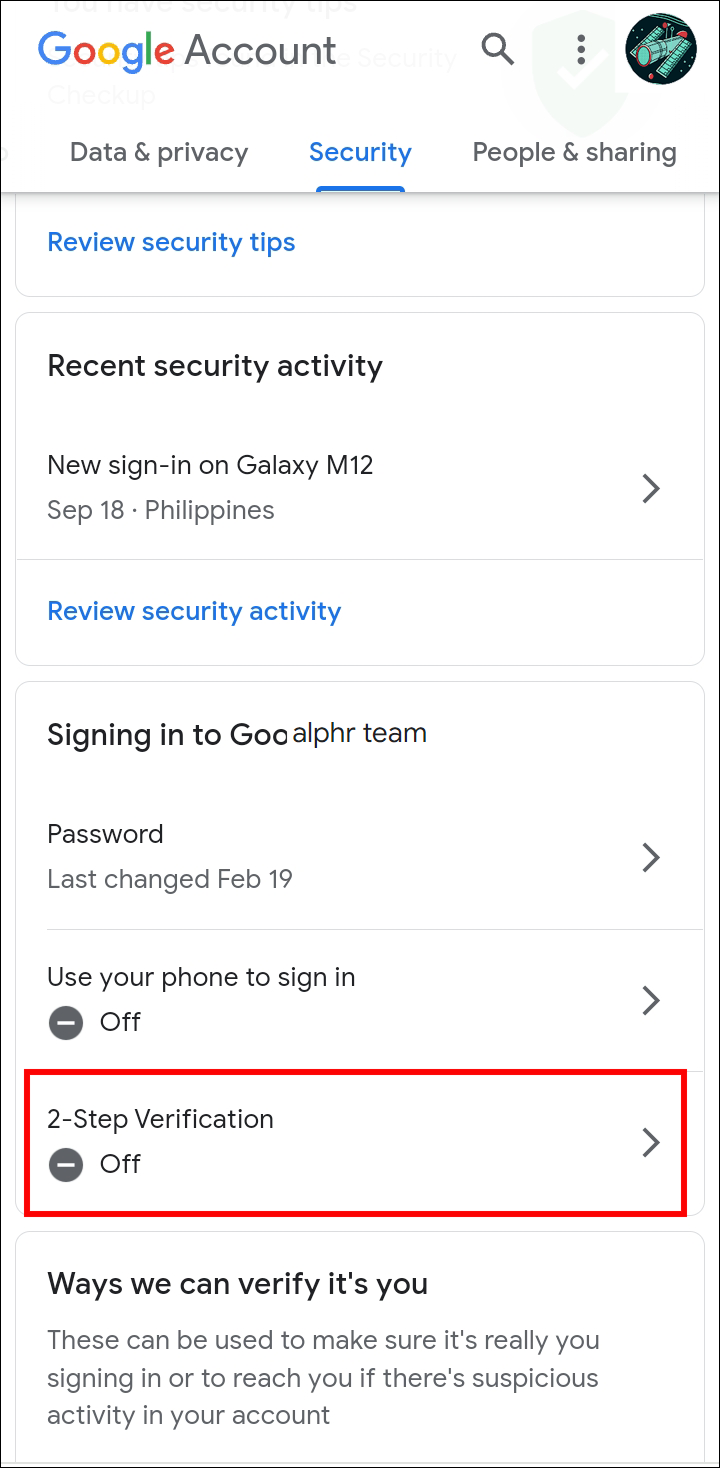
- Press the “2-Step Verification” option.
- Hit the “Get Started” button at the bottom of the page.
- Enter your password to verify your identity, and tap “Next” to log in.
- Type in your phone number.
- Select “Text message” under “How do you want to get codes?”
- Enter the verification code you’ve been sent to confirm it works and hit “Next.”
- Press the “Turn on” button to finalize the process.


While these verification codes are set as the second step by default, they can be vulnerable to phone number-based hacks. For that reason, it’s better to choose another step or add more security options. Let’s have a look at your choices.
Google Prompts
Google prompts allow you to quickly confirm you’re logging in to your Google account on a different device by tapping a notification on your phone. They are easier to use than verification codes. They can protect you against phone number-based account hacking and give you more information about sign-in attempts.
Unfortunately, not all Android devices support this step. If you’d like to use Google prompts as part of the 2FA process, you need an Android smartphone with updated Google Play services.
Security Keys
A security key is a more secure second step than verification codes. You can use it to increase phishing protection. You can buy physical security keys, or you can go for the phone’s built-in Bluetooth or NFC security keys.
After adding the desired security keys, you can follow the on-screen instructions to pair the devices the next time you log in from a different browser.
Note that this option is only available for Android devices 8.0 and higher.
Google Authenticator App
If you use verification codes as your second step, you’ll need an internet connection and mobile service to receive the codes. As this isn’t always possible, we suggest setting up an alternative verification code app, such as Google Authenticator.
This app works even when you’re offline and spares you from waiting for verification codes. It will create a one-time verification code you can fetch and enter on the sign-in screen.
Backup Codes
Backup codes are helpful to have on hand in case you lose your phone. All you have to do is enable this step and print or download the generated 8-digit codes. Remember to keep these codes in a safe place and never give them out to anyone.
How to Skip the Second Step on Trusted Devices
Although secure, providing a second verification step every time you sign in on your phone or computer can be pretty annoying. You can opt-out of this option for devices you regularly use and don’t share with anyone. All it takes is checking the “Don’t ask again” box when you sign in using a trusted device.
If you’re selling a previously trusted device or start sharing it with others, you should remove it from your trusted list.
- Visit your Google Account.
- Open the “Security” tab at the top.
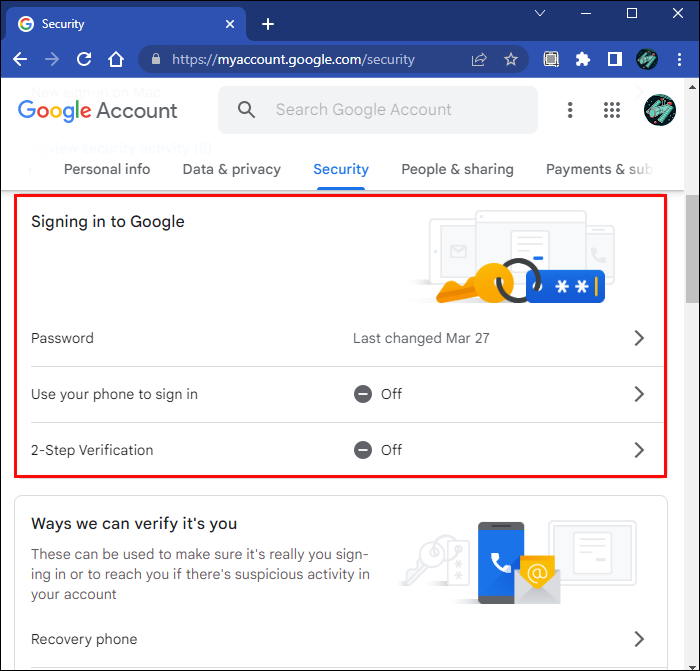
- Locate the “Signing in to Google” section.
- Tap the “2-Step Verification” option.
- Scroll down to the “Devices you trust” section.
- Press the “Revoke All” button next to the device in question.


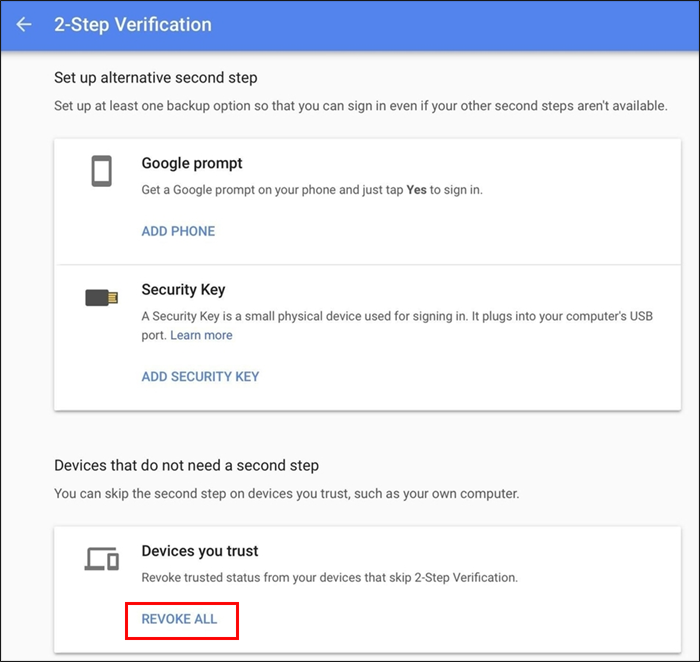
Alternatively, you can hit the “Revoke all” button to remove all trusted devices. This step is recommended when disabling two-factor authentication.
How to Disable 2FA on an Android Device
If you ever need to turn off two-factor authentication, the process is even simpler than turning it on.
To disable 2FA on your Android phone or tablet, do the following.
- Open your Google Account.
- Go to “Security” in the navigation panel at the top.
- Scroll to the “Signing in to Google” section.
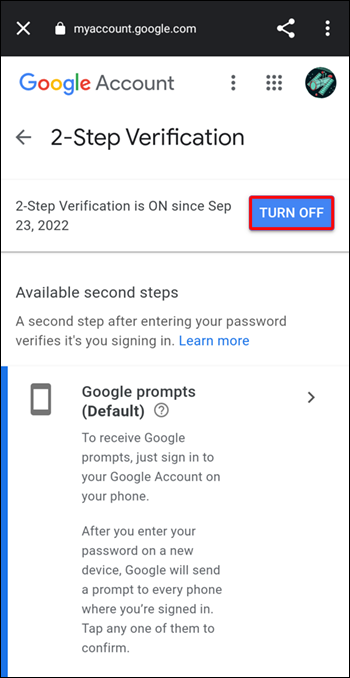
- Tap the “2-Step Verification” option.
- If necessary, confirm it’s you by entering your password.
- Press the “Turn off” button.
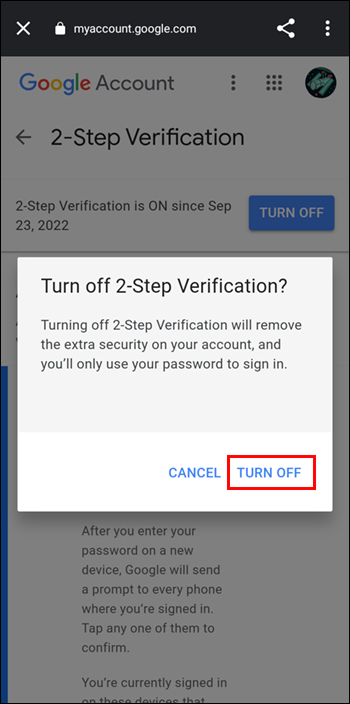
- Confirm the action by tapping “Turn off” again.

Protect Your Assets
Your Google account is a valuable asset that should be protected at all times. Enabling two-factor authentication helps you secure your account and have peace of mind regardless of where you’re accessing your account from. The more second steps you add, the more you can rest assured your account is safe from bad actors.
Have you tried enabling two-factor authentication on your Google account? Which second step appeals to you the most? Let us know in the comments section below.
Disclaimer: Some pages on this site may include an affiliate link. This does not effect our editorial in any way.