Most people understand how Windows or MacOS uses applications; you open an executable file, which installs the application onto your machine’s hard drive. Once the application is installed, you can open and use it as you like. Chrome OS might be based off the actual Chrome browser, but that doesn’t mean it can’t also support a wide variety of applications, though. Apps work a bit differently on Chrome OS—any app you install on your Chromebook works just like a typical app, but they run in the Chrome browser. While this might sound a bit limiting, most users find that they can recreate their daily workflow on Chrome OS using either online versions of the apps they already use, or web app alternatives. You just need to get into your own groove with it.
But what if you just want to relax and watch a movie? Many users have found the open-source VLC Media Player to be their video app of choice—it can play nearly any video file, and it’s endlessly customizable. While you can’t run traditional VLC on your new Chromebook, VLC does offer a Chrome version of their player in the Chrome Web Store. The app isn’t perfect, but if you give it some time and patience, VLC’s web app is one of the best video players you can use for your Chromebook. Let’s take a look.
Installing VLC for Chrome OS
When you install VLC on most computing platforms, you use the download link provided by VLC’s website, which automatically downloads the correct version of the app for your specific operating system and computer. However, when installing VLC within Chrome OS, you’ll need to use the version hosted by Google inside of the Chrome Web Store. Unfortunately, the Chrome Web Store has shut down for all non-Chrome OS users, so if you’re trying to install the app on a non-Chrome OS device using the Chrome Web Store, you’re out of luck. Fortunately, as of right now there are no formal plans to shut down the Chrome Web Store for Chrome OS users, though we will absolutely update this article if that were to happen. It would be a bit of a backwards decision if it happened, though.
Regardless, you’ll need to navigate to this link to install VLC on Chrome OS. The app will only give you the option to add to Chrome if you’re on your Chrome OS device; otherwise, you’ll see a red “Not Compatible” icon on the page, displaying the inability to add the app to Chrome.
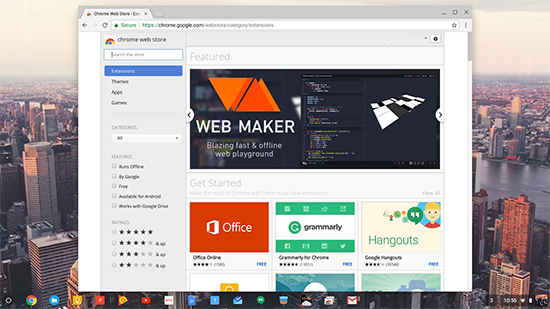
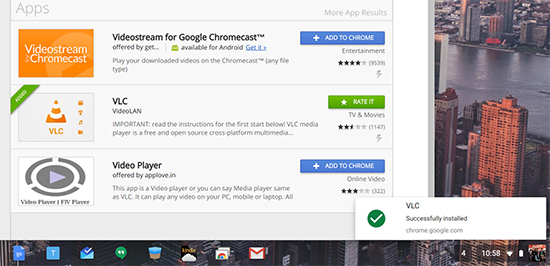
Once you’ve loaded the Web Store, use the search bar on the left side panel to search for “VLC” and hit enter. Your search results will load, and you’ll want to scroll down to the “Apps” category. Find “VLC” in your results; it will be listed from VideoLAN, the organization behind VLC. Press the blue “Add to Chrome” button on the left side of the display, and your installation will begin. If you’re on a non-Chrome OS device, you’ll see a red “Not Compatible” option that stops you from installing the app.

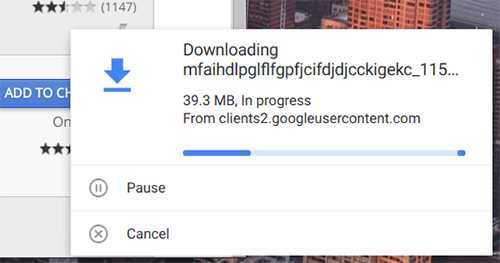
Chrome will begin downloading the first of two files. The first one is far larger than the second, but both are required to use VLC on your Chromebook or Chrome OS device. Let both files download and install; depending on your internet speeds, this may take a few minutes. Make yourself some tea and meditate, or whatever else floats your boat.
When the installation is complete, you’ll receive a notification in the bottom-right corner of your display, and the blue “Add to Chrome” button will have changed to a green “Added” button in the Web Store.
Using the Google Play Store Version of VLC
If you’re having difficulties using the Chrome Web Store version of VLC on your Chromebook, you can also try using the Google Play Store version of the application as well. The Web Store version is a simple port of the original Android version, but the version hosted on the Play Store is far more up to date. We were unable to test VLC downloaded from the Play Store on our test Chromebook, as our device still doesn’t have the Play Store added to its version of the operating system.
Still, for those who do have the Play Store up and running on their Chromebook—and you can find that list of devices here, to see if yours works—then installing the app is as simple as downloading the application from the Play Store like you would for any other app. Open the Play Store and search for VLC, then click on the Install icon to add it to your device. This version of VLC will be kept up to date with more settings, features, and bug fixes than the traditional Chrome Store version, and you’ll still be able to watch movies, television shows, and more to your heart’s content.

Setting Up VLC on Your Chromebook
Now that you’ve added VLC to your Chromebook, it’s time to start using it to play your videos. Chrome OS includes a rudimentary video player along with its operating system, but its file type support is weak, to say the least. VideoLAN advertises VLC for Chrome as being able to play the typical video and audio file types users go to VLC for, including MKV, MP4, AVI, MOV, Ogg, FLAC, TS, M2TS, Wv, and AAC. VLC also supports network streams, and it supports additional audio tracks and subtitles. It’s definitely a few steps ahead of Chrome OS’s default video player.
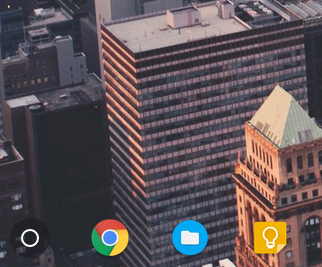
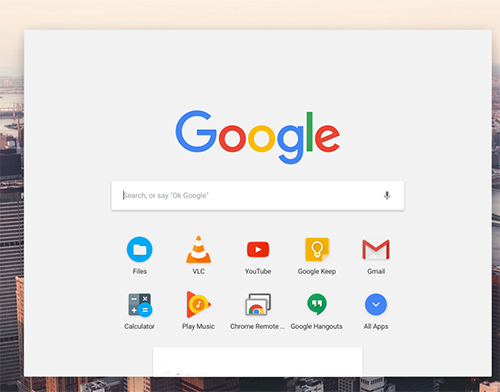
So, to begin setting up VLC on your Chromebook, you’ll need Chrome’s app launcher. Hit either the Search key on your laptop, or the small circle in the bottom-left corner of your device. Because VLC was just added to your Chromebook, it’s probably listed in your recent apps underneath the Google search bar. If it’s not, hit the All Apps button in the lower-right corner of the App Launcher display to view all of your apps. Because VLC is your newest addition, it will be at the end of your list of apps.
Upon your first launch, VLC will prompt you to select a folder to open. It isn’t asking for a video to play or a file type; instead, it’s looking for the folder destination to scan to populate your playable video list. Most users keep videos in one selected folder, so it might be best to organize your files beforehand into one easy-to-use folder. If you can’t do this you’re going to have to select individual folders with media in them, or if all of your collected videos are in the default Downloads folder, then you can select that one instead.

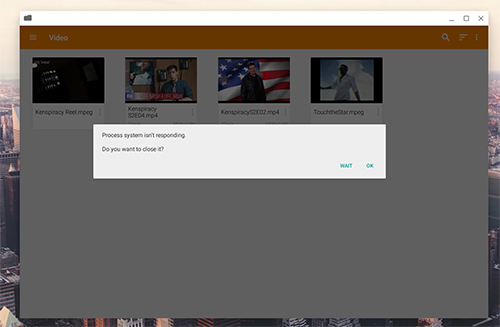
Once you’ve selected your videos, they’ll load inside of VLC for you to browse. You might experience a problem where the app warns that the process system has stopped responding. If this happens, but your videos loaded behind the warning, simply exit out and relaunch VLC. In our experience, this fixes the problem, and our video collection will still stay loaded on the device.
Playing Video or Audio Through VLC
Alright, the moment everyone’s been waiting for: let’s play some files. By default, VLC shows any loaded videos on your display. You can switch to audio files by tapping the triple-line menu button on the side and selecting Audio from the slide-in menu. For the purposes of our demo, we’ll be using a video file to demo VLC. One tap on the video file will begin playing your file, along with a quick overlay that shows you how to control volume and seeking controls with mouse or (on touch-supported Chromebooks) finger gestures.

The bottom of the player features every control you could want in a video player. From left to right, you can lock your controls—again, useful on touch-enabled devices—from being manipulated, change your audio or subtitle track, play or pause the video, use a multitude of accessibility features (including sleep timers and subtitle display options), and finally, change the shape, size, and fit of the video inside your player. Most of these features will be familiar to any long-time VLC fans, and it’s nice to see functions like these being carried over to lighter versions of the app. We played a multitude of file types, sizes, and lengths, and each played without any problems or breaks in functionality.

You can always return to the video select screen by hitting the Back button in the very top-left corner of the display. VLC will remember where you left off in playback, so if you need to return to the video selection display for any reason, you won’t have to worry about losing your spot.
Settings to Know and Use
Unsurprisingly, VLC has a ton of settings buried in their menu system to which you’ll want to pay attention. To get access to those settings, hit that triple-lined hamburger menu on the left side of the display, and tap the Settings button.
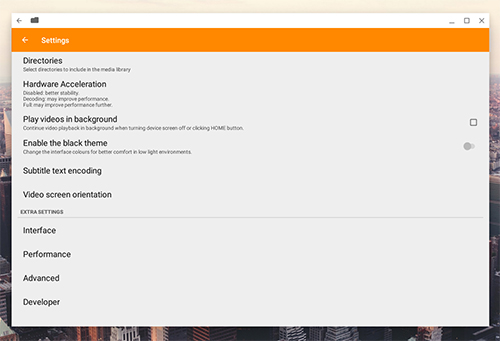
From the top, we have options for selecting the directory for your main file system. You probably won’t have to use this too often, but if you need to change directories from internal storage to an SD or microSD card, it’s useful to know where this setting is. Next up, we have Hardware Acceleration, which is another setting most people should leave alone. If you’re having difficulty playing large files, though, give hardware acceleration a shot. Leaving this disabled will offer you better stability to VLC, but changing the setting to Decoding or Full will improve performance. Use this one at your own risk. By default, VLC leaves this on automatic, which is a good balance between losing your stability when you need additional performance, and keeping the app stable when you don’t.

There are a couple more settings before we dive into the additional, more specific details. There are two toggles: one to allow you to play videos in the background even when the display is off, and another to enable an included black theme for better vision at night. VLC on Windows or Mac is known for its wide variety of themes, and while you lose that functionality on Chrome, it’s nice to see a black theme included in the web release. Finally, there are two more settings for subtitle text encoding and video screen orientation.

And now, some extra settings. Interface has the option to change how your player acts and looks. This is all pretty specific stuff, but there are some useful settings, like asking for a confirmation to resume its playback or enabling seek buttons to rewind and fast forward without scrubbing over your timeline. Performance has some hidden settings, like enabling frame skip or deblocking filter settings that are better left untouched unless you know what you’re doing. Advanced can change the audio output, disable auto-rescan on your device at startup, and quit or restart the application; if you’re having problems with VLC, it’s best to come here first. Finally, VLC’s Developer options can display debug logs and force VLC to use hardware decoding.
Using VLC as Your Default Player
Here’s an important setting for most users looking to enable VLC as their standard player for video and audio on their Chromebook. Typically, if you try to open a media file on Chrome, it’ll use the built-in, very basic video and audio playback apps to show your content. Luckily, we can change this permission over to VLC and let our new media app handle it with a lot more finesse.
To set VLC as your default player, head into your File browser on your system and find a video or audio file—any media file will do. Right-click on your selection, and instead of selecting Open with Video Player, tap More actions… 
This will bring up a prompt to select your video player. Select VLC from this menu, and VLC will open.
Before your video begins playing, you’ll receive a prompt similar to the default app menu on Android, asking you to open the video with a specific player. Tap on VLC, and tap Always if you want to use VLC as your default media player, or Just Once if you don’t want VLC to be your default. 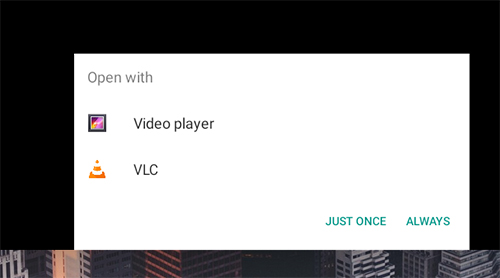
If you find a new file type you’re trying to open in VLC instead of Chrome’s Video Player, just follow the same steps to open the file through VLC.
Using a Disk Drive With VLC and ChromeOS
By default, ChromeOS doesn’t play or recognize disk drives, external or otherwise. Fortunately, there are a few external hard drives that have been known to work with ChromeOS, a few Mac disk drives and a handful of others.
Third-party apps, such as VLC can detect and utilize some disk drives that are compatible with your Chromebook but aren’t detected by default.
Using Subtitles on Your Chromebook
The ported version of VLC, the one on the Chrome Store, at the time of this writing, claims to support subtitles, but many have had issues with it.
One option is to use Subtitle Videoplayer. This app allows for subtitles to be used with ease on your Chromebook. 
***
And that’s it! VLC for Chrome isn’t perfect—it’s essentially a modified port of the Android app—but it’s still one of the best ways to play non-standard or unusual file types, especially on a device like a Chromebook, and it’s several leagues ahead of Chrome OS’s default media player. We only had the program experience bugs or flaws twice during our setup and testing, and never while playing an actual video. It’s web apps like VLC that allow Windows and Mac users to make the switch to Chromebooks without missing out on the same features and apps they used to have on their more fully-featured, robust operating systems.
While VLC for Chrome might not have the same theming abilities of its older desktop brother, it does feature subtitle support, volume modification, and hardware decoding. Most users should be more than satisfied with the VLC for Chrome experience, but if you run into any strange problems or errors, let us know in the comments below and we’ll help you out!
Disclaimer: Some pages on this site may include an affiliate link. This does not effect our editorial in any way.