VLC’s developers keep the VLC Media Player from crashing. However, the application hasn’t advanced to a level where it’s immune from crashing issues. Unfortunately, when you’ve just settled in to binge-watch your favorite collection, VLC might welcome you with an “Oops VLC media player just crashed.” But what causes VLC crashes, and how can you fix the problem?
This article will explain why VLC crashes and how to resolve the issue.
VLC Keeps Crashing
Despite standing tall as one of the best open-source media players, VLC has its shortcomings. One of the most common is regular crashes. While the problem may derive from the application, it could come from your device. Regardless of where the crashing originates, the aftermath is VLC behaving abnormally and you being unable to play your files smoothly.
VLC crashing doesn’t manifest in one way. Sometimes you receive a crashing error. Other times, the application acts abnormally. Knowing all the symptoms of VLC crashing would be great, right? It allows you to determine whether a VLC malfunction is a crash.
Here’s what to look out for when it’s a crash:
- VLC fails to open even after trying multiple times.
- Your playback screen flashes black from time to time. Other times, your screen might display green, white, or black instead of the video.
- VLC exits every time you open a video.
- VLC plays a video smoothly up to a certain point and then stops. When you replay the video, it quits at the same spot.
- VLC freezes as though it’s buffering but doesn’t resume playback.
Common Causes of VLC Crashes
1. VLC Not Installed Correctly
It’s not easy to tell if VLC has been installed properly. Nevertheless, corruption in the installation process could be a possible cause of VLC crashing. When VLC fails to install correctly, important system information is left out. It will perform some functions but not others.
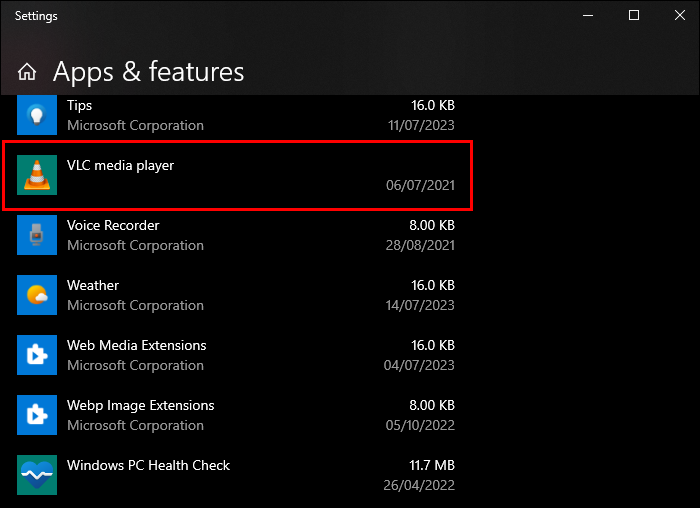
The solution to this problem is uninstalling and reinstalling the application. To uninstall VLC from Windows, follow these steps:
- Press “Windows + X” to launch the Quick Link Menu.

- Tap “Apps and features” at the top.

- Locate VLC in your app list and double-tap on it.
- Click “Install” and wait for the installation process to finish.


To reinstall the app:
- Browse VLC’s official website.
- Hit “Download VLC” in the middle of the screen.
- Open the application after downloading and run it.
- Select your language and click “OK” to start the setup process.
- Click “Next” without changing anything on all the windows that appear, and tap “Finish” on the last window. Try using VLC now and see if it works well.


2. Using Outdated VLC
When did you last update your VLC Media Player? The application gets regular updates to increase performance efficiency and fix bugs. Using an outdated version leads to compatibility glitches, causing the videos to load improperly. In some cases, VLC fails to open.
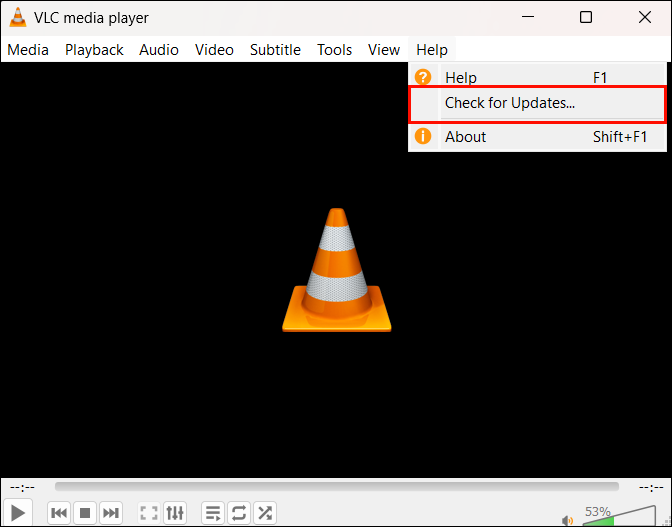
Though VLC has an auto-updating feature, you can’t rely on it to always notify you of updates because it’s prone to break down. Hence, you have to check for updates and install them manually.
- Open your VLC application and click “Help” on the menu bar at the top.
- Tap on “Check for updates.” If there are updates, you’ll get a message asking if you want to install it.
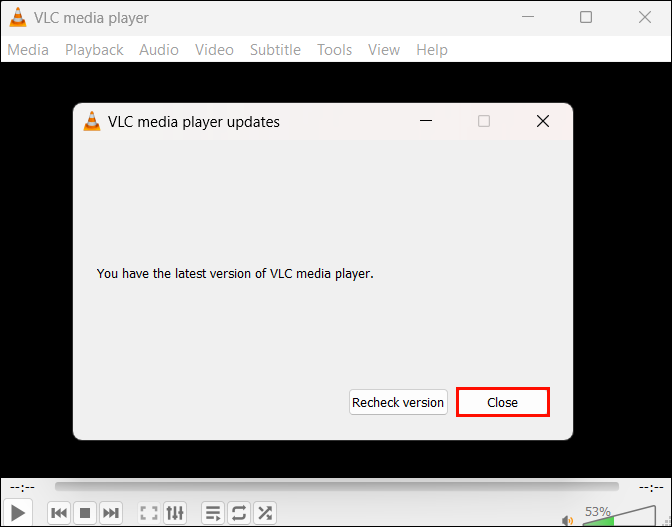
- Click “Recheck version” and wait for the update to complete.
- Click “Close.” Your VLC should now operate smoothly.


3. Low Cache Value
Another reason that could cause your VLC to keep crashing is too many junk or cache files. Every time you play a file, VLC stores its cache to gather information quickly when you replay the file in the future. These cache files are stored locally on your device.
If you last cleared the cache files a long time ago, they might use much of your storage space. This affects the file caching process because there’s no space to store additional cache files. As a result, the application stutters for a few seconds and then closes. This might happen if you’re playing a heavy file or using a PC with a low-end configuration.
You can resolve this problem in two ways: by clearing the cache on your VLC and by increasing your file caching value.
How to Clear VLC Cache
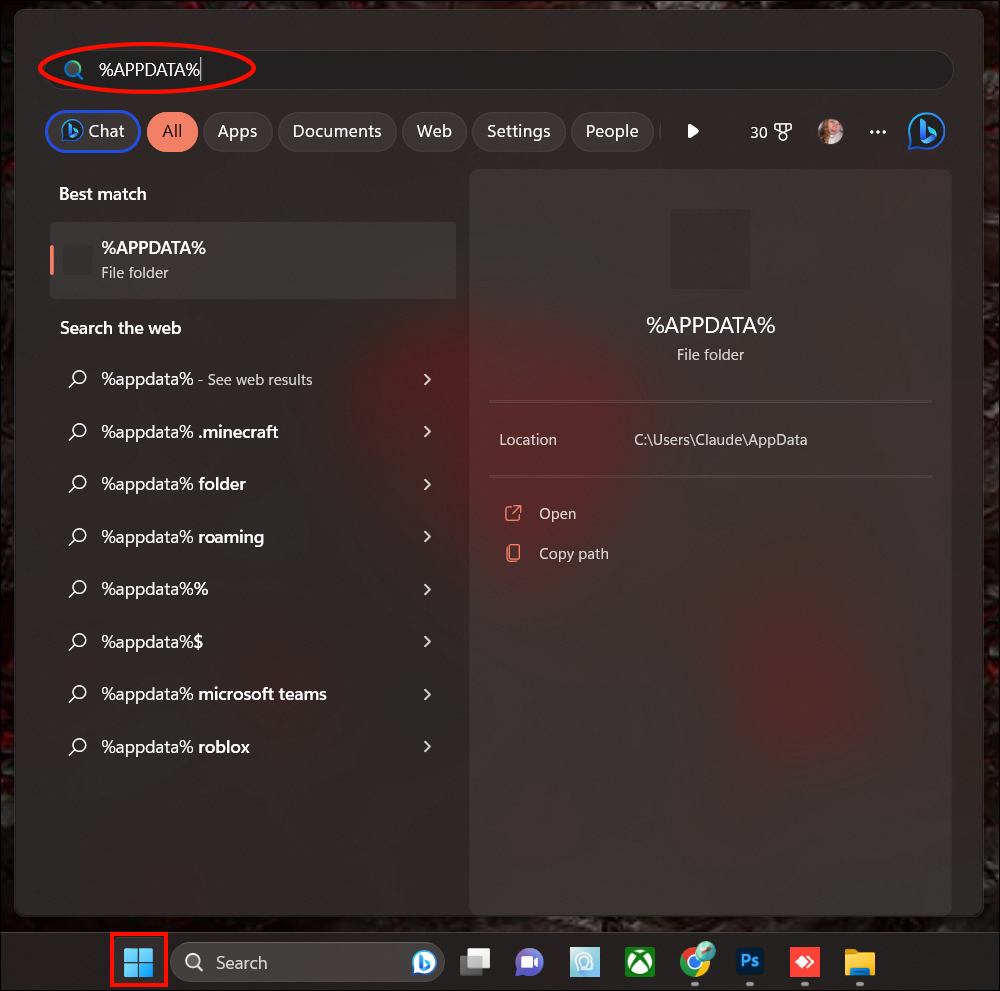
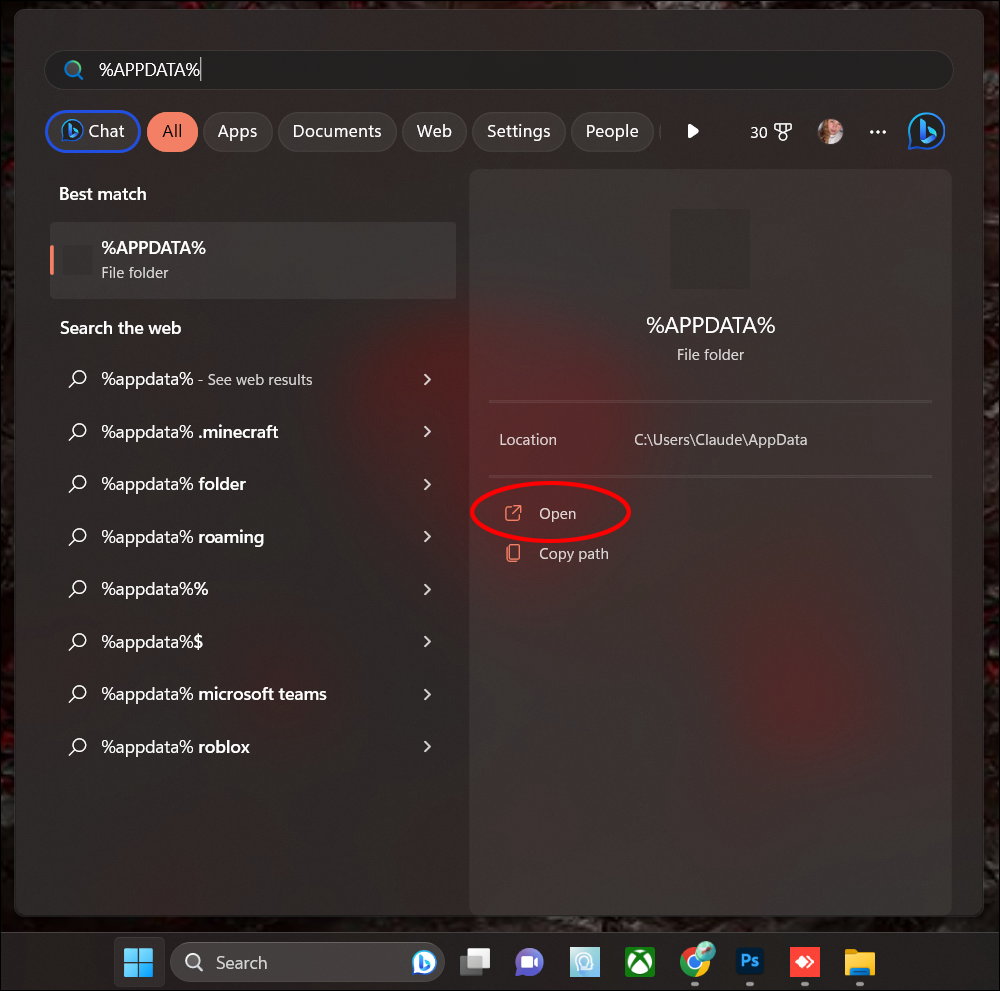
- Go to your Start Window search bar and type “
%APPDATA%.” - Tap the %APPDATA% folder that appears.
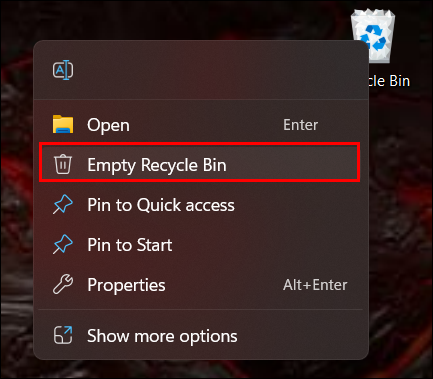
- Locate the VLC folder and delete it.
- Clear the recycle bin. You can do the same for other apps to free up more space.

How to Increase VLC Caching
VLC sets the file caching value at 300 milliseconds. However, you can increase it to give files sufficient caching time. Here’s how you do it:
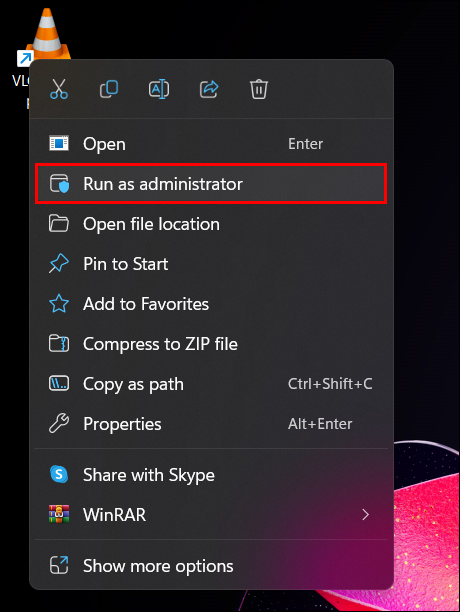
- Select VLC application from your window and right-click on it.
- Tap “Run as administrator” to have access to restricted settings.
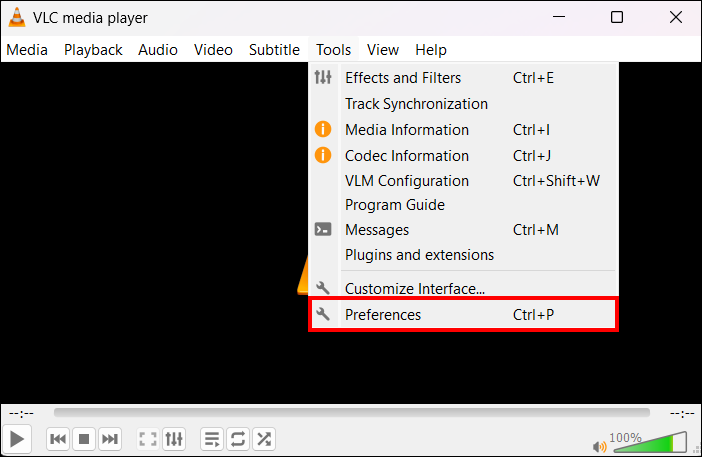
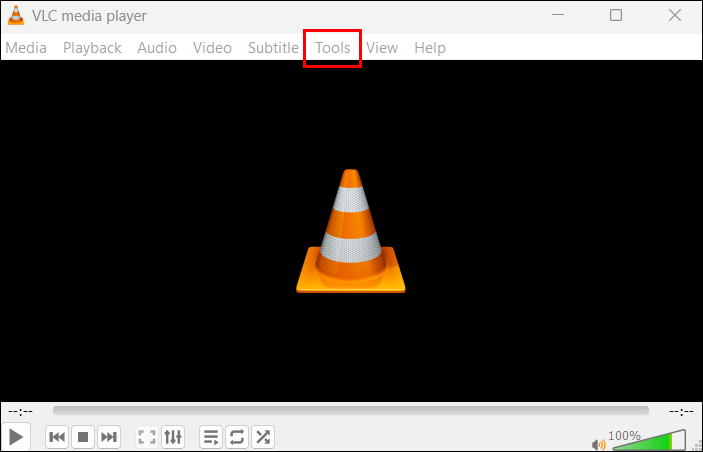
- Click “Tool” from the menu bar at the top and tap “Preferences” from the options that appear.
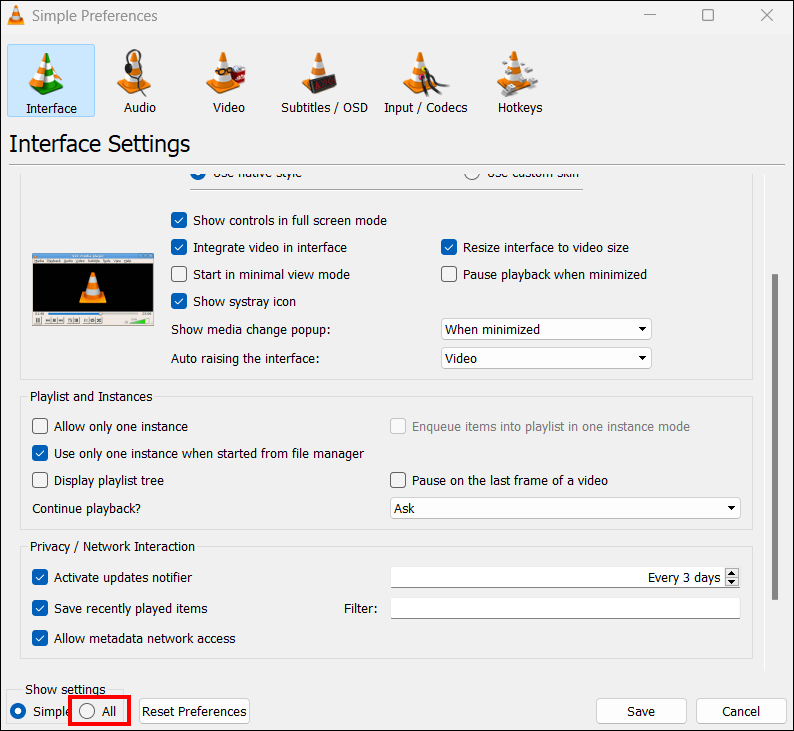
- Locate “Show settings” and adjust the toggle from “Simple” to “All.”
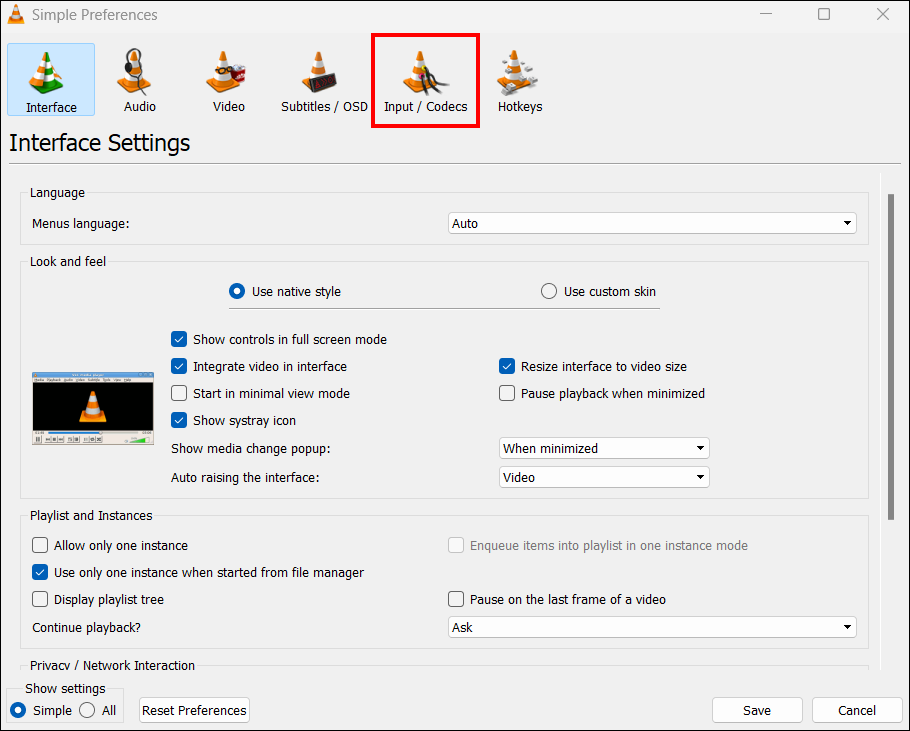
- On the menu to the left, click “Input/Codecs.”
- On the right-side menu, locate “File caching (ms),” and adjust the value from 300 to 700 or 1000 and click “Save.”


4. Hardware Acceleration Malfunction
VLC has an inbuilt hardware acceleration feature that helps to increase performance. It offloads the burden of encoding and decoding from the Central Processing Unit (CPU) and Graphic Processing Unit (GPU). In return, you get a smooth video playback.
Hardware acceleration sounds like it can improve your video playback, right? However, it sometimes malfunctions due to incompatibility issues, especially in devices with buggy hardware drivers. When this happens, your video keeps stuttering.
To fix this issue, you need to disable hardware acceleration from your VLC application.
- Right-click your VLC application and click “Run as administrator” to access restricted settings.
- Hit “Tools” from the menu bar at the top.
- Tap “Preferences” from the menu that appears.
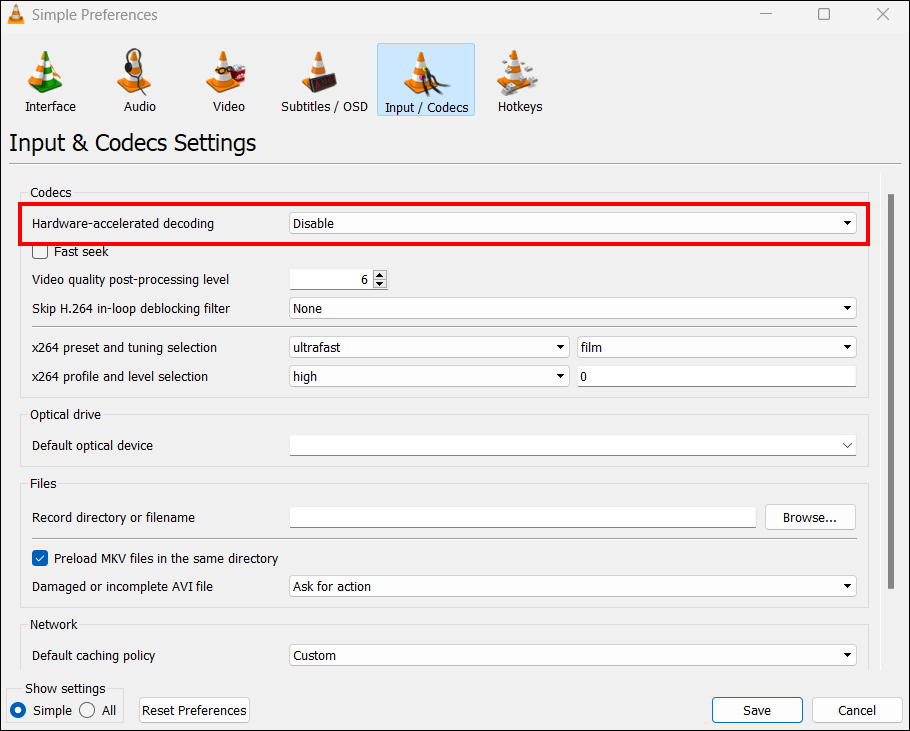
- Click the “Input/codecs” at the top.
- Tap the drop-down menu to the right of “Hardware-accelerated decoding” and select “Disable” from the options.
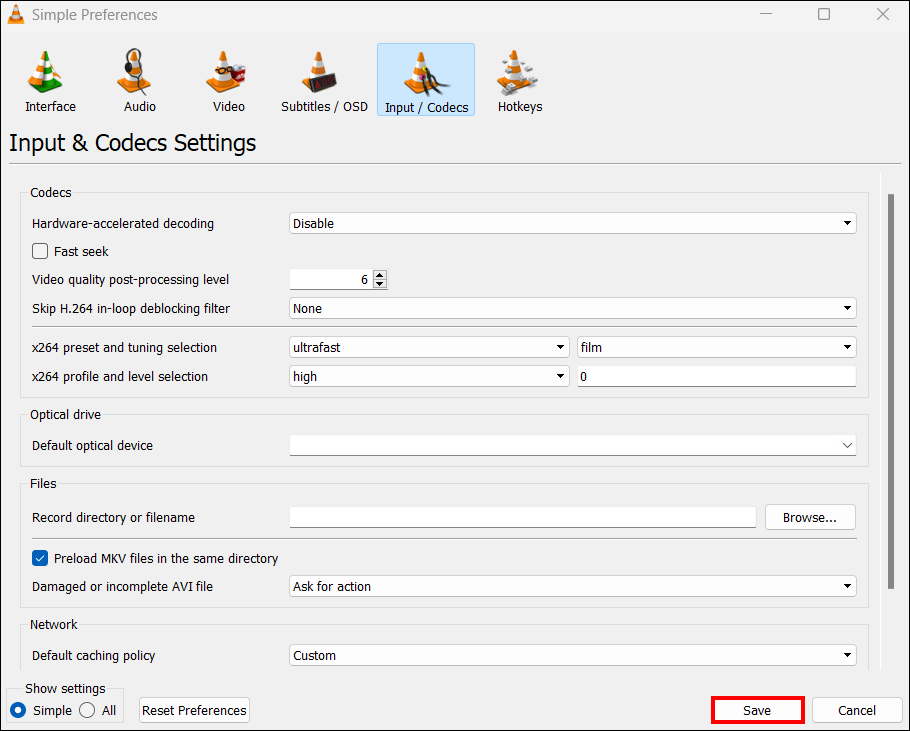
- Click “Save.” Open VLC and play a file to see if it works properly.
5. Faulty In-Loop Filter
A faulty in-loop filter is another possible cause of VLC crashes. Don’t know what an in-loop filter is? Well, it’s a feature used in encoding and decoding to block pixelation or maintain picture sharpness. When the in-loop filter is faulty, it may affect VLC’s ability to play files smoothly. To fix this problem, you should turn off the in-loop filter.
- Open your VLC and run it as an administrator.
- Click “Tool” in the menu bar and tap “Preferences” from the options displayed.
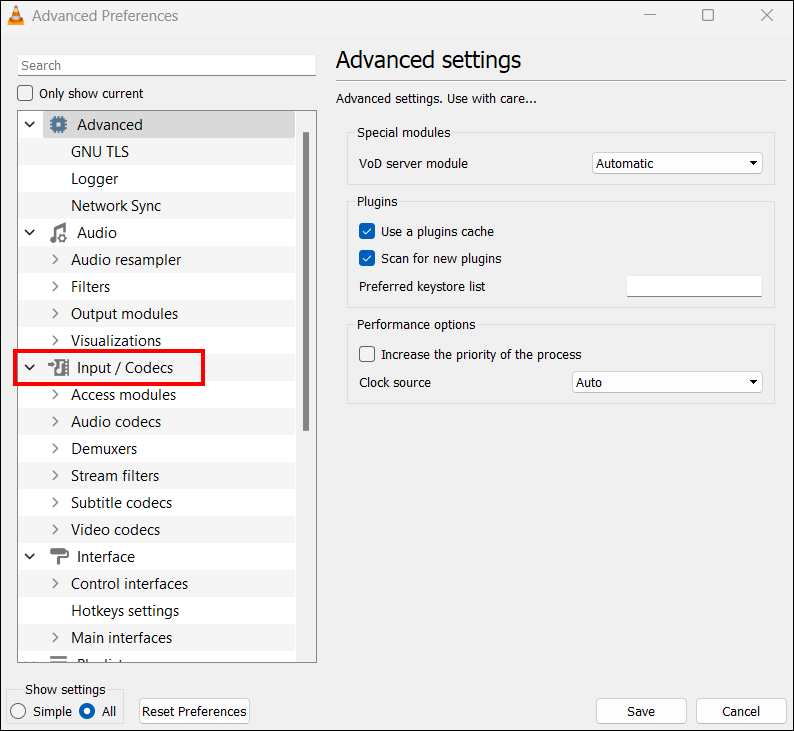
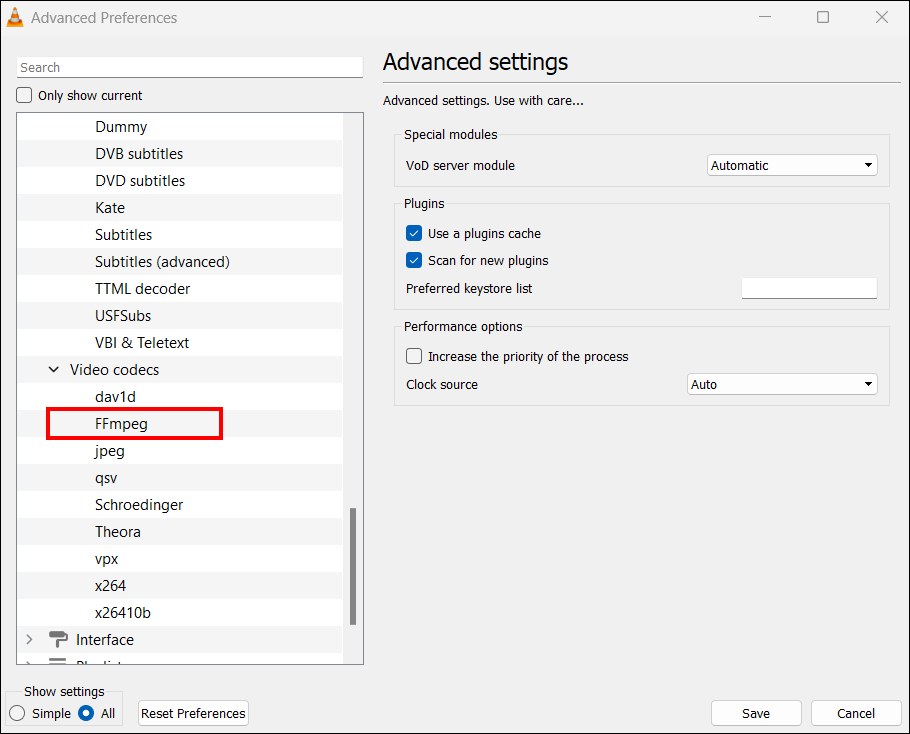
- Locate “Show settings” in the bottom left corner and enable the toggle for “All” to access advanced settings.
- Tap “Input/codecs” to open more options. On the left side task pane, click “Other codecs.”
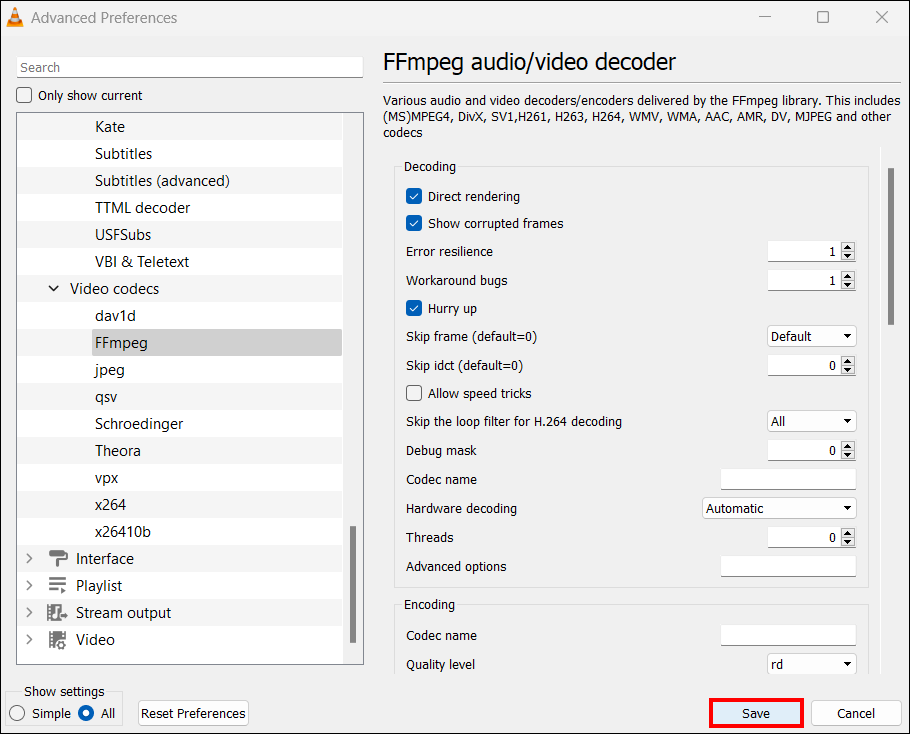
- Click “FFmpeg” to open the audio and video decoding settings to the right.
- Look for “Skip the loop filter for H.264 decoding.” Click the drop-down menu beside it and select “All.”
- Click “Save” and close VLC. Open it again and try playing a file to see if the issue is fixed.

Get Back to Watching
VLC crashing can discourage you from using it. But that shouldn’t be the case since there are different ways of fixing the issue. The next time you experience a VLC crash, try resolving any of the above problems before throwing in the towel. If it doesn’t work, try other methods until VLC runs normally.
Have you experienced VLC crashing before? Did you fix it with any of the tips and tricks featured in this article? Let us know in the comments section below.
Disclaimer: Some pages on this site may include an affiliate link. This does not effect our editorial in any way.