Windows 11 has been a highly anticipated release, but some users are reporting problems with the sound system. This appears to be a widespread issue, with people all over the internet reporting that they have no sound on their Windows 11 machines.
Thankfully, there are a few things you can try to fix the problem.
In this article, we’ll walk you through the steps to take to get your audio working again.
No Sound in Windows 11
Windows 11 has been hailed as a major improvement over previous versions of the operating system, and it’s easy to see why. In addition to a sleek new design, Windows 11 offers several features that make it more user-friendly and efficient.
The Start menu has been completely redesigned, making it easier to find the apps and programs you need. The taskbar has also been updated, with new shortcuts that make it easier to access your most-used programs. And thanks to the new Edge browser, Windows 11 is now much faster and more secure than ever before.
But despite these features and upgrades, Windows appears to be plagued by sound problems. In some cases, restarting the computer may resolve the issue, but the problem typically returns after a short time. Microsoft has already released several patches and updates for Windows 11, but these have not been effective.
As a result, many users are forced to resort to third-party software or manual workarounds to get sound working on their computers. While this is not an ideal solution, it is currently the best option if you’re affected by this problem.
In this article, we’ll look at the troubleshooting methods that have been found to resolve various sound problems on Windows 11.
Windows 11 No Sound After Update
If you’re experiencing sound issues after installing some Windows 11 updates, there are a few things you can try to fix the problem:
Run the Audio Troubleshooter
Before trying anything complex, it may be wise to give Windows itself the chance to fix the problem. The operating software comes equipped with a self-diagnosis tool that can automatically detect and fix audio problems.
Here’s how to launch the audio troubleshooter:
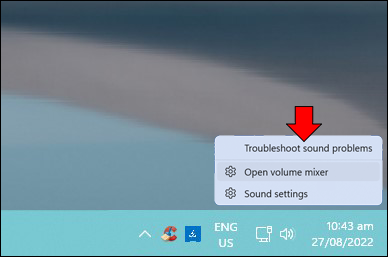
- Click on the speaker icon in the bottom right corner.

- Select “Troubleshoot sound problems” from the popup menu.

- On the next screen, click “Yes” to give Windows permission to run sound diagnostics.
After taking these steps, Windows will scan your machine and then display the results.
Make Sure Your Audio Device Is Set as Default
Windows is a versatile operating system that can play audio through multiple audio sources. This can be incredibly handy when sharing music or other audio with multiple people.
However, the downside to this feature is that sometimes Windows doesn’t recognize the proper output device currently being used. This can be frustrating, but it’s easy to fix the problem:
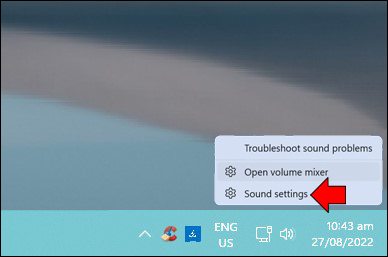
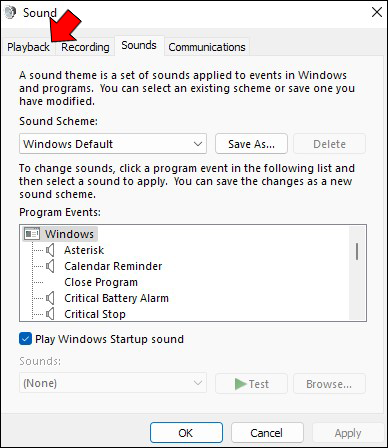
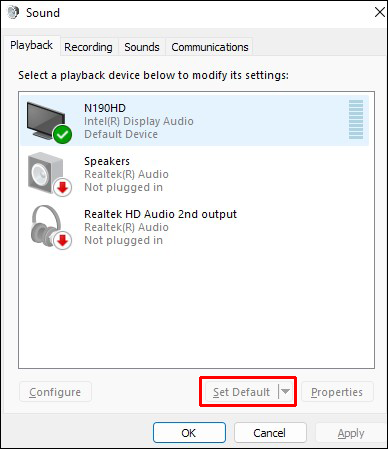
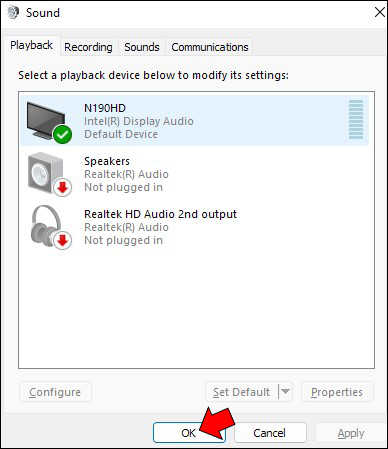
- Click on the sound icon in the bottom right corner and select “Sound” from the popup menu.
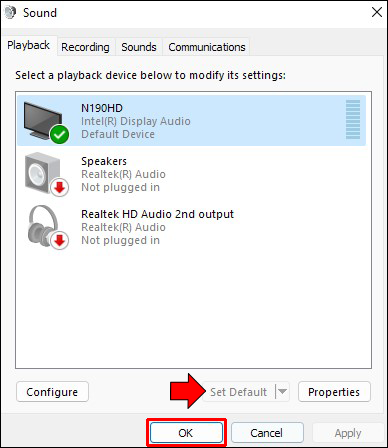
- Click on the “Playback” and select the proper output device.
- Finally, click on “Set as Default” and then “Ok.”
Update Your Audio Drivers
Computer audio performance can be severely impacted if the audio drivers are not updated. This is because the audio drivers manage the communication between the computer and the audio hardware.
If they are not updated, then the computer may not be able to properly process the audio data, resulting in poor sound quality or even no sound at all.
Here’s how to update the audio drivers on your computer:
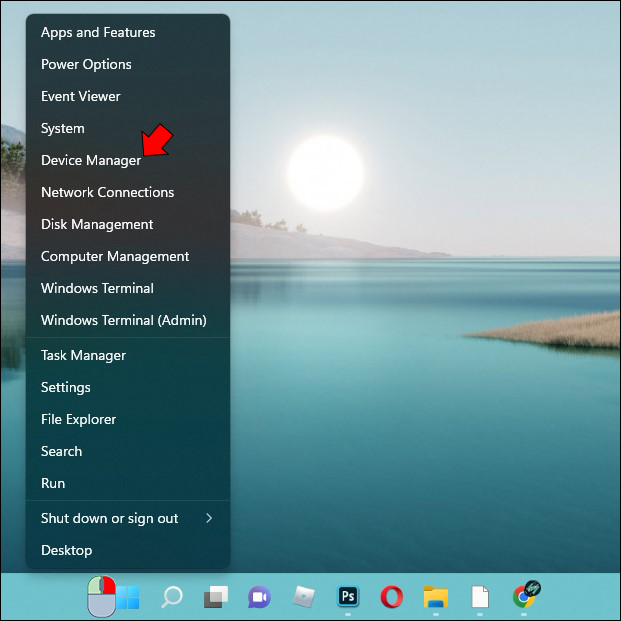
- Right-click on the Start icon in the bottom left corner and select “Device Manager.”
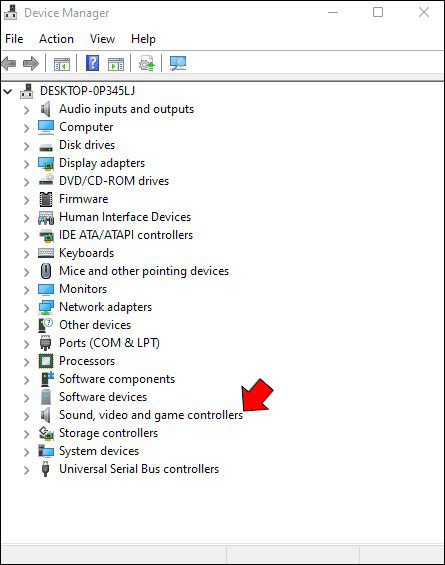
- Double-click to expand the “Sound, video, and game controllers” menu.
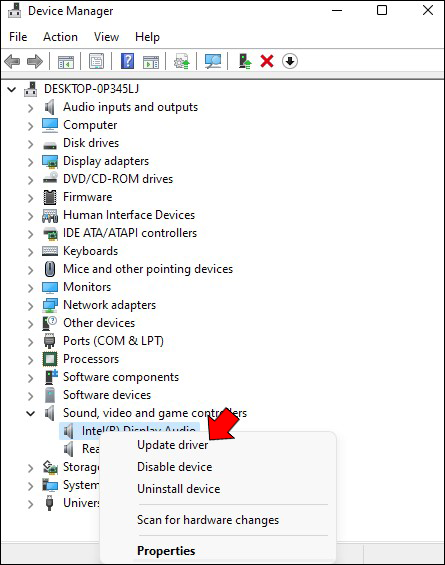
- For each driver listed, right-click and select “Update driver.”
Windows 11 No Sound From Speakers
If you have recently upgraded to Windows 11 and are no longer hearing any sound from your computer speakers, there are a few potential fixes:
Unmute Speakers or Increase the Volume
Sometimes when audio isn’t working on Windows 11, the volume is muted or set too low. To fix this, you just need to unmute the audio or increase the volume.
Here’s how to do it:
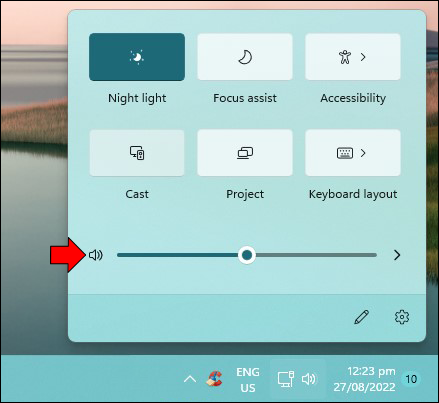
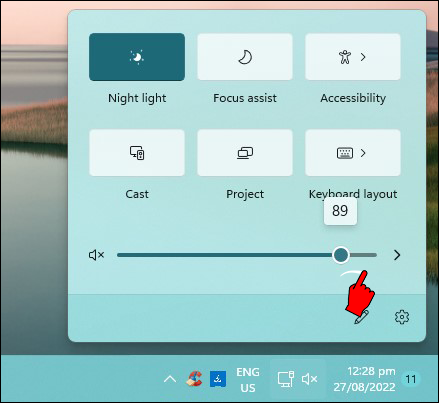
- Open the Action Center by pressing the Windows logo key + A.
- Click on the volume icon at the bottom of the screen to unmute the sound.
- Move the volume slider button to the right to increase the volume to your desired level.
- Play an audio file to check whether the problem is fixed.

If your computer’s audio isn’t working even after these steps, move on to the other troubleshooting methods below.
Choose the Right Audio Source
There’s also a possibility that the audio source you’ve selected in your settings doesn’t match the one your computer is trying to use.
Here is how you can choose the right audio source:
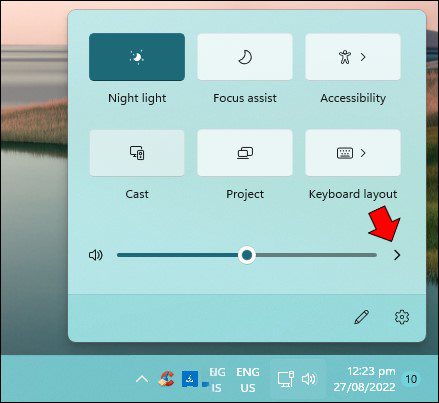
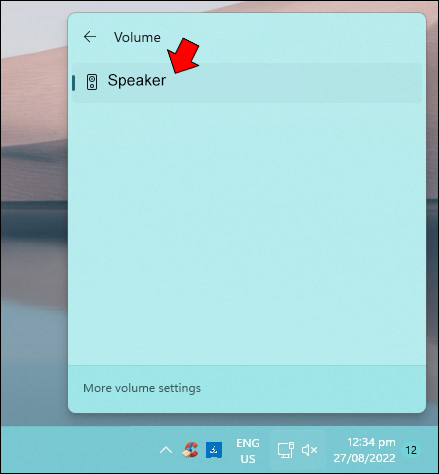
- Open the Action Center by clicking on the icon in the taskbar. Alternatively, you may use the “Windows + A” keyboard shortcut.
- Click on the arrow icon to the right of the speaker icon.
- Choose “Speakers” as your preferred audio source.
- Close the Action Center.
Adjust Windows 11 Sound Settings
The audio enhancement feature on Windows 11 is designed to improve the sound quality of your computer’s speakers or headphones. However, the feature can negatively affect the audio system if you’ve recently connected an incompatible output device.
Disabling audio enhancement can resolve sound issues and get your speakers working again.
Here’s how:
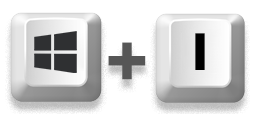
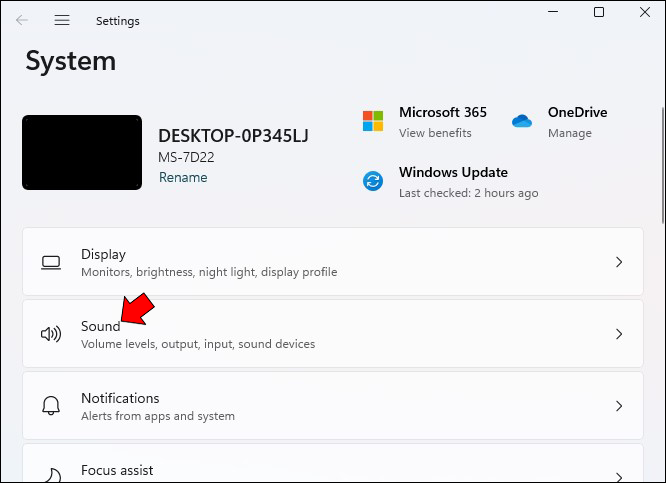
- Open the Settings app by pressing the Windows logo key + I.
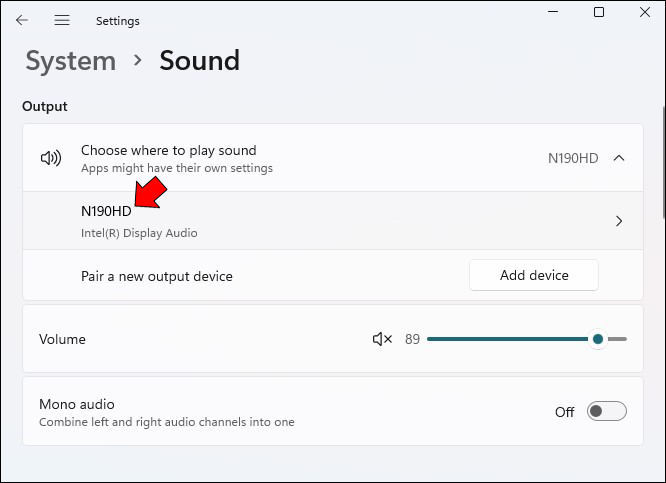
- Click on the “Systems” tab and select “Sound.” This should display all the audio devices available, including your speakers.
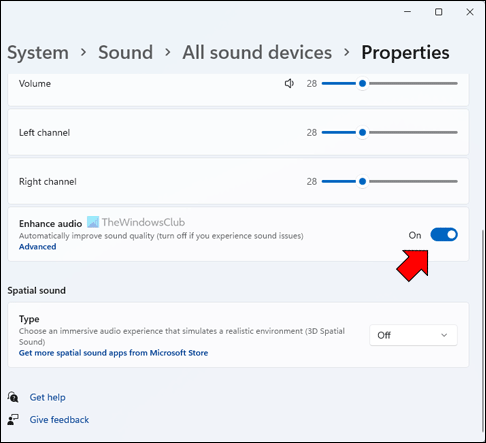
- Click on your speakers to open the “Properties” panel.
- Toggle off “audio enhancement.”
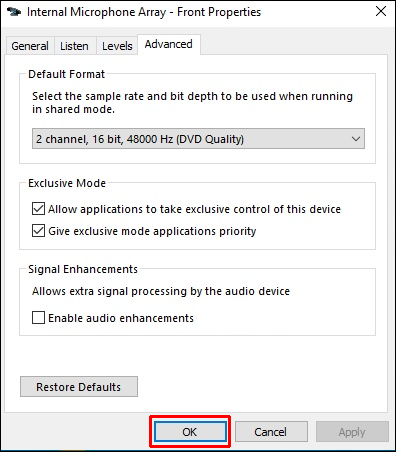
- Click on the “Advanced” tab and check the box next to “Disable all enhancements.”
- Click “OK” and save the changes.

Windows 11 No Sound Realtek
Realtek Audio is a driver that allows computers to put out sound. It is an essential part of the Windows operating system and is included with every installation of Windows. Realtek Audio is easy to install and can be used with any sound card.
However, Realtek Audio is not compatible with all output devices. Indeed, some users have reported poor sound quality and total audio failure on Windows 11.
Luckily, several troubleshooting methods have been found to fix Realtek sound issues:
Update Your Audio Drivers
Updating your machine’s audio drivers can get your sound system working again. Here’s how to go about it:
- Right-click on the Start icon in the bottom left corner and select “Device Manager.”
- Double-click “Sound, video, and game controllers.”
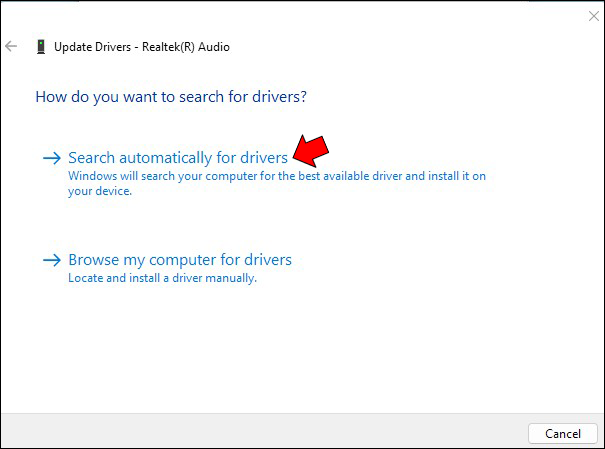
- Right-click “Speakers (Realtek High-Definition Audio)” and select “Update driver” from the popup menu.
- On the “How do you want to search for drivers?” window, select “Search automatically for drivers.”

Reinstall Realtek Audio Drivers
Sometimes updating Realtek audio drivers may not resolve sound problems because the drivers may be corrupted or incompatible with your hardware. To be sure that the drivers are working correctly, you may want to uninstall them and then install fresh copies.
To do so:
- Go to Device Manager and double click “Sound, video, and game controllers.”
- Right-click “Speakers (Realtek Audio)” and then click on “Uninstall driver.”
- Restart your computer. The drivers will be reinstalled by the system automatically during startup.


Restart Realtek Audio Services
Realtek audio services won’t work if it’s disabled in your Windows 11 PC settings.
The steps to restart the services are as follows:
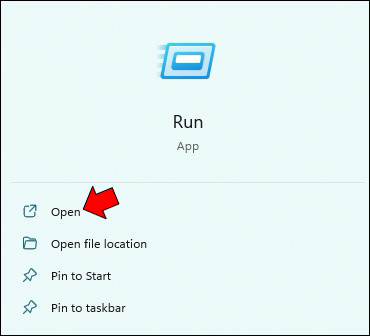
- Open the Run dialog box.
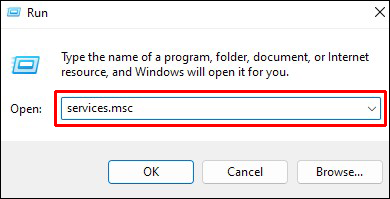
- Type “
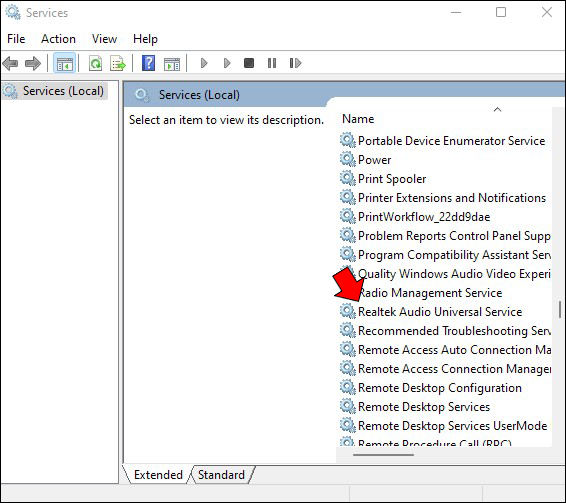
services.msc” and press “Enter.” - Find “Realtek Audio Service.”
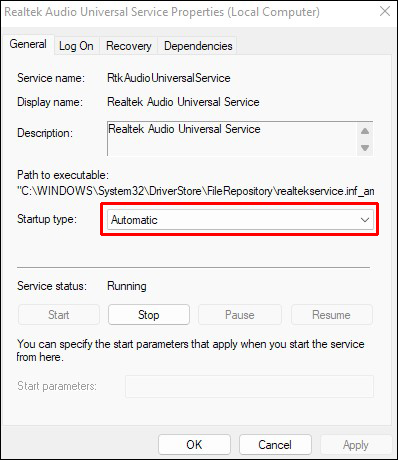
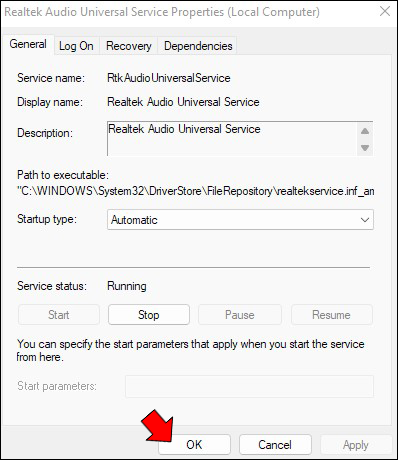
- Right-click on “Realtek Audio Service” and select “Properties.”
- Under “Startup type,” select “Automatic.”
- Click “OK” to save your changes.
- Restart your computer for the changes to take effect.

Windows 11 No Sound After Sleep Mode
If you’re experiencing no sound after your computer goes into sleep mode, there are a few things you can try to fix the issue:
Update Your Audio Driver
The first thing you should do is update your audio driver.
To do this:
- Open Device Manager (you can search for it in the Start menu) and find your audio driver under the “Sound, video, and game controllers” category.
- Right-click on the driver and select “Update driver.”
Windows will automatically search for an updated driver and install one if it is found.
Run the Sound Troubleshooter
If updating the audio driver doesn’t solve the problem, you can try running the Sound troubleshooter. To do this:
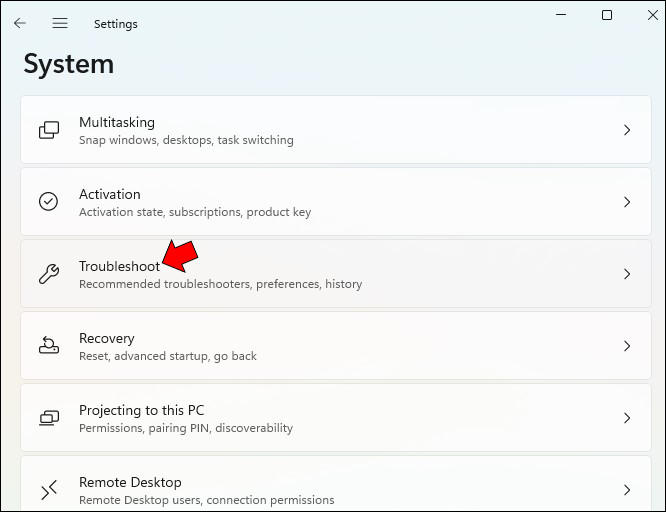
- Open the Settings app (you can search for it in the Start menu) and go to System > Troubleshoot.
- Select the Playing Audio and click “Run.”
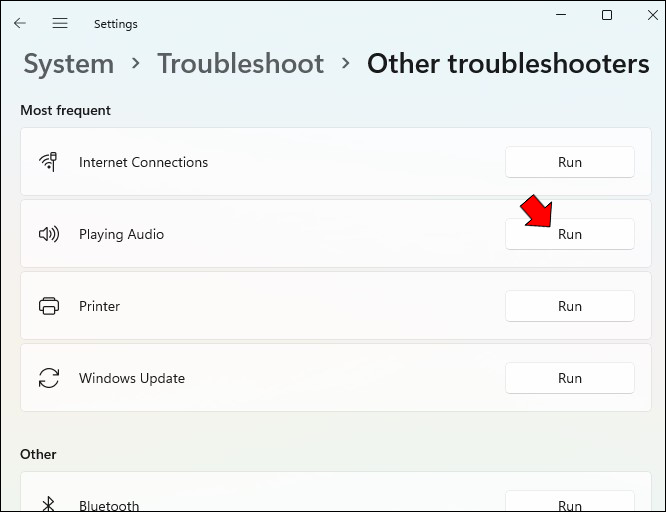
The troubleshooter will scan for any problems with your audio devices and try to fix them.
Change Your System Memory Value
If neither of the above solutions works, you may have to change your system memory value.
Here’s how:
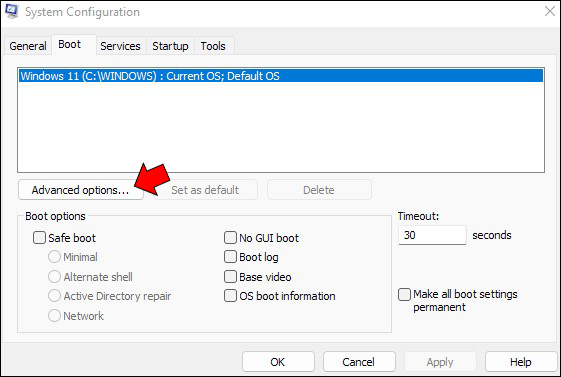
- Open a Command Prompt as Administrator and type in “msconfig”. This will open the System Configuration window.
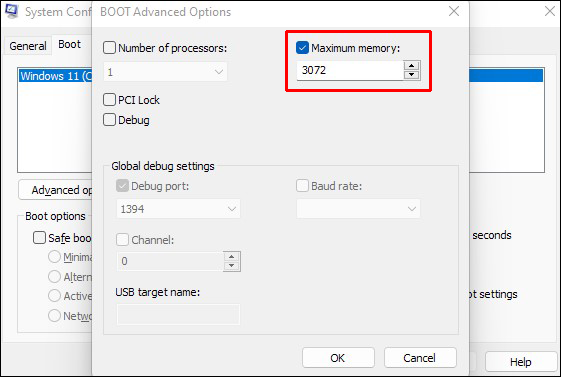
- Select the “Boot” tab and click on the “Advanced options” button.
- Under “Startup Options,” click on the “Change” button next to “Memory Management.”
- In the window that pops up, change the “Maximum Memory” value to something lower than your machine’s memory. For example, if your machine has an installed memory of 4GB, you can set the value at 2048 or 3072.
- Click “OK” to save your changes and restart your computer.


And just in case the issue isn’t resolved, you might also want to ensure you have the latest version of Windows 11 installed on your computer.
Windows 11 No Sound HDMI
If you’re using a Windows 10 operating system and suddenly find that you have no sound coming from your HDMI device, don’t panic.
There are a few potential causes and, thankfully, a few potential solutions:
Check If the Right Audio Output Device Is Selected
If you’re not getting any sound from your HDMI connection on Windows 11, you should first check if the right audio output device is selected.
To do this:
- Open the Control Panel and go to “Hardware and Sound.”
- Select “Sound.”
- Under the Playback tab, you should see all the devices currently connected to your computer. If your HDMI device is listed, select it, and click “Set as Default.”
- Click “OK” to save the changes.


Download the Latest Drivers
If the HDMI device is listed, but there’s still no sound, there’s a chance the driver for your HDMI audio output is outdated or damaged. Therefore, you should try downloading the latest HDMI driver for your PC.
Once you’ve installed the driver, restart your computer, and see if that fixes the issue.
Reset the Windows Audio Service
If there are still problems with your audio output device after updating your drivers, you may need to reset the Windows audio service.
To do this:
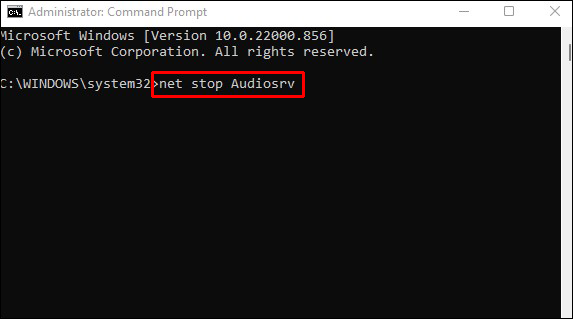
- Open a Command Prompt as Administrator and type the following commands in succession:
net stop Audiosrv
net start Audiosrv
The first command will stop the audio service, while the second will restart the service. - Restart your computer.

Windows 11 No Sound Bluetooth Headphones
Users have been reporting an issue with Windows 11 where no sound comes through Bluetooth headphones. This can be a frustrating problem, as it may prevent you from enjoying your music or being able to hear audio from other applications wirelessly.
There are a few potential solutions to this problem. First, make sure that the headphones are properly paired with the device. If they are, try restarting both the headphones and the computer. Additionally, check to see if the audio drivers on your computer are up to date. If they are not, you can usually download the latest drivers from the manufacturer’s website.
Finally, if none of these solutions work, you may need to reset the audio settings on your computer. To do this:
- Go to the “Hardware & Sound” control panel and select “Sound.”
- Under the “Playback” tab, select “Bluetooth speakers” as the default output device.
- Click “OK” to save the changes.


Hopefully, one of these solutions will fix the problem, and you can once again enjoy sound through your Bluetooth headphones.
Stay Calm
Sound output issues can be frustrating, especially if you’re not sure what the cause is. However, there are a few things you can try that will usually fix the problem. Though we have outlined almost a dozen troubleshooting methods, three of them have been found particularly effective.
First, check your audio drivers and make sure they’re up to date. If they’re not, you can download the latest drivers from your sound card manufacturer’s website. Next, run the Windows audio troubleshooter. This will scan your system for common problems and attempt to fix them automatically. Finally, double-check that you haven’t accidentally muted your device or turned the volume too low.
If all these things fail, you may need to contact Microsoft support for further assistance.
Have you experienced the no-sound problem on Windows 11? How did you resolve it?
Let us know in the comments section below.
Disclaimer: Some pages on this site may include an affiliate link. This does not effect our editorial in any way.


