Ableton is one of the most popular audio workstations for Windows and Mac. One of the reasons why it’s so popular is automation or automatic parameter control. It’s used to boost your track’s energy and improve the overall sound. Carefully employing automation in Ableton is necessary and valuable for creating great music.
If you’re interested in learning more about how to record automation in Ableton, you’ve come to the right place. This article will provide a detailed step-by-step guide on how to do it and offer tips and tricks you can use to make your tracks sound even better.
How to Record an Automation in Ableton
By employing automation, you avoid repetition, enhance suspense, and include variation in your tracks. Typically, automation is used for fading volume, working with audio effects, adjusting cutoff, etc., but you can automate virtually any parameter.
Here’s how to set up and record automation in Ableton:
- Open Ableton.
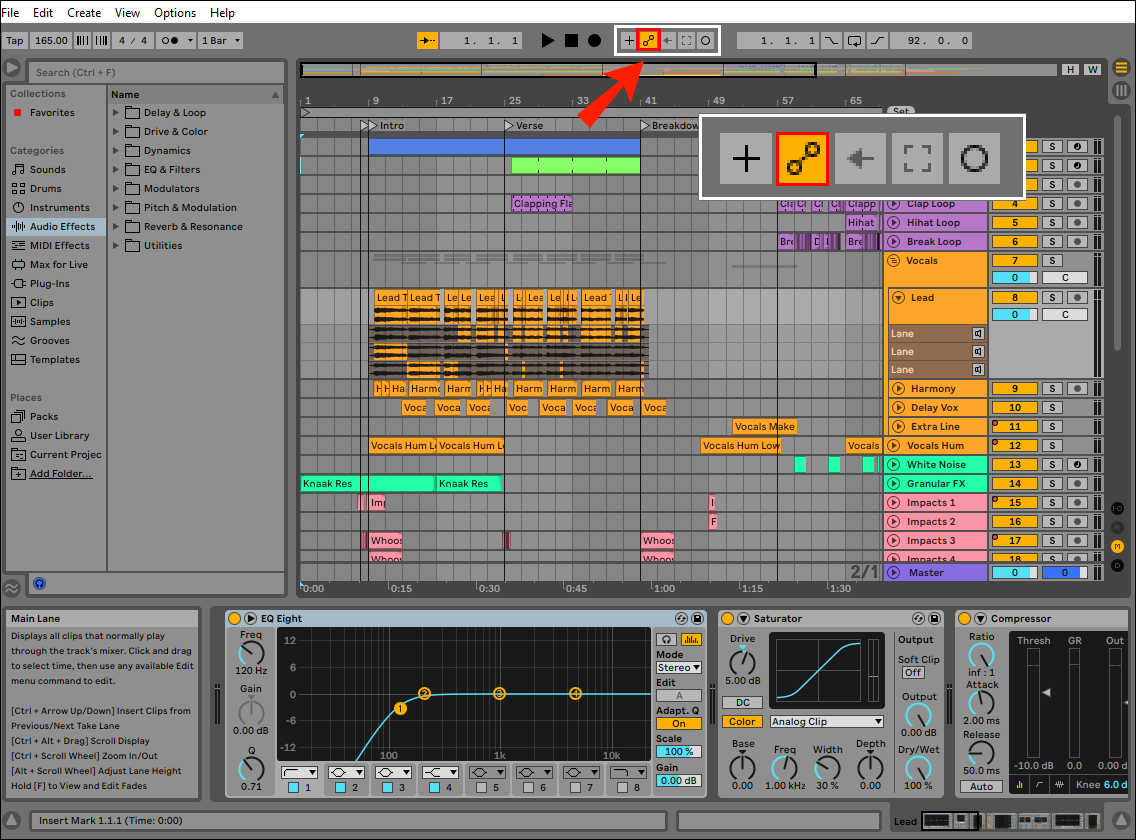
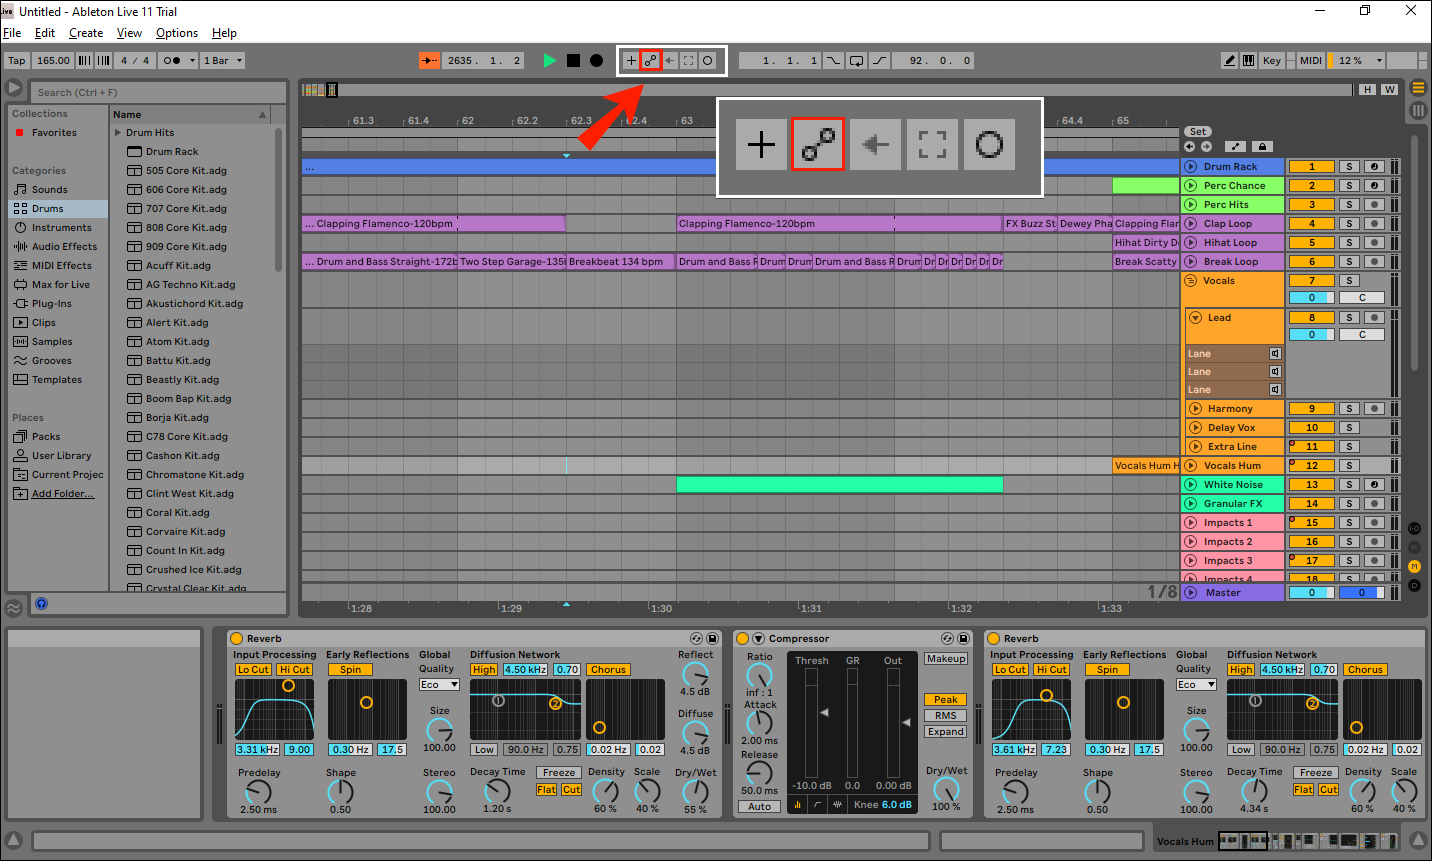
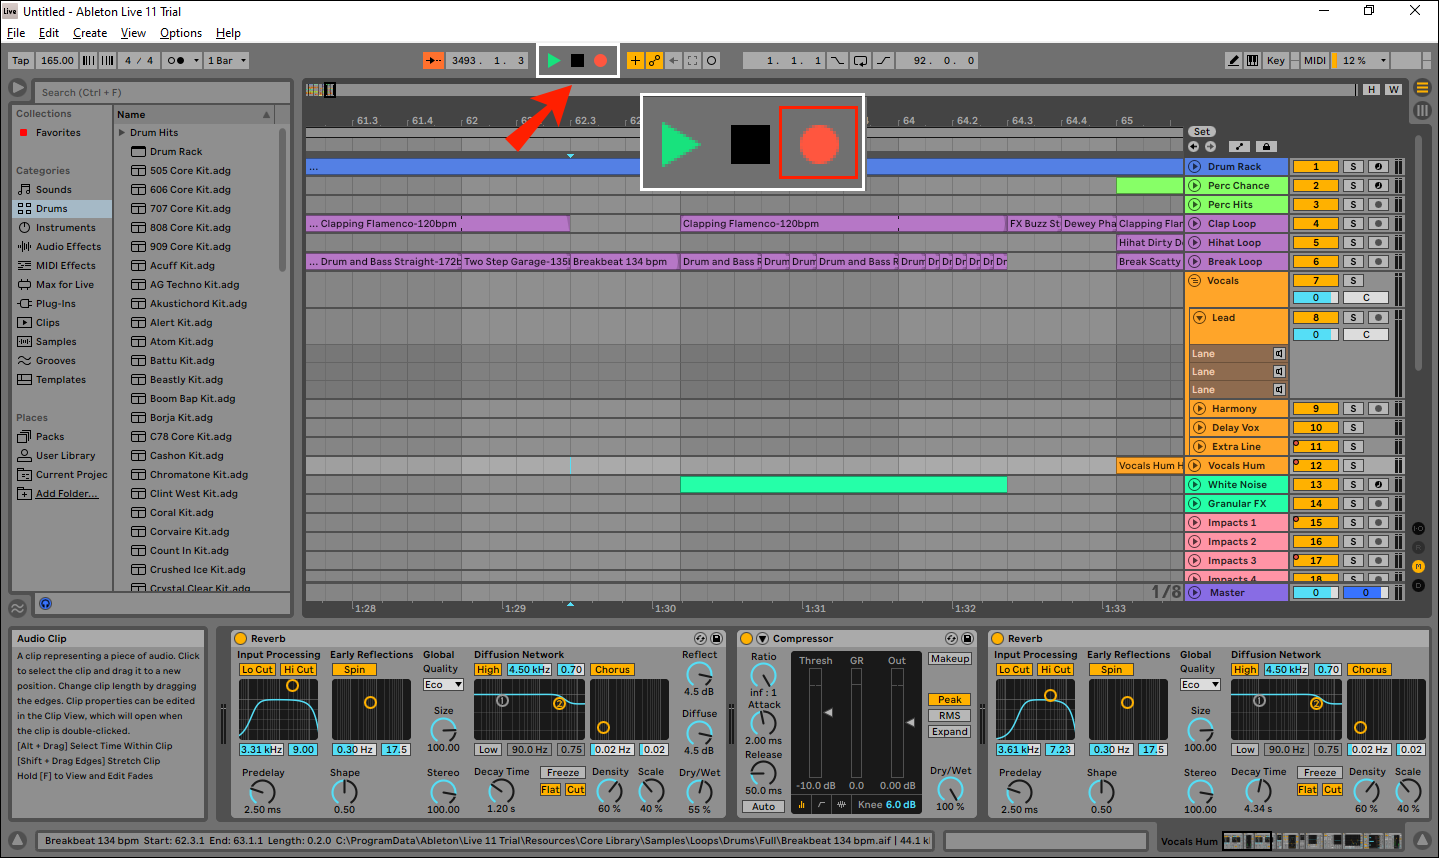
- Press “A” on your keyboard or press the Automated Arm icon. It’s the icon with two circles connected with a line. You’ll see automation lanes appear on your screen.

- Find the parameter you wish to automate and left-click on it. The parameter will show up in the Device Chooser and Automation Control Chooser for the desired track.
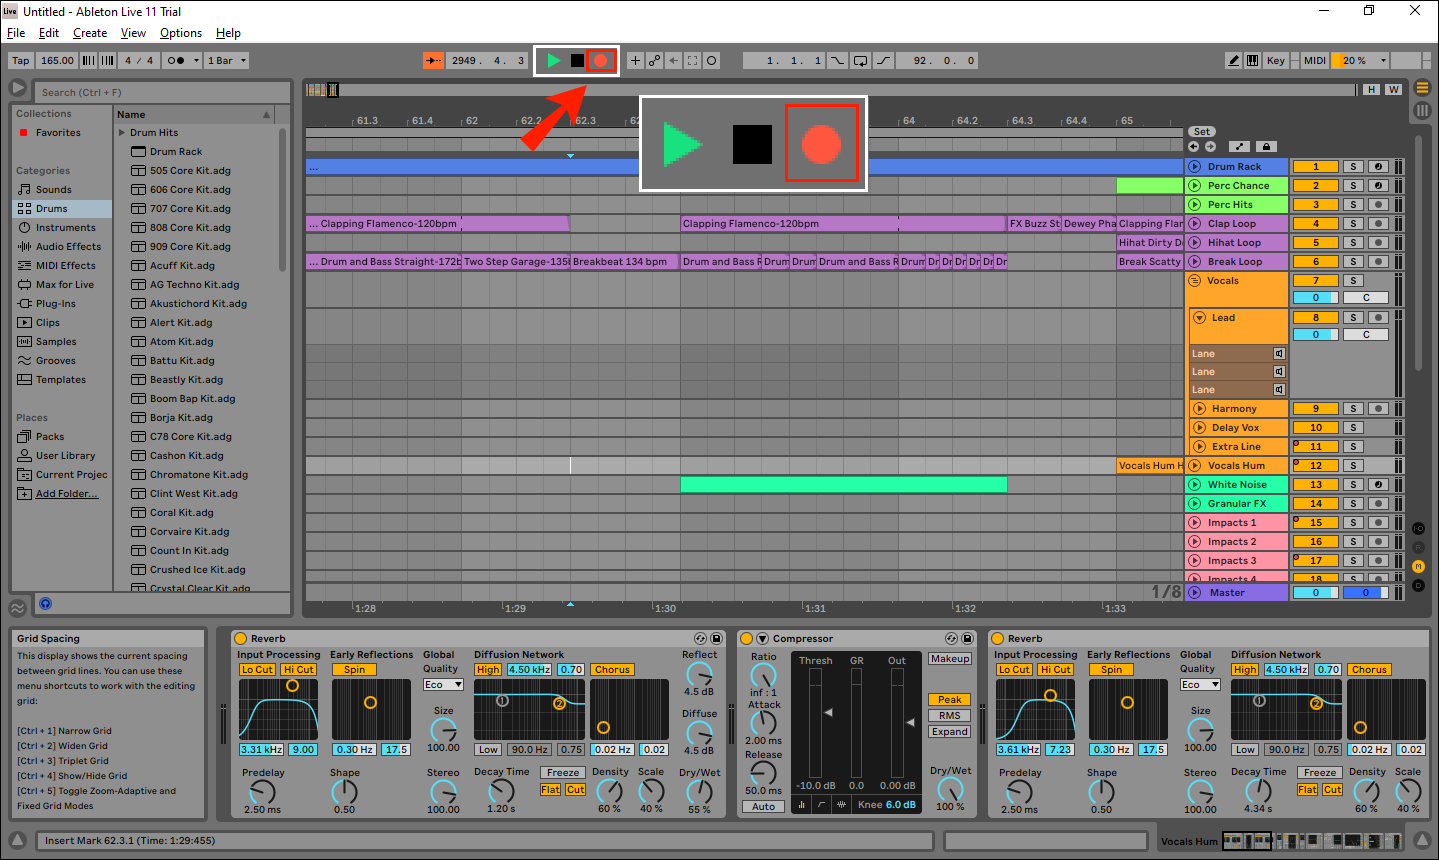
- Press the circle icon at the top menu to start recording. Every change you make will be automatically recorded.


Once you’re done recording automation, a small red button will appear next to the parameter.
How to Record Automation Only in Ableton
Saving only automation data without changing the audio/MIDI track isn’t complicated:
- Open Ableton.
- Enable automation by selecting “A” on your keyboard or selecting the Automated Arm icon.
- Disable the Recording Arm icon for the desired track.
- Press the record button.
- Adjust the controls you wish to automate. Only the automation data will be saved.

How To Record Automation Without Overwriting MIDI in Ableton
If you don’t tweak your settings, automation will write over your MIDI notes. With only one click, you can prevent this from happening:
- Open Ableton.
- Select “A” on your keyboard or press the Automated Arm icon to enable automation as you usually would.
- Press the plus sign next to the Automated Arm icon. This will enable automation layering without affecting your MIDI notes.
- Select the record button.


How To Record Automation Without Overwriting Audio in Ableton
Ableton enables you to employ automation without overwriting and replacing the existing audio. Here’s what you need to do:
- Launch Ableton.
- Press “A” on your keyboard or select the Automated Arm icon to enable automation as you usually would.
- Select the plus sign next to the Automated Arm icon. This will enable automation layering without overwriting your audio.
- Select the record button.
Additional FAQs
How Do I Copy an Automation in Ableton?
The copying process differs depending on the operating system you’re using.
If you’re using Windows and want to copy automation data in Ableton, here’s what you need to do:
1. Select the automation you wish to copy.
2. Press “Ctrl + C.” The automation will be copied to your clipboard.
3. Go to the track to which you want to add the automation and press “Ctrl + V” to paste it.
If you’re a Mac user and wish to copy automation in Ableton, follow these instructions:
1. Find and select the automation you want to copy.
2. Select “Command + C” to copy the data to the clipboard.
3. Find the track where you want to add the automation and select “Command + V” to paste it.
Why Is My Automation Gray?
Your automation will become gray if it is temporarily disabled. Specifically, if you manually adjust an automated control, you overwrite it, making the original automation gray.
If your track contains gray (overwritten) automation, you’ll notice an orange arrow next to the Automated Arm icon in the top menu. To reenable it, press the arrow.
Automate Like a Pro in Ableton
With automation, you can increase your track’s energy and make it sound like it was created in a professional studio. This feature enables you to customize virtually any control to build suspense into your track while avoiding repetition at the same time. In Ableton, you can choose whether you want to overwrite audio and MIDI or save automation only.
We hope this article helped you learn how to record automation in Ableton. Along with that, we hope we’ve answered important questions related to automation and that you’re now able to create your unique, top-chart hits.
What features do you like best in Ableton? Have you ever used automation before? Tell us in the comments section below.
Disclaimer: Some pages on this site may include an affiliate link. This does not effect our editorial in any way.


