Basic Input/Output System, or BIOS, is a built-in program that boots Windows when you turn on your computer. It also manages the communication between your operating system and other devices like a mouse or keyboard. Finally, it allows you to troubleshoot and configure different settings. However, accessing BIOS isn’t as simple as accessing a folder or file.
If you’re interested in learning how to access BIOS in Windows 11, you’ve come to the right place. This article will tell you different ways to do it, so you can choose the one that works best for you.
How to Access BIOS in Windows 11
Accessing BIOS can help you troubleshoot and resolve numerous problems in Windows 11. But BIOS isn’t a folder you can access from File Explorer. There are several ways to get to the settings:
How to Access BIOS in Windows 11 at Startup
The most common way to access the BIOS menu in Windows 11 is at startup. Users need to press the assigned key to enter BIOS. Here’s how to do it:
- Turn on your computer.

- As soon as the computer begins to boot up, push the assigned key until a menu appears on the screen.


BIOS should then show up on your screen. Navigate through it and make the changes you want.
Note: Not all computer manufacturers assign the same key to access BIOS. Depending on your computer’s brand, the key may be F2, F10, F1, or F12. If you don’t know which key to use, we recommend referring to the manufacturer’s website or checking your instruction manual. You can also find this information on the first splash screen that appears when you turn on your computer. Keep in mind not all computer and laptop models show this information.
While this method is the simplest, it requires speed. This can be a problem if your computer is fast and boots up in only a few seconds, leaving you no time to push the relevant key. Fortunately, there are other methods to access BIOS.
How to Access BIOS in Windows 11 From Settings
If you weren’t fast enough to press the assigned BIOS key at startup on time, or you don’t know what key to use, you can access BIOS through Settings. Follow the instructions below to do it:
- Open the Start menu and press the gear icon to access Settings.
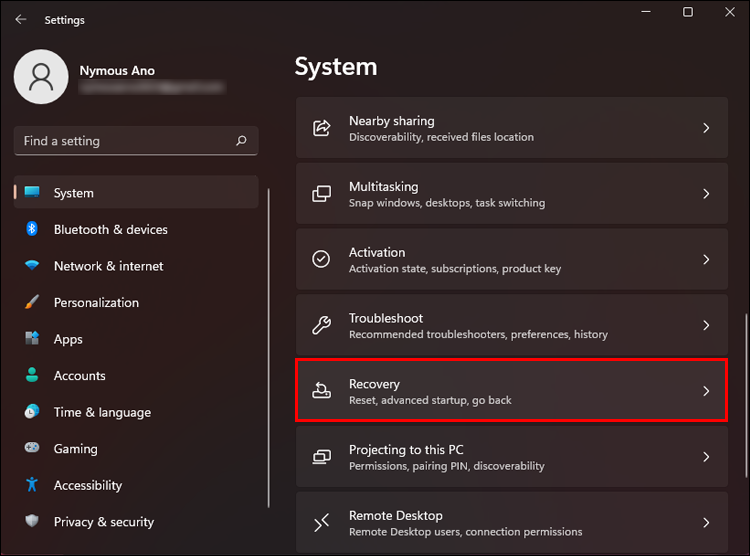
- Select System in the menu on the left.
- Press Recovery on the right side.
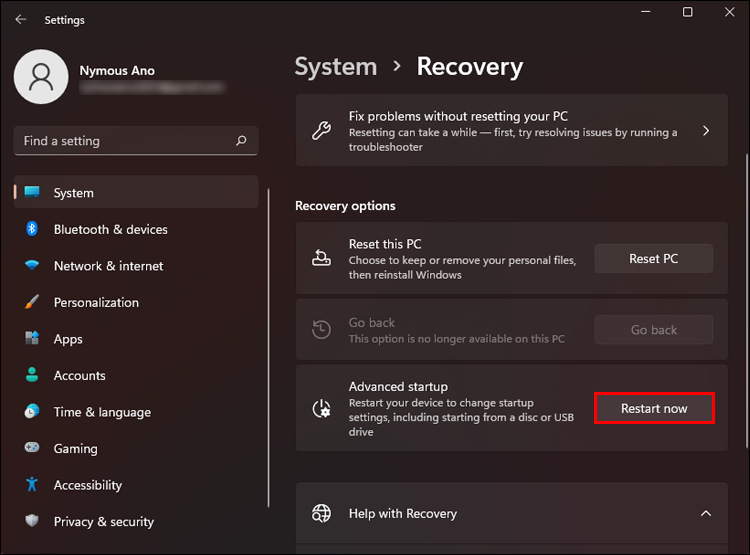
- Select Restart now next to Advanced startup.
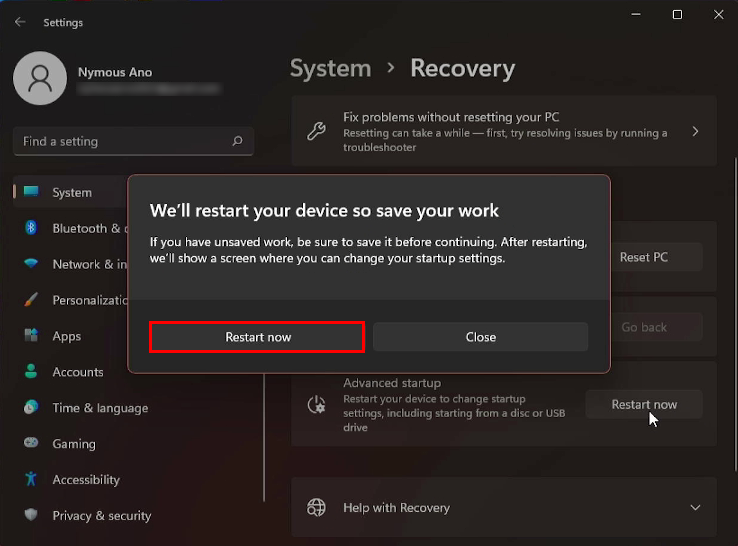
- The “We’ll restart your device so save your work” message will appear on the screen. If you’ve saved your work, press Restart now.
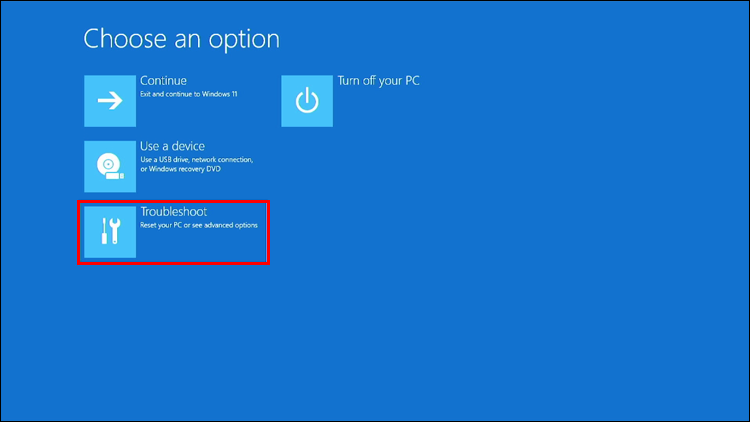
- A menu with three options will appear. Choose Troubleshoot.
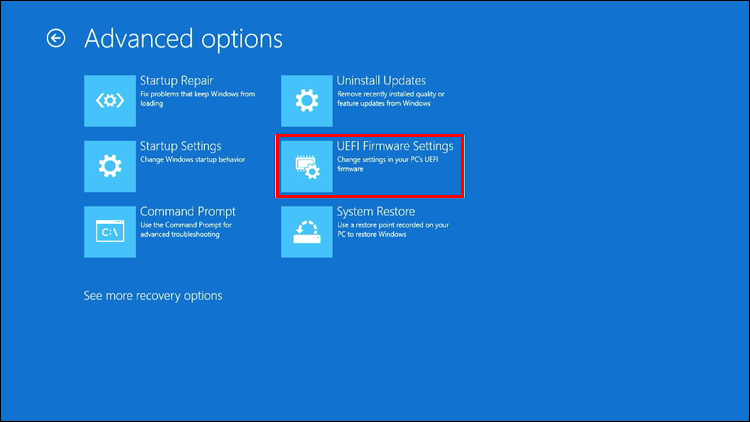
- Press Advanced options.
- Select UEFI Firmware Settings and choose Restart.
- Enter BIOS Setup.


Although accessing BIOS using this method takes more time than doing it at startup, it’s a sure-shot way that doesn’t require speed.
How to Access BIOS in Windows 11 With Command
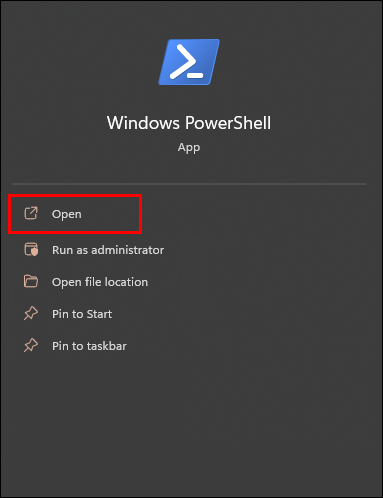
You can use different task automation and configuration management programs like PowerShell or Terminal to access BIOS. Follow the steps below to do it:
- Open your preferred program.
- Type
shutdown /r /o /f /t 00orshutdown.exe /r /oand hit Enter. - Numerous options will appear on the screen. Select Troubleshoot.
- Press Advanced options.
- Go to UEFI Firmware Settings.
- Choose Restart.


Your computer will restart and enter BIOS automatically.
How to Access BIOS in Windows 11 With a Shortcut
If you need to access BIOS often, you can create a shortcut that allows you to enter BIOS in only a few clicks. Here’s how to do it:
- Right-click on your desktop, hover over New, and select Shortcut.
- Under “Type the location of the item,” enter
shutdown /r /o /f /t 00. - Press Next and follow the on-screen instructions to complete the process.


Once you’ve created the shortcut, here’s how to use it to access BIOS:
- Double-click on the shortcut.
- Press Troubleshoot.
- Go to Advanced options.
- Select UEFI Firmware Settings.
- Press Restart.

The computer will enter BIOS automatically.
How to Access BIOS in Windows 11 With Shift + Restart
If you want to access BIOS in Windows 11 without signing in, here’s what you can do:
- While on the lock or sign-in screen, press and hold Shift, click the Power icon, and choose Restart.
- You’ll be taken to the Advanced Startup screen. Choose Troubleshoot.
- Press Advanced options.
- Choose UEFI Firmware Settings.
- Select Restart.

You can do the same if you’re signed in:
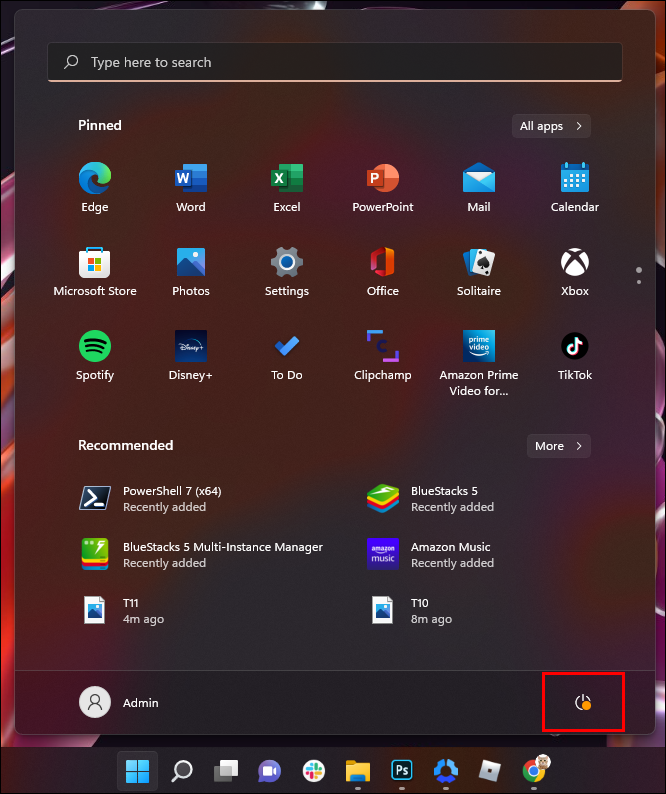
- Press and hold the Shift button and open the Start menu.
- Select the Power icon.
- Choose Restart.
- Select the Troubleshoot option from the Advanced Startup screen.
- Choose Advanced options.
- Click on UEFI Firmware Settings.
- Press Restart.


How to Access BIOS in Windows 11 With Run Window
Another way to access BIOS in Windows 11 is using the Run window. Follow the instructions below to do it:
- Press Windows + R to open the Run window.
- Type
shutdown /r /o /f /t 00and click Ok or select Enter. Alternatively, you can use theshutdown.exe /r /ocommand, but it’s not as fast. - Navigate to Troubleshoot.
- Choose Advanced options.
- Click on UEFI Firmware Settings.
- Select Restart.


How to Access BIOS in Windows 11 on a Surface Pro
Many Surface Pro devices already come with Windows 11, while others can be upgraded to it. If you have a Surface Pro device, here’s an easy way to access BIOS:
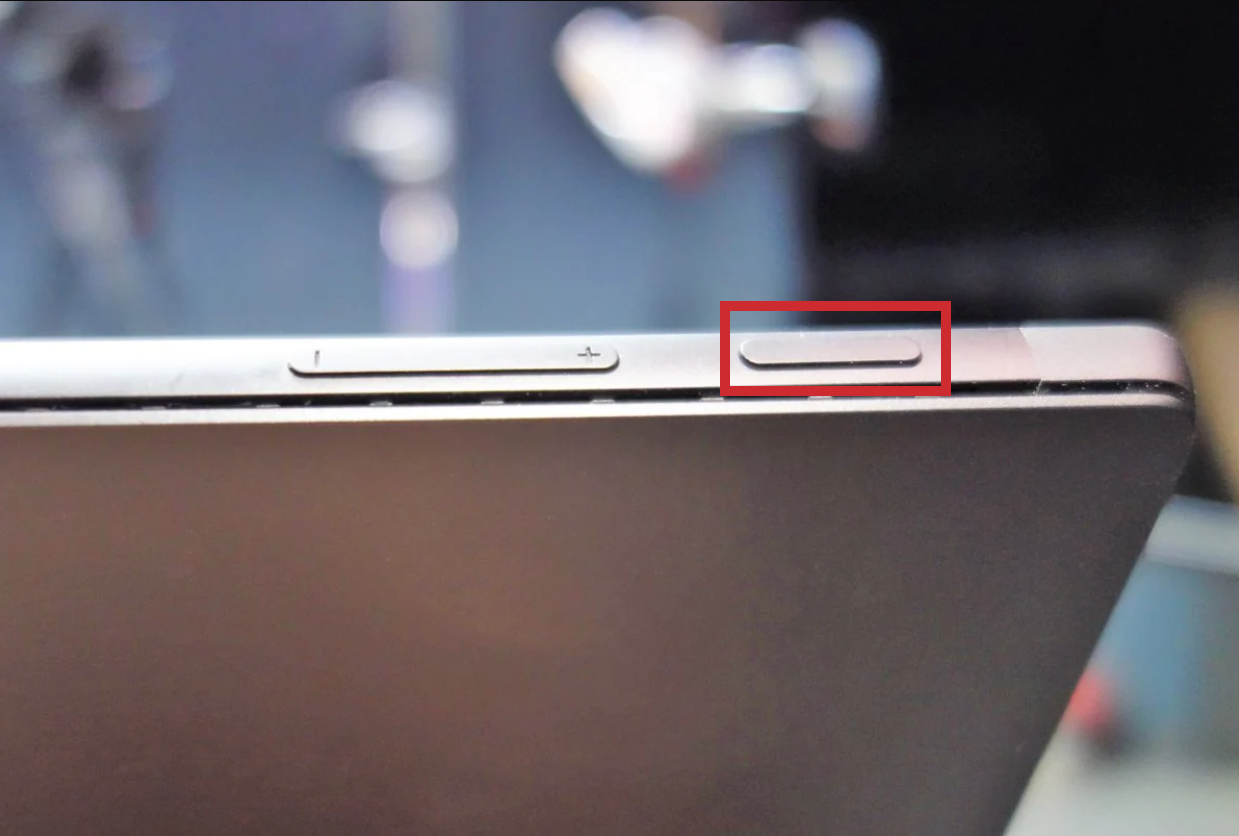
- Shut down your device.
- Press and hold the Volume Up button (the plus sign).
- Hold and release the Power button while still holding the Volume Up button. When you see the Microsoft or Surface logo, release the Volume Up button. You should now enter BIOS for your Surface Pro device.


UEFI vs. BIOS
Many users aren’t sure whether Unified Extensible Firmware Interface (UEFI) is the same as BIOS. As you may have noticed, most of the instructions for accessing BIOS in Windows 11 actually involve accessing UEFI, so it’s natural to wonder if the two terms are interchangeable.
While both UEFI and BIOS are interfaces that start the operating system and act as mediators between the operating system and firmware, they aren’t the same. BIOS uses the Master Boot Record (MBR), while UEFI uses the GUID Partition Table (GPT). The MBR is located in the first sector of the hard disk, which increases the risk of corruption. UEFI uses the GPT that performs regular redundancy checks that minimize the chances of corruption issues.
UEFI was developed in 2007, and nowadays, it’s considered standard for modern interfaces. It’s a newer and more advanced interface that corrects some of the BIOS’s technical shortcomings and has features that BIOS doesn’t offer. Many experts project that UEFI will replace BIOS in the near future.
BIOS operates only in 16-bit mode, while UEFI operates in 64 bits. This means UEFI has more memory, making the booting process much faster.
Modern motherboards are shipped with UEFI instead of BIOS because it offers more options and is more capable.
FAQs
What are the basic functions of BIOS?
BIOS has four main functions:
• Power-on self-test (POST) – BIOS tests the hardware connected to your computer and ensures there are no errors before loading the operating system.
• Bootstrap loader – BIOS locates your operating system. When (and if) it locates the system, BIOS will pass control to it.
• Drivers and software – BIOS identifies the drivers and software that interact with the operating system once it’s loaded.
• Complementary metal-oxide-semiconductor (CMOS) setup – CMOS is BIOS’s non-volatile memory that allows users to customize system and hardware settings.
How can I check the BIOS version?
If you want to check the BIOS version you have on your computer, here’s what you need to do:
1. Open the Start menu and type “cmd” in the search bar.

2. Launch the Command Prompt.

3. Type wmic bios get smbiosbiosversion, You’ll see the version number of BIOS.

Should I update BIOS on my computer?
Updating our operating system ensures smooth performance and allows us to use new features. However, this isn’t the case with BIOS. Unlike operating system updates, BIOS updates don’t involve new features, performance improvements, or security patches. They typically fix minor bugs or add support to new CPUs.
If your computer is working properly, there’s no need to update BIOS. In fact, updating BIOS can often do more harm than good, and you could experience bugs or even brick your computer. BIOS updates are hardware-specific, and if you get the wrong version, your computer could become unbootable.
If you’re experiencing bugs that are fixed in a new BIOS version or want to upgrade your CPU, you probably should update BIOS. We recommend letting a professional handle it to minimize the risks.
Accessing Your BIOS Has Never Been Easier
Contrary to popular belief, accessing BIOS at startup isn’t the only way to get to it. The new Windows 11 allows you to enter BIOS in numerous ways to troubleshoot your system or fix issues. Be very careful when working in BIOS and change the settings only if you know what they are for. Otherwise, you could jeopardize your computer’s performance.
Have you had difficulty accessing BIOS? Did you know there are many ways to access BIOS? Tell us in the comments section below.
Disclaimer: Some pages on this site may include an affiliate link. This does not effect our editorial in any way.


