As an owner of an Android device, you probably know that the Android operating system (OS) requires an update every so often. These updates improve the security, fix any bugs, and add more features to your device.
If you want to update your Android device but you’re not quite sure how to go about it, you’re in the right place. In this article, we provide you with step-by-step instructions on how to update your Android device manually or set it to automatically update whenever a new OS is available. And, if you have an old phone, we can help you update that software too.
How to Update Android OS Manually
In most instances, your Android device will give an update notification automatically. You can either choose to install the update right away or set it for another time. But there may be times when you want to perform the update manually. Here is how to go about doing so:
- Open your Android phone and make sure you are connected to Wi-Fi. Sometimes the updates are large and may use up a lot of your data, so using Wi-Fi is advised.
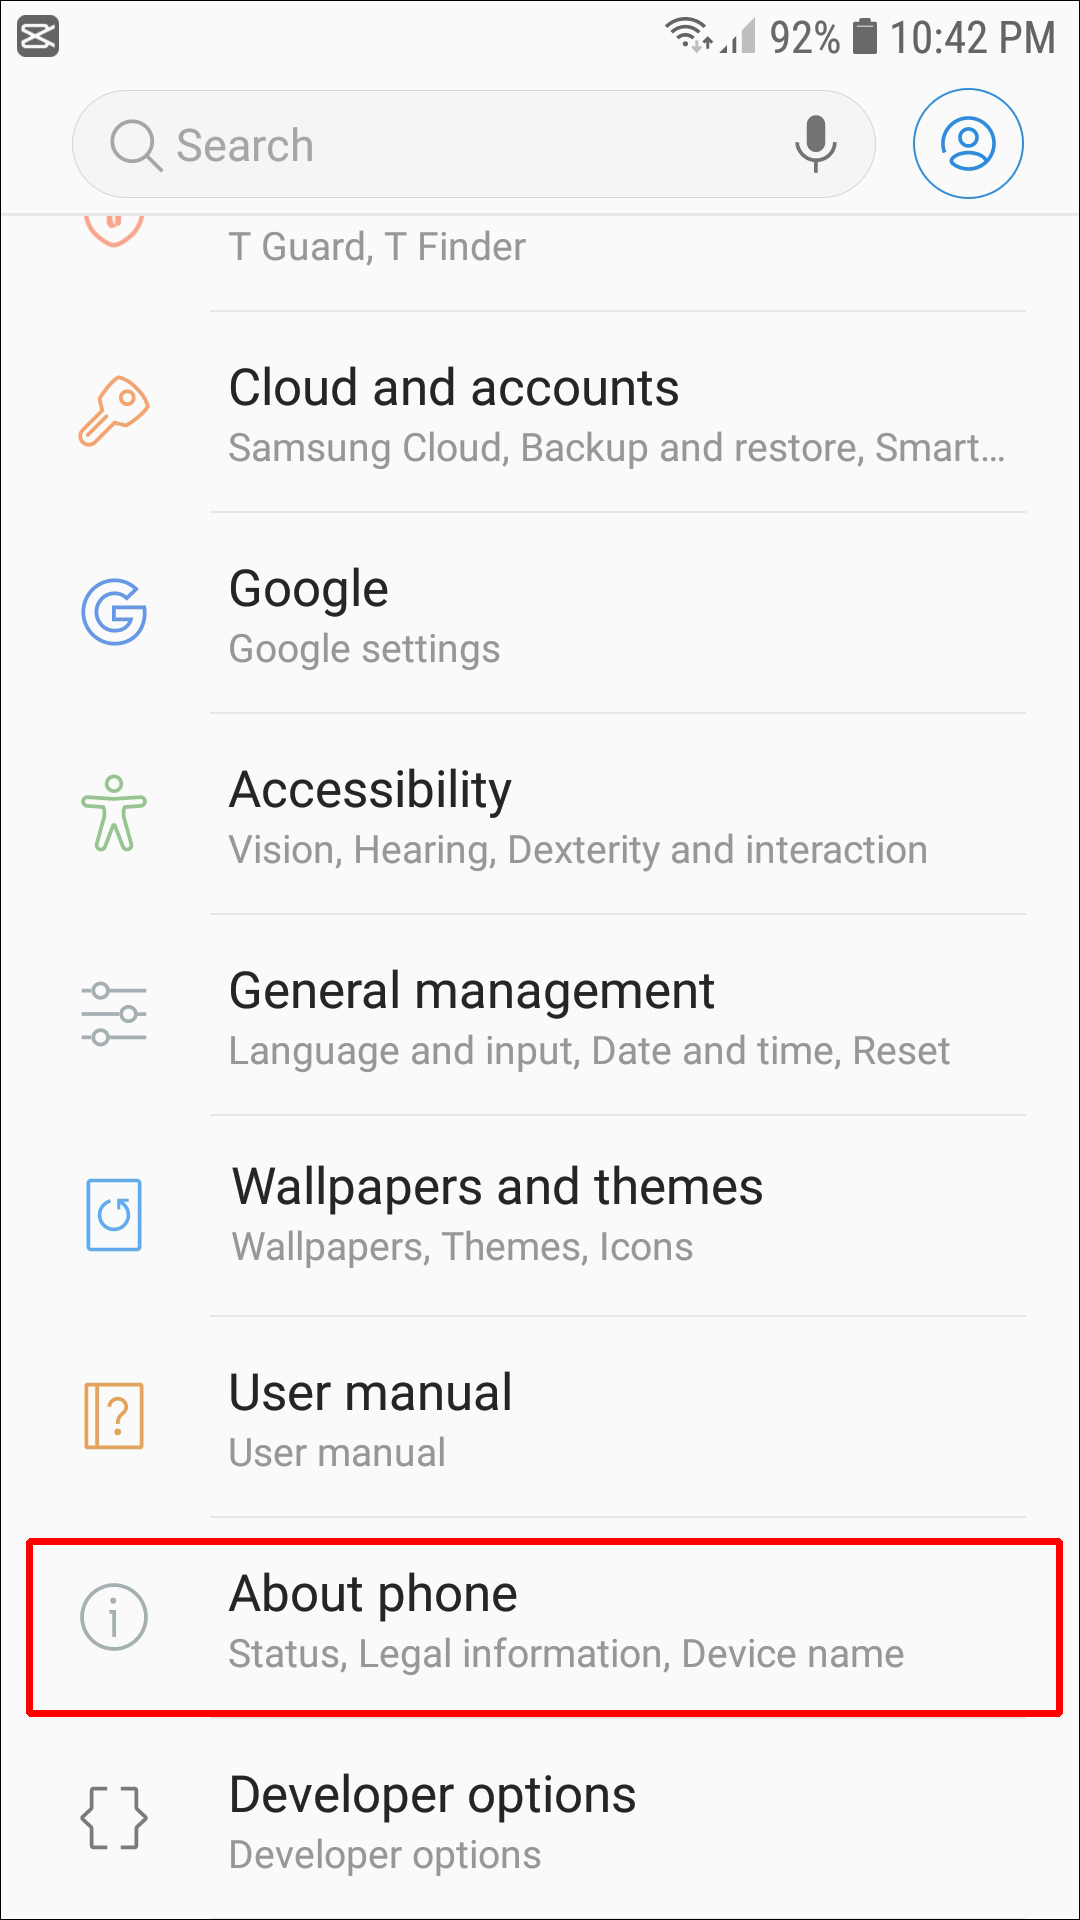
- Navigate to your “Settings” icon, usually depicted by a cog, and click on it. In the “Settings” menu, scroll down to find the “About Phone” option and tap on it.

- Locate “System Updates” and select it. Then choose “Check for Updates,” followed by “Update to Download and Install the Latest Android Version.”
Your phone will now update.
How to Update Android OS Manually on a Samsung Phone
- Open your device and navigate to “Settings.”
- Scroll to the bottom of the “Settings” menu to find “Software Update.” Click on it.
- Select “Download and Install.” Your phone will check to see if there are any updates available. If there are, select the update to start running. But, if there are no updates, it will tell you, “Your software is up to date.”


How to Update Android OS on a Tablet
Updating your Android tablet is fairly simple; this is how you do it for Android Pie (9.0), Android 10, and 11:
- Make sure your device is connected to Wi-Fi to avoid using up a lot of your data.
- Navigate to the “Settings” icon by pulling down your notifications bar or looking on your “Home” screen. This icon features the image of a cog or gear. When you have found it, tap on the icon.
- In the “Settings” menu, scroll down until you see “Software Update” and click on it.
- Select “Download and Install.” Your tablet will then check to see whether updates are available; if not, it will inform you that your system is up to date. If there is an update available, you can click on it to start running the software.
To update Android Nougat (7.0) and Oreo 8.0, use this method:
- Open your tablet and connect to Wi-Fi. Then, navigate to “Settings.”
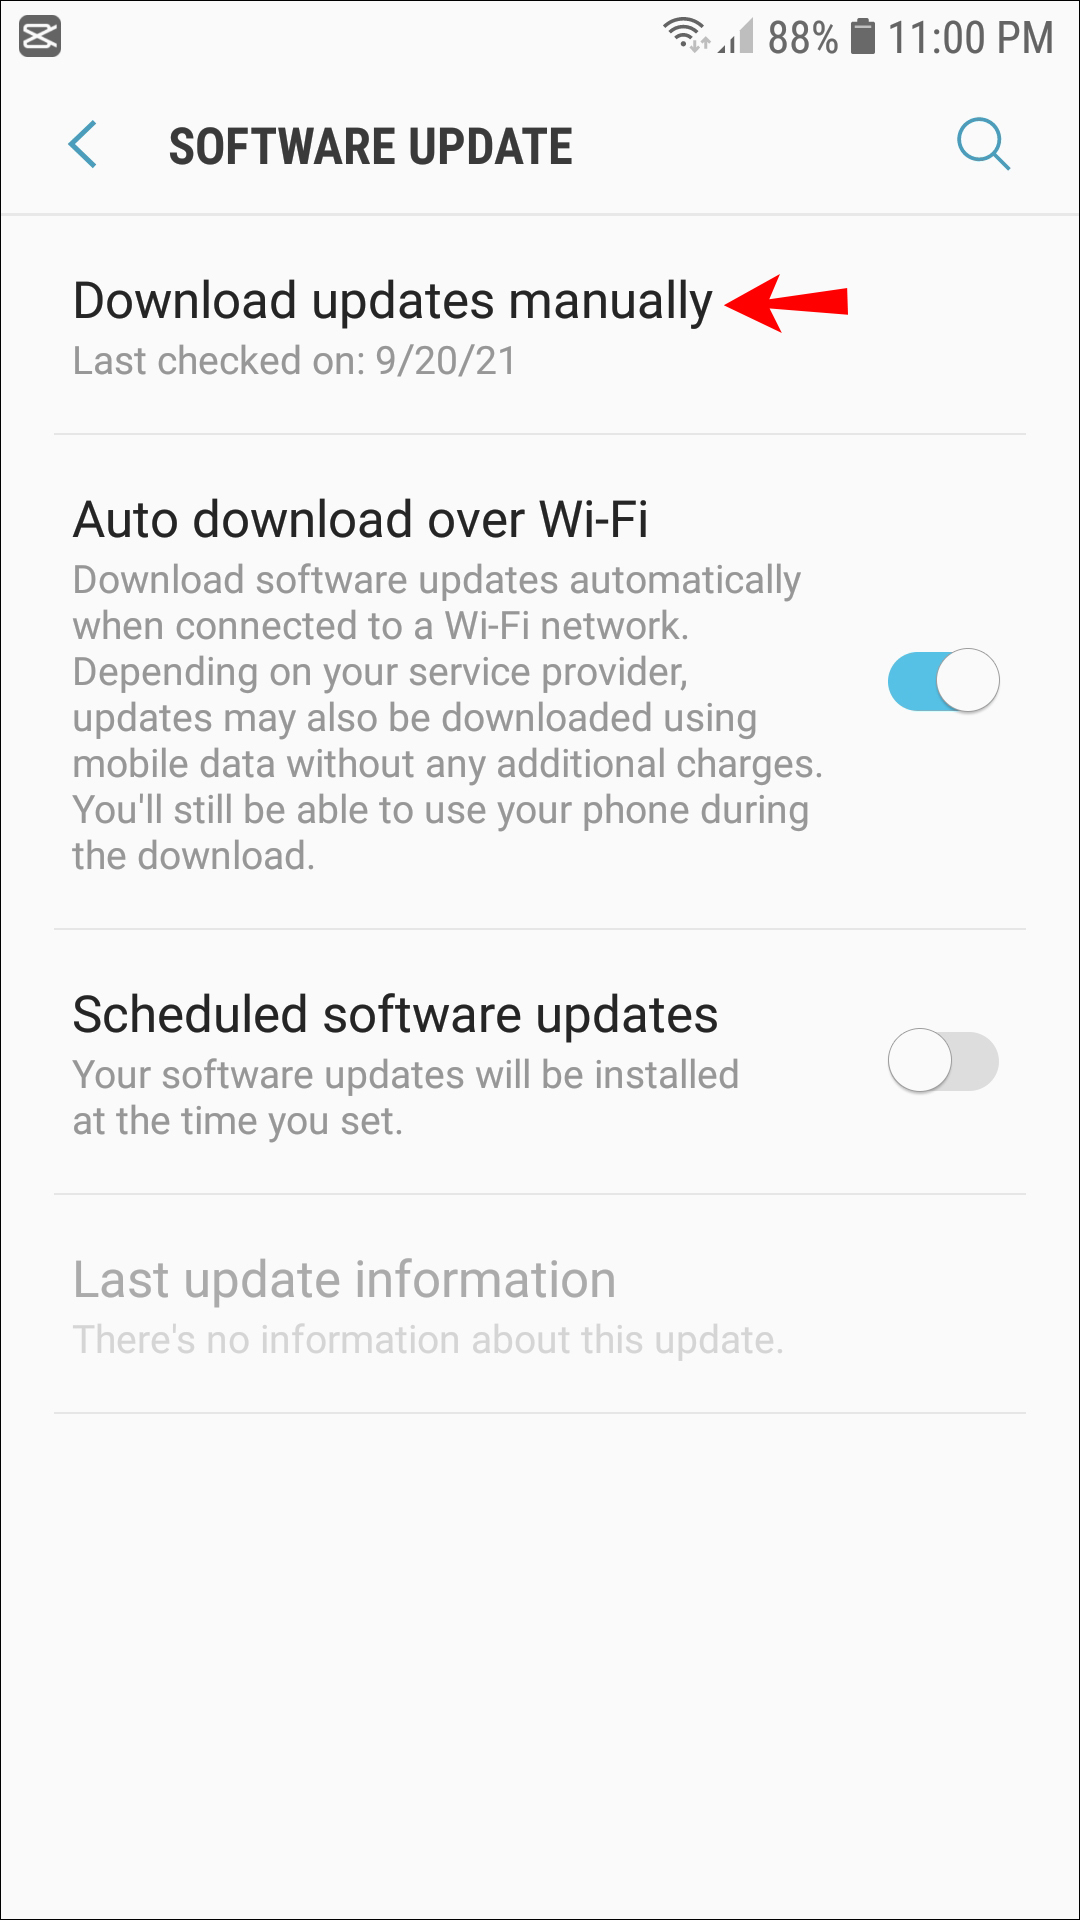
- From the “Settings” menu, select “Software Update.”
- Choose “Download Updates Manually.” You can then run the update once it has downloaded.
How to Update Android OS on an Old Phone
Android will not update phones older than two or three years in an attempt to get users to buy new phones. So, if you have owned your phone for four years and it won’t let you update your Android OS even though you know there are later versions, this is probably the reason.
But, there is a way to get around this, and it requires you to run a custom ROM. This method is advanced. We suggest backing up your system before attempting to follow this method.
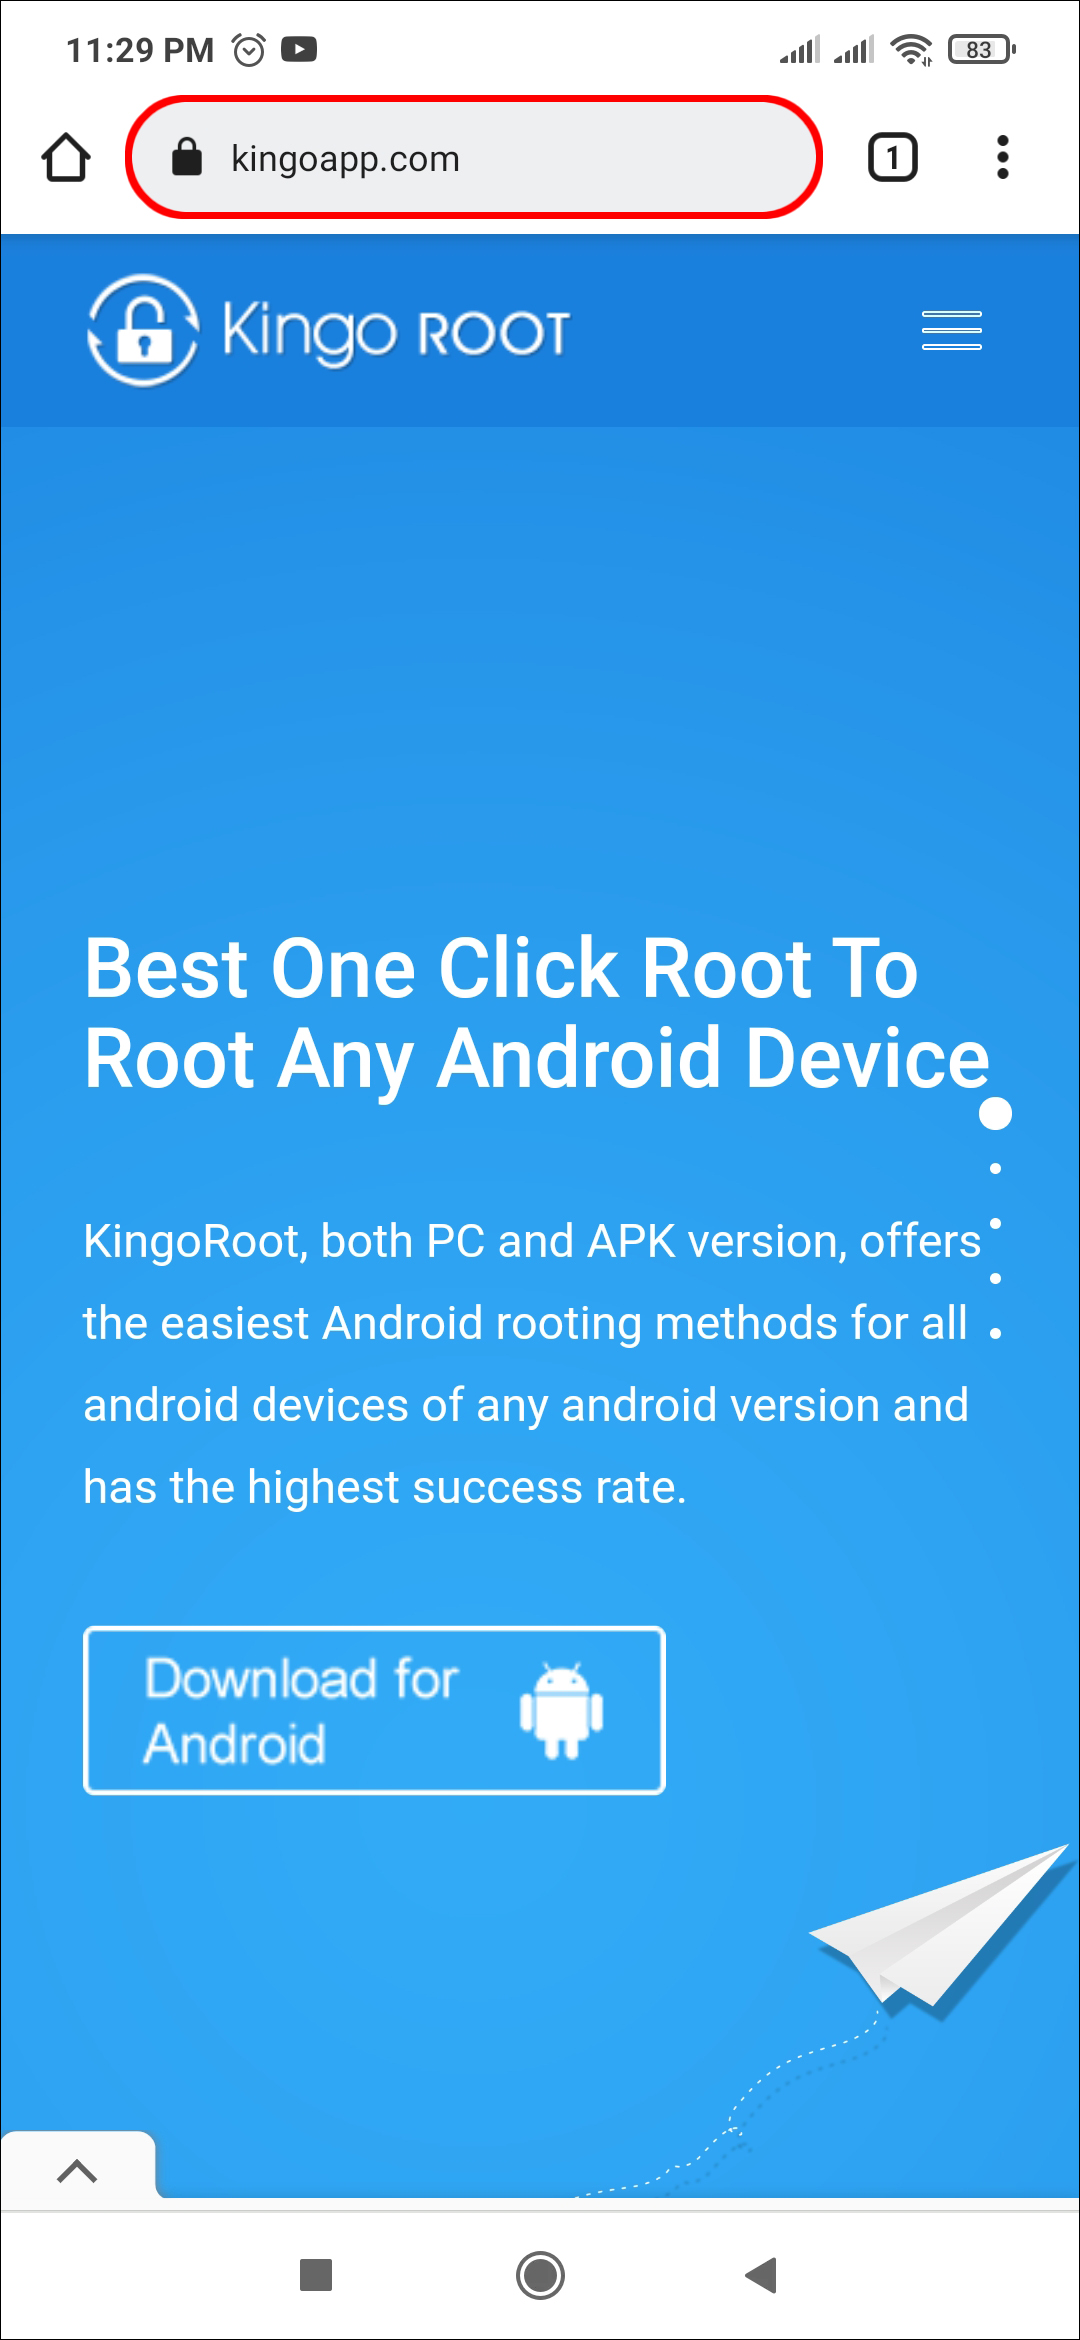
- Start by rooting your device. You can find various types of rooting software available for download. We suggest trying Kingo Root. This software will guide you on the necessary steps for your particular Android device.
- You will also need to install a custom recovery tool on your phone. TWRP is a great tool to use and will provide you with the exact steps to follow for your specific device.
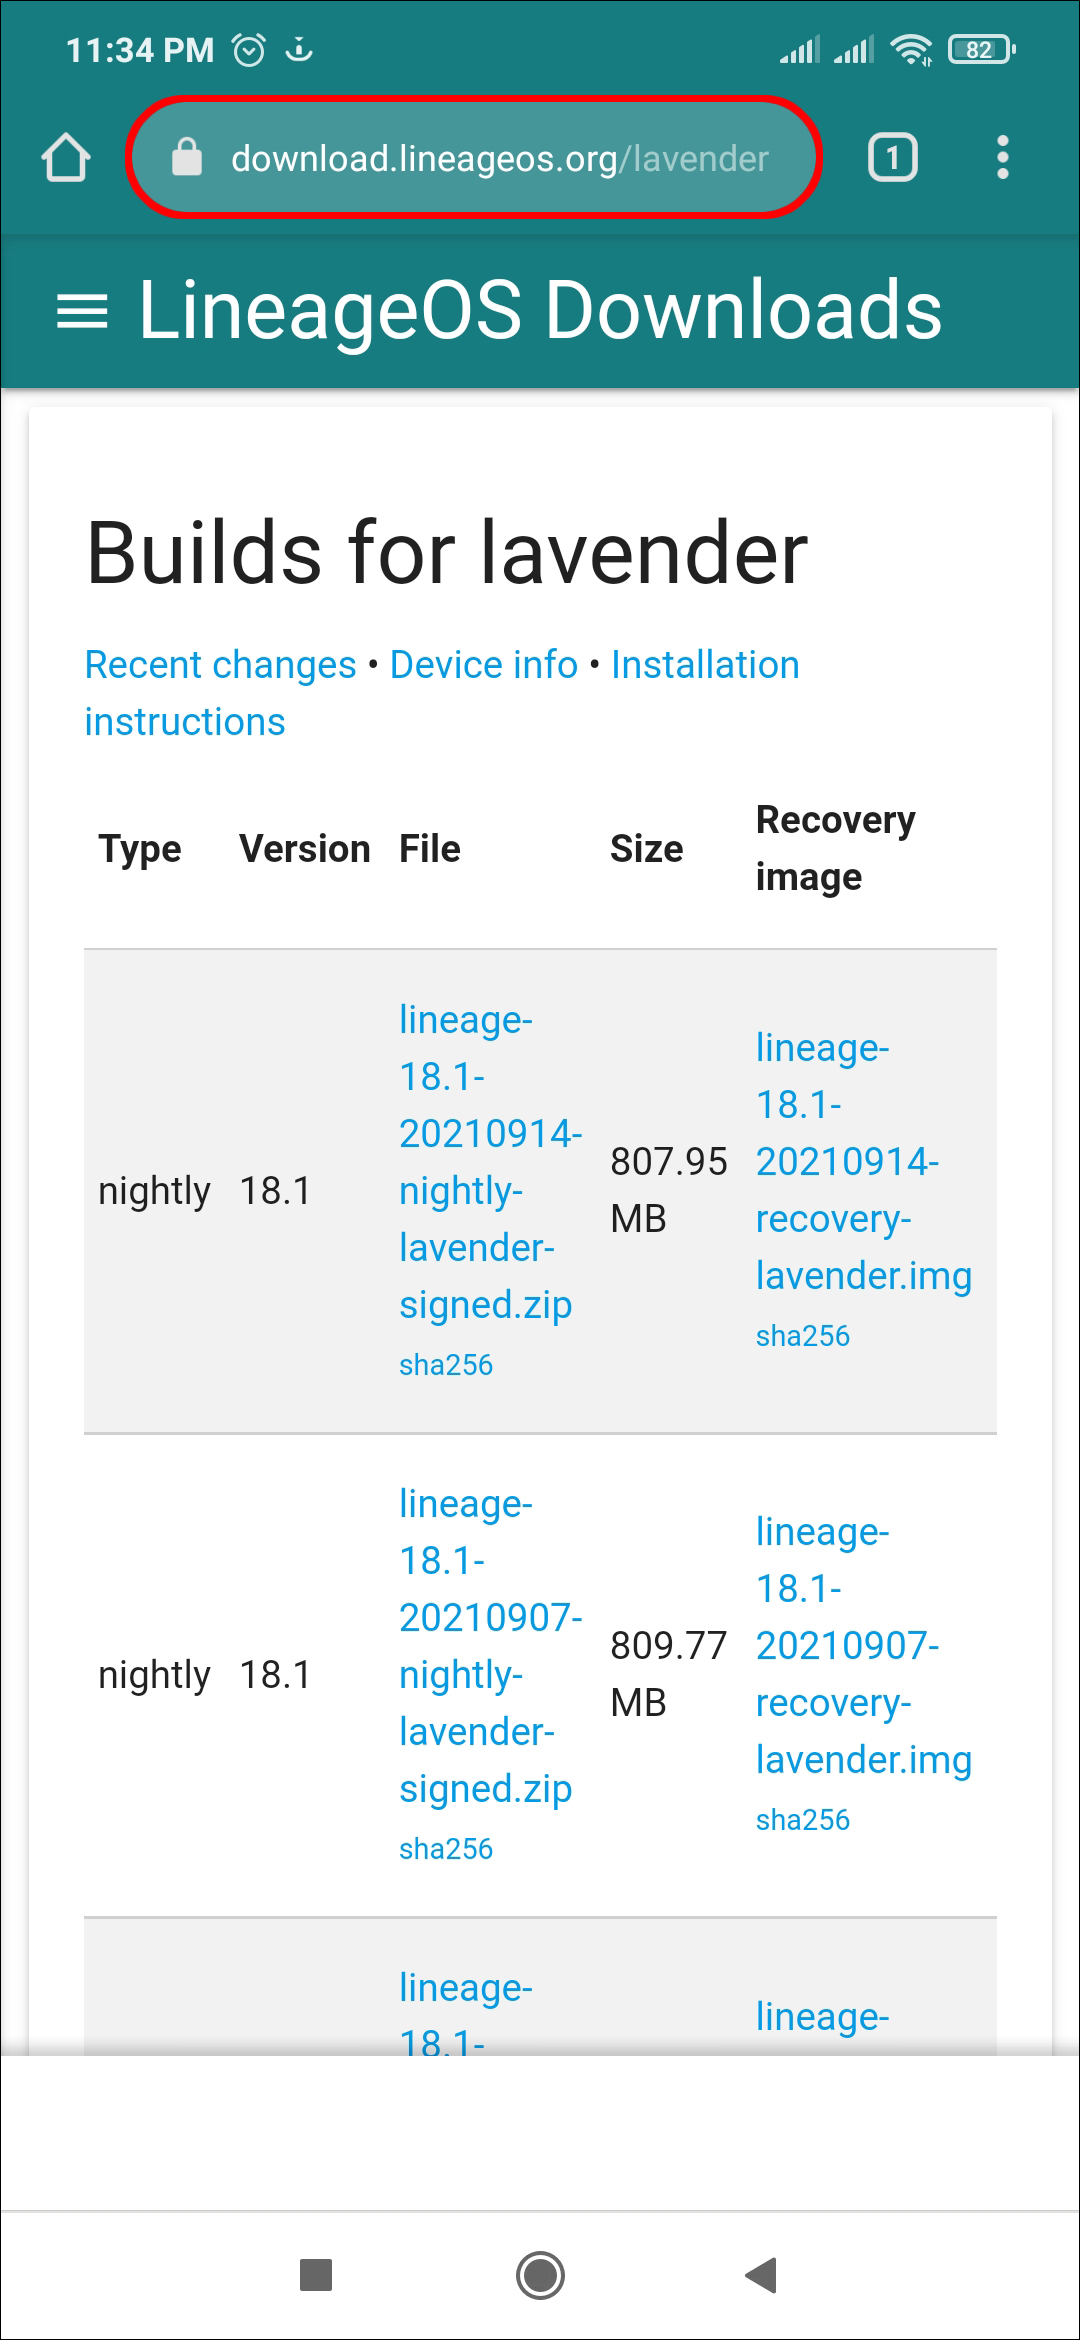
- Next, download the latest version of Lineage OS for your phone and install it.
- You will also need to install Gapps, the Google applications for the phone that includes Maps, the Play Store, and Search. To find the correct version of Open Gapps for your device, you need to first determine what architecture your device and the new Android version uses and then choose a variant. To figure out the device architecture download an app like the CPU-Z app. Once installed, open the “SOC” tab and look at the “Architecture Value.” This should tell you the device architecture. If you’re unsure, do a Google search to find out what architecture your phone uses. The Android version you end up with depends on the Lineage OS version you downloaded.
- Select your Open Gapps variant. There are several options to choose from, and each offers different services. Don’t worry too much about which one you pick, as you can always install missing apps later.
- Download the version of Open Gapps you have chosen.
You’ll now need to flash your device.
- Boot your device into recovery mode by pressing the “Power” and “Volume Down” buttons simultaneously. This will start TWRP.
- TWRP will ask you if you want to “Keep System Read Only.” You don’t want to accept this option, so select “Allow modifications.” Then select “Wipe” and then “Advanced Wipe.”
- Choose “Dalvik / ART Cache,” followed by “System,” “Data,” and then “Cache,” and then tap to wipe.
- Navigate back to the main menu and press “Install.” Choose the Lineage OS file you downloaded earlier from your “Downloads” folder. Then tap to confirm flash.
- Once the flashing is complete, a “Wipe cache/Dalvik” button will appear; tap it and then swipe to wipe.
- Again, navigate back to the main menu and select “Install.” Choose the “Open Gapps” file from your downloads folder. Tap it and then swipe to confirm the flash.
- Click on “Reboot System,” and when the “Install TWRP App?” prompt appears, choose “Do not Install.” Your phone will now boot to the latest version of Android OS.
How to Have Android OS Update Automatically
Android usually pushes updates to your device automatically. However, sometimes you may not receive these updates because a setting needs to be turned on. These steps show you how to enable automatic updates:
- Open your Android device and navigate to “Settings.”
- Scroll down the “Settings” menu until you find “Software Update.”
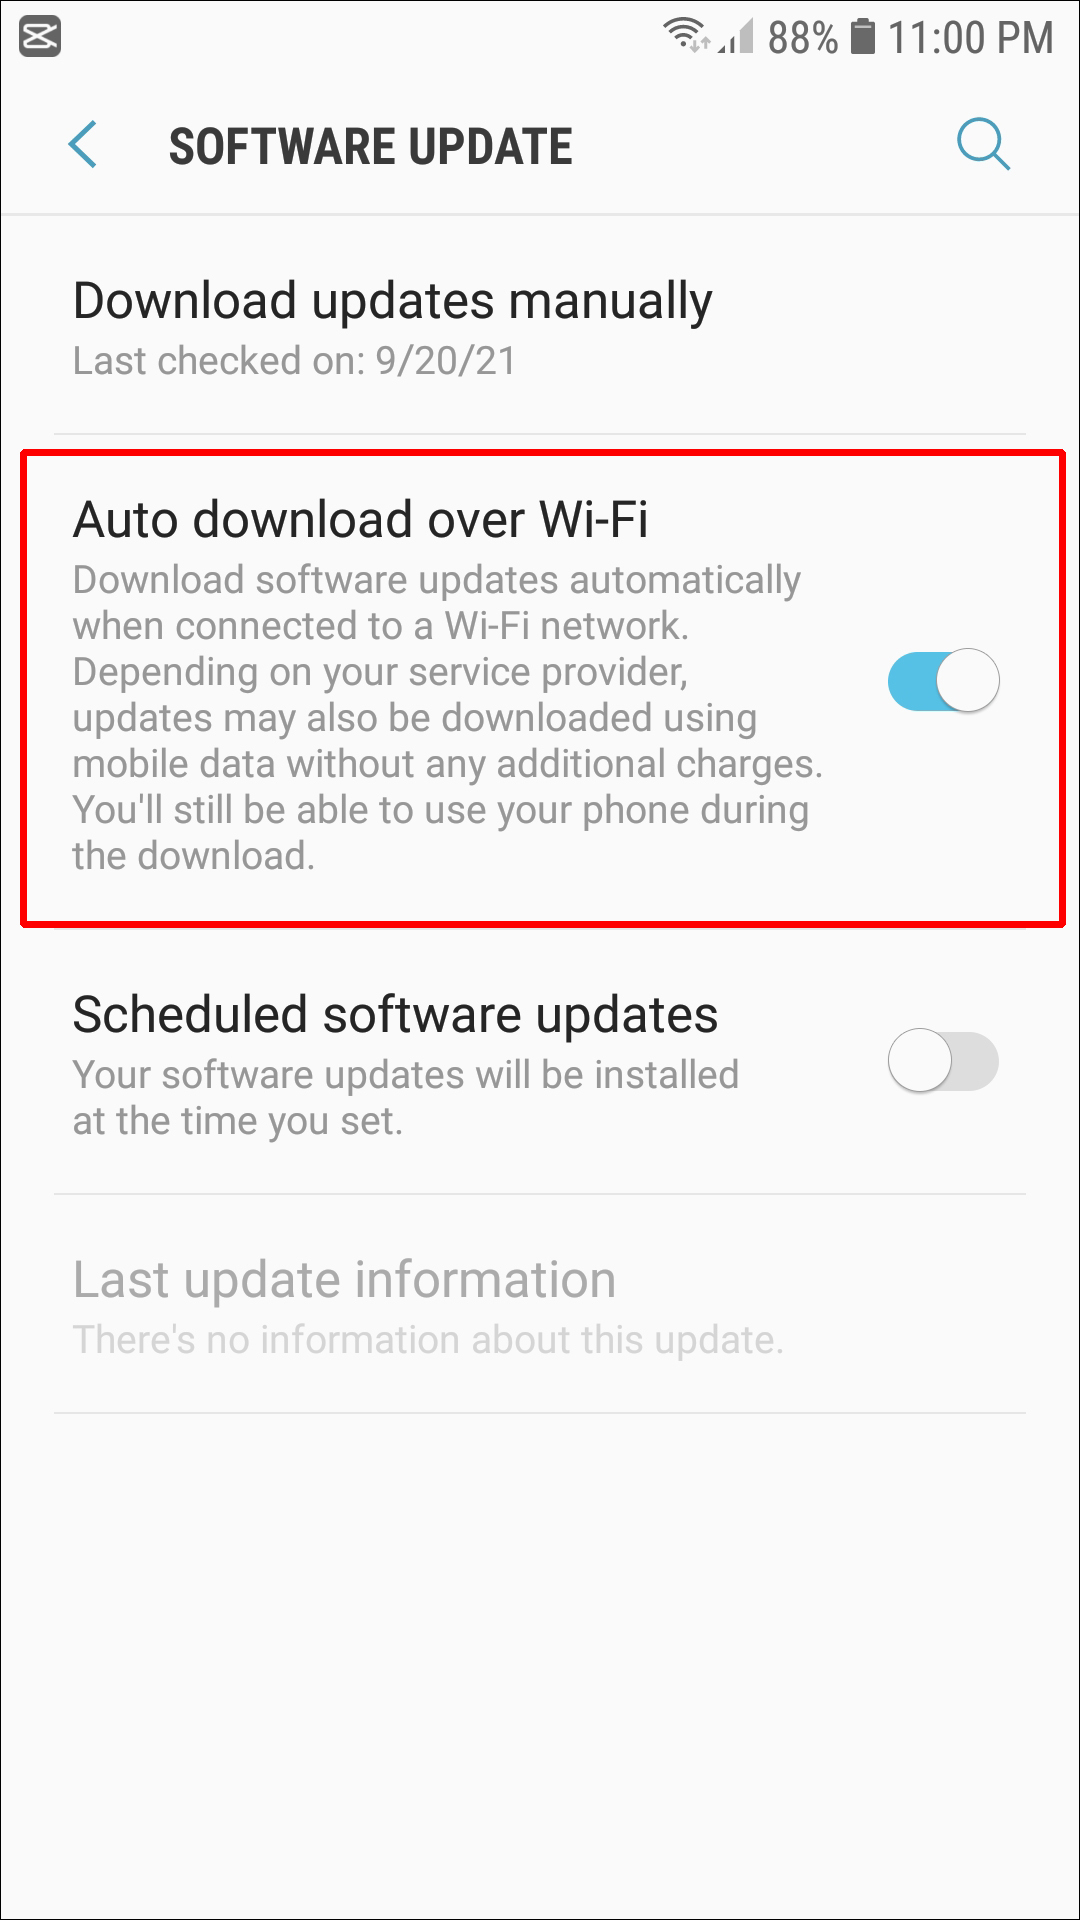
- Here, you will see an option to “Auto download over Wi-Fi.” Slide the toggle to the right to turn this option on; the toggle will then turn green.
- Close the menu. Your Android device will now automatically update, provided you are within Wi-Fi range.

Additional FAQs
Why Can’t I Update My Android Version?
There are several reasons why your Android device may not be updating. This could be anything from insufficient battery power, not enough storage space on your device, or something less easily fixable such as your device is too old.
First, try charging your phone and free up storage space by deleting apps you don’t use or transferring photographs and videos to your PC. If this doesn’t work, do a Google search to see what versions of Android OS are compatible with your specific device. If your device is not compatible with the latest version, follow the steps above to update an old phone with a newer Android OS.
Android OS Updated!
Updating the OS on your Android device can be challenging. But, if you follow the steps outlined in this guide, you should find the process relatively straightforward. Soon you will have the latest OS on your Android device, and you will know how to do the updates for future versions too.
Have you updated the Android OS on your device? Did you use a method similar to those shown in this article? If you have, let us know in the comments section below.
Disclaimer: Some pages on this site may include an affiliate link. This does not effect our editorial in any way.


