Using Bots to customize your Discord server is one thing that makes this messaging application so great. Although the ability to auto-assign roles is not readily available within the application, adding a bot is a simple and effective way.
What is a Discord Role?
Roles are a defining feature of a Discord server’s hierarchy. They grant specific privileges to a member, enabling them to perform certain actions within the server. Sometimes, it would be easier to have a role automatically assigned to a member for reaching a certain milestone, doing a particular task, or simply for time spent remaining a loyal member.
Roles also come in handy to sort departments or categories like Fortnite, COD, and PUBG groups or modding discussions like Motorola, HTC, and iPhone.
What are Auto-Roles in Discord?
Rather than consume time constantly assigning/changing roles for new and existing members, mods let you configure how they change for a user or enable the user to pick their own so you can manage other essential server elements. Auto-Roles is just another term for Auto-Assigned Roles.
The only known way to auto-assign roles is by using a Discord Bot. There are a few different bots available from which to choose. Each one can auto-assign them to members or let them choose their own. You’ll see how to set up a bot and auto-assign roles with two more prominent bots on the market—Dyno Bot and MEE6. For letting users auto-assign their role(s), see How to Add Reaction Roles in Discord.
Using Dyno Bot to Auto-Assign Roles in Discord
Dyno Bot is a feature-rich Discord bot on over 3 million Discord servers. It is fully customizable and features a simple and intuitive web dashboard. You can also use MEE6, which features a dashboard for easy setup and management—more on that below.
Dyno Bot also offers a Music Search option that pulls videos from YouTube for you to watch, an “Announcements” feature, an automated Google Search feature to surf the web on your behalf, various custom commands at your disposal, and much more.
How to Set Up Dyno Bot, a.k.a. Dyno Discord Bot
Setting up Dyno Bot on your Discord server is both simple and the first step to assigning auto-roles. Once it’s up and running, enabling “Autorole” is only a few additional steps away. Of course, you should already have a Discord server and several roles (not auto-roles) set up. If not, here’s how to manage roles in Discord.
To set up Dyno Bot, you’ll need to start by visiting the official website and downloading the tool:
- Head to the Dyno Discord Bot and select “Add To Server.”

- Choose your subscription option: “Free Plan,” “Premium 1x,” or “Custom Premium.”
- If prompted, log in to your Discord account. Next, click the “Select a server” dropdown, then choose which server you want to use the bot on.
- Click “Continue.”
- Click “Authorize” to give Dyno Bot all necessary access permissions to your Discord account. All items should default to being selected.
- Verify that you are human by following all prompts.
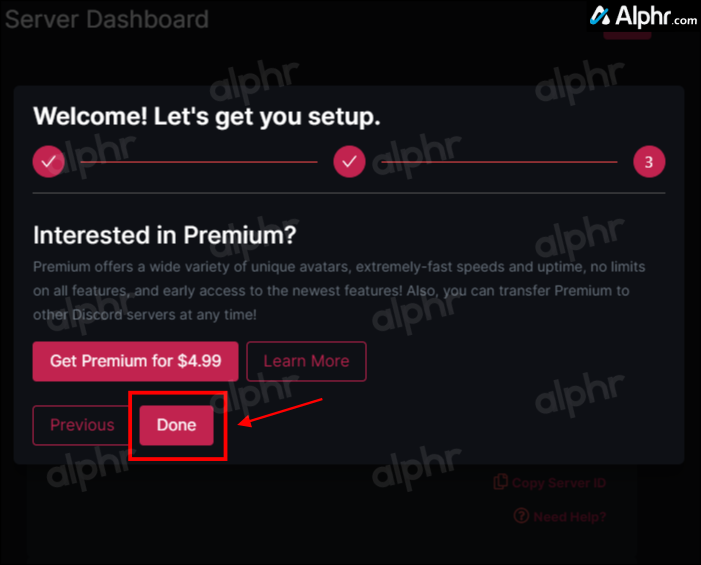
- Choose a prefix (a character to identify that a typed string is a command), select the closest time zone, and click “Next” to save the server settings.
- Choose the channel to get update/changelog notices and Dyno Bot server stats (coming soon), then click “Next.”
- If desired, upgrade to a premium subscription or click “Done” to save your settings.
- If not already on the “Manage Servers” page, click the “Dyno” icon in the top left section. Once on the main page, click the “Manage Servers” link.
- Confirm you’re on the “Servers” tab on the Dyno Bot website, then click on the server you want to manage, and you’ll be taken to the Dyno Bot dashboard.
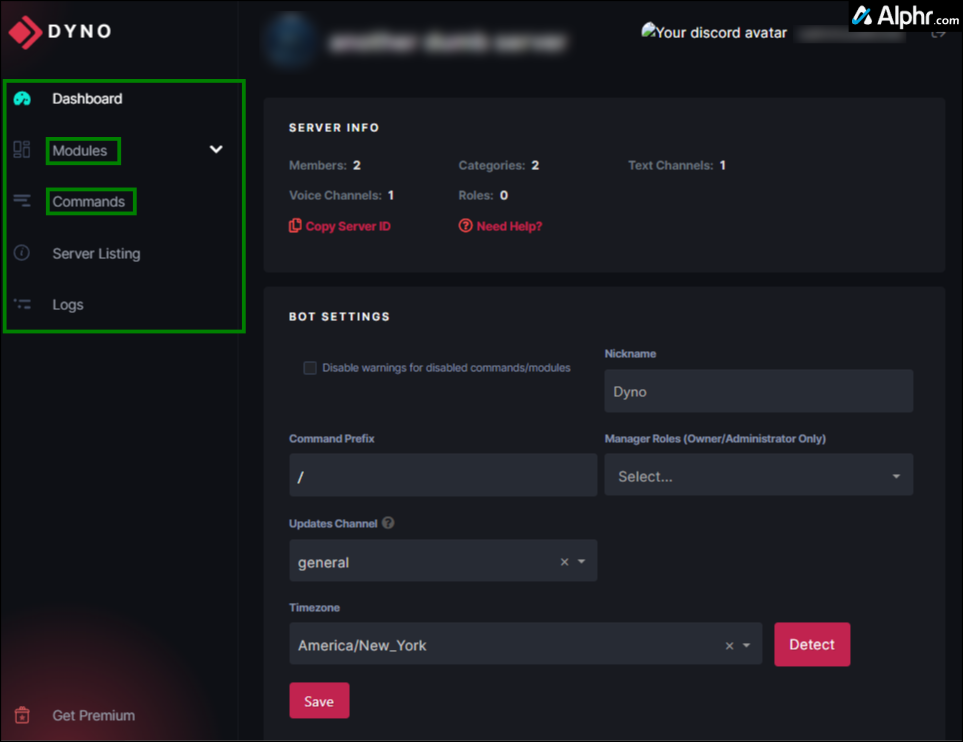
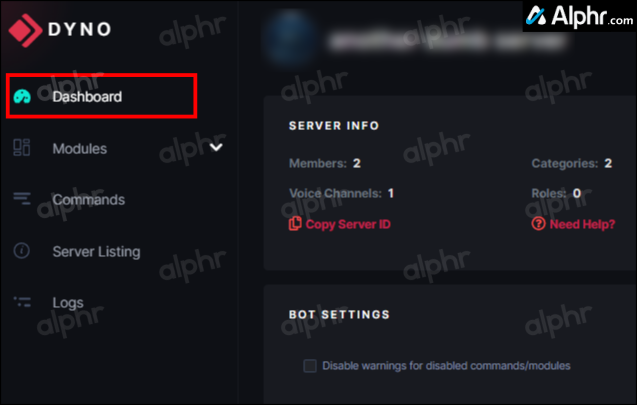
- Ensure you are in the “Dashboard” menu as indicated in the left nav menu.
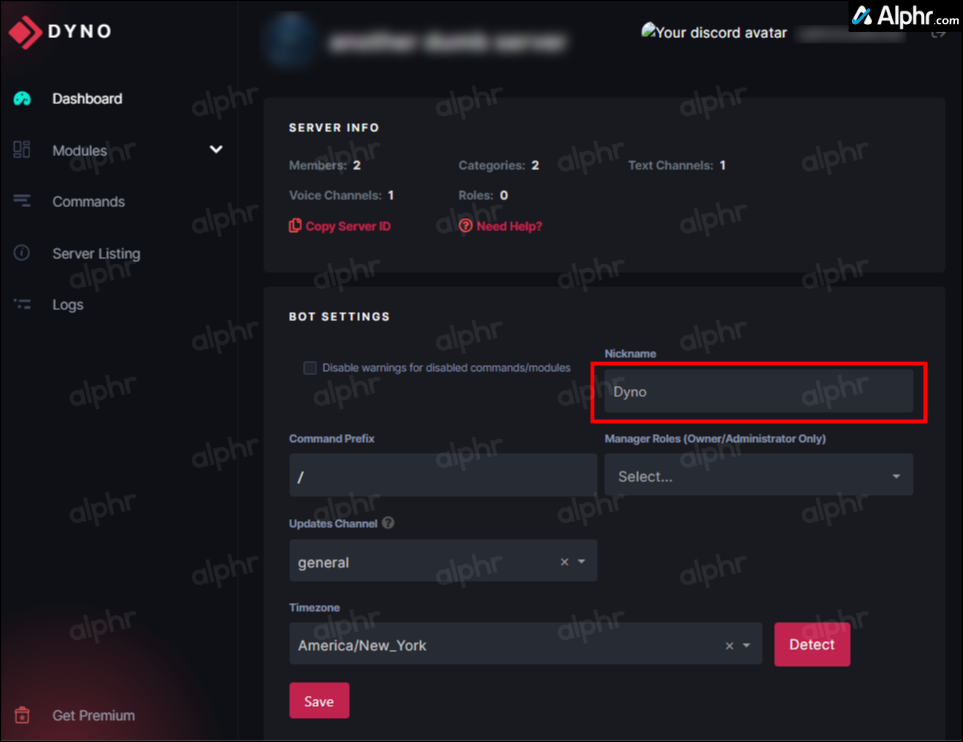
- Go to the “BOT SETTINGS” section and give your new bot (Dyno Bot) a “Nickname” for the server.
- Add managers to the “Managers Roles” section if desired. These users get access to the “Dyno Dashboard” and other settings. You can always change this option later.
- All other sections under “BOT SETTINGS” should be set based on the previous steps. Feel free to make any changes, then click “Save.”


You have now set up your server with Dyno Bot. The next step is to manage it and auto-assign roles.
Managing Your Discord Server Using Dyno Bot
Once the server is set up, you can manage it and assign automatic roles. You can create auto-roles based on the criteria you desire.
Note: To create auto-assigned roles, you must first set them up in your Discord server. See “How to Add, Manage, and Delete Roles in Discord“ for more information.
How to Auto-Assign Roles and Ranks Using Dyno Bot
Discord has two kinds of auto-assigned roles: Autoroles and Joinable Ranks. The first one is automatic roles you set up in which the user must meet your specified time requirements to obtain the next rank/role, such as limiting new users to the “Contributor” role/rank, then advancing them to “Moderator” after 21 days. The second type, called “Joinable Ranks,” allows the user to choose their role—more on that later.
No matter which type of Dyno Bot Autorole you choose, the permissions must be set in the “actual” Discord role within your server’s settings. For more information, check out how to manage your Discord roles.
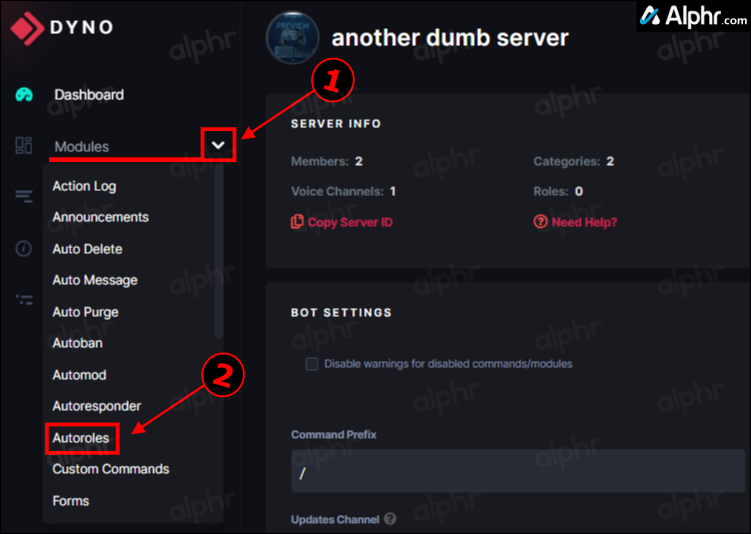
You can enable the Autoroles feature (auto-assign roles) from the dashboard in Dyno’s “Modules” section.
- If not already on the “Manage Servers” page of the Dyno Bot website, click the “Dyno” icon in the top left section. Once on the main page, click the “Manage Servers” link.
- Ensure you’re on the “Servers” tab, then choose the server you want to have automatic roles assigned.
- Click the dropdown for “Modules” in the left nav menu, then select “Autoroles.”
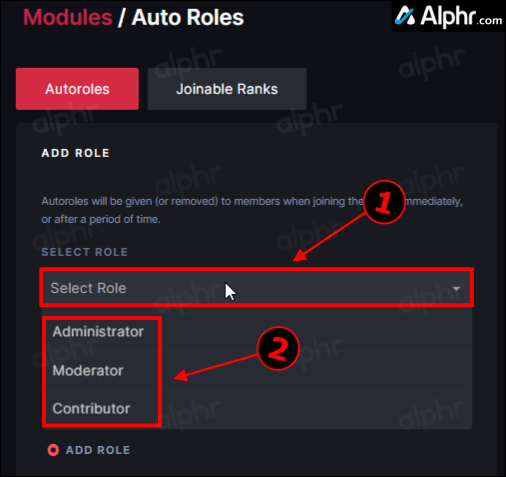
- In the “ADD ROLE” section of the “Autoroles” tab, click the “SELECT ROLE” dropdown and choose the role you want to auto-assign to a specified time.
- Select the “DELAY (MINUTES)” dropdown, then choose the time length necessary for new members to acquire this role up to 10080 minutes (seven days). It can be immediate by placing a ‘0’ or leaving the space empty.
- Click the “Add” button to place the role as auto-assigned.

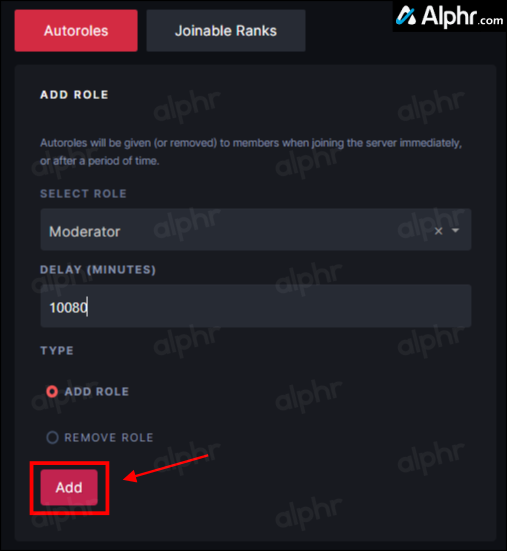
The role is now granted to every member who reaches the allotted time set in place.
Note: Ensure that the Dyno Bot role is listed higher on your server than the auto-assigned role, or it will not work. See below for steps on adjusting its position.
Now, you have an auto-assigned role that triggers after the time you specified. You can repeat the process for as many as needed. If you’re good with math, you can make the duration last days, weeks, months, or even years by placing the appropriate time in minutes.
Note: You can remove any auto-assigned role whenever you want by clicking the red “Remove” button to the right of the listed role in the “Autorole List.” The original role remains in Discord, so no worries there.
To adjust Discord role ranks so that Dyno Bot is on top, do the following:
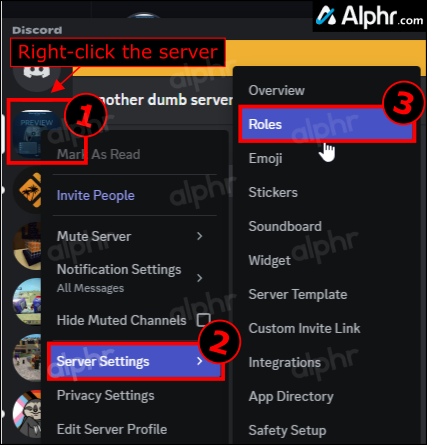
- Right-click on your Discord server on the left-hand side using the Discord app or website, then choose “Server Settings -> Roles.”
- Confirm that the Dyno Bot role is above all others used in Dyno Bot. If not, press and hold the “eight-dot” rectangular icon to the left of the role and slide it upward.

The above steps ensure that Dyno Bot controls the roles listed underneath it. Otherwise, your auto-role setup will fail.
How to Let Discord Users Auto-Assign Their Roles Using Dyno Bot
Dyno Bot also allows your server members to set themselves up with roles/ranks. Ranks are the same as roles, but the “? rank” command determines the ability to grant them. They are created the same way as roles are—the server owner will make them and set each permission on the Discord server.
Anyone considered a bot administrator can determine which ranks are open to the public by adding them from the Dyno Bot dashboard. Though not regarded as automatic, it’s still a faster way to provide specific permissions, including exclusive access to your members, without you giving it to them personally.
If interested in setting up ranks for Dyno Bot, do the following:
- Return to the “Dyno Bot server dashboard” for which you want to add classes.
- Head into the “Autoroles” tab from the “Module Settings” section just as you would for roles.
- This time, click the “Joinable Ranks” tab at the top of the main window.
- Click the “Select Role” dropdown and choose which role or roles you want to make joinable.
- In the “Rank Settings” section, you can limit members to a single role if desired. This will help restrict the power members can have.
- Click the “Add” button for each role selected.
Your members can set their rank/role by typing in “?rank [role],” where the role has to be typed out in full without brackets, such as “?rank admin.”
Using Mee6 to Auto-Assign Roles in Discord
Those newer to the Discord bot scene may find Dyno Bot confusing. It can be too much for a less-than-savvy user. The Mee6 bot is an excellent tool for a server wanting to branch out into the community. It offers almost as much as the Dyno Bot (in some ways more) while remaining more straightforward to use and navigate. The LEVEL UP feature is excellent as it incentivizes your server members to engage more.
Every time you send a text message in one of the server channels, you can “level up.” It doesn’t necessarily provide additional perks (without purchasing Premium), but just like in video games, it can still feel pretty good.
How to Set Up Mee6
Mee6 is similar to Dyno Bot in its setup process. You’ll need to head to the official Mee6 site to begin.
Here’s how to set up Mee6:
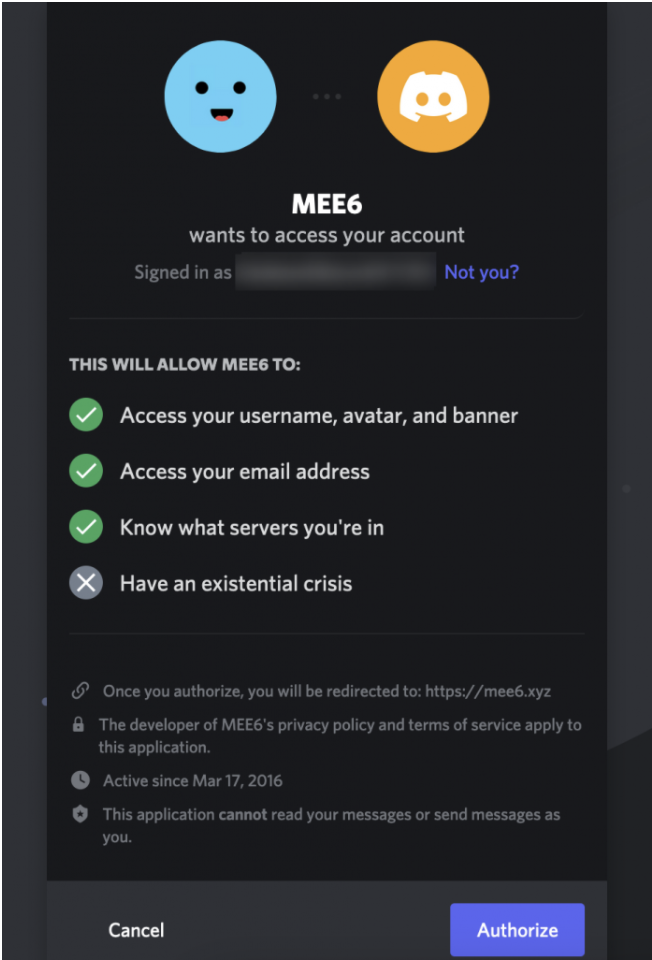
- Head to https://mee6.xyz/ and click the “Add to Discord” button. This process goes quicker if you’re already logged into Discord, but all that is required is your Discord login credentials.
- Once logged into Discord, you’ll receive the Mee6 authorization pop-up window asking for access. Click the “Authorize” button at the bottom right of the window.
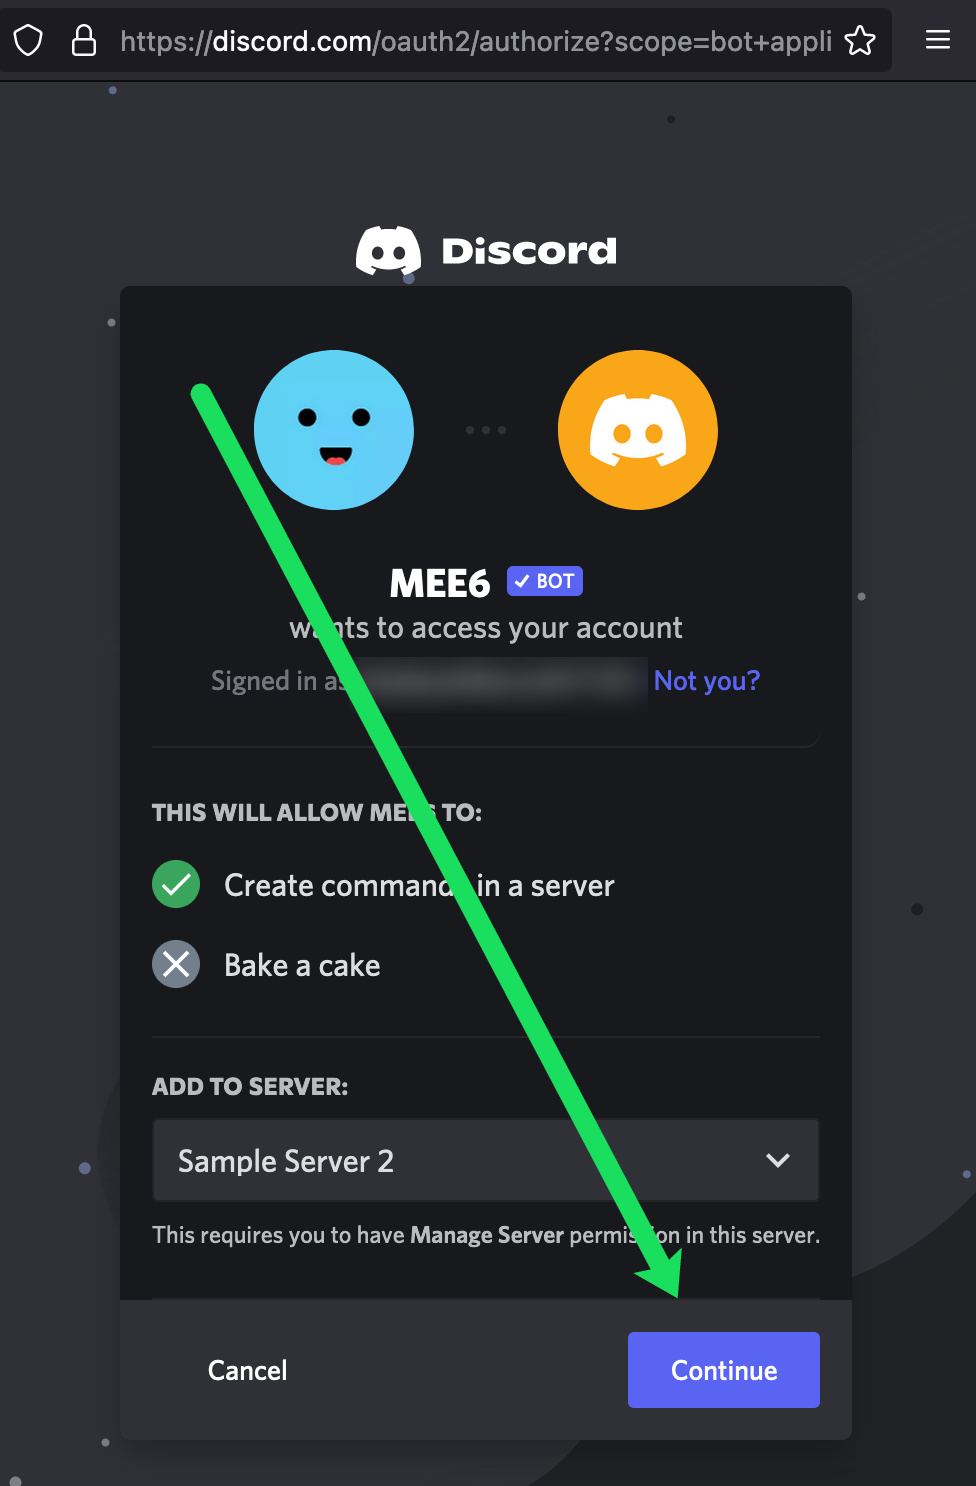
- Click on the logo for the server you’d like to manage.
- You’ll receive another authorization window with the previously selected server in the dropdown. Just click on the “Continue” button once again to proceed.
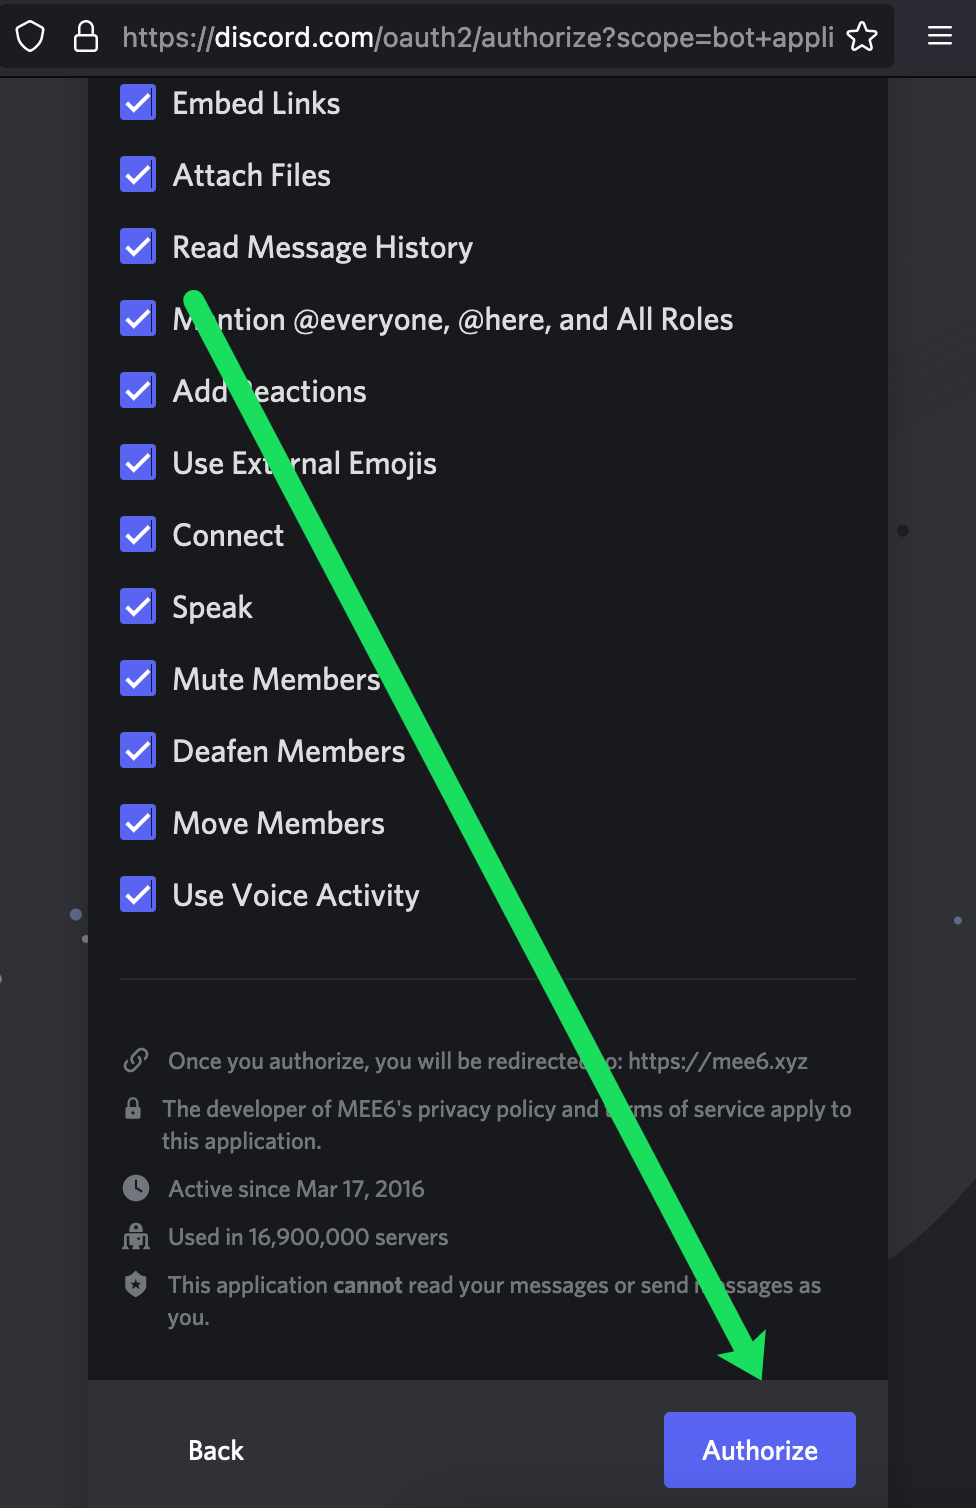
- Authorize the bot for a second time. Click the box next to “I’m not a robot” to continue.

You should now see your Mee6 dashboard! It’s here that you can make changes to the settings and commands associated with your Mee6 bot. Mee6 offers various auto-commands, such as banning users, deleting messages, and warning a user that they are violating your channel’s standards.
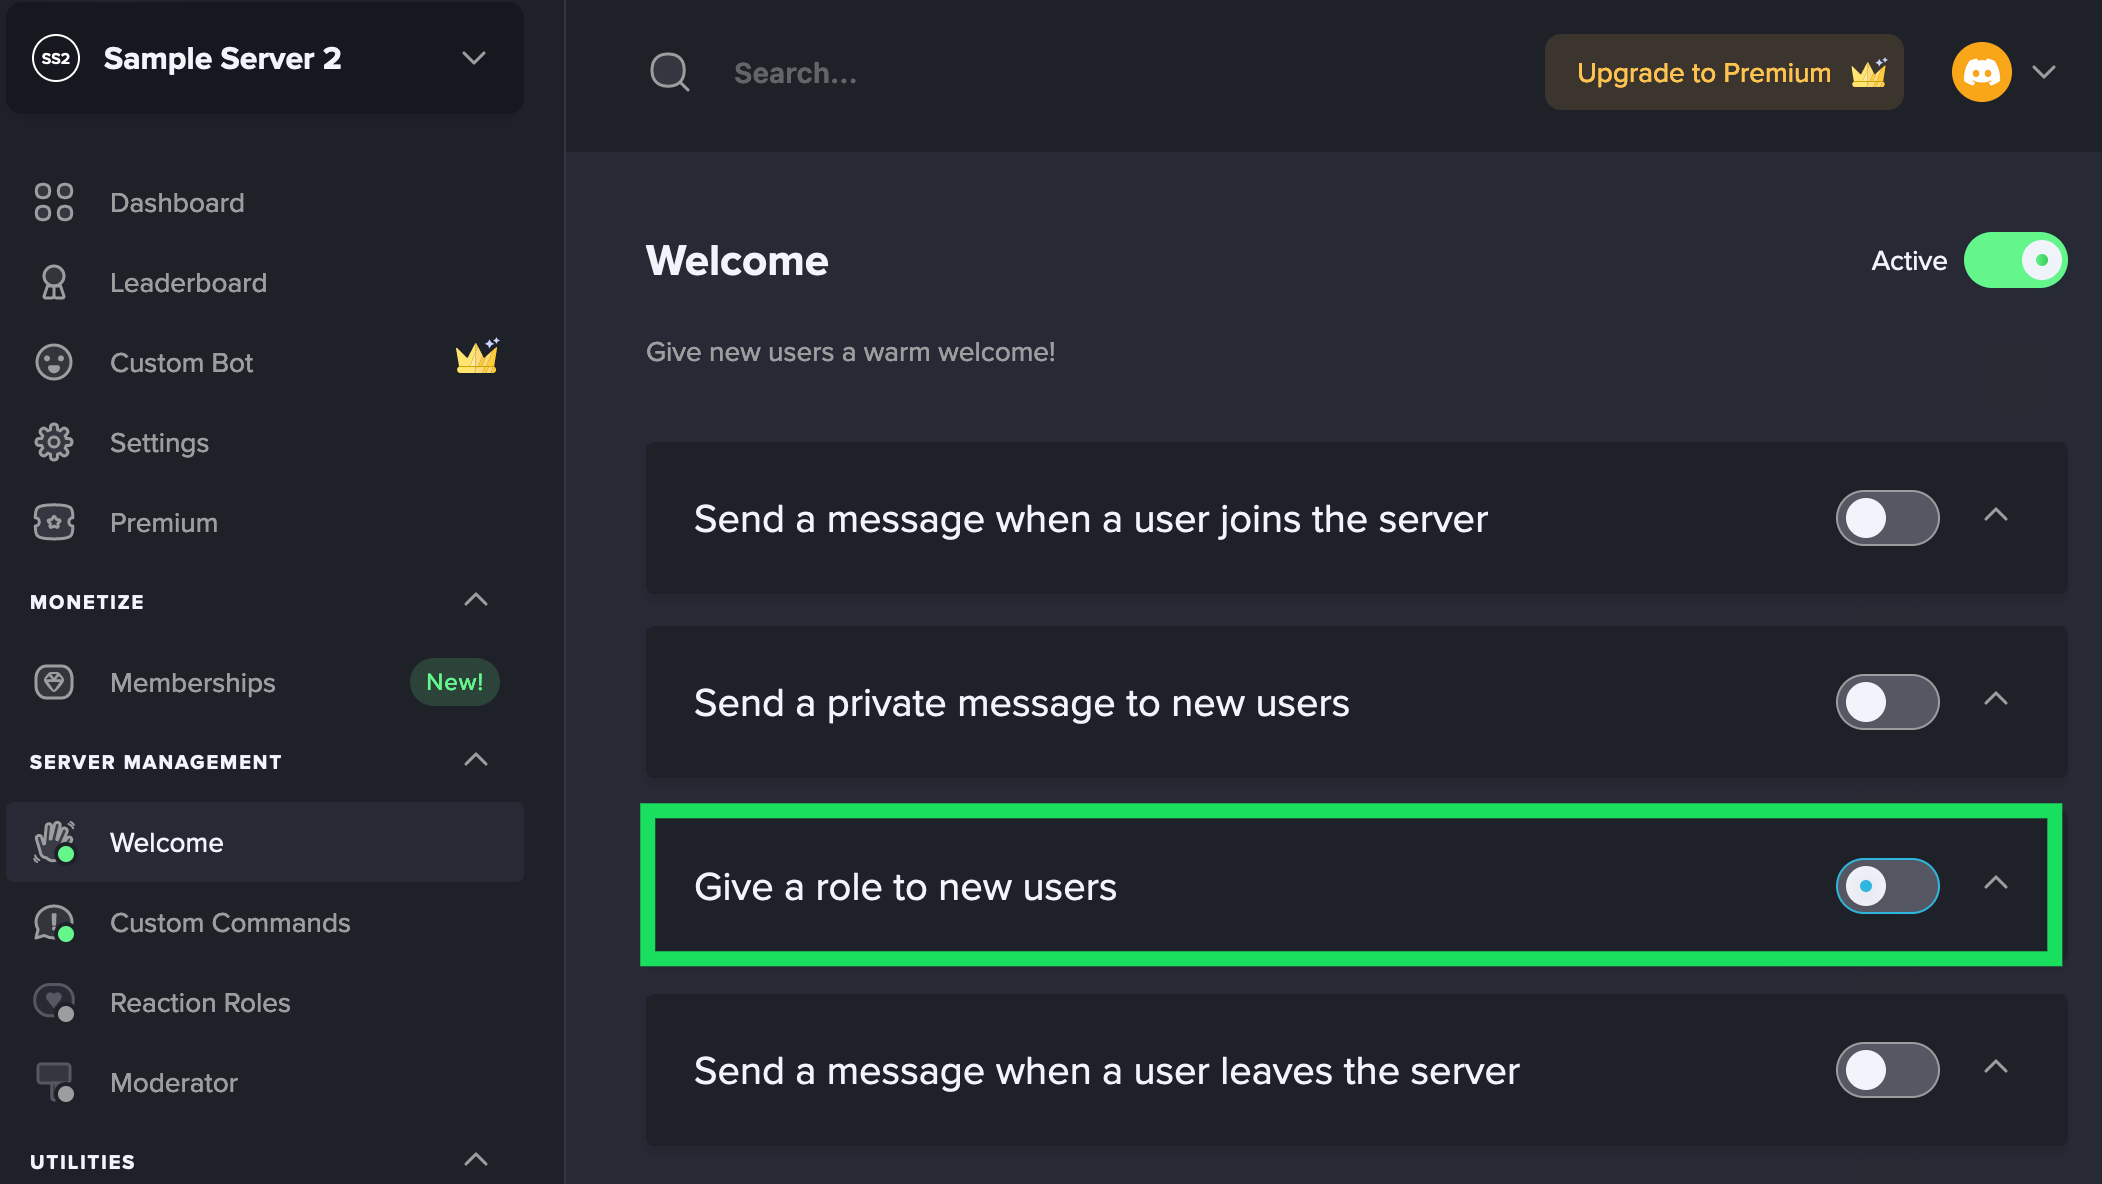
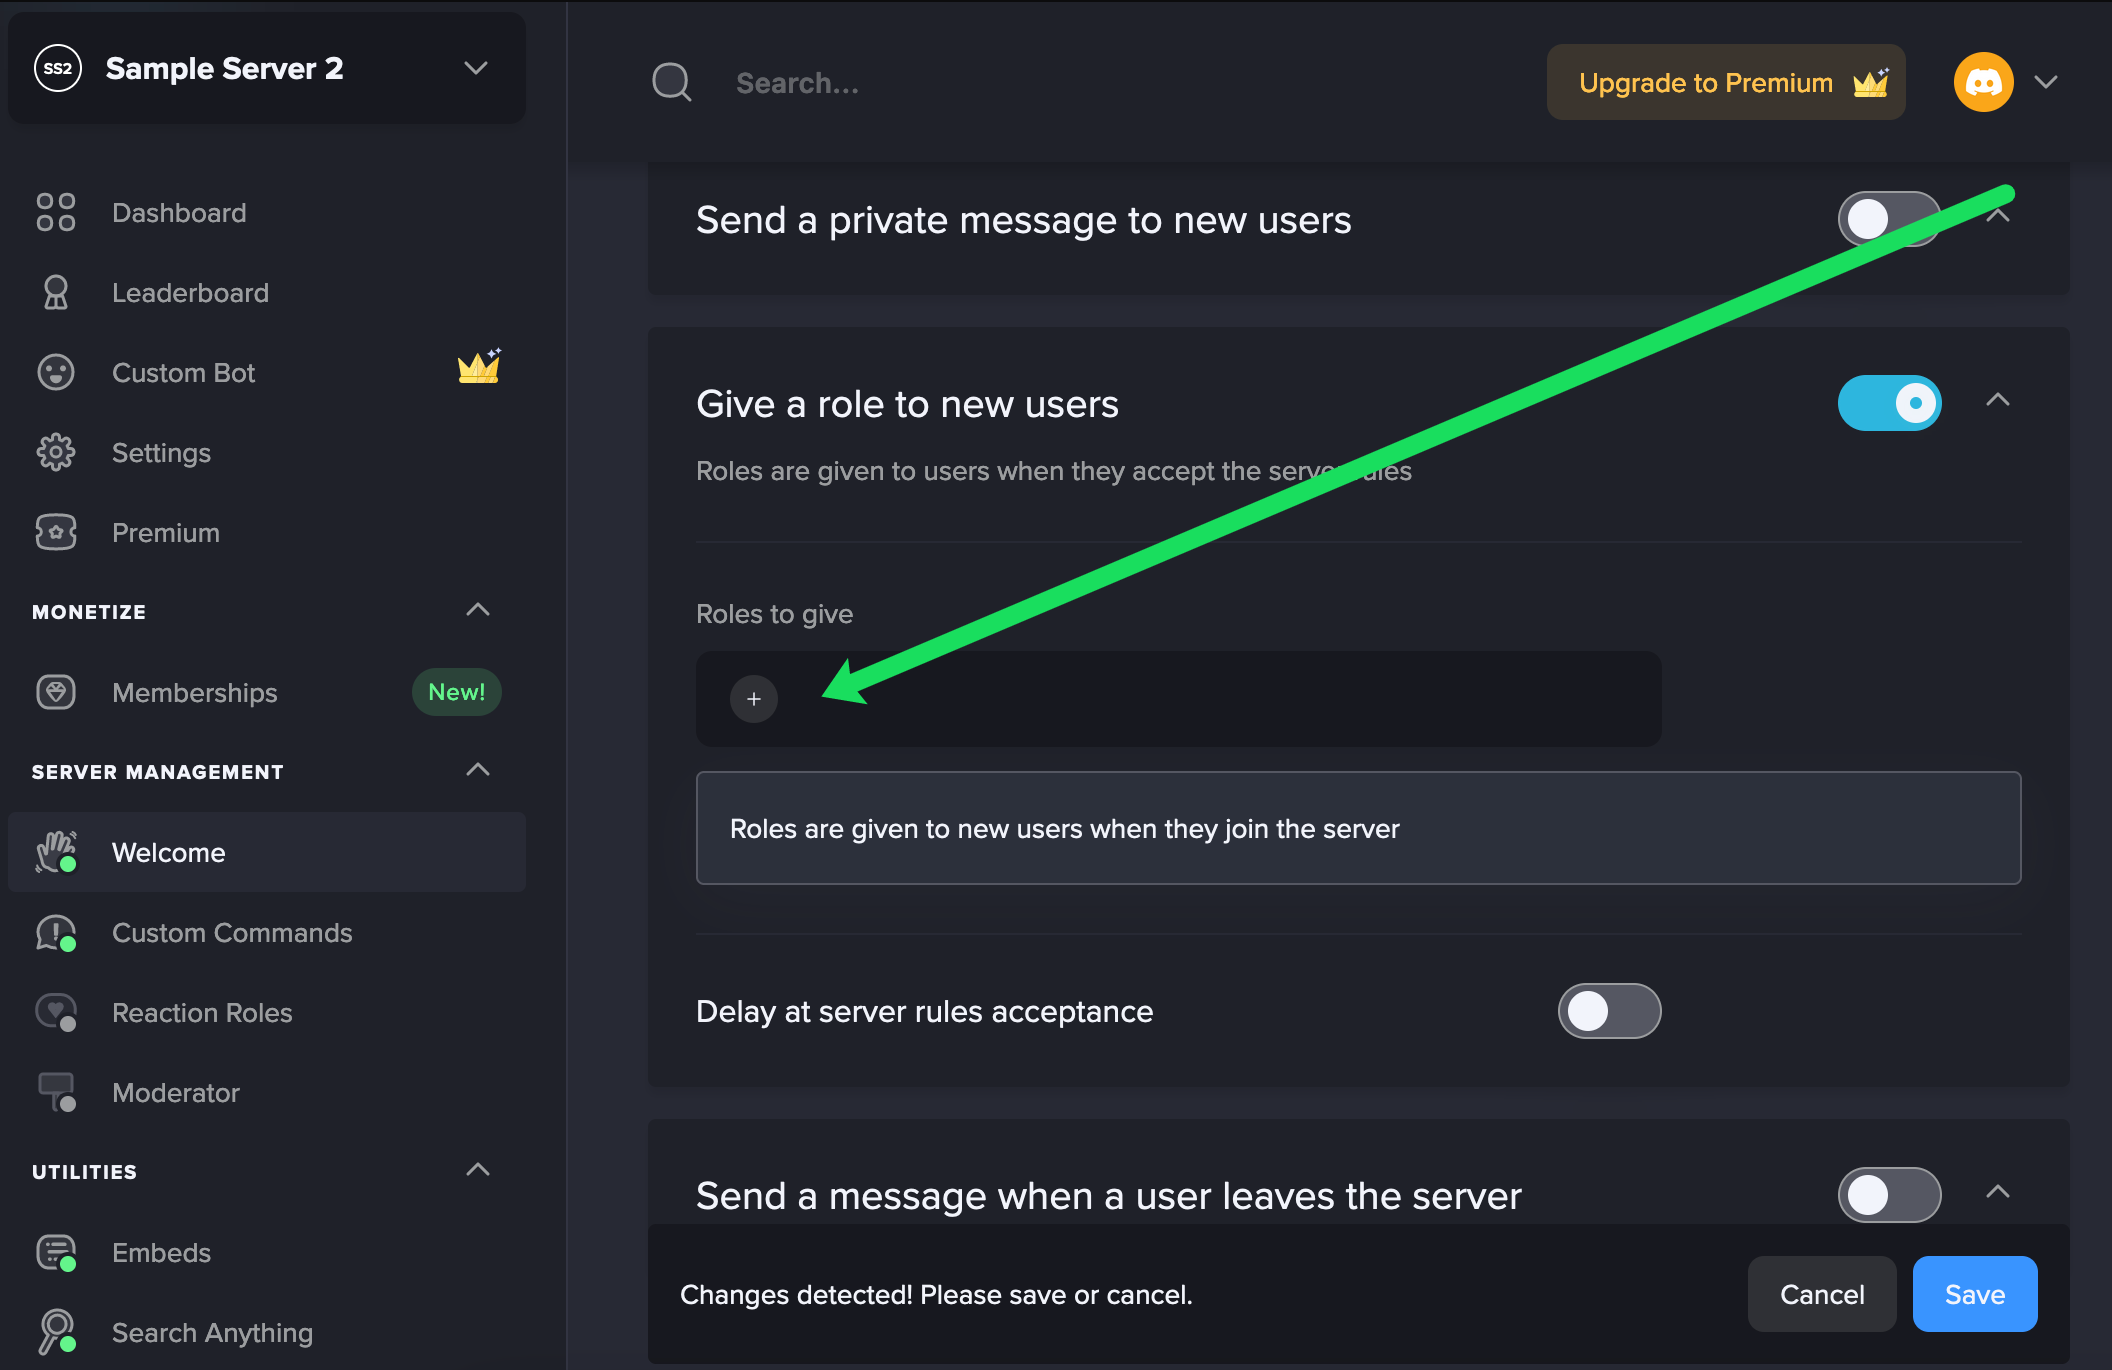
How to Add Auto-Roles in Mee6
Mee6 allows you to add a role automatically to first-time visitors to your server. Most auto-assign capabilities for Discord bots revolve around those new to your server. Without going for the premium options on bots that enable more, you’re pretty much stuck with this limited feature.
To add a role in Mee6 for newcomers automatically, do the following:
- From the Mee6 website, click “Welcome” on the left-hand side. Then, toggle the switch for “Give a role to new users.”
- Click the “+” under “Roles to give.”
- Finalize your decision by clicking the “Save Changes” button at the bottom of the screen.
Like Dyno Bot, ensure that Mee6 has a higher authority role than the roles you grant.
For more information, see how to manage server roles within the Discord app.
In closing, the only other way to add an auto-role feature is to develop a bot yourself that does the deed. You can add your unique spin on things that will allow certain milestones to be met to achieve a new role or any other way you think to add one. The limit is your creativity, coding ability, and understanding of the Discord API.
Regardless, the two proposed bots in the article are very popular, meaning they’re likely to continue receiving support and evolving as time goes on. If you have any special requests for additional features, contact the Dyno Bot Support Team or the Mee6 Support Team on their Discord Support servers.
FAQs: Discord Auto-Assigned Roles
Discord is packed with so many features already; add to that bots and auto-assigning roles, and it’s natural to have more questions. We’ve included more answers to those questions below.
Can I assign roles to new members?
Absolutely. Assigning roles for new members is often essential to keeping peace in your channels. As new users join, you can assign roles that keep them from commenting too much, alleviating any possible annoyance. Go to the Roles tab, add the New Members role, and click on the channel you want to moderate.
Can I assign a temporary role?
When someone needs temporary access to permissions, you can toggle them on, but you will have to turn them off manually once done. However, just because Discord doesn’t offer a temporary option doesn’t mean you can’t add a bot to your Discord servers and assign temporary user roles.
Can I assign roles to level up automatically?
Aside from the role timers available, the Mee6 Bot will allow you to set auto-level-up options. All you need to do is verify that Mee6 can access your server and open the Bot dashboard. From here, you can create the level-up options.
Disclaimer: Some pages on this site may include an affiliate link. This does not effect our editorial in any way.