If you’re wondering why there is no startup sound when you turn on your Windows 10 system, the answer is simple. The startup sound is actually disabled by default. So, if you want to set a custom tune to play every time you turn on your computer, first you need to enable the startup sound option.
With every system update, the settings section in the control panel is updated too. That’s why it might be confusing for users who haven’t gotten used to their new Windows yet. One of the major differences between Windows 10 and the previous Microsoft Windows operating systems is the startup sound, or rather, the lack of it.
Since the startup sound is automatically switched off, there are a couple of steps you need to take first to enable this option. When you complete these steps, you will be able to change the Windows 10 startup sound.
The first thing you need to do is to switch off the fast boot option, after which you will be able to enable the startup sound. However, to change the startup sound, you will need to download a third-party app. We’ll show you how to do it, step by step.
Switch Off Fast Boot
The first step to changing your Windows 10 startup sound is disabling fast boot. Fast boot allows all your programs and apps to continue to run, even after you turn off your computer. Fast boot is also the reason why your startup sound option is disabled.
Here’s how to switch off fast boot on your Windows 10:
- Click on the magnifying glass icon in the bottom-left corner of your screen.

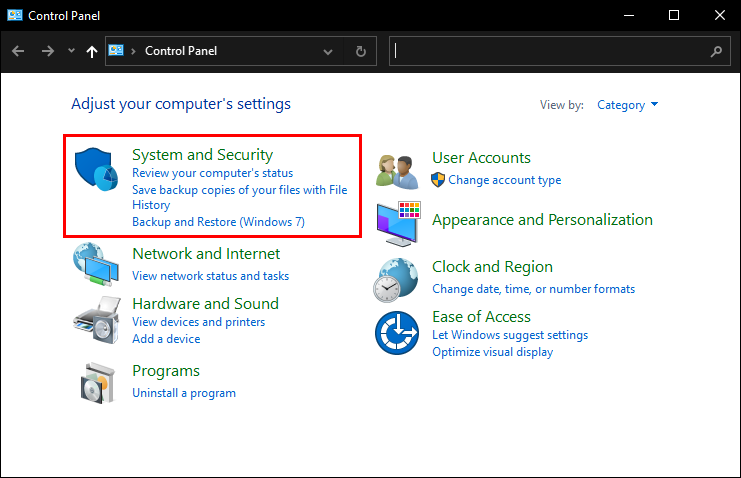
- Type in “Control Panel” and click on it.

- Go to “System and Security.”
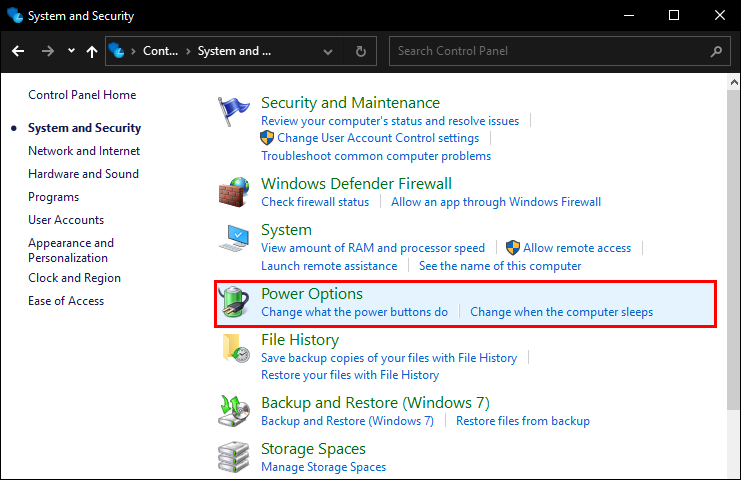
- Navigate to “Power Options.”
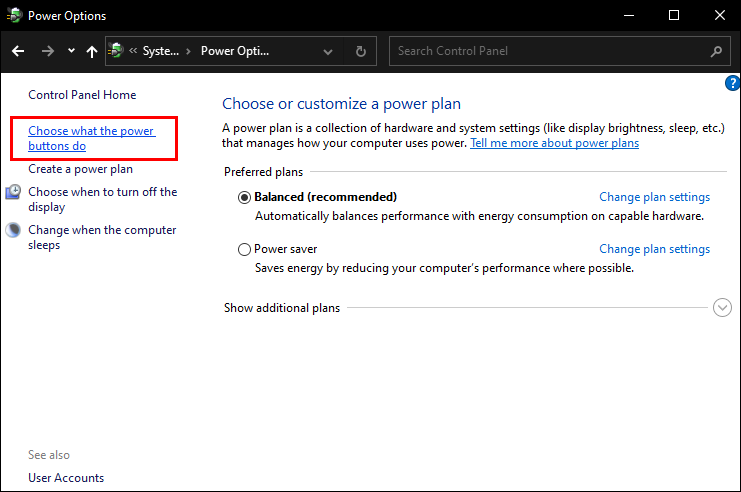
- Click on “Choose what the power button does” option on the left sidebar.
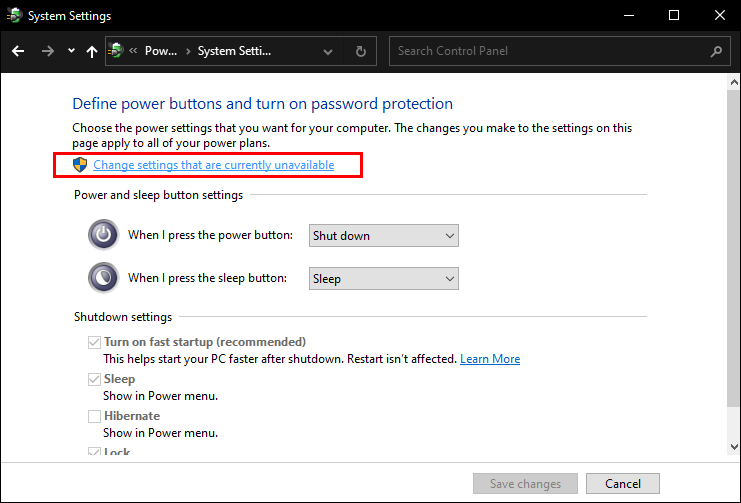
- Go to “Change settings that are currently unavailable.”
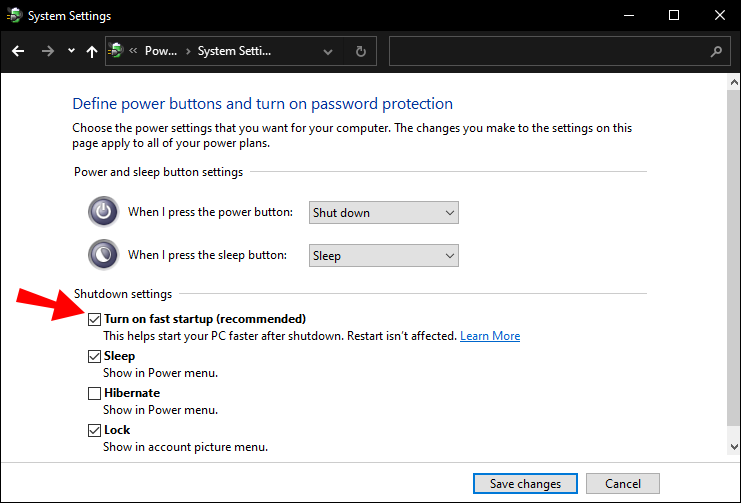
- In “Shutdown Settings” find “Turn on fast startup.”
- Click on the box to disable it.
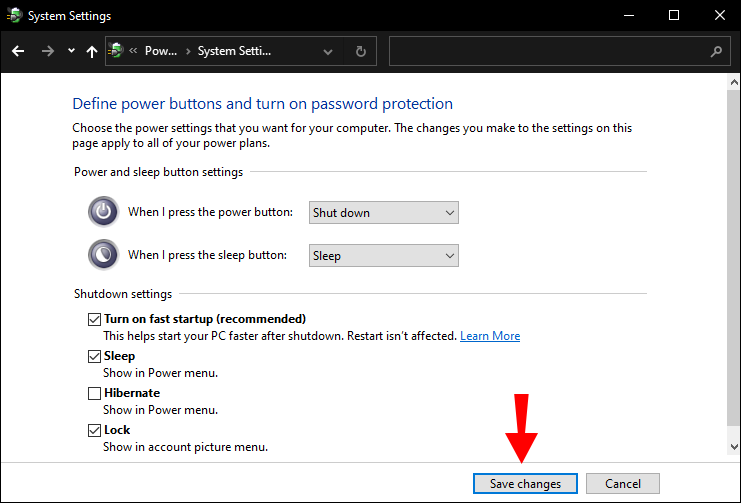
- Select “Save changes.”


Note: It’s recommended that you restart your computer at this point.
Enable Windows Startup Sound
Now that you’ve disabled fast boot, the next step is to enable the startup sound option. This is how it’s done:
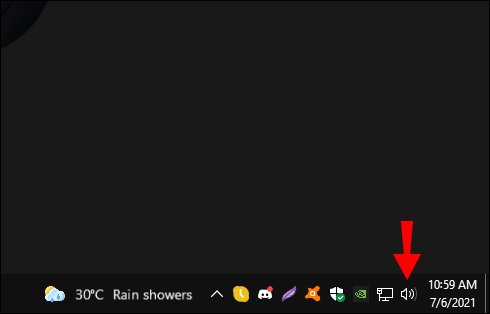
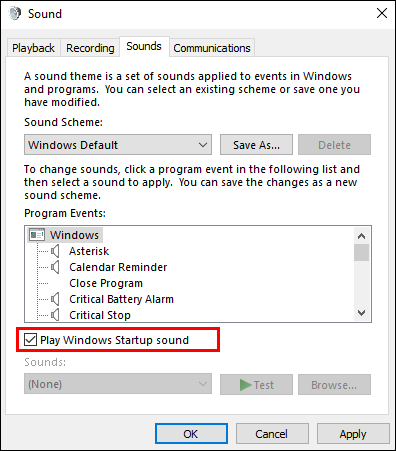
- Right-click on the speaker icon in the bottom-right corner of your screen.
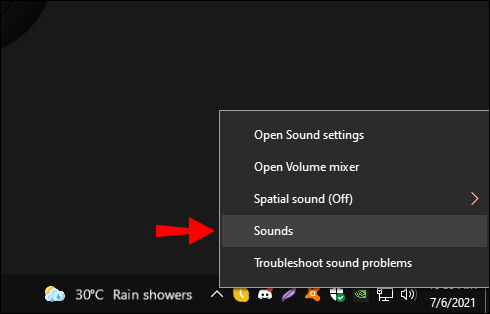
- Go to “Sounds.”
- A new tab will pop up in the middle of your screen.
- Check the “Play Windows Startup sound.”
That’s all there is to it. Now every time you turn on your computer, you will hear the Windows 10 startup sound.
Another way you can open this tab is by going to the magnifying glass icon in the bottom-left corner of your screen and typing in “Change system sounds.”
How to Set a Custom Sound as Your Windows 10 Startup Sound?
Unfortunately, Windows 10 only allows you to enable and disable the startup sound, without giving you the option to customize it. To set a custom jingle as your Windows 10 startup sound, you will need to install a third-party app.
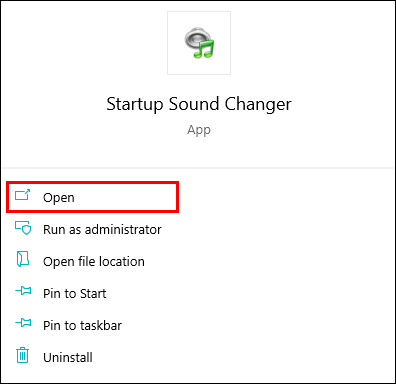
The app in question is called Startup Sound Changer. You can download and install it in a few moments. Once you do so, follow the steps below:
- Open the app.
- Find the “Replace” option and click on it.
- Find the tune you want to be your startup sound.

Note: The sound must be stored in the C:\Windows\Media folder. If you place it in another folder, Windows won’t be able to find it.
One more thing you should keep in mind is that your startup song has to be in a .wav format, as Windows 10 only supports Wave audio files for all its notification sounds. If your preferred tune is in an MP3 format, you can change it on this website. It will allow you to convert your audio file format in a few seconds.
How to Modify Startup Sound Registry Files?
When you right-click on the speaker icon in the bottom-right corner of your screen and go to “Sounds,” you will see a list called “Program Events.” On the list, you should see “Windows Logon” and “Windows logoff,” which you can also use to change your startup sound.
However, if you can’t see these two options on the sound settings list, it means that you have to enable them by using Windows Registry Editor. This is how it’s done:
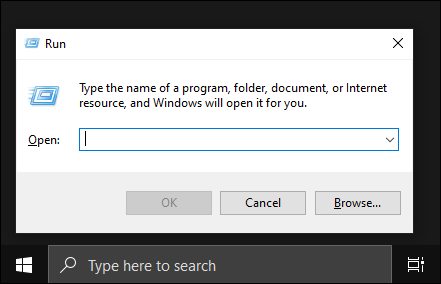
- Press the ‘’Windows and R buttons on your keyboard.
- The Run tab will pop up.
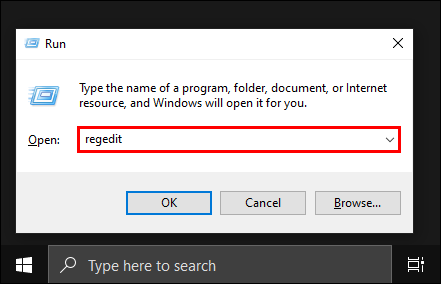
- In the dialogue box, type in “regedit.”
- Select “OK.”
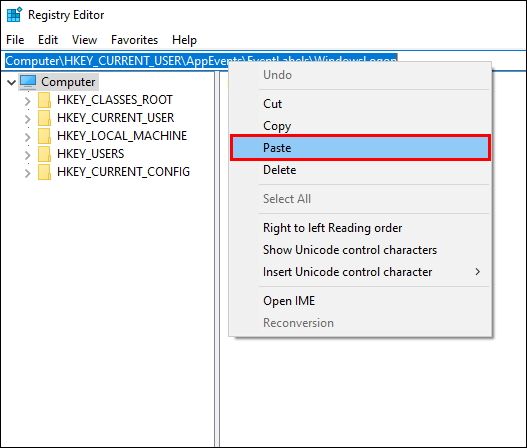
- Paste “Computer\HKEY_CURRENT_USER\AppEvents\EventLabels\WindowsLogon” into the search box of the Registry Editor.
- Press the “Enter” key on your keyboard.
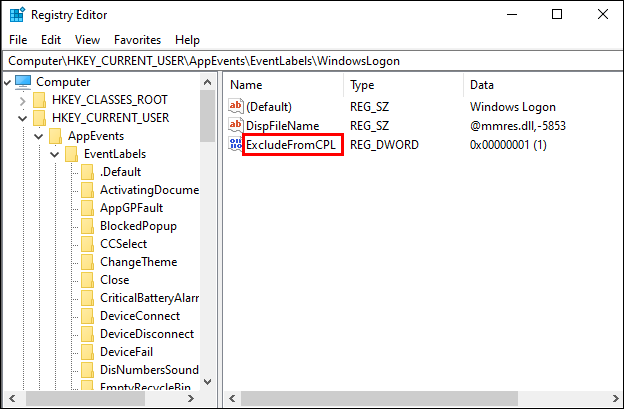
- Find the “ExcludefromCPL” file and double-click on it.
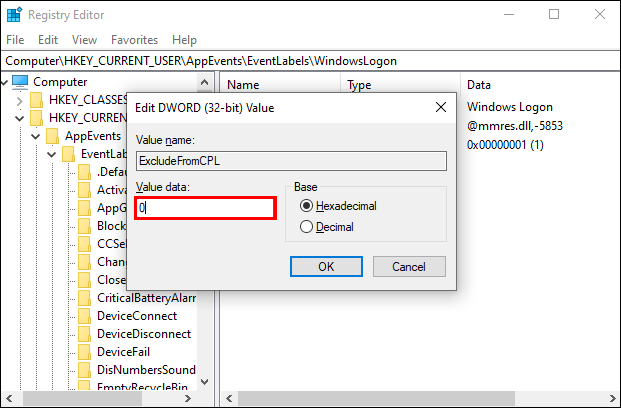
- A new tab called “Edit DWORD (32-bit) Value” will pop up.
- In the “Value data” box type in “0.”
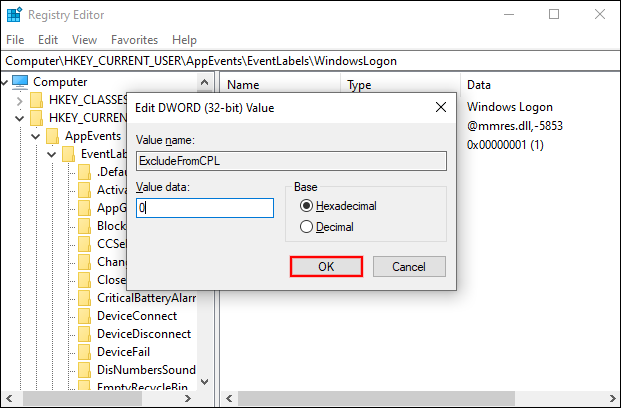
- Click on “OK.”
Now, you can proceed to change your Windows 10 startup song. You can do so by right-clicking on the speaker icon and going to “Sounds.” This time, you will be able to find “Windows Logon” option on your “Program Events” list.
A lengthy list of preset startup sounds will be available to you now. You can scroll down to find one that you like best. Once you’re done, click the “Apply” button, and then the “OK” button. Next time you turn on your computer; your preferred jingle will play.
Note: Before you complete any of these steps, back up your computer’s Registry.
You can also use this method to set up or change your log off sound. All the steps will be the same, except that you need to paste “Computer\HKEY_CURRENT_USER\AppEvents\EventLabels\WindowsLogoff” in the Registry Editor’s search box. From that point, follow the same steps for the startup sound process.
Additional FAQs
What can I fix when the windows 10 startup sound won’t play?
If your Windows 10 startup sound still won’t play, even after you’ve completed all the necessary steps, try doing one of the following:
• Restart your computer.
• Back up your computer’s Registry.
• Check if you modified your computer’s Registry correctly.
• Make sure the sound you want to use is in the C:\Windows\Media folder.
• Make sure your preferred sound is in a .wav format.
How can I enable the Windows logoff sound?
Enabling your Log off sound is also done in the Windows Registry. Here’s what you should do:
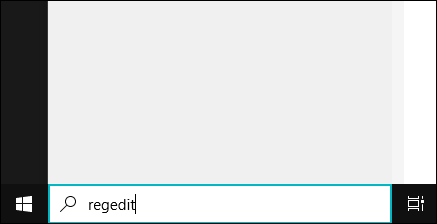
1. To open your Windows Registry, click on the magnifying glass icon and type in “regedit.”
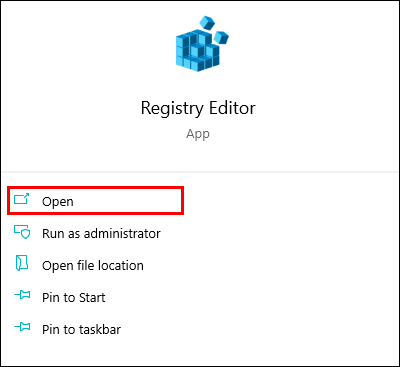
2. Click “Open” on the list of options.
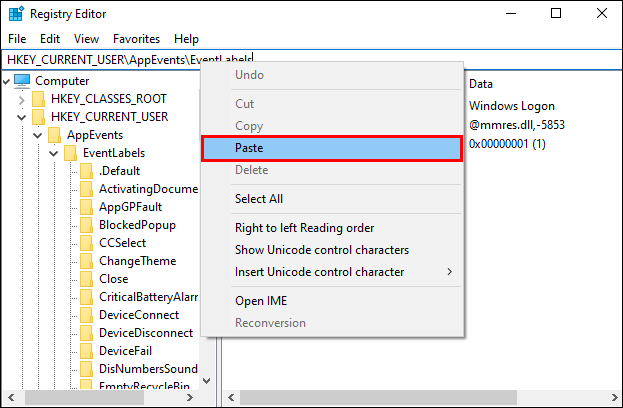
3. Paste “HKEY_CURRENT_USER\AppEvents\EventLabels.”
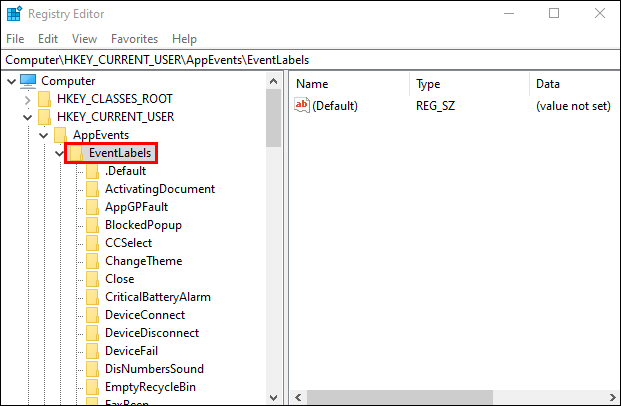
4. Find the “Event Labels” folder in the left sidebar.
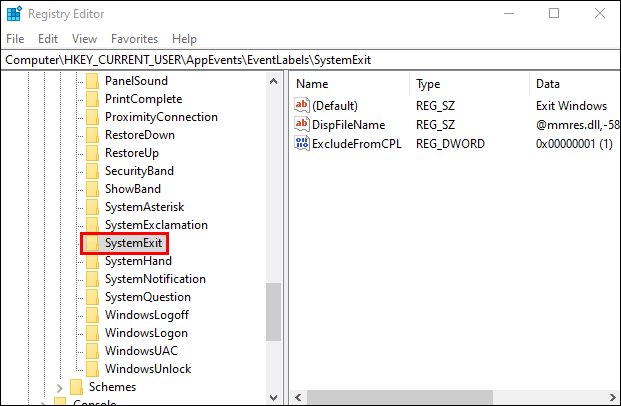
5. Click on the “System exit” folder in the left sidebar.
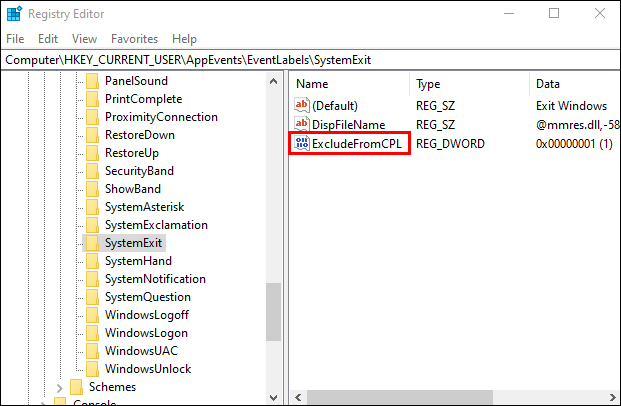
6. Double-click on “ExcludeFromCPL” option.
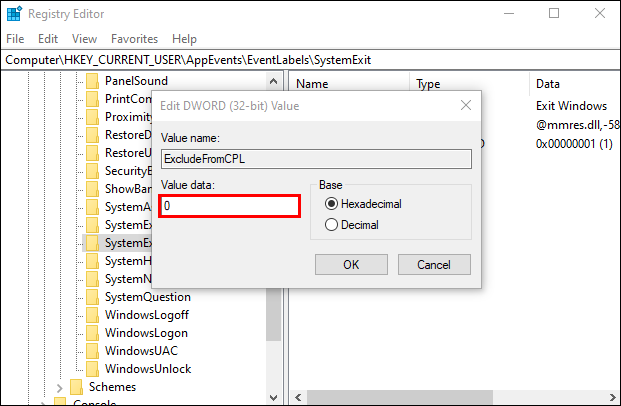
7. A folder called “Edit DWORD (32-bit) Value” will appear.
8. In the “Value data” box type in “0.”
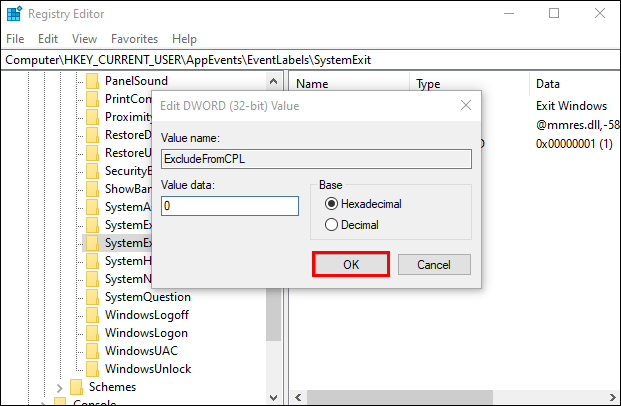
9. Select “OK.”
Repeat steps 7-8 in the “Windows Logoff” folder in the left sidebar (where you found the “System exit” folder.)
The last thing you have to do is restart your computer. The next time you turn it on, go to the “Sounds” tab by right-clicking the speaker icon. Find “Exit Windows” in the “Program Events” list. Now you can change your log off song as well.
Your Favorite Startup Song Can Now Welcome You
Now you know how to enable, change, and customize your Windows 10 startup song. You also know how to do this with the Windows log off song. Now, you can choose any tune you want to welcome you every time you turn on your computer.
Have you ever changed the Windows 10 startup song? Did you use any of the methods outlined in this guide? Let us know in the comments section below.
Disclaimer: Some pages on this site may include an affiliate link. This does not effect our editorial in any way.


