Knowing how to access your print history can be very useful. Whether you want to double-check if you have printed something already, determine how many documents you print monthly for inventory purposes, or tell whether another user printed documents without your knowledge, you can get the info in a couple of quick steps.
There are a few ways to check your computer’s print history in Windows 10, and that’s exactly what we’ll cover in this guide. We’ll also show you how to enable logging for print history in Windows 10.
How to Check Print History on Windows 10
While the option to check your computer’s print history on Windows 10 is available, you need to turn this feature on manually before using it. In other words, if you haven’t already enabled the print history feature on your device, it’ll be impossible to see what documents you’ve printed in the past. That’s because your printer deletes any record of the documents you printed up to this point by default.
Even though you can’t currently view your print history because of this, you can make sure that it’s accessible in the future. The first step is to enable the print history feature, and then you can check what you printed from that point forward.
Although it might only take you a couple of minutes to do this, it might be a bit more complicated than you may think. There are two methods you can use to do this – with Settings and the Event Viewer. We’ll show you how to do both on Windows 10. You can also install third-party logging software.
Use Settings
To activate the print history feature in Windows 10, you can use your computer’s Settings. Here’s how it’s done:
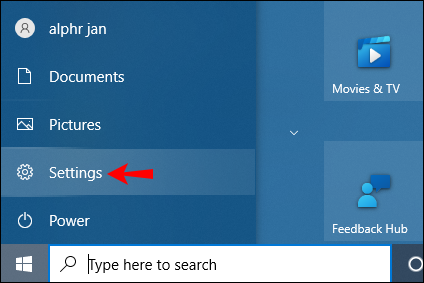
- Click on “Start” in the bottom-left corner of your screen.

- Proceed to the Settings icon on the left sidebar of the start menu.

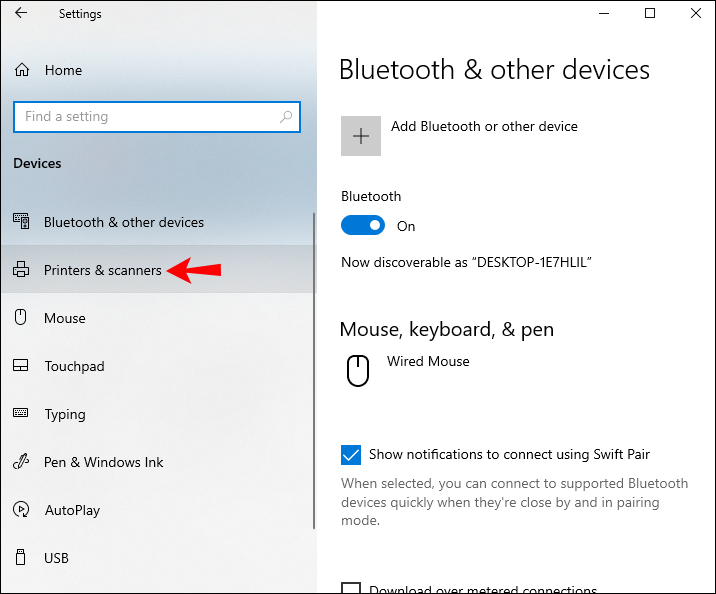
- Choose “Devices,” and then continue to “Printers & scanners.”
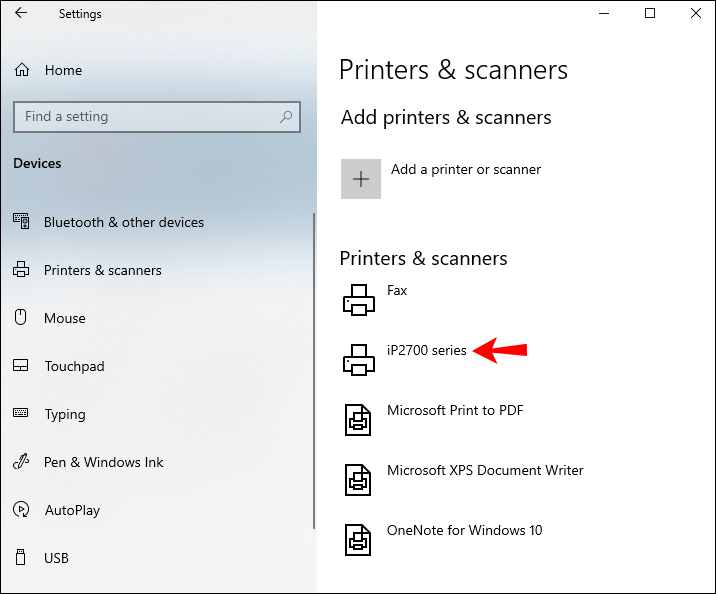
- Locate your printer on the list of devices and click on it.
- Select the “Manage” button under the printer’s name.
- Click on the “Printer” tab on the print queue window.
- Choose “Properties” on the drop-down menu.
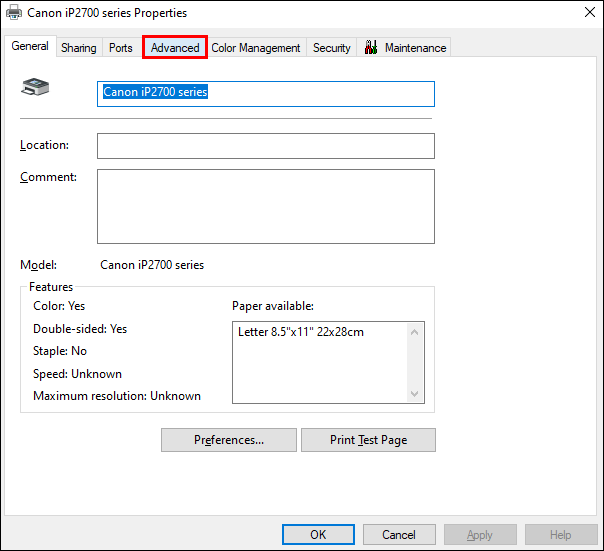
- Select the “Advanced” tab on the new window.
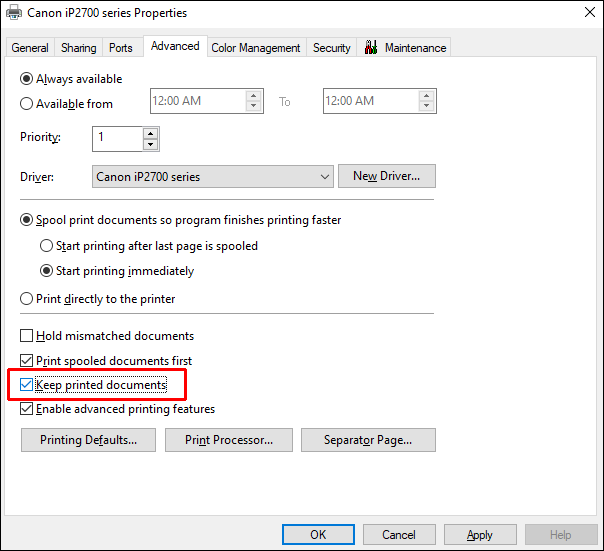
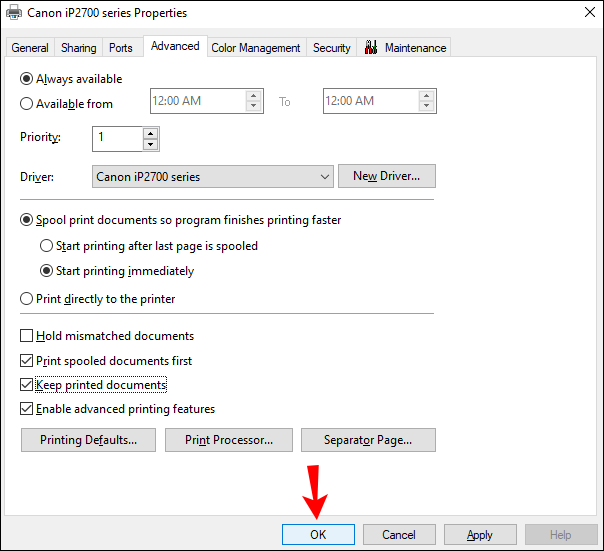
- Find the “Keep printed documents” box and check it.
- Click on the “OK” button.


Now that you’ve enabled the printed history feature, this is what you need to do to view it:
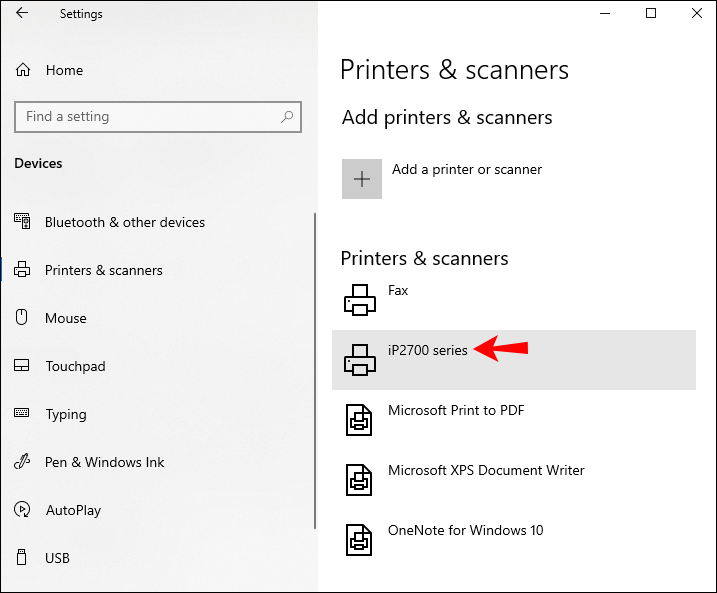
- Open Settings once again.
- Go to “Devices” and then to “Printers & scanners.”
- Under “Printers & scanners,” find your printer from the list of devices.
- Click on the printer and continue to “Open Queue.”

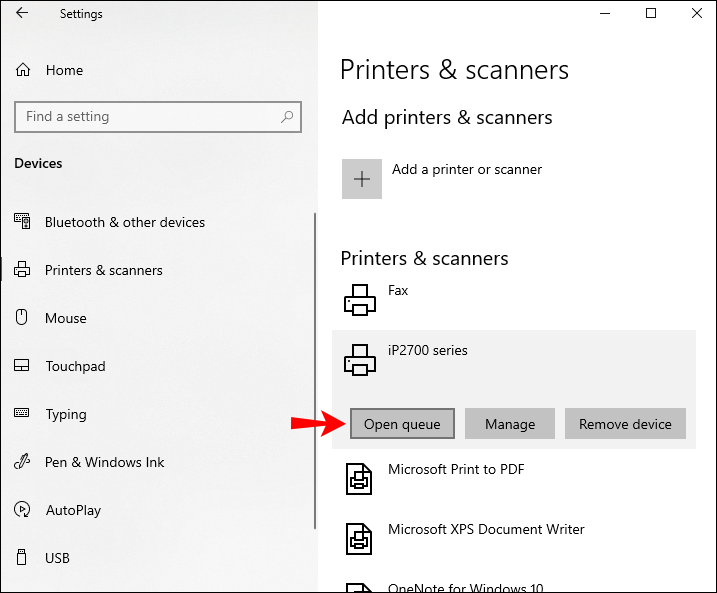
Everything you print from this point on will be saved in the “Open Queue” window. Although this method is quick and easy, it will only provide you with a short-term list of printed documents. That’s why it’s best to use the Event Viewer.
Use the Event Viewer
The Event Viewer is a built-in app that can be found on every Windows 10 computer. If you’re not sure where the Event Viewer is, you have a few options to find it:
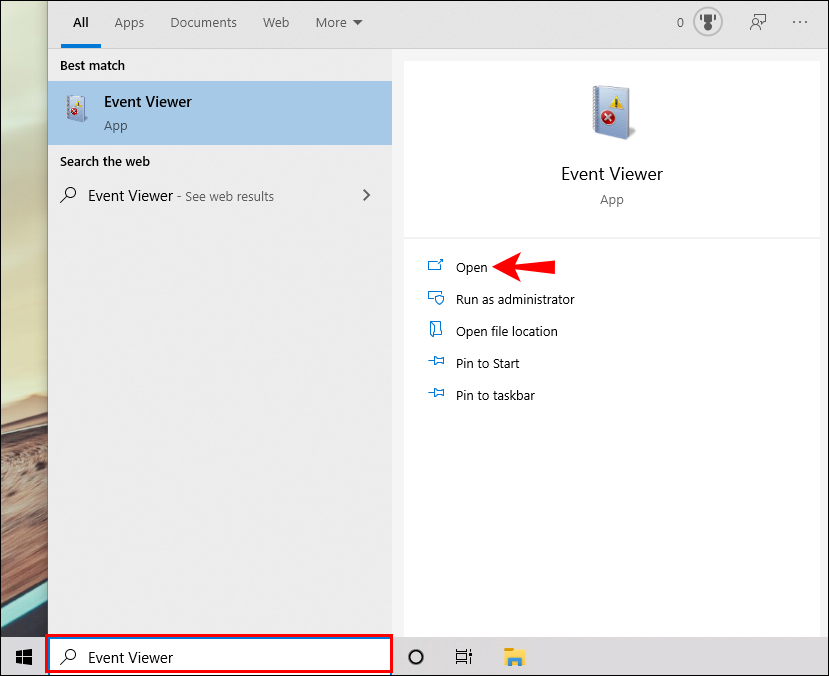
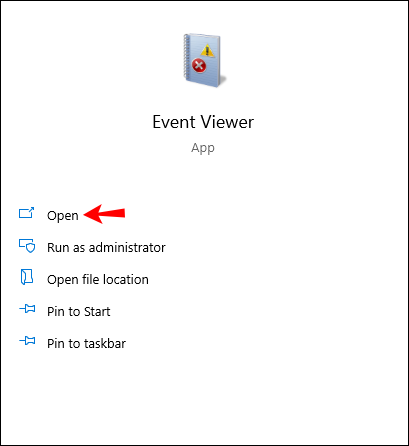
- Go to the magnifying glass in the bottom-left corner of your screen. Type in “
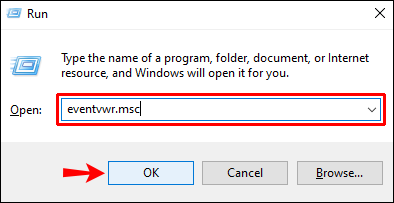
Event Viewer” in the search bar and click on “Open” on the result page. - Press the Windows key and the “R” key at the same time. This will open the Run app. In the search bar, type in “
eventvwr.msc” and then click on “OK.” It will automatically open the Event Viewer. - You can also find it in Control Panel.
Once you have the app opened, this is what you should do next:
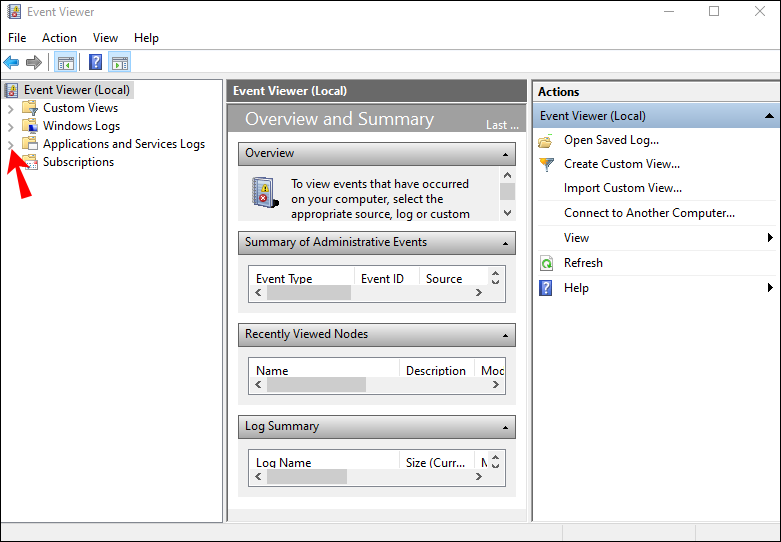
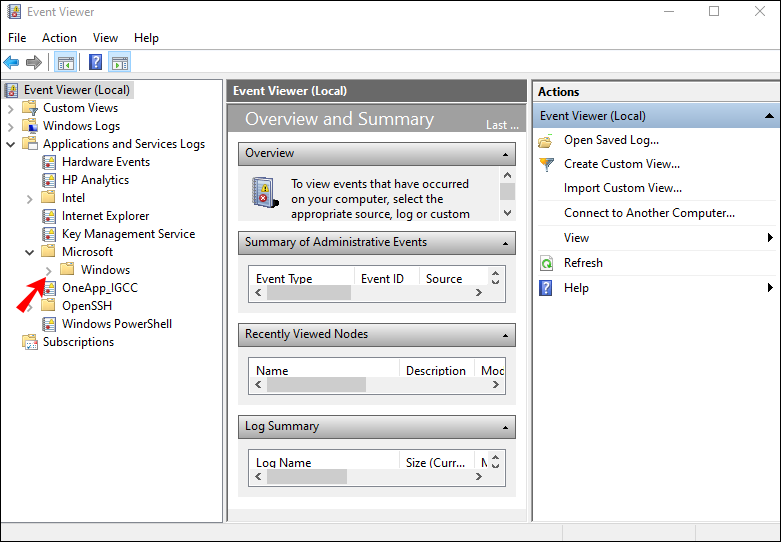
- Find “Applications and Services Logs” on the left sidebar.
- Click on the arrow on the left side of the folder icon.
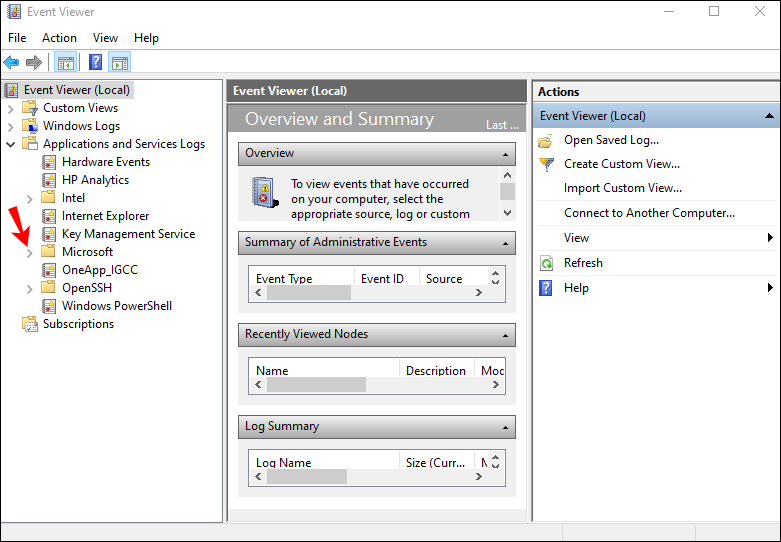
- Proceed to the “Microsoft” folder and click on the arrow on the left side.
- Select “Windows” on the left sidebar.
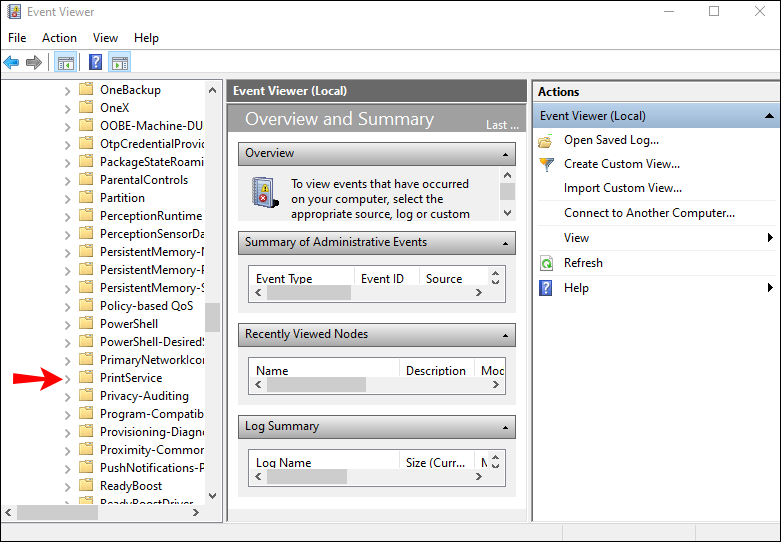
- Scroll down until you find “PrintService” on the list.
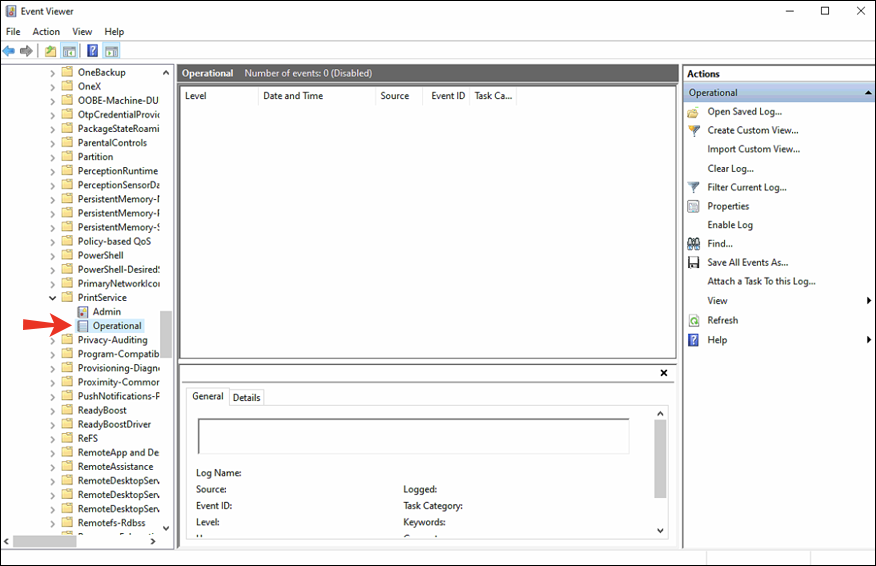
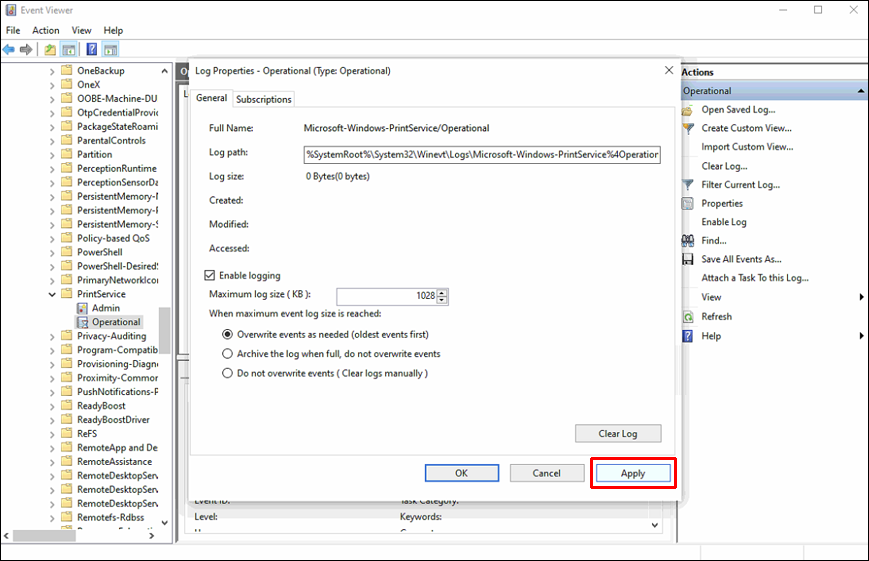
- Double-click on it and then right-click on “Operational” in the “PrintService” tab.
- Continue to “Properties.”
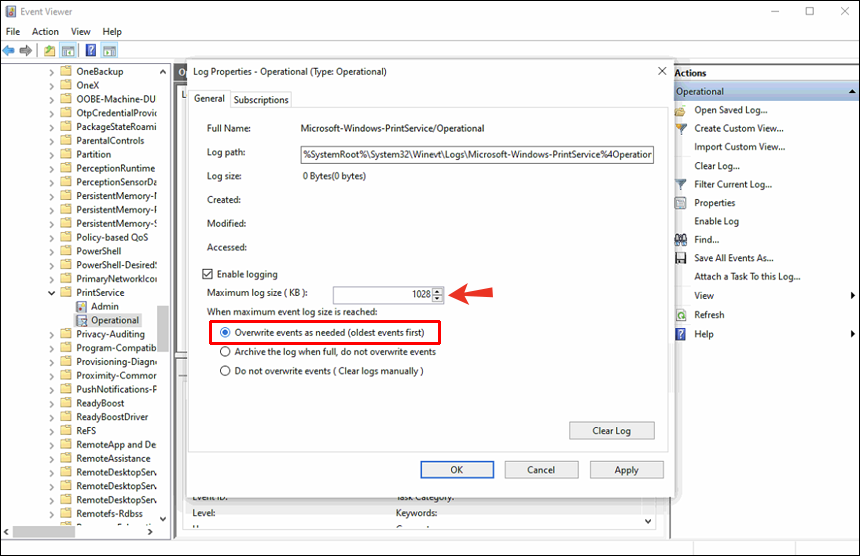
- Click on “Enable logging” in the new window.
- Choose what your computer should do when maximum event log sizes are reached. It’s best to check the “overwrite events as needed” box.
- Select “Apply.”
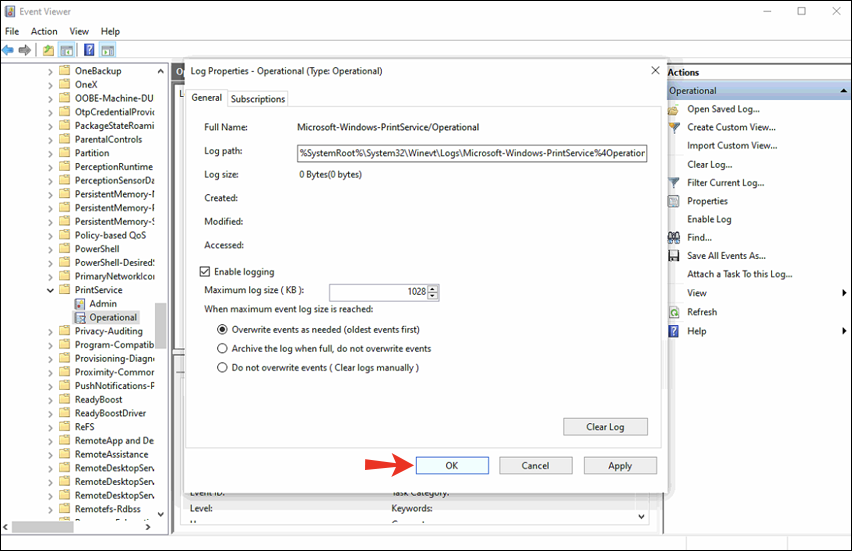
- Click on the “OK” button.


Where Is the Printer History Saved
Now that you’ve enabled the logging feature, let’s see how you would use the Event Viewer to check your print history:
- Open the Event Viewer.
- Go to the “Applications and Services Logs” folder.
- Proceed to “Microsoft,” and then go to “Windows.
- Find “PrintService” on the list.
- Continue to the “Operational” log.
Everything you print from now on will be saved here. Not only will printed documents appear on this list, but failed prints as well. You’ll be able to find that information out under the “Task Category” tab. In addition, you can see the exact date and time all your documents were printed.
If you want to organize your print history, you can do so by right-clicking on “Task Category.” You can choose to:
- Add and remove columns
- Sort events by this column
- Group events by this column
If you choose the third option, then it will be much easier for you to discern the information about the printed documents. In addition, if you are looking for a specific print log, then this is the best way to categorize it.
Use a Third-Party App
Another option you have is to download a third-party app, or logging software, to view your computer’s print history. An excellent option for this is an app called PaperCut Print Logger. It’s designed for Windows, and it’s completely free.
Some of the printing information this app offers includes the exact time and date of the print, the name of the user who printed the document, the name of the document, the number of pages that were printed, the size of the paper, and more.
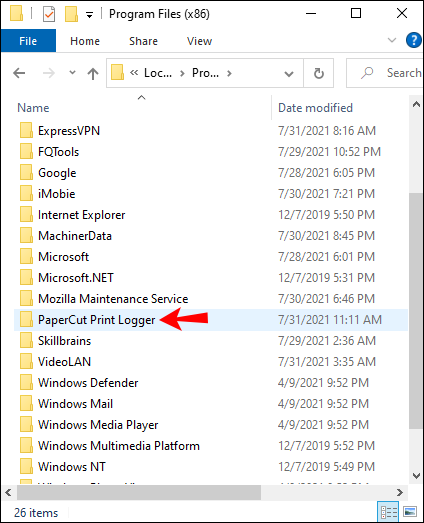
To access the admin page, you would need to go to the PaperCut Print Logger directory. If you’re not sure how to find it, follow the steps below:
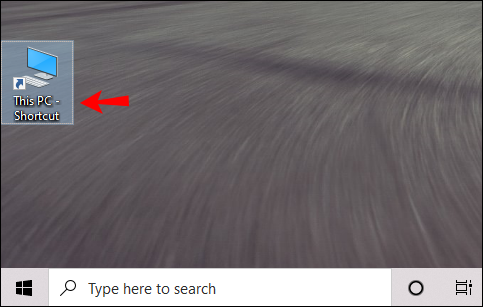
- Go to “This PC” on your desktop.
- Proceed to “Local Disk (C:)” and then go to the “Program Files” folder.
- Find the “PaperCut Print Logger” folder and double-click on it.
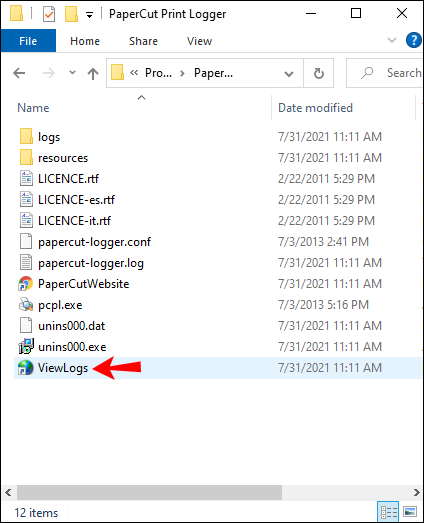
- Continue to “ViewLogs.” This will open the PaperCut print logs page.
- Go to the “HTML” tab, and then to “View.”

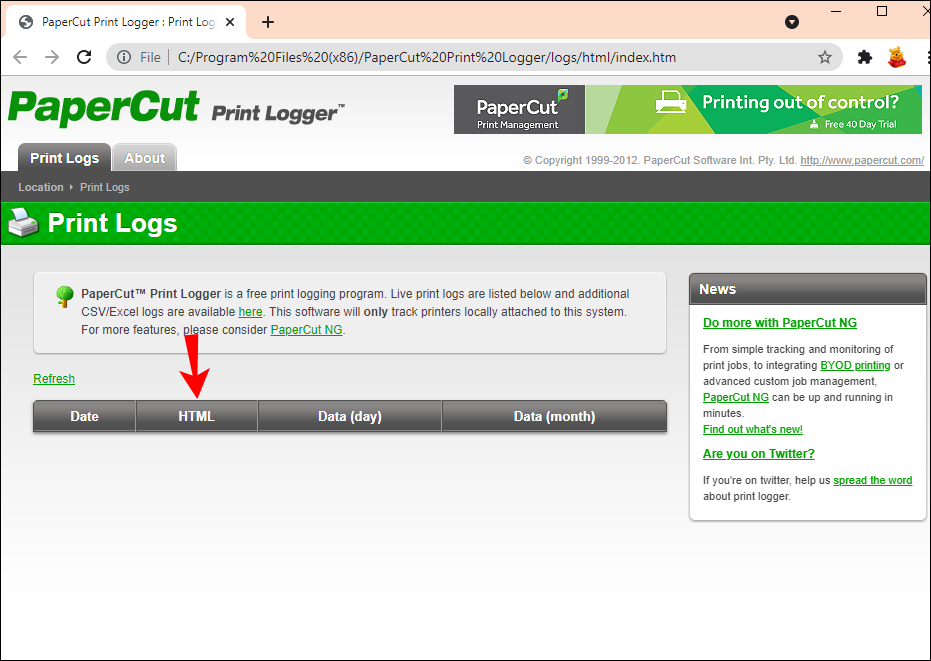
You’ll be able to see your print history on this page. Apart from PaperCut Print Logger, there are several other apps you can install for this.
View Everything You Have Ever Printed
The process of enabling your computer’s print history on Windows 10 might seem complicated. However, if you follow the step-by-step guide provided in this article, you’ll achieve this in a couple of minutes. Even though you might not be able to check all your previously printed documents, by enabling this feature, you can monitor all future print jobs.
Have you ever checked your print history in Windows 10 before? Did you use any of the methods explained in this guide? Let us know in the comments section below.
Disclaimer: Some pages on this site may include an affiliate link. This does not effect our editorial in any way.


