Do you feel like your computer is running slower than it used to? Have you started to notice some errors popping up? Or are some of your programs taking longer to launch? If so, don’t panic.
The most common reason for this slowdown is that the C drive has become cluttered with old files and unnecessary programs. Over time, these files can eat up a lot of space on your drive and even slow down the execution of certain commands on your PC.
This article will show you how to clean up your C drive in Windows to recover space and speed things back up again.
How to Clean Up the C Drive in Windows 11
Windows 11 is the newest version of Microsoft’s longtime operating system. It combines some features from other versions, such as Windows 7 and 10, and unique features.
These include Xbox tech for gaming, Microsoft Teams for better communication, and Android support to help you enjoy your favorite mobile apps right on your PC.
But even with all these features, Windows 11 isn’t immune to C drive cluttering. If anything, the new utilities mean you’ll probably be forced to deal with even more junk and temporary data.
Fortunately, Windows 11 does offer several tools to clean up the C drive and free up space for more apps while improving performance.
Let’s see how each tool works.
Disk Cleanup
Disk Cleanup is a Windows utility that does a great job at cleaning up your C drive. It deletes all the residual and temporary files that are not needed anymore, providing more space for new data.
Here’s how to use it:
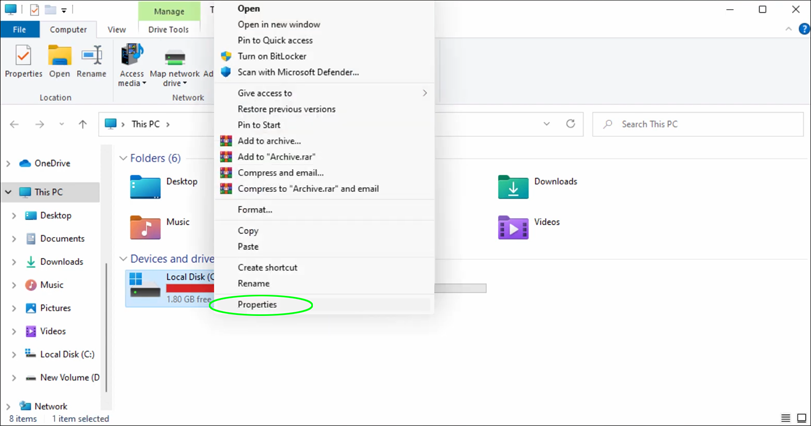
- Open File Explorer by pressing the Windows and E keys together. This should open a window showing all your existing drives, including C.

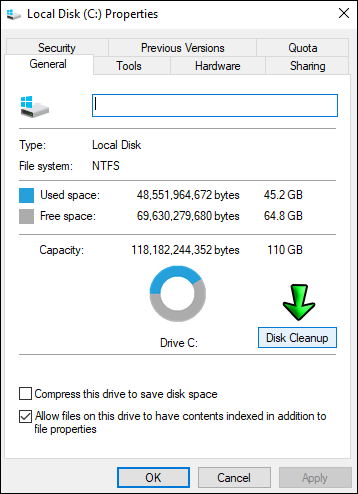
- Right-click on the C drive and select “Properties” from the popup menu.

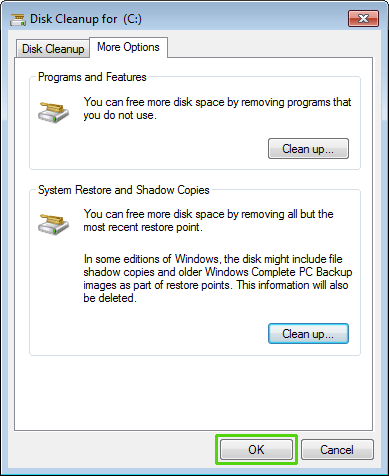
- Once the “properties” window opens, click on “Disk Cleanup.” At this point, this utility will start running in the background to determine how much space you can free up by cleaning junk and deleting folders containing any unwanted file.
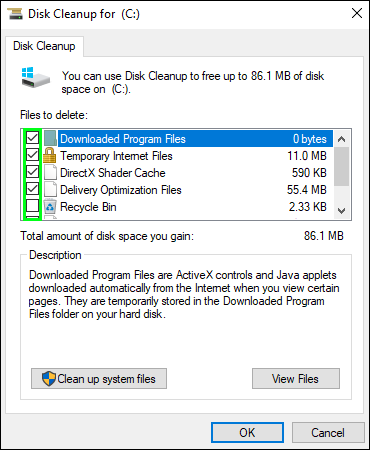
- After scanning your system for junk, you should see a new window with a list of file types that can be deleted. Check each category box and then click on the “Ok” button at the bottom of the window.
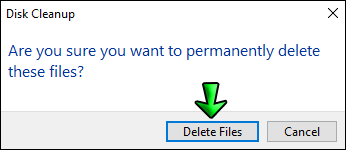
- Confirm the deletion in the popup window to initiate the process.


The Temp Folder
The Temp folder is a generic term used to describe the “temporary data storage” directory for Microsoft Windows. It stores temporary files used by applications to run smoothly, but these can easily be removed when they’re no longer in use.
Here’s how to go about it:
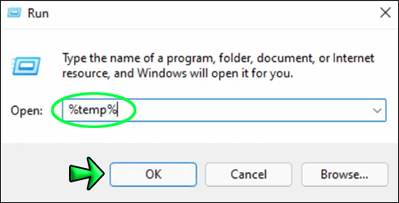
- Press the Windows and R keys simultaneously to open the Run command.
- When the Run command box opens, write “%temp% “and click on “OK.”
- Click on “Continue” if a message appears warning that you’re about to get permanent access to a sensitive folder.
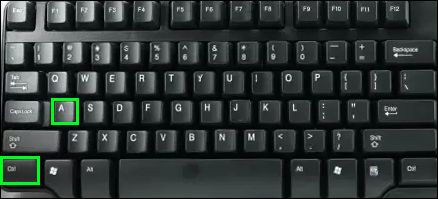
- When the Temp window opens, press Ctrl+A to select all the folders and files in the Temp folder.
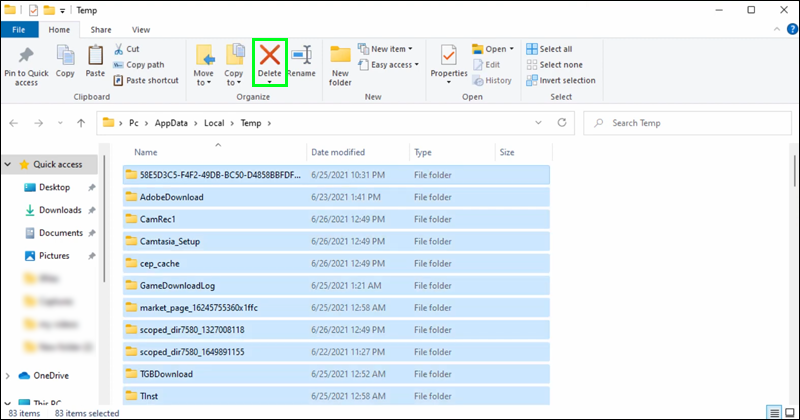
- Click on the “Delete” button at the top of the window to initiate the cleanup process.

How to Clean Up the C Drive in Windows 10
Windows 10 is undoubtedly one of the most popular operating systems in the Windows series, but it comes with one major drawback: It doesn’t auto clean junk files and residual content.
If you don’t want these unwanted files to slow down your computer and eat up valuable space on your C drive, here’s how to delete them:
Using the Storage Sense Utility
The Storage Sense feature on Windows 10 was designed to automatically detect your device needs and free up space when needed. It runs automatically to find and delete temporary files, empty the recycle bin, and delete old Windows updates and other temporary files.
Here’s how to turn on the Storage Sense feature on your PC:
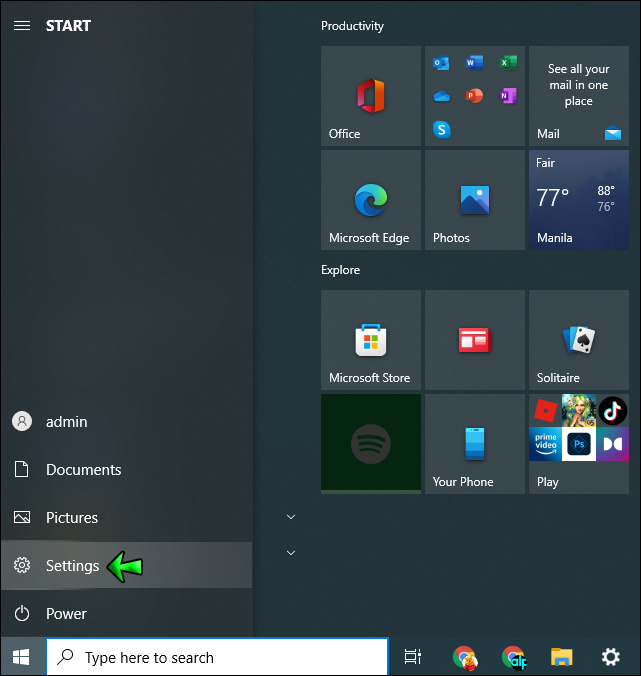
- Open the Start menu and select “Settings.”
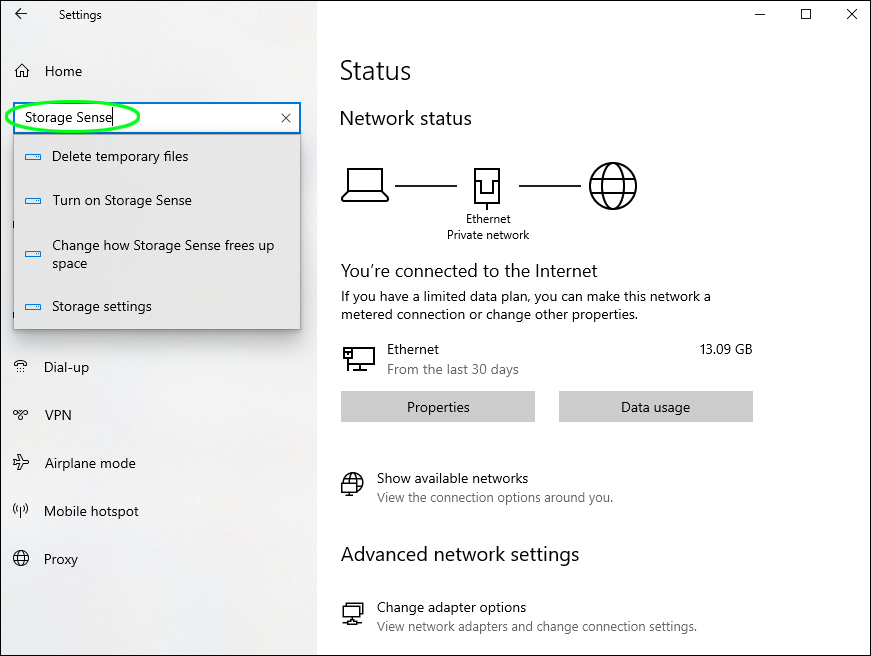
- Once the Settings window opens, type “Storage Sense” in the search bar at the top and then “Enter.”
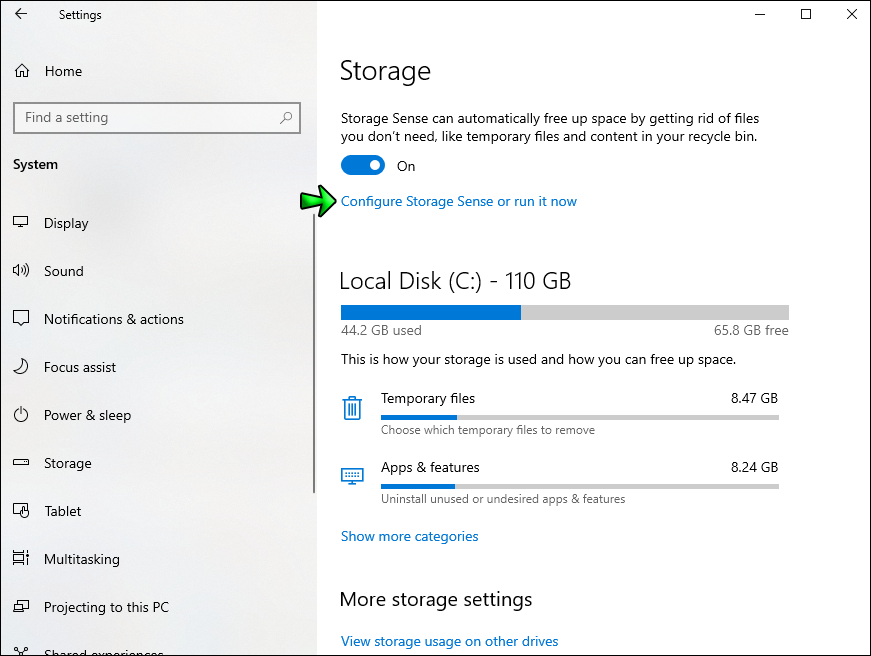
- After the “Storage” window opens, click the slider bar to turn on the Storage Sense utility.
- Click on “Configure Storage Sense or run it now.”
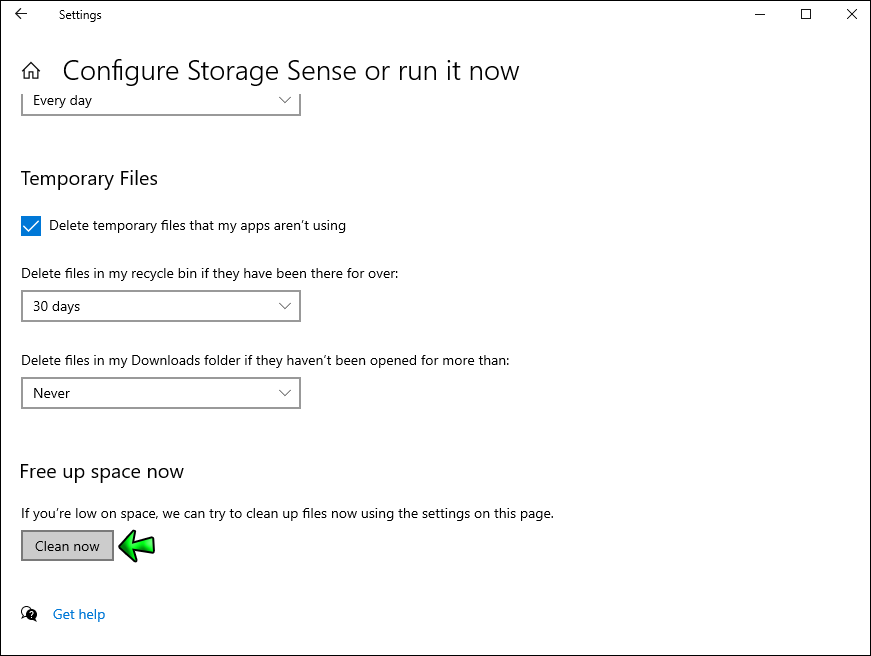
- Select how often you’d like the feature to scan for unwanted files. For the best results, you should go with “daily.”
- To free up space immediately, click on the “Clean Now” button at the bottom of the window.


Using Disk Cleaner
Disk Cleaner is one of the few apps found in both Windows 11 and Windows 10. It can help rid your system of junk and other temporary or unwanted data that can slow down your PC.
Here’s how to use it:
- Press the Windows and E keys together to open File Explorer.
- Right-click on the C drive and click on “Properties.”
- Click on “Disk Cleanup.”
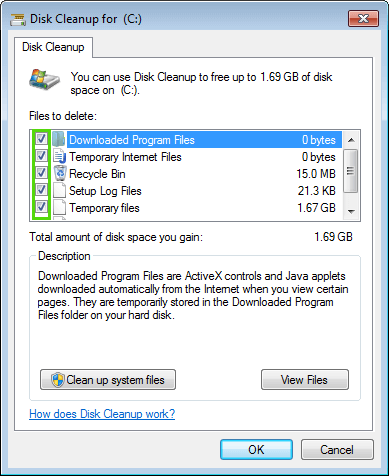
- After the Disk Cleaner has scanned your system for junk, you should see a new window with a list of file types that can be deleted. To delete a given category of files, check the box next to it.
- Click on the “Ok” button at the bottom of the window.
- Confirm the move in the popup window to initiate cleanup.


How to Clean Up the C Drive in Windows 7
Windows 7 comes with Disk Cleanup, a utility that allows you to free up space on the C drive by deleting unnecessary files such as old backups or temporary files apps create while running.
Here’s how to run the utility:
- Press the Windows and E keys together to open File Explorer.
- Right-click on “C” and then select “Properties” from the popup window.
- Click on “Disk Cleanup.”
- Select the files you’d like to delete.
- Click on “Ok.”
- Confirm your selection to initiate cleanup.


Lock in Better Performance
The C drive on Windows has a reputation for being the most cluttered of all drives. This is because, by default, that’s where Windows saves temporary files, downloads, updates, and all the programs you’ve installed on your PC.
Fortunately, there are ways to clean up your C Drive safely and lock in better performance while still creating space for apps or programs.
Have you tried cleaning up your windows C drive using any of the tools discussed in this article? How did it go?
Let us know in the comments section below.
Disclaimer: Some pages on this site may include an affiliate link. This does not effect our editorial in any way.


