ZIP files allow you to send larger folders and files since they’re smaller after compression. Instead of sending large files over email, a ZIP file is more compact to download and saves time. These files also act as great archives for better organization.
If you’re looking for instructions on how to create a ZIP file, look no further. In this article, we’ll teach you how to do compress files on the many platforms available. We’ll also answer some of your burning questions about ZIP files.
How to Create a Zip File?
You can create ZIP files on both computers and mobile phones. The operating system doesn’t matter, though the exact methods will differ. ZIP files are convenient, which is why many platforms allow you to create them.
Linux
On Linux, creating a ZIP file is as easy as a few clicks. All you need to do is to select the files and folders to compress. After that, you can send it to someone, store it in a different location, or keep it where you created it.
These are the step for creating a ZIP file on Linux:
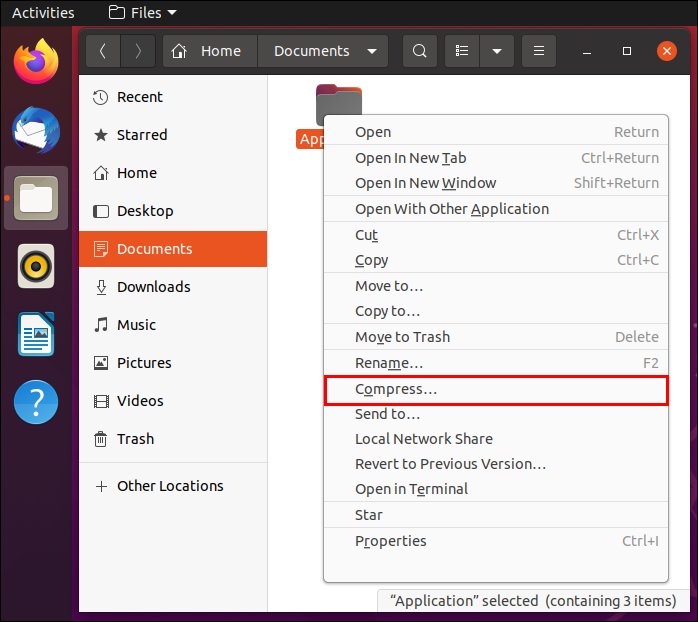
- Select the files and folders you want to compress.

- After you’re done selecting the objects, right-click on the space around them.

- Select “Compress.”
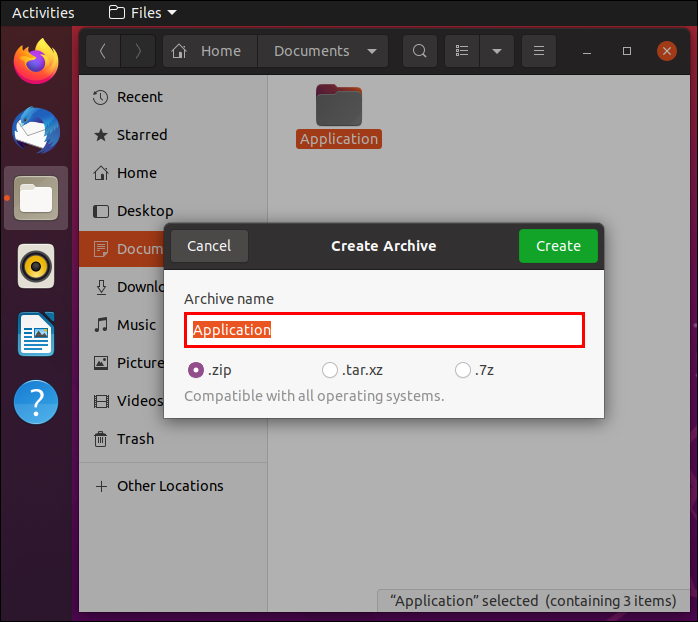
- A window labeled “Create Archive” will appear, allowing you to name the archive.
- After that, select the “.zip” option below and click the “Create” button at the top-right.
- After a short wait, you can find the ZIP file in the same directory.


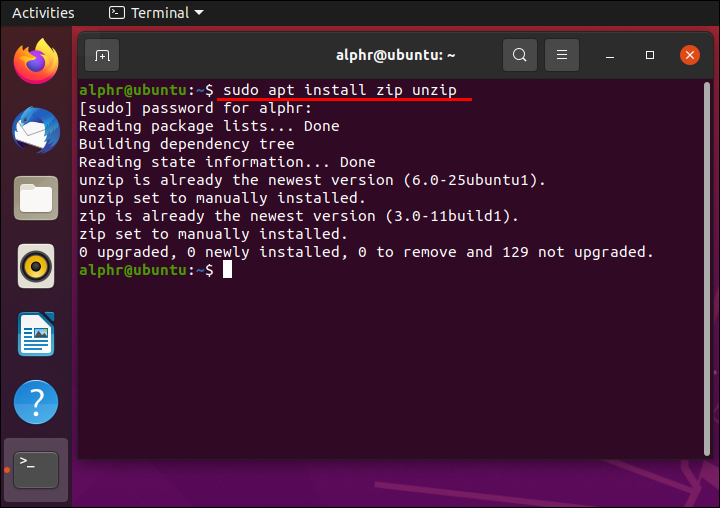
Sometimes, ZIP support isn’t installed, but you can easily rectify that. Simple run “sudo apt install zip unzip” and you should have ZIP compression capability. If your Linux build already has ZIP support, it won’t install it again.
This method works with Ubuntu and many other Linux distributions.
You can also use the Command Line to compress files.
- Open the Command Line then type “CD Directory”, in this case “CD Documents.”
- To see the lists in the Directory type “LS.”
- Type zip -r foldername.zip folder name.
- Wait for the process to complete.


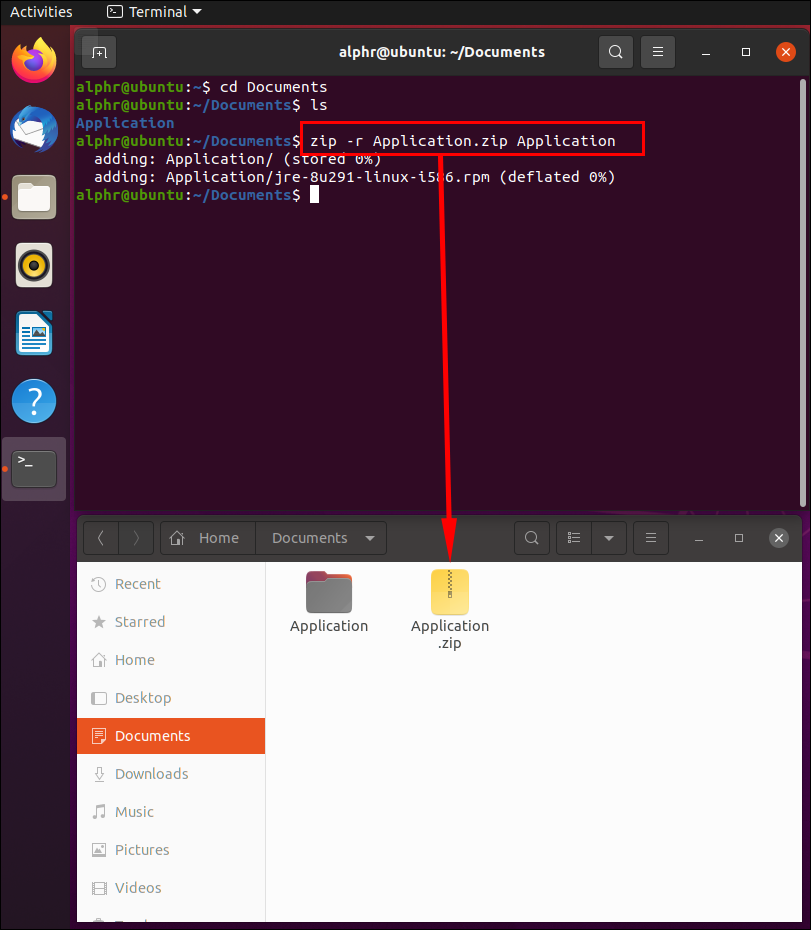
The archive and file names have to be your file’s actual names. The extensions should also be typed along with the names.
Mac
Mac OS X also allows you to create ZIP files easily. The process takes very little time to complete, and when you’re done, you can save a lot of space on your hard drive.
This is how you make ZIP files on your Mac:
- Create a new folder.
- Drag and drop everything you want to compress into the folder.
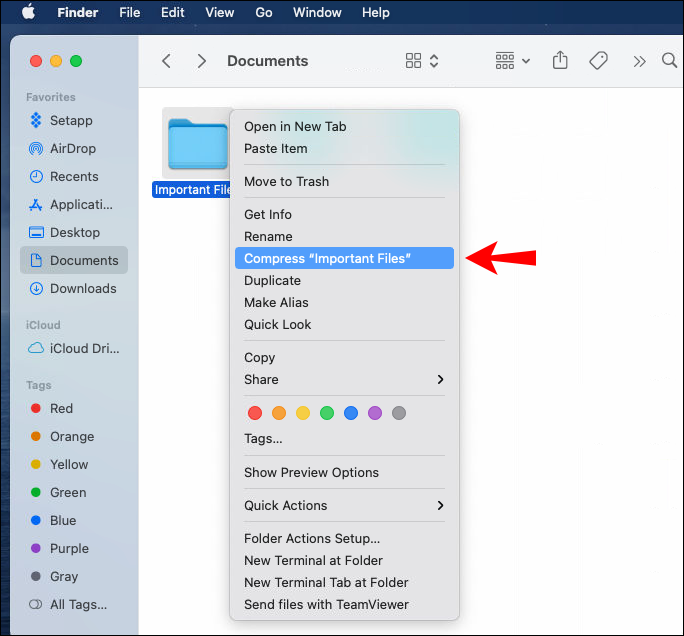
- Right-click the folder.
- Select “Compress (name of the folder).”
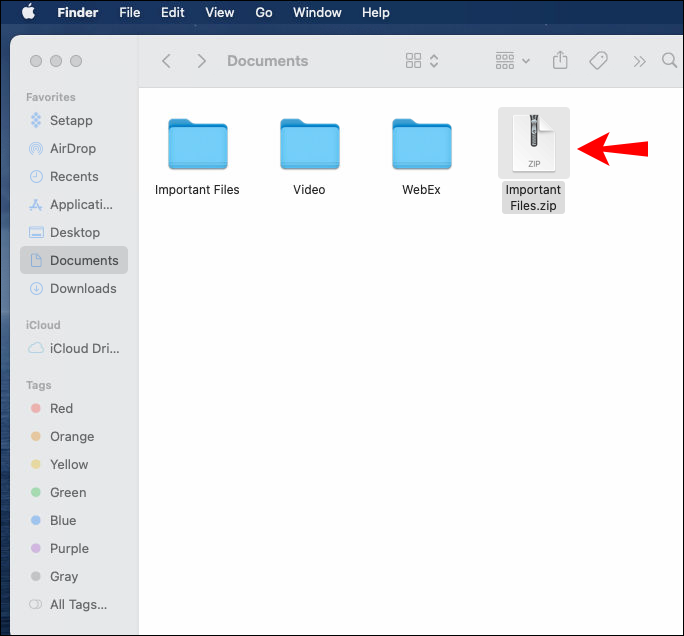
- Wait for the compression process to end.

You can also do this with single objects or multiple files without creating a new folder. Creating a new folder is simply for convenience’s sake.
Once the files are archived, you can send friends, say, the many pictures you took on vacation. Instead of sending them individually, why not archive them and send them in a single batch?
Windows
On Windows, creating ZIP files has been made a standard feature since Windows XP. There’s no need to download any third-party programs to zip anything. Just like Mac and Linux, it takes but a few clicks.
Making ZIP files on Windows can be done like this:
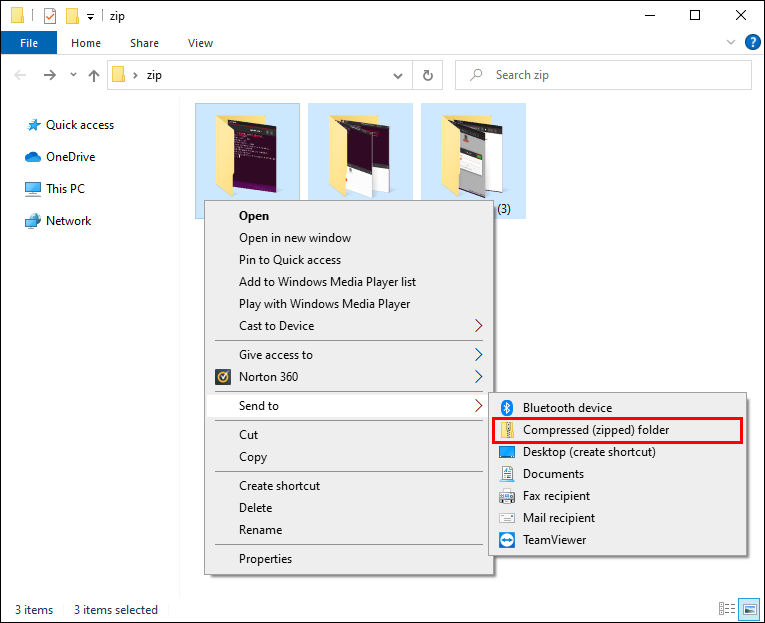
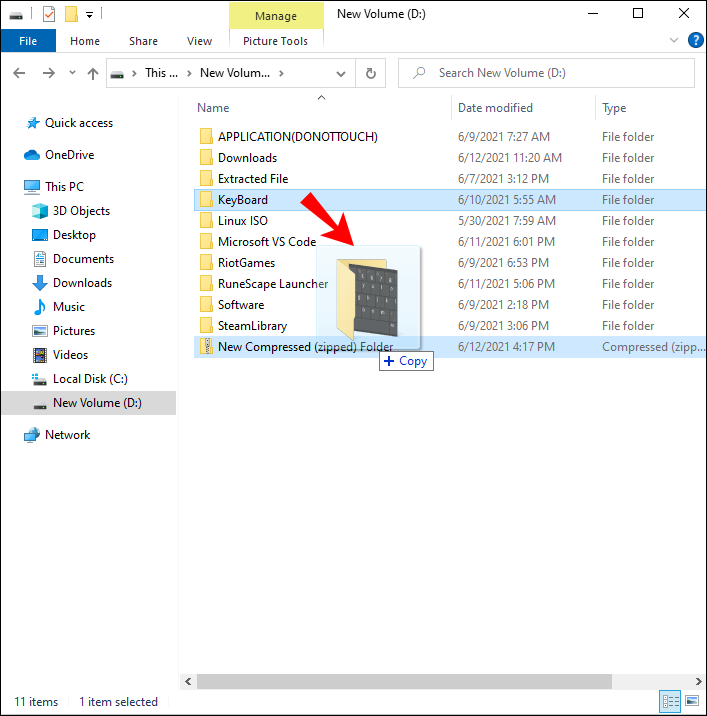
- Select the files and/or objects you wish to compress.
- Right-click the space around the objects.
- Select “Send To.”
- A list will appear, and from that list, select “Compressed (Zipped) Folder.”
- The new ZIP file will appear in that directory after a short wait.


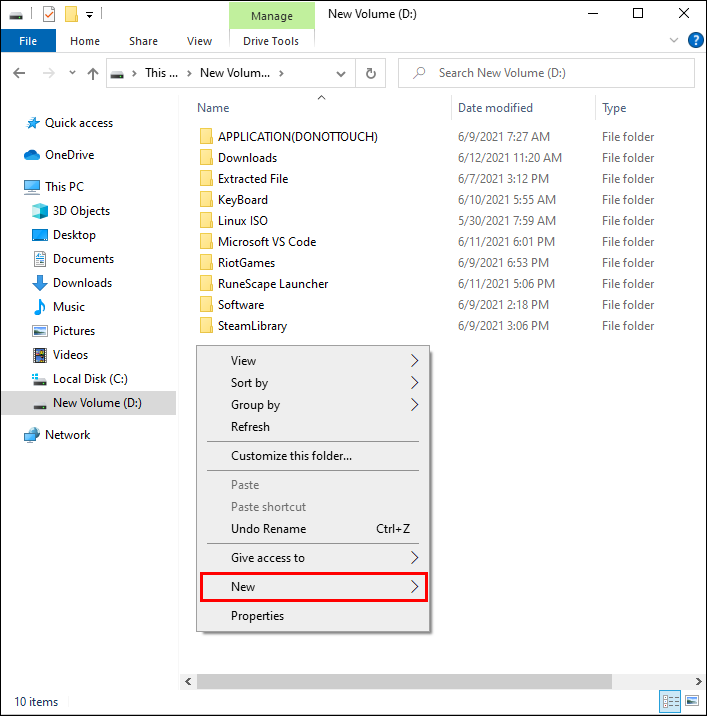
In addition, you can also make a ZIP file without selecting the objects to compress. You can just create one.
- In any directory, right-click with your mouse.
- Select “New.”
- Next, find “Compressed (Zipped) Folder.”
- Select it and create the ZIP file.
- After that, you can drag and drop any files and folders into the ZIP file.

Android
While computers have native ZIP compression support, Android phones don’t have this luxury. Don’t worry, you can get WinZip from the Google Play Store. It’s free and convenient to use.
Zipping files on Android involves these steps:
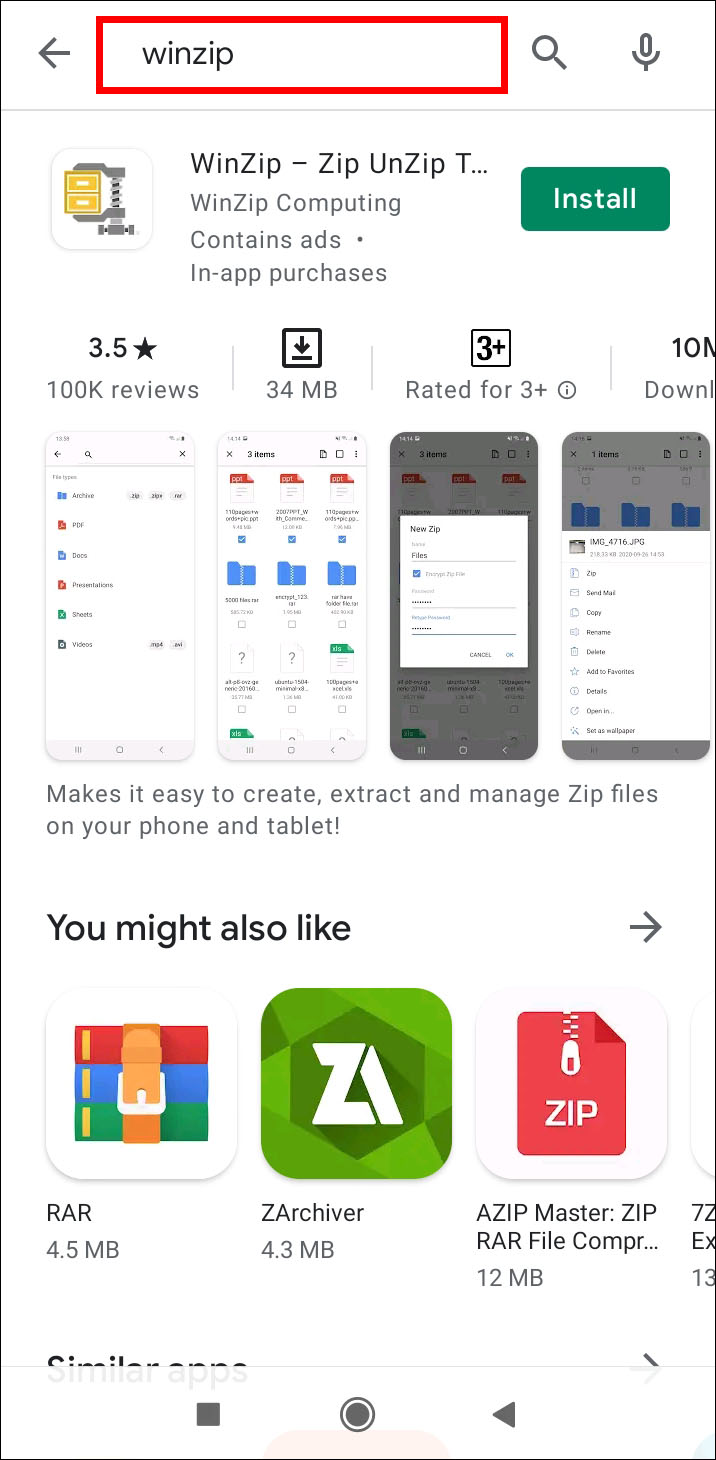
- Launch Google Play Store on your Android phone.
- Search for WinZip.
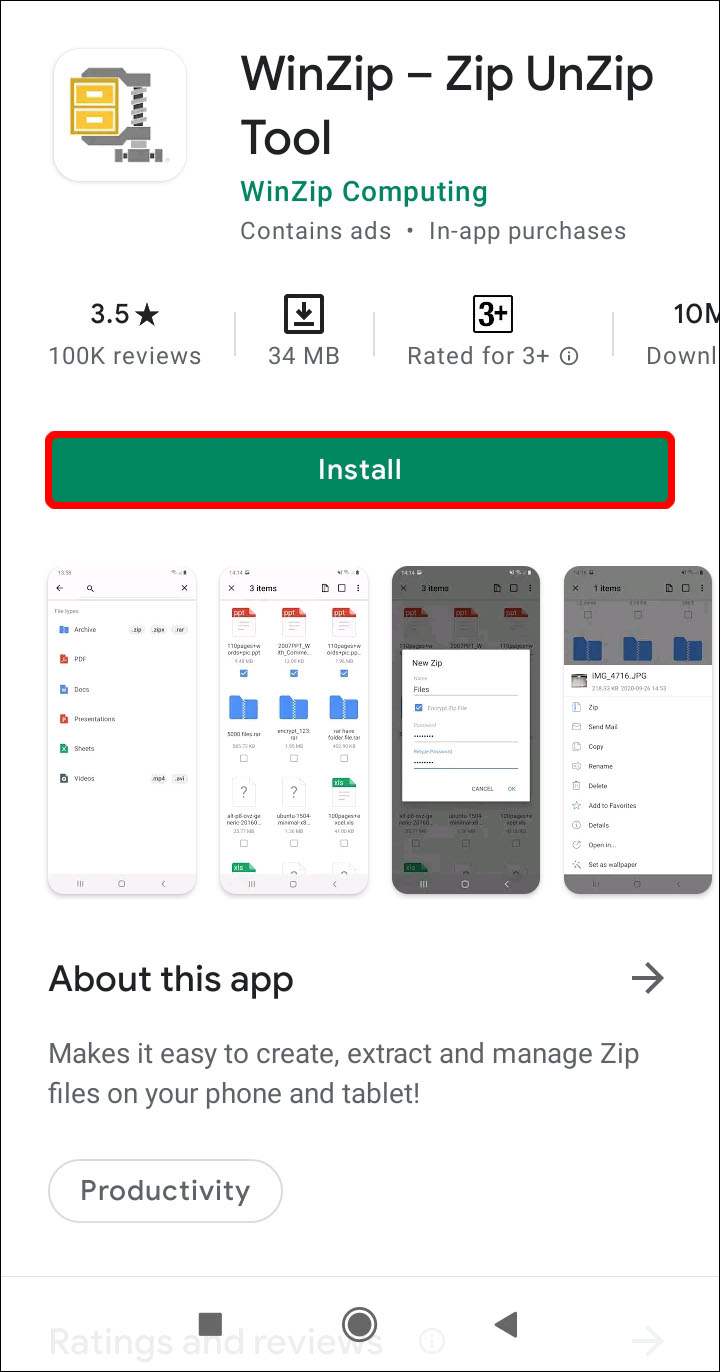
- Download and install the app.
- Launch the app when done.
- Locate the objects you want to compress.
- Select the objects.
- Tap the “ZIP” button at the bottom tab.
- Select the directory and then tap “Zip Here.”
- Wait for the process to finish.


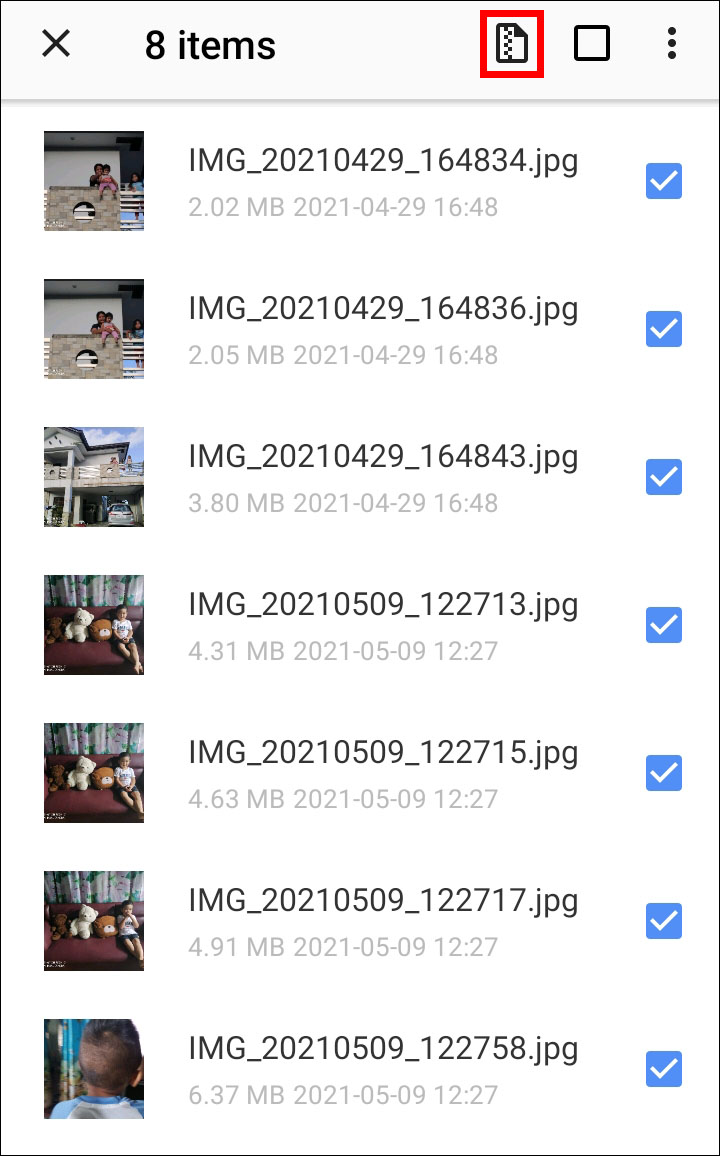

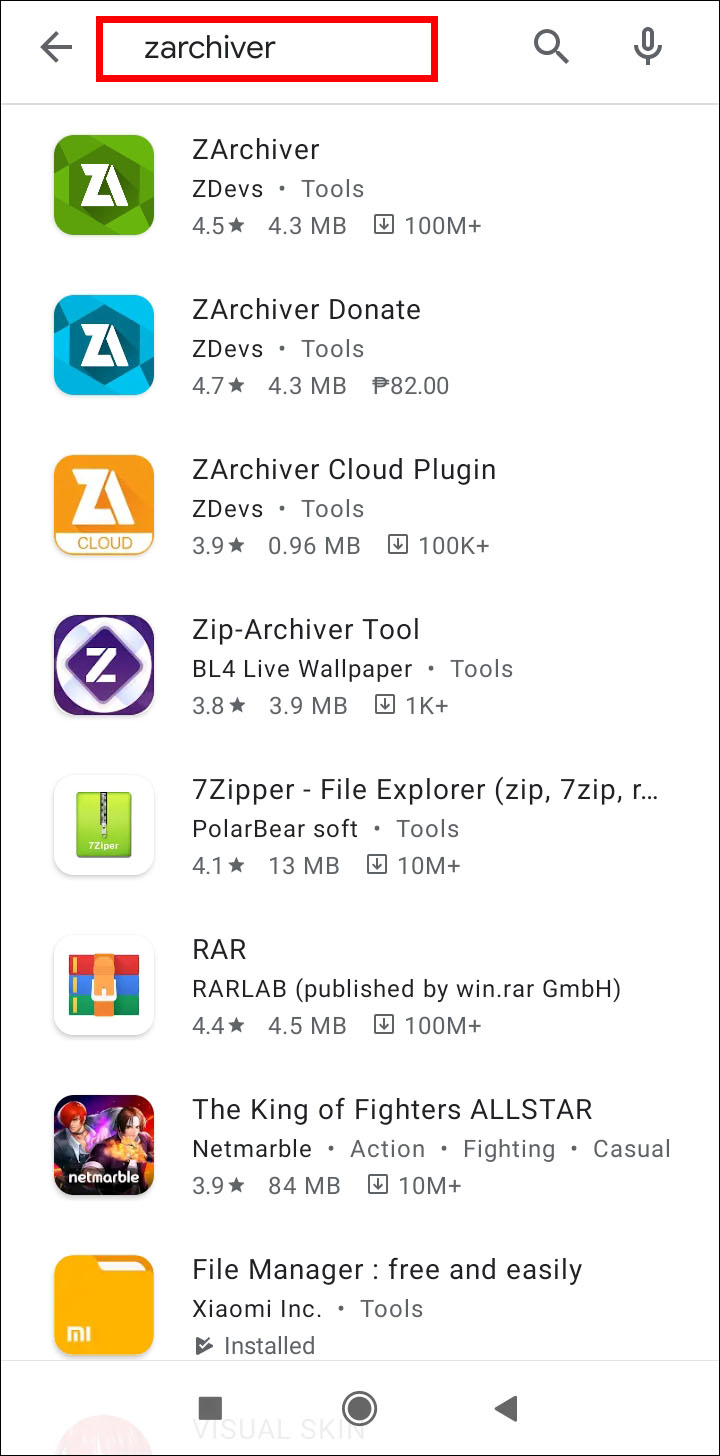
If you don’t like using WinZip, you can download Zarchiver instead. This app is an excellent alternative.
- Launch Google Play Store on your Android phone.
- Search for Zarchiver.
- Download and install the app.
- Launch Zarchiver.
- Locate and select the objects to zip.
- Tap and hold the screen to bring up a menu.
- Select “Compress.”
- You can name your archive and select the compression format.
- Choose the ZIP file option and then tap “OK.”
- Wait for the files to be zipped.
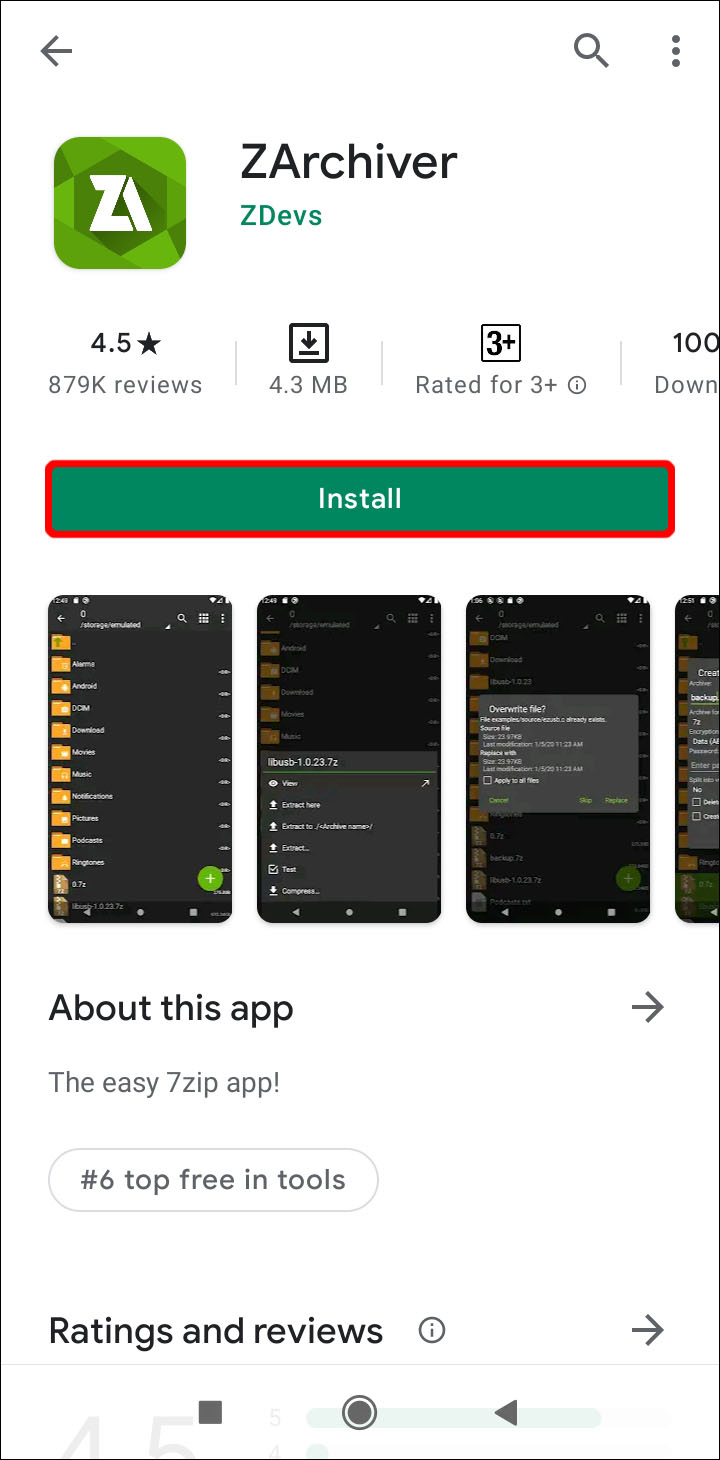


Zarchiver allows you to compress files in more formats than ZIP and 7z. If you’re interested in the versatile options, it might be the app for you.
Keep in mind that this works for all Android devices, including tablets.
iPhone
Now, you might think that iPhones also require you to download an app before you can create ZIP files, but you’ll be surprised. Contrary to Android’s lack of compression functionality, iPhones can zip files natively. The Files app allows you to do just that.
This is how zipping files on iPhone is done:
- Open the Files app.
- Choose the location you want to create your ZIP files.
- Tap the triple dots and then choose “Select.”
- Choose the objects you want to archive.
- Tap the triple dots again, but this time you select “Compress.”
- Wait for the process to complete.
If you’re only compressing one object, the ZIP file will be named after the object. However, ZIP files containing more than one object will be named “Archive.zip”. You can tap and hold it to rename it.
Thankfully, iOS allows you to compress files right away. If you want to compress files in other compression formats, you’ll need to find a third-party app in the App Store. iOS doesn’t support other formats natively.
How to Open ZIP Files?
Now that you know how to create ZIP files, we’ll show you how to open them. Opening ZIP files are naturally supported by both Windows and Mac OS X.
Mac
Opening ZIP files on Mac is easy, since all you have to do is double-click them. Mac OS X already has built-in archiving functions, including opening ZIP files. Double-clicking ZIP files on Mac automatically unzips them.
You can find the expanded file in the same directory, usually right beside the ZIP file. If not, it’s still in the same directory. The unzipped file will appear on your desktop if the ZIP file was opened there.
Windows
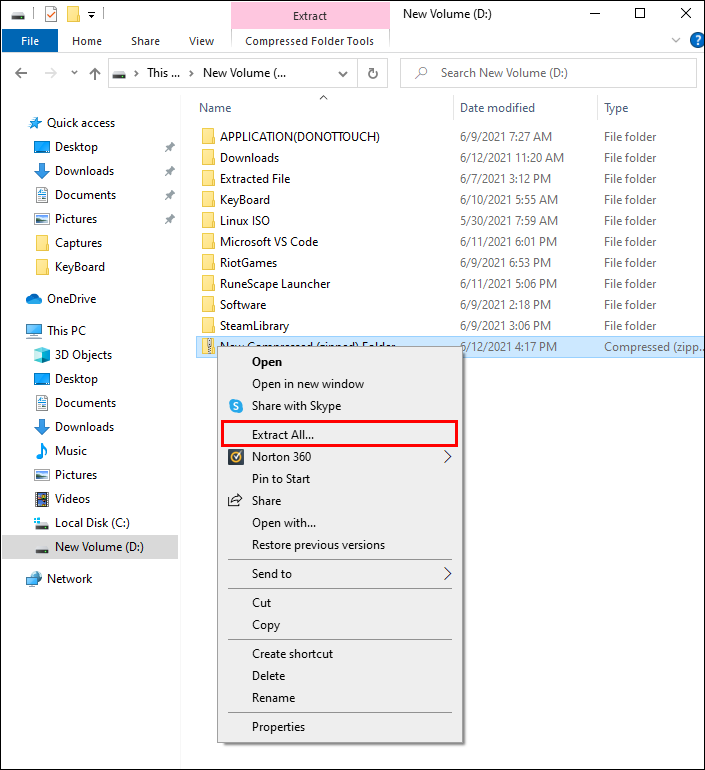
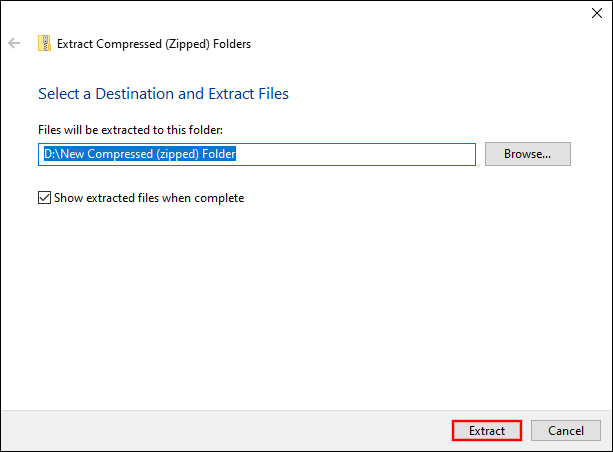
One advantage Windows has over Mac is that users can peep inside ZIP files without extracting its contents. A double-click will let you open a ZIP file directly and you can access the contents. Should you want to extract the compressed object or objects, follow these steps:
- Right-click the ZIP file.
- Select “Extract All.”
- Click “Extract” to extract to the same directory.
- If you want to extract the contents elsewhere, browse for the location before doing Step Three.
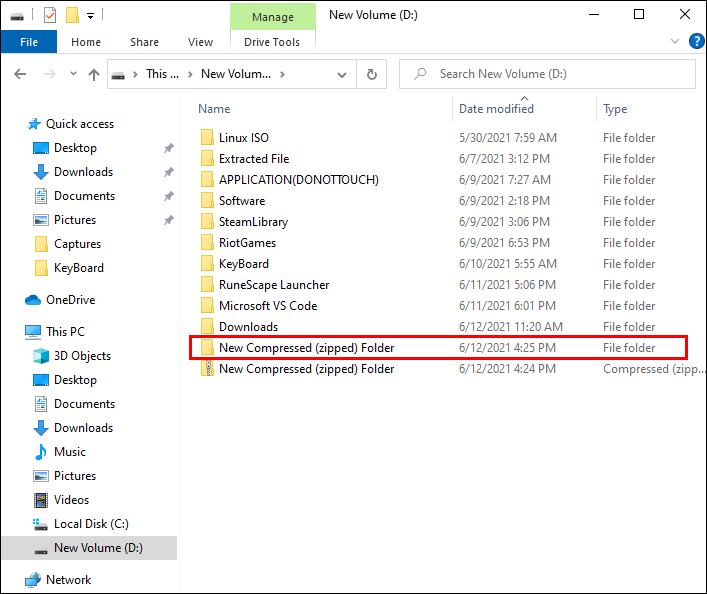
- The extracted file will be in the same directory or custom location.

Alternatively, you can just open the ZIP file and drag the contents to any location you want. Sounds convenient, right? It’s that simple.
Password-Protected ZIP Files
ZIP files are convenient to share, but sometimes you want to keep their contents hidden from everyone else. This is where password-protected ZIP files come in. After encrypting the ZIP file, only a person with the password can open and access the contents.
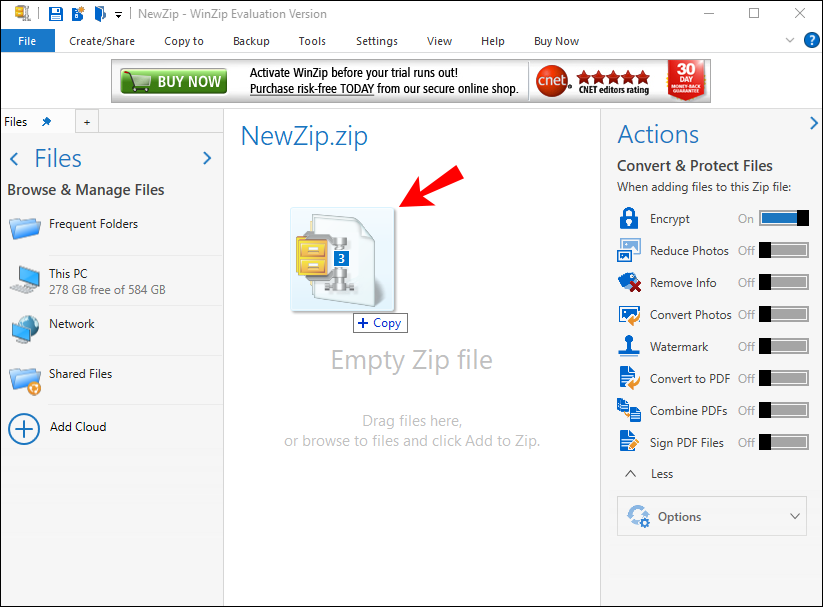
While both Windows and Mac can password-protect ZIP files naturally, the steps aren’t as straightforward. As such, it’s better to download WinZip, as it also offers better encryption options. The steps are the same for both operating systems.
- Download and install WinZip.
- Launch the program.
- Go to “Actions” and select “Encrypt.”
- Drag and drop your files and folders to the newly-appeared pane.
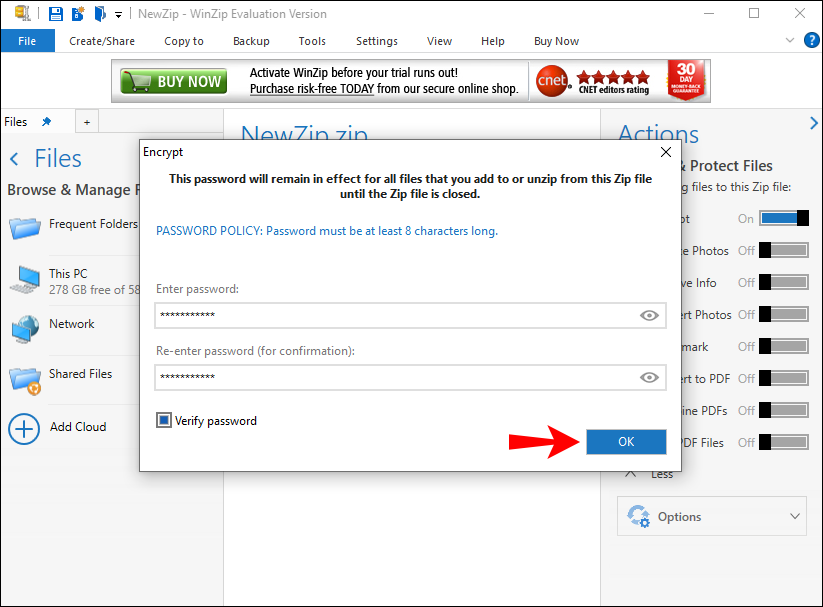
- Enter a strong password.
- Select “OK.”
- Go to “Options” and select “Encryption Settings.”
- Set a level of encryption and click “Save” to end.

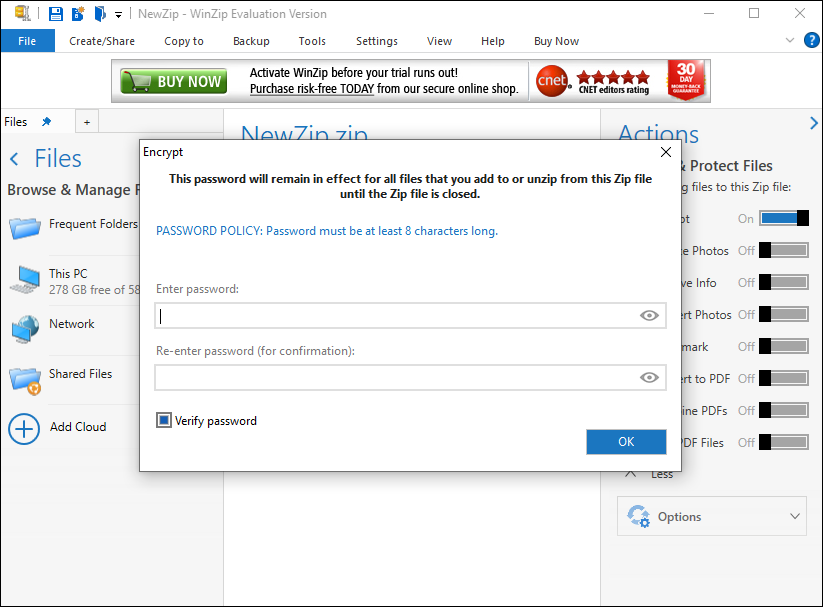

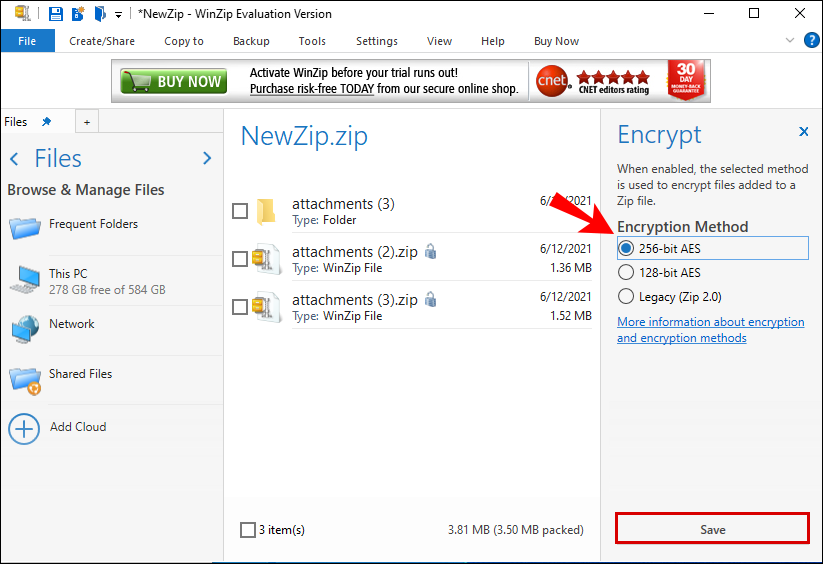
128-bit AES is a common encryption choice since it’s very secure and doesn’t take time to encrypt. 256-bit AES is the second choice, but it takes more time to finish encrypting. That said, you can choose what works for you.
When you want to share the encrypted ZIP file with someone else, you should do it over a safe medium of communication. Encrypted messaging platforms or encrypted email services are great ways to ensure no one cracks the password.
A strong password contains numbers, symbols, and letters. You can use a random password generator to create a secure password. The more security measures you take, the harder it is for hackers to gain access to the ZIP file’s contents.
Additional FAQs
What Are ZIP Files Useful For?
ZIP files are great for saving space and keeping your files organized in one place. In addition, you can encrypt them so only the right people can access the contents. Compared to uncompressed files, ZIP files are easier to share due to their smaller size, which also saves bandwidth.
File Compression Is Not Working With My ZIP File?
Occasionally, ZIP files can be corrupted due to improper compression or downloading. Virus infections also cause errors.
Some files are also difficult to compress. Often, they’re already compressed or they might be encrypted. Compressed music, image, and movie files won’t be much smaller even if you archive them in a ZIP file.
Save Some Space
Knowing how to create a ZIP file can save you a lot of space and bandwidth. Now, you can fit lots of photos and songs in an email after compressing them.
Do you use other compression algorithms other than ZIP files? What do you use your ZIP files for? Let us know in the comments section below.
Disclaimer: Some pages on this site may include an affiliate link. This does not effect our editorial in any way.


