Device Links
You may have remote data at your fingertips by mapping network drives and other places on your local area network. However, over time, you may choose to erase some of these disk mappings and preserve only those that you use often.
There is more than one way to delete mapped drives. In this article, we’ll walk you through the different methods on Windows 11,10, and 7.
Delete Mapped Drives in Windows 11
Removing a mapped drive on Windows 11 is pretty straightforward and can be done in several ways.
Use File Explorer
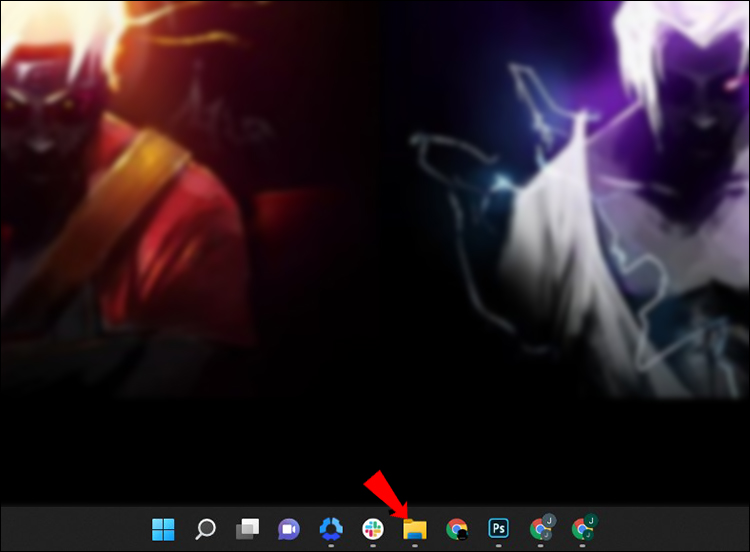
The quickest and simplest way to delete mapped drives in Windows 11 is to use File Explorer.
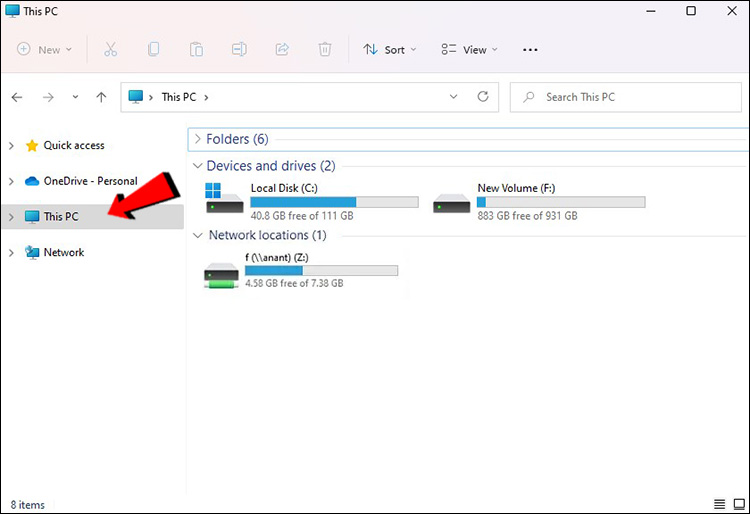
- Navigate to the File Explorer
- Select “This PC” or “Network.”

- Click the Network Drive you wish to delete, and then select Disconnect.
- The network driver should now be removed.

Use Command Prompt
If you prefer code lines, you can also use the command prompt.
- Go to File Explorer and write down the drive letter you wish to delete.
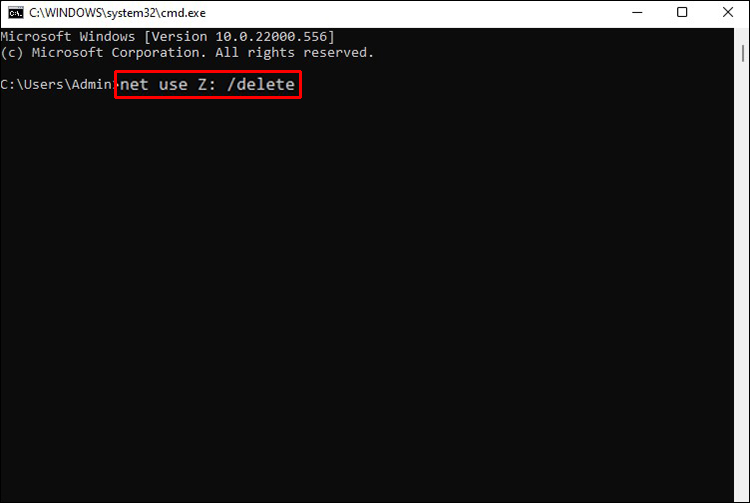
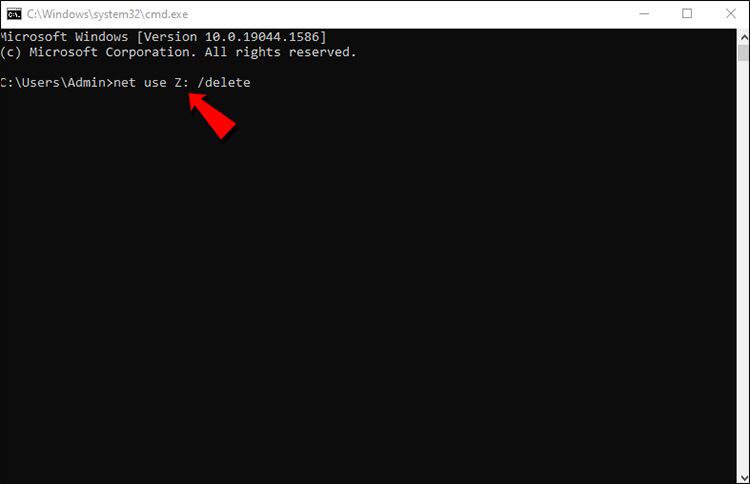
- Open Command Prompt with administrator privileges.
- Type and run the following command:
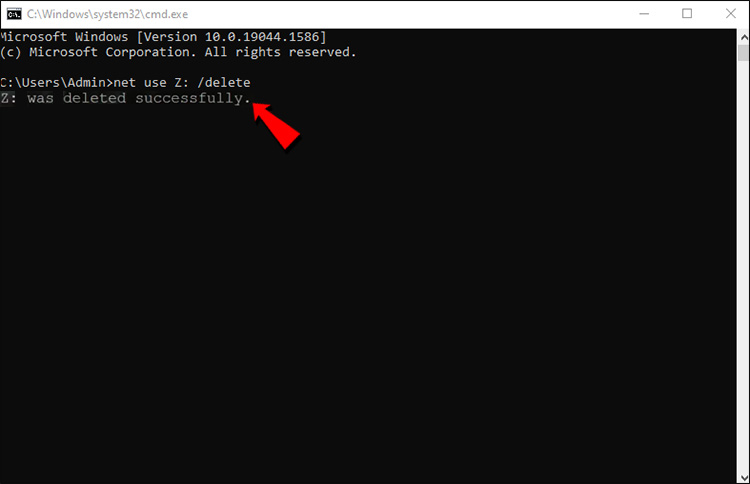
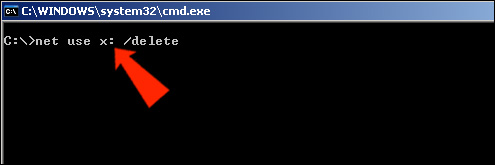
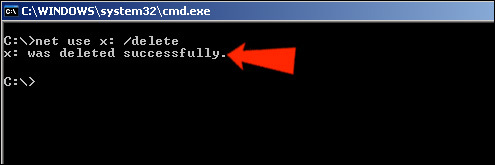
net use [Mapped Drive Letter]/delete - Examine File Explorer, and you should no longer see the mapped network.

Use Registry
Before proceeding, create a restore point or make a registry backup. If you delete anything mistakenly and the system becomes useless, you can restore it to a functional state.
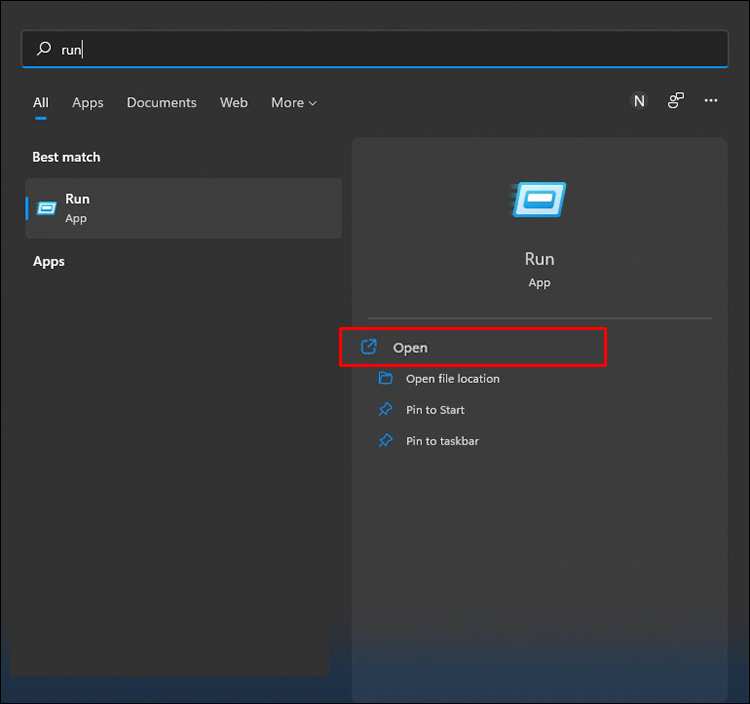
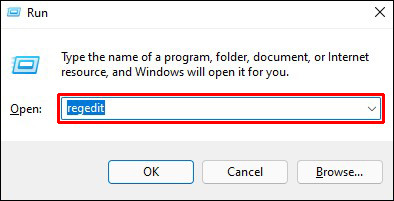
- Open Run.
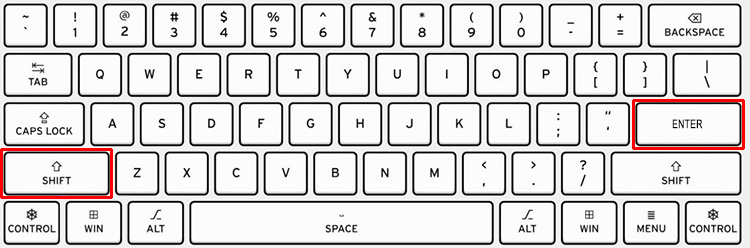
- Type “
regedit” into the Run prompt. - To open the registry editor with administrator permissions, press Shift + Enter.
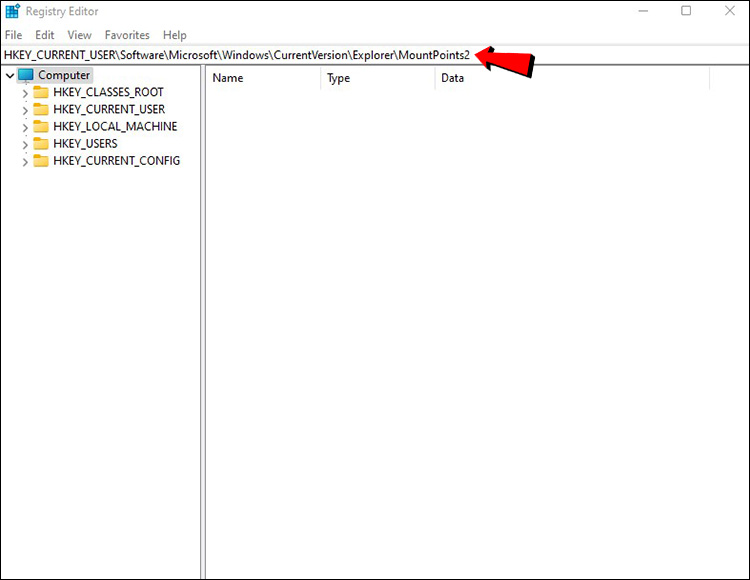
- Navigate to the path shown below.
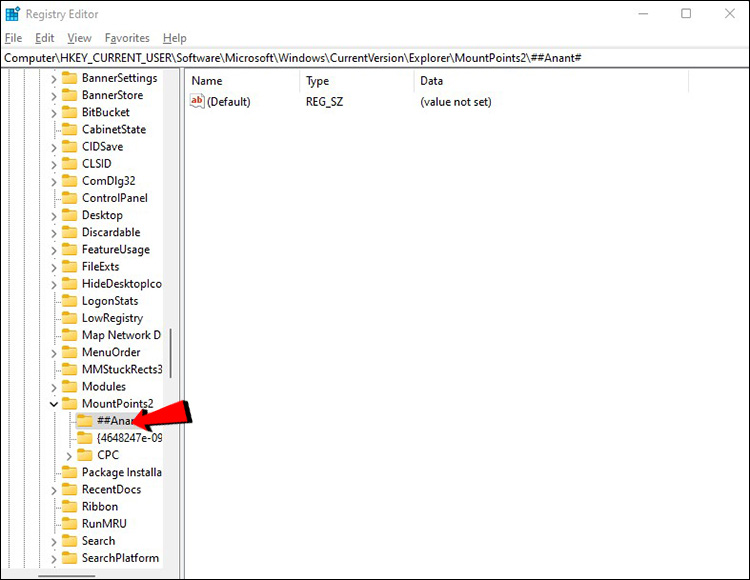
HKEY_CURRENT_USER\Software\Microsoft\Windows\CurrentVersion\Explorer\MountPoints2 - This directory contains all mapped network entries, and you must locate the one you wish to delete.
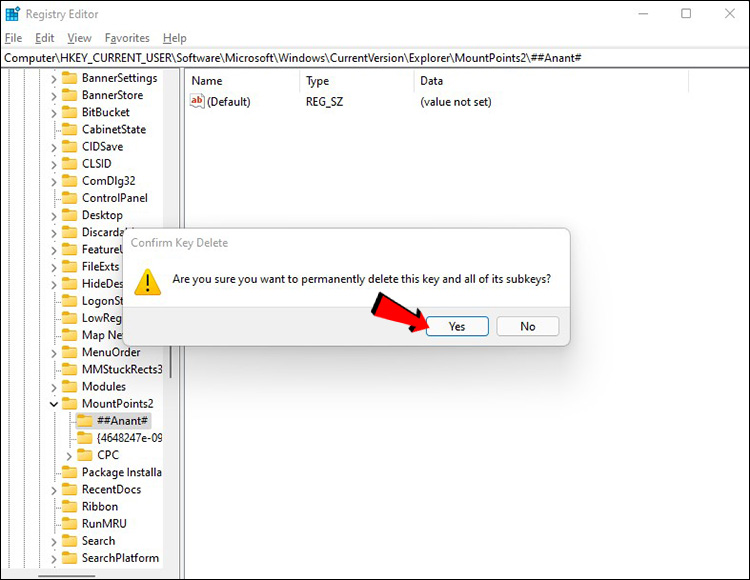
- Remove the folder by right-clicking on it and selecting “delete.”
- Select “Yes” to finalize.
- Refresh File Explorer, and the network driver should be removed.

Delete Mapped Drive in Windows 10
There are four ways to delete mapped drives in Windows 10
Use File Explorer
File Explorer allows you to remove mapped drives easily. Here’s how:
- Launch File Explorer.
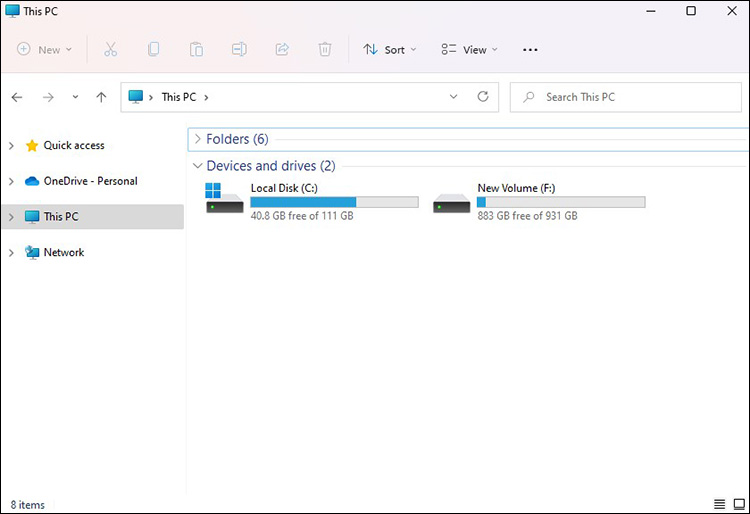
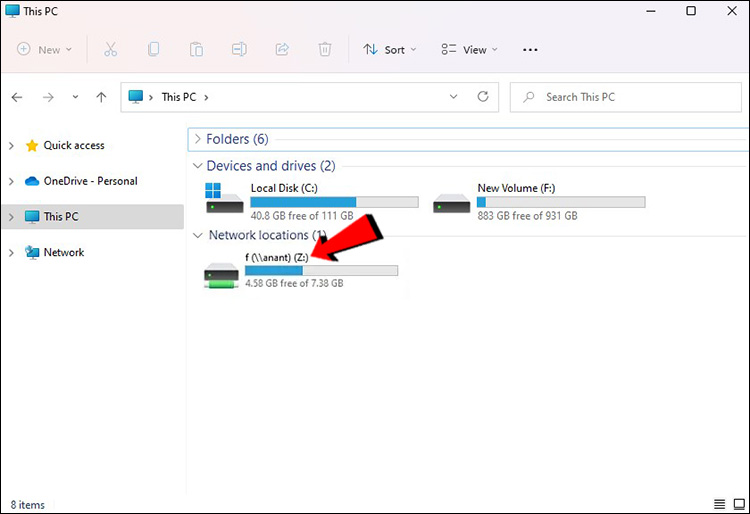
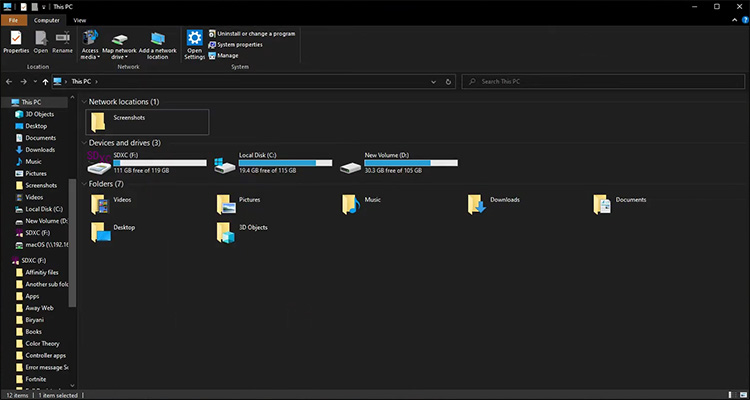
- Click on “This PC” on the window’s left-hand side menu.
- You’ll find all of your mapped drives in the “Network Locations” category under your solid-state drive, hard-disk drive, and other comparable devices like CD/DVD players or USB memory sticks.
- Select the drive you want to remove and right-click “Disconnect.”
- The network driver should now be removed.


The mapped disks should’ve disappear. You’ll have to start from scratch if you want to get them back.
Use Command Prompt
There are two ways to remove mapped drives in the Command Prompt. The first is by running “net use /delete.”
- Open Command Prompt
- Type in this command below:
net use [Mapped Drive Letter]/delete - Replace the [Mapped Drive Letter] with the drive letter and hit “Enter.”
- You’ll see a message that the network drive has been erased successfully, and you can no longer access it.

Keep in mind that only disk mappings with an assigned letter are compatible with the net use /delete command. This method doesn’t support network location mappings, such as FTP servers or web servers.
If you want to delete more than one mapped drive at once, you can run a similar command:
- Open Command Prompt
- Run the command:
net use*/delete - As a result, all currently active network connections are listed in Command Prompt. It may also ask if you are sure that you want to continue. To agree, type Y, or N if you’ve changed your mind.
- To erase all mapped network drives without prompting for confirmation, you may use the net use command:
net use*/delete/y

This command will delete all network drives without prompting for confirmation.
Removing Shortcuts
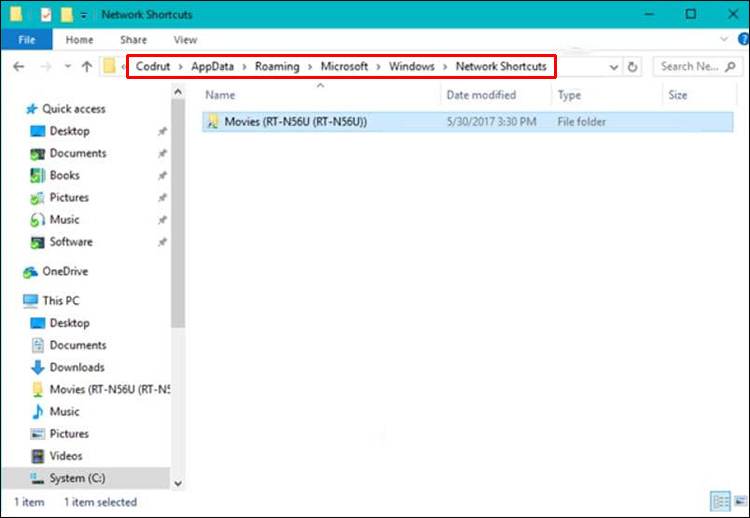
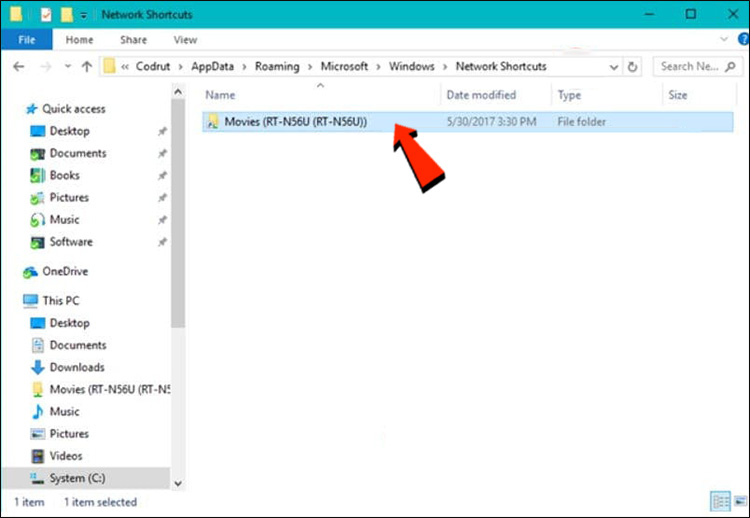
Network location mappings are shortcuts saved in a file on your PC. If the first way doesn’t work, you have alternative options. This method is also done through file explorer, but we’ll be using shortcuts to erase mapped drives this time.
- Open File Explorer.
- Go to “C: username>appdata/local/Microsoft/Windows/Network Shortcuts” to find the shortcut. Your Windows 10 user name is “Your User Name.” You may find all network location mappings in the “Network Shortcuts” folder.
- Select the ones that you no longer need to have on your computer.
- To remove items, you may either hold down your mouse button down and click on “Delete” or just use the Delete key on your keyboard.
- The specified network mappings are removed instantly and without further confirmation.

If Nothing Works
If these methods aren’t working on your Windows 10, here are some other things you can try:
- There is a possibility that the File Explorer didn’t update its data when you disconnected a network disk or deleted a network location. In File Explorer, right-click a file and select “Refresh” from the context menu.
- Your Windows operating system may be outdated if you get an error message when you try to erase a network mapping from your Windows 10 PC. Update your operating system and try again.
- It’s a good idea to restart Windows 10 if the methods don’t seem to work. You may use Taskkill /f /IM explorer.exe and explorer.exe to restart the explorer.exe process in Powershell or Command Prompt.
Delete Mapped Drives in Windows 7
Using a Windows 7 PC, you may access many network drives at once. This gives you a wide range of alternatives for storing data, such as the ability to store sensitive information on a single disc. Adding extra drives is also an option if you run out of space on your current disk. You may also delete a mapped drive from your list or add new drives. Windows 7 Computer window has a button for this.
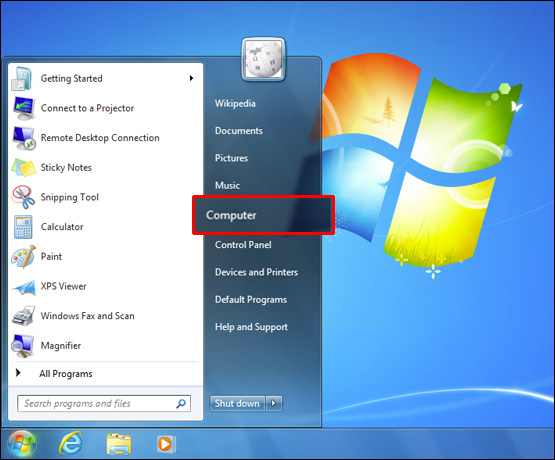
Here’s how to delete a mapped drive in Windows 7:
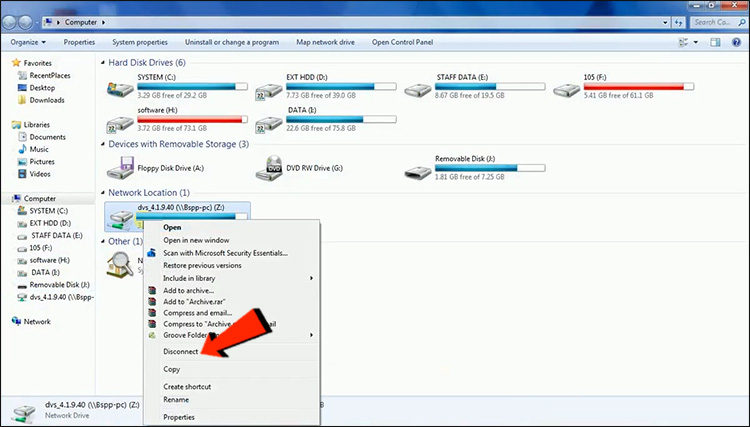
- Open the Computer window by clicking “Start” and then “Computer.”
- Select “Eject” from the context menu that appears.
- From the drop-down menu, select “Disconnect.”
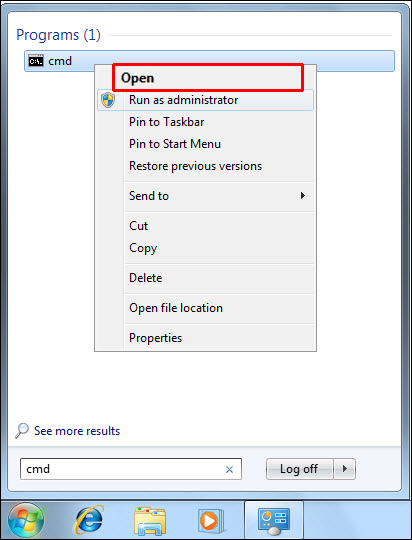
You can also remove all the mapped drives using the command prompt:
- Launch the Command Prompt
- Enter the following command.
net use [Mapped Drive Letter] /delete - Replace [Mapped Drive Letter] with the drive’s letter and press “Enter.”
- A notification indicating that the network drive has been successfully deleted will appear, and you will no longer be able to access it.
Erase All the Mapped Drives You Want
If you follow these guidelines, you can delete specific or all mapped drives on your Windows 11,10, or 7 PC. However, if you’re not sure about deleting mapped drives, you can also clear the cache. Mapped drives are cached so that you can access them quickly. You will get a similar result from deleting the drive as you would from deleting the cache.
Have you ever deleted a mapped drive? What approach did you use? Let us know in the comments section below.
Disclaimer: Some pages on this site may include an affiliate link. This does not effect our editorial in any way.


