Once your computer starts to get laggy, it’s a sign that you need to free up some space. Usually, deleting temporary files is an excellent place to start.
In this article, you’ll learn how to go about the process so that you can free space from your hard disk and eventually improve your computer’s performance. Keep reading to find out more.
How to Delete Temporary Files on a Windows 11 PC
A temporary file holds a file’s data temporarily while it’s being created or edited. These files are useless once a file is created or modified.
Unfortunately, computers don’t automatically erase temporary files causing them to occupy a lot of your hard drive’s space without reason. Therefore, deleting temporary files is a good practice that will give your computer that extra performance boost.
To delete temporary files on a Windows 11 PC, follow these steps:
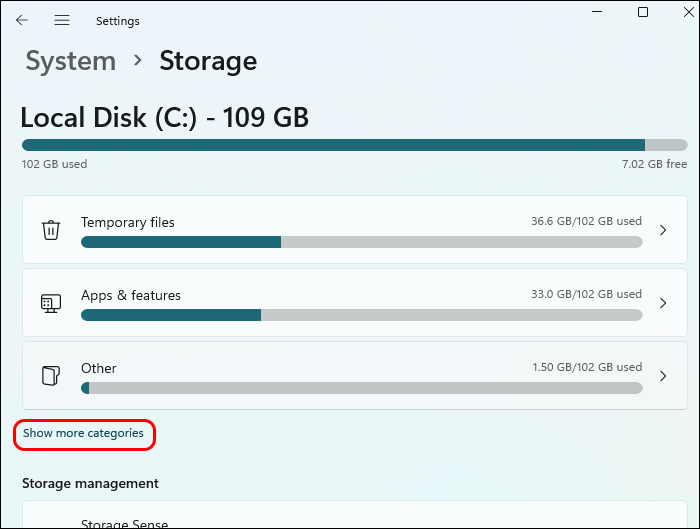
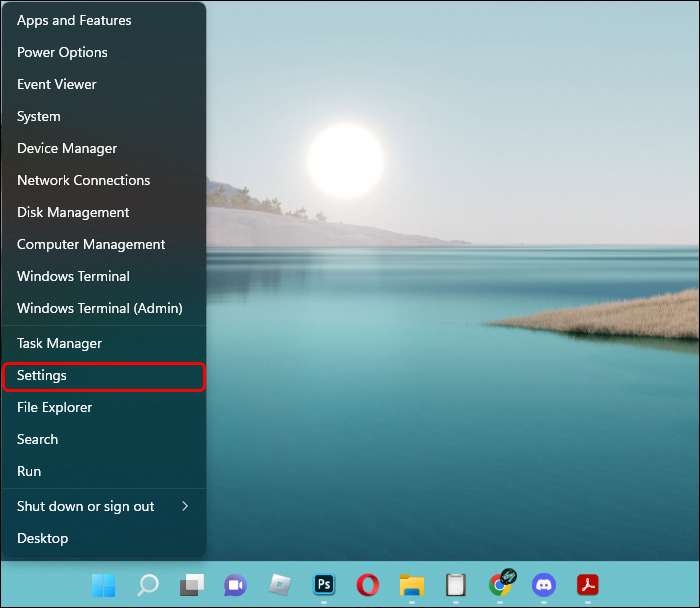
- On your computer, go to Settings.

- Open System and navigate to Storage.

- Under the Local Disk (C:) section, click on Temporary files. If you don’t see the option immediately, click on Show more categories to show the hidden storage categories.
- Select all the files you want to delete and hit the Remove files button.
- Click Continue to complete the deletion.


The deletion process might take longer to complete, depending on the size of the files you’re deleting. If the process is taking longer to complete, you can continue with other tasks on your computer without worrying about interrupting the process. Also, be sure to restart your computer once the process is finished.
Alternatively, you can follow these steps:
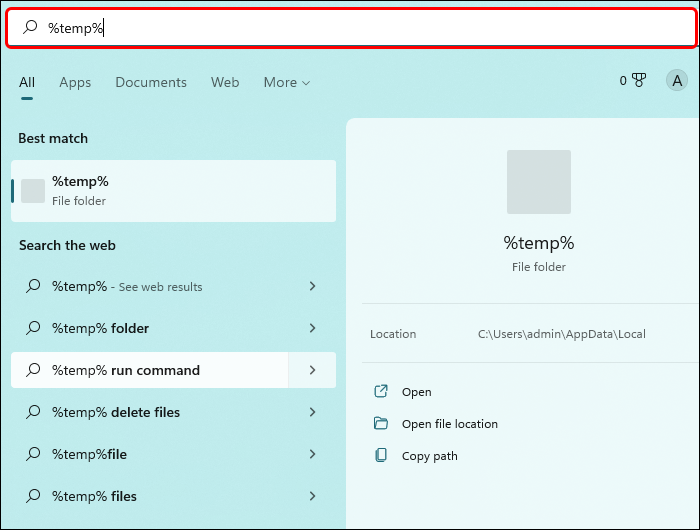
- On your Windows 11 computer, click the search icon and type %temp%.
- Open up the first result that comes up.
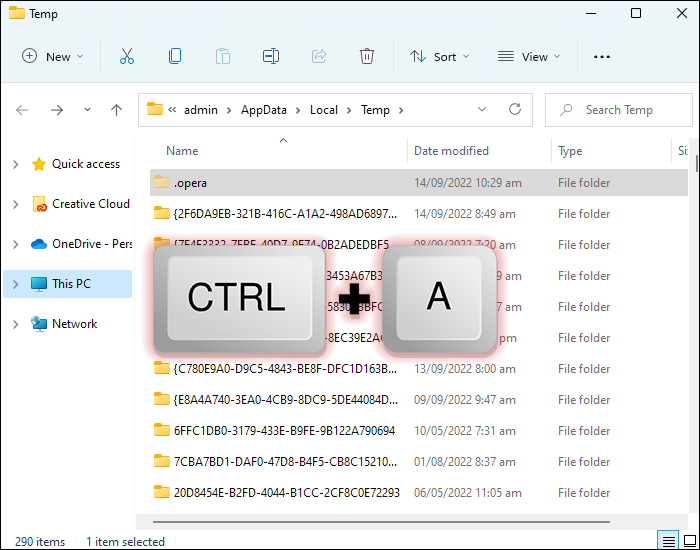
- Select all the files in the Temp folder by pressing the Ctrl + A keys.
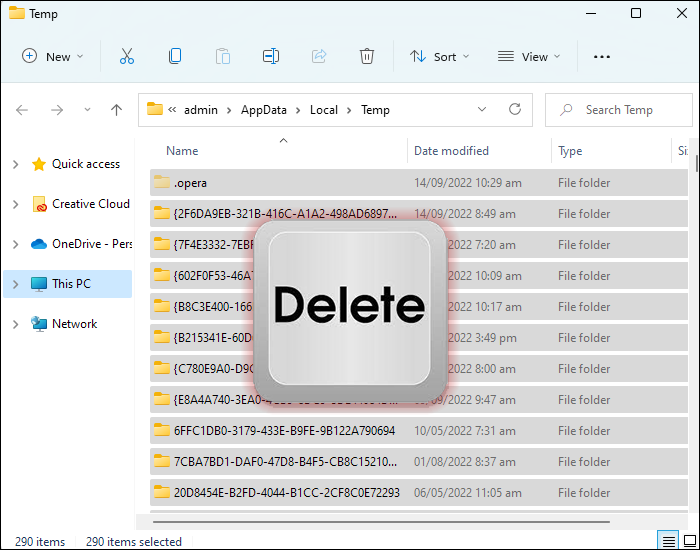
- Press the Delete button.

If you see a pop-up with a message informing you that you can’t delete the file, hit the “Skip” button. Also, note that you can’t recover temporary files once they are deleted. For that reason, it’s always a good idea to have a backup of the files you consider important before proceeding with the action.
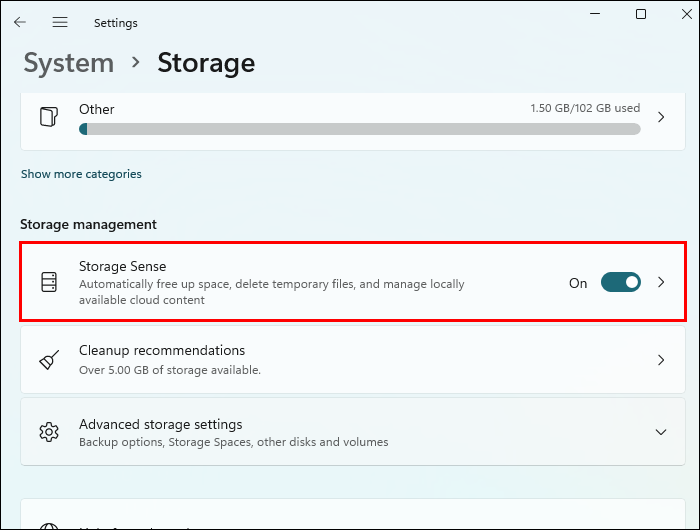
How to Delete Temporary Files on Windows 11 Using Storage Sense
Another method of deleting temporary files from your Windows 11 PC is using the “Storage Sense” feature. Here’s how to go about the process:
- On your computer, open Settings.
- Go to System and then Storage.
- From the options, select Storage Sense.
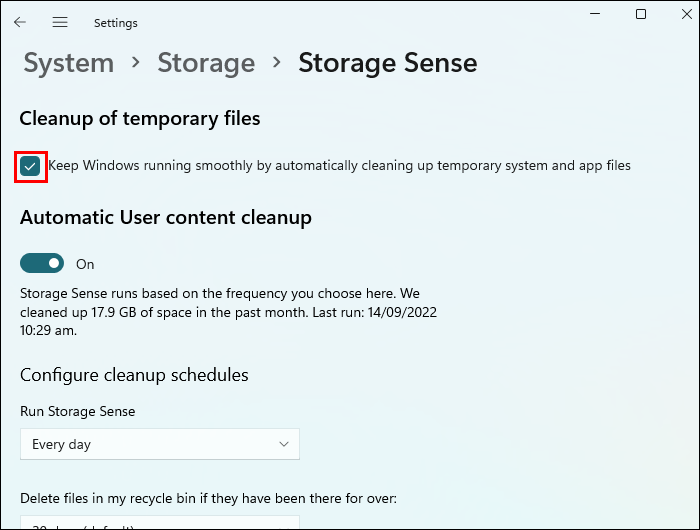
- Check the box under the Cleanup of temporary files section.
- If you want to delete temporary files automatically after a predetermined period, turn on the Automatic user content cleanup option and specify the cleanup frequency.
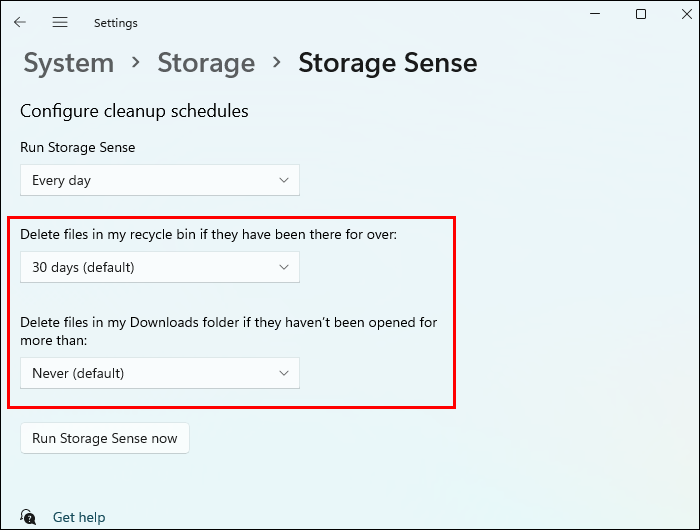
- Specify if you want the content automatically cleaned from the recycle bin or downloads folder. You can also specify deleting files that have already been uploaded to your OneDrive.
- Once you’re done setting your preferred configurations, click on Run Storage Sense now.

How to Delete Temporary Files on a Windows 10 PC
Deleting temporary files on Windows 10 is slightly different from doing it on Windows 11. However, it’s relatively simple. Here’s how to go about it:
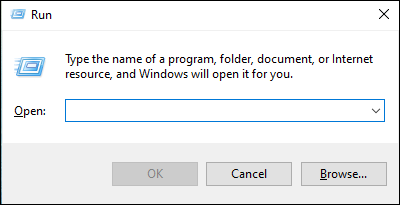
- Press the Windows + R keys to open the Run command.
- From the menu, select Run.
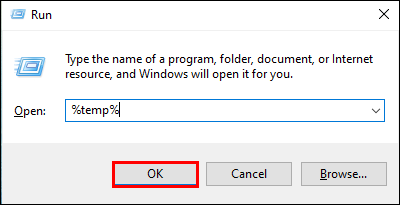
- In the text field, type in %temp% and click OK.
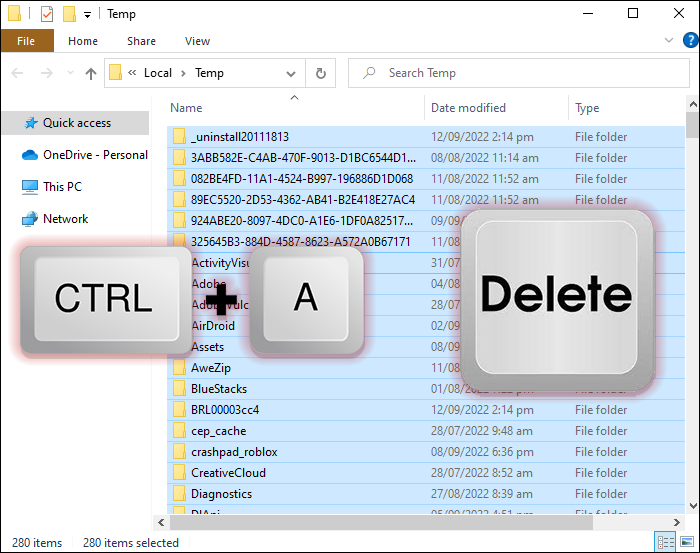
- Select all the temporary files by pressing the Ctrl + A buttons, then hit the Delete button.

How to Delete Temporary Files Using the Temp Command
To delete temporary files using the “temp” command, follow these steps:
- On your Windows 10 PC, search for Run and click on Open.
- In the text field, type in temp.
- Click on the OK button.
- Select all the files in the temp folder and press the Delete button.
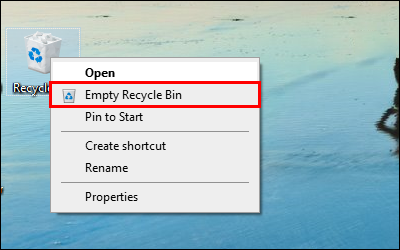
- Empty the trash to ensure the temporary files are deleted permanently.


How to Delete Temporary Files Using Prefetch
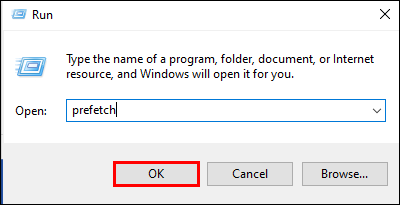
Another way to delete temporary files on a Windows 10 computer is by using the “prefetch” command. Here’s how to go about the process.
- Press the Win + R shortcut to open the Run application. Alternatively, search for Run and select the first command that pops up.
- In the available text field, type prefetch.
- Click the OK button.
- Select all the files in the Prefetch folder and hit the Delete button.
- Go to your computer’s desktop and delete all the files in the Recycle bin.
- Now, all your temporary files have been successfully deleted.


How to Prevent the Temp Folder From Filling Up Quickly
If your Temp folder fills up quickly; it’s likely because of the application files that Microsoft Store utilizes. To fix the issue, you’ll need to reset the Microsoft Store, clear its cache, and troubleshoot Windows Update.
First, let’s go through the process for Windows 10 users.
Here’s how to reset the Microsoft Store:
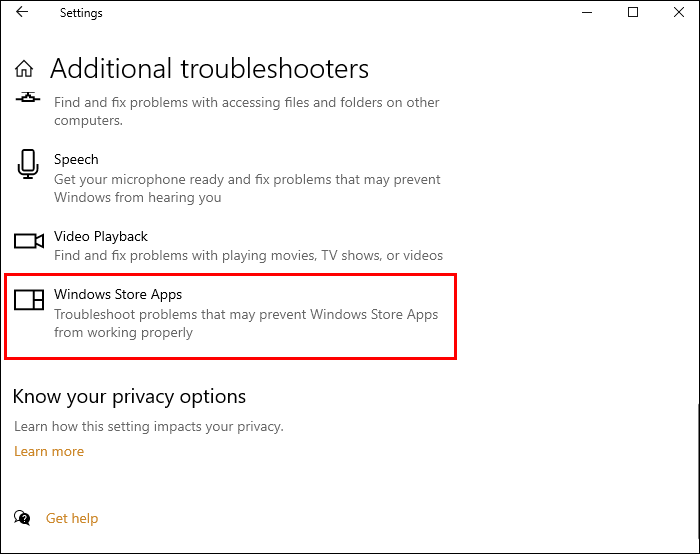
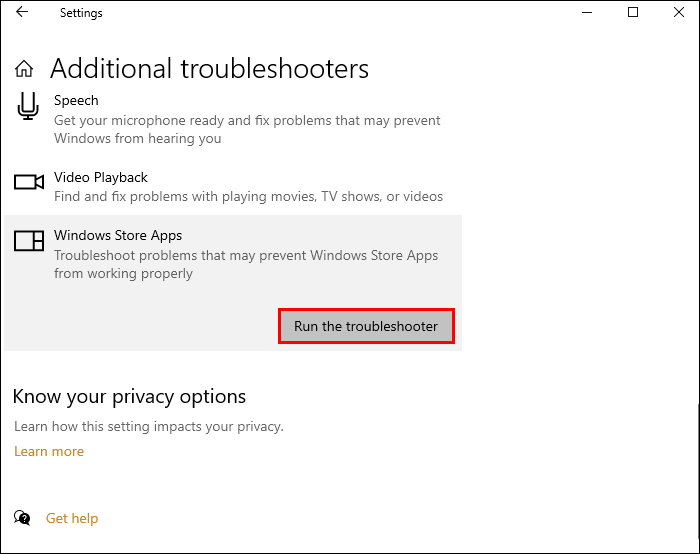
- Go to Settings and open Update & Security.
- Click on Troubleshoot and open Windows Store Apps.
- From the options, choose Run the troubleshooter.

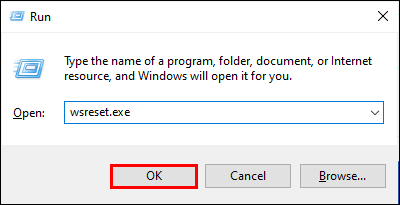
To clear the cache in the Microsoft Store, follow these steps
- Press the Windows + R keys on your computer.
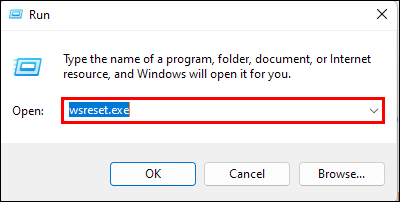
- In the text field, type wsreset.exe and press OK.
- Wait for the command prompt to open, and Microsoft Store will restart automatically.
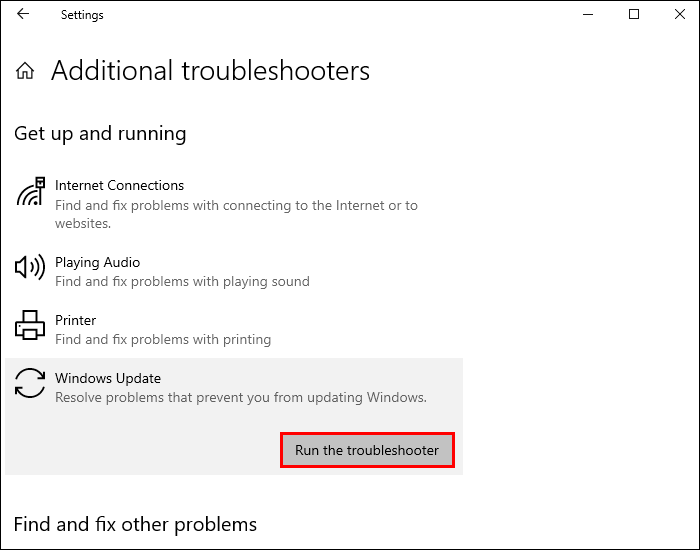
To troubleshoot Windows Update, follow these steps:
- Go to Settings then Update & Security.
- Open the Troubleshoot page and navigate to Windows Update.
- Click on Run the troubleshooter.

Once you’ve done the above steps, restart your PC and observe if the solution works.
For Windows 11 users, follow these steps to prevent your Temp files from filling up quickly.
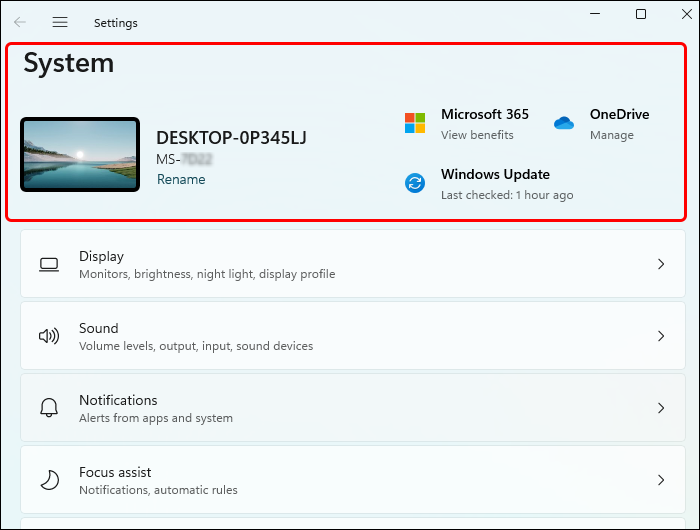
- Open Settings and navigate to System.
- Go to the Troubleshoot page.
- Choose Windows Store Apps and click the Run button.
- Press the Windows + R keys, and type in wsreset.exe in the text field.
- Click OK.
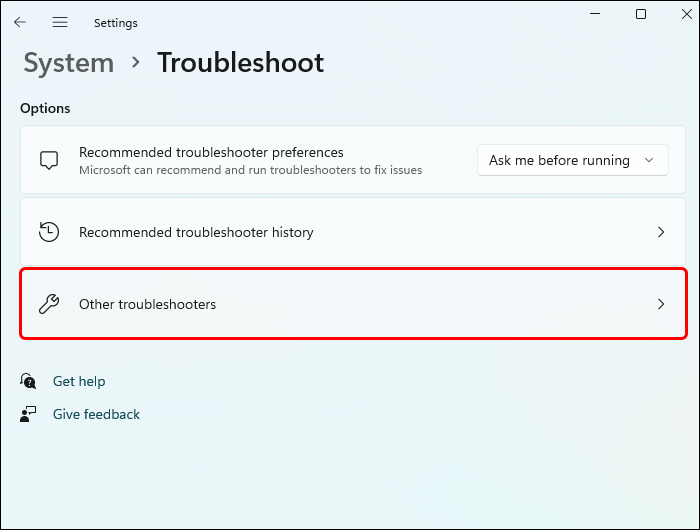
- Now open Settings then System.
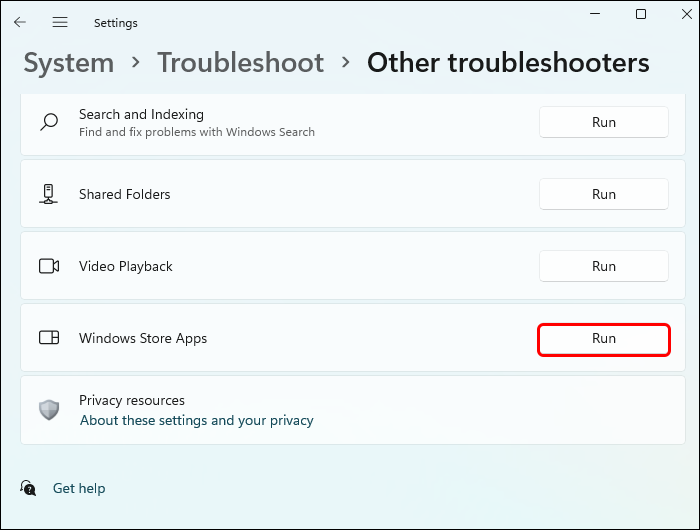
- On the System page, go to Troubleshoot and select Other troubleshooters.
- Select the Run button next to Windows Update.
- Restart your computer and examine it to see that the issue is resolved.


Additional FAQs
Will I lose important data on my computer if I delete temporary files?
You won’t lose any critical data on your computer if you delete temporary files. Temporary files are created to temporarily hold a file’s data during its creation or modification. Once these operations are done, the temporary files don’t contain any important data.
Get Rid of the Clutter
Temporary files can quickly eat into your computer’s space and compromise performance, especially when they accumulate. For that reason, it’s always a good idea to delete them if you notice your computer lagging. Fortunately, the process is relatively easy. Simply delete the contents in the “Temp folder,” and you’re good to go.
Have you wiped out temporary files on your Windows PC yet? If so, how has that impacted your computer’s performance? Please share your experience with us in the comments section below.
Disclaimer: Some pages on this site may include an affiliate link. This does not effect our editorial in any way.


