GeForce Experience is a feature that NVIDIA GTX graphics card users are familiar with. The program allows a user to manage graphics drivers and keep them up-to-date. However, some people prefer not to have the feature, or it may be causing them problems.
If you want to learn how to disable GeForce Experience, look no further. We’ll tell you everything you need to know and answer some questions related to the topic.
How to Disable GeForce Experience
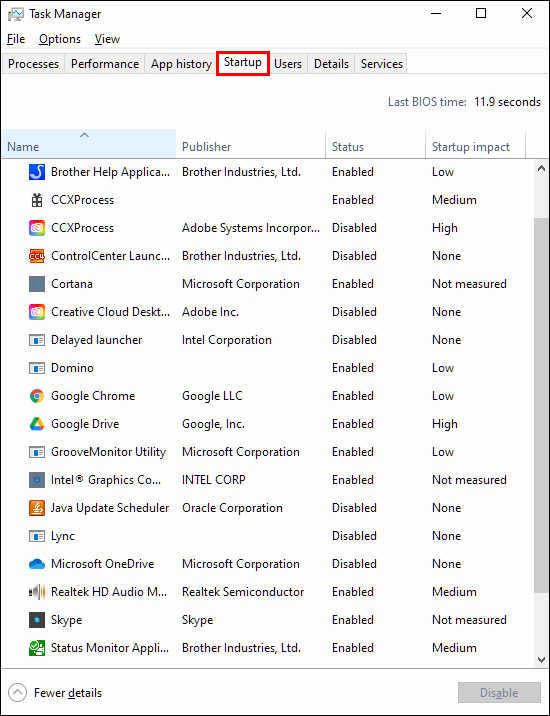
You can use the Task Manager to disable GeForce Experience. The process only requires a few simple clicks:
- Open the Task Manager by right-clicking the Taskbar.

- Go to the “Startup” tab.

- Scroll until you find “NVIDIA GeForce Experience.”
- Click to highlight it and then select “Disable” in the bottom-right corner.
- Restart your computer to allow the change to take effect.

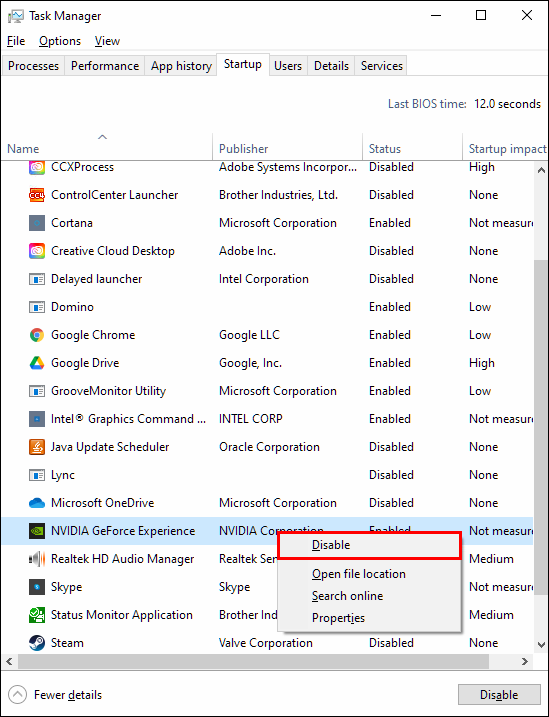
By doing this, you will prevent GeForce Experience from being active when you turn your computer on. For some users, GeForce Experience might crash or malfunction. Disabling it will prevent this from happening.
How to Disable Instant Replay Overlay
This feature allows you to instantly record clips of gameplay and then share them with your friends. Some people don’t want to see the overlay that pops up when saving a clip. If you feel this way, you can disable the overlay while keeping the instant replay feature intact.
- Input Alt-Z to bring up the NVIDIA GeForce Experience window.
- Select “Preferences” at the top-right of the window.
- From the drop-down menu, select “Overlays.”
- Select “Status Indicator.” From there, you can choose the “Off” option.


Now you can play games, save exciting clips, and share them without seeing the overlay pop up. The steps can also be used to adjust the position of the overlay. If you change your mind about disabling it, you can keep it on.
How to Disable NVIDIA Overlay of Share Notification
When you launch any video game and have GeForce Experience running in the background, you might be greeted with a notification. “Press Alt-Z to share your gameplay” has become familiar to many gamers, casual or competitive. If you don’t want to see it anymore, you can prevent it from appearing too.
No need to have to watch it pop up when your game launches anymore. No more clicking to get it out of the way either.
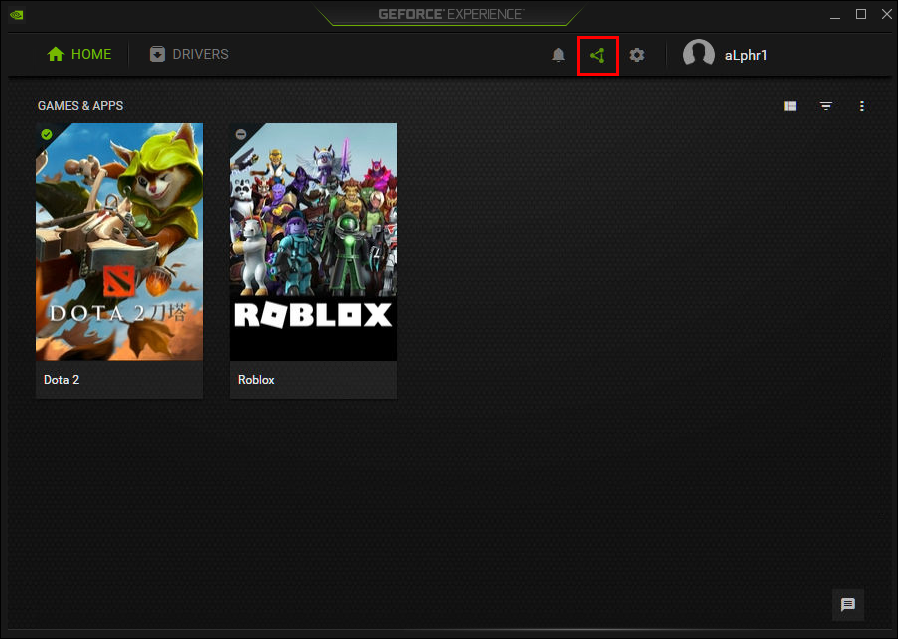
- Open GeForce Experience with Alt-Z or through a shortcut.
- Select the “Share” option, to the left of the gear option at the top right.
- Select “Preferences,” which is also a gear.
- From here, scroll down the menu until you find “Notifications.”
- Select “Off” from “Open/close share overlay.”
Now when you want to play your games, you won’t see the notification over and over again.
How to Disable NVIDIA in Game Overlay
If you want to disable the game overlay completely, you can also do that. Perhaps you plan to use a capture card and OBS to stream to Twitch. No matter your reason, you can stop these functions from working through GeForce Experience.
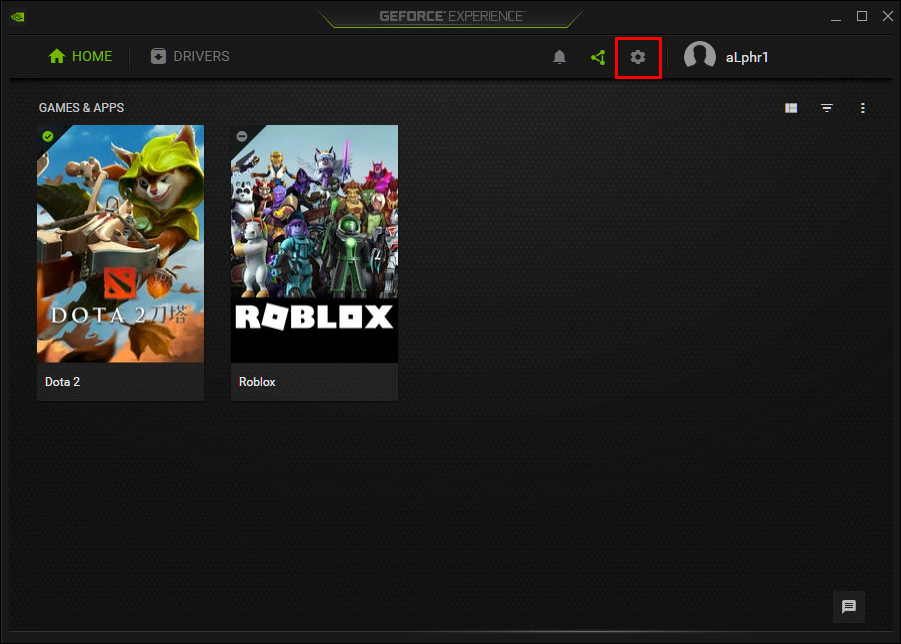
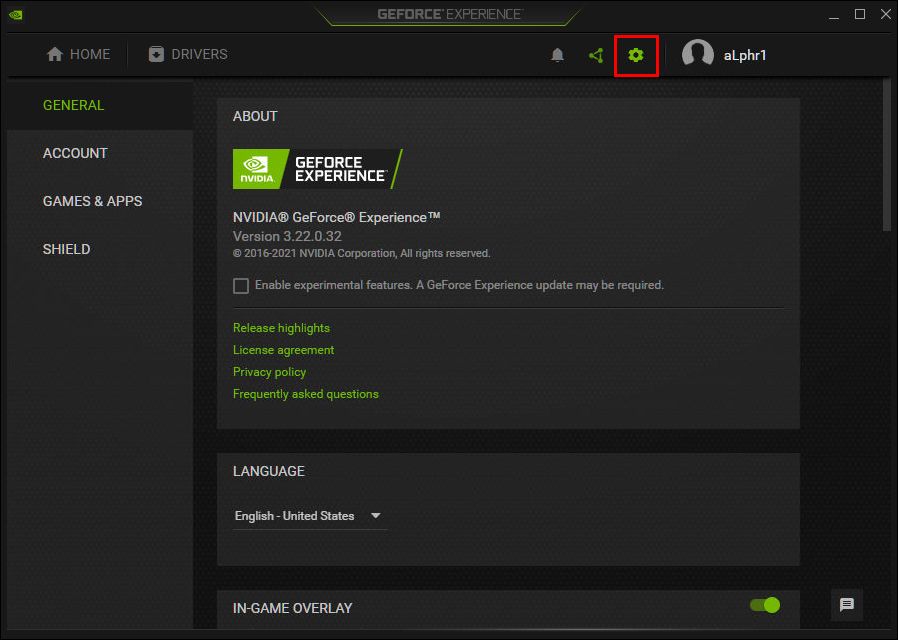
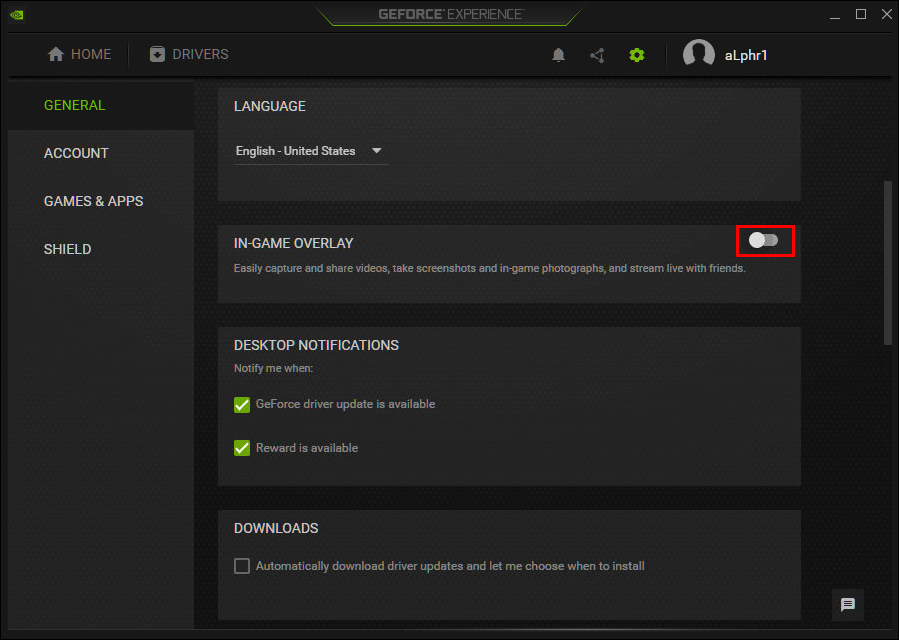
- Launch GeForce Experience.
- Go to “Settings” – the gear icon to the right of the window.
- Move to the “General” tab and locate “In-Game Overlay.”
- The section should be in the lower part of the screen, where you can switch the overlay off with a click.

With these features out of the way, you don’t have to worry about accidentally activating any of the functions. You can focus on gaming and working with other software.
How to Turn Off NVIDIA Overlay
There is another way to turn off the NVIDIA overlay. Some users report framerate drops when it’s active. For gamers requiring all the speed and precision they need, it’s essential to disable it.
This second method achieves the same purpose, though you’ll have to do a bit more work.
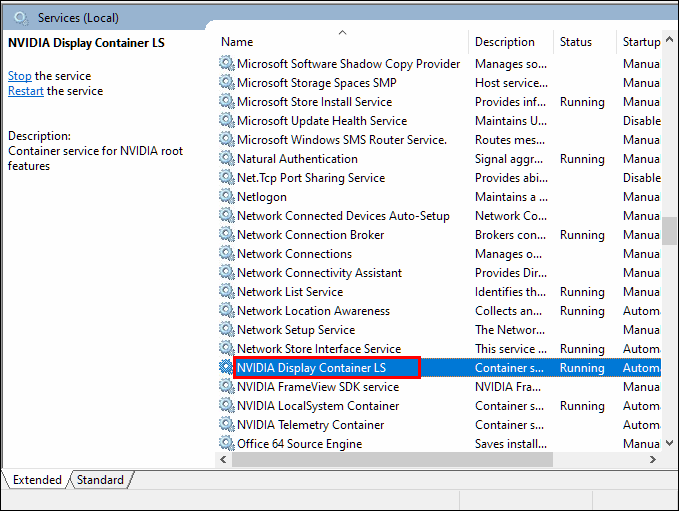
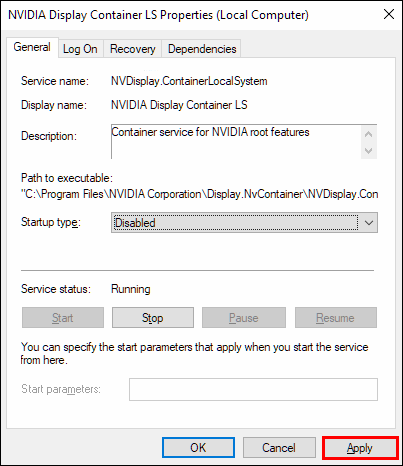
- Click on the “Start” menu and type “services.msc” as the first step.
- When the program is open, search for “NVIDIA Display Container LS.”
- Right-click it and select “Properties.”
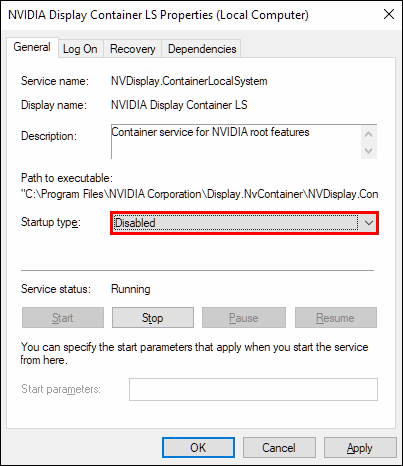
- From “Startup Type,” select “Disabled.”
- Select “Apply” first before clicking the “OK” button.
- Restart your system to allow the changes to take effect.


If the easier method with the Task Manager doesn’t work, now you know an alternative method. Keep it in the back of your mind just in case the simpler way doesn’t disable GeForce Experience. Forget about the performance drops!
How to Uninstall GeForce Experience
Uninstalling GeForce Experience is perfectly fine, as it isn’t your display driver. You don’t have to worry about wiping your screen out and navigating in the dark.
There are a few ways you can go about uninstalling GeForce Experience, so let’s take a look at the most practical ones. It’s great to know more than one method, just in case one fails.
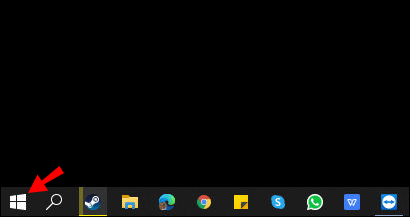
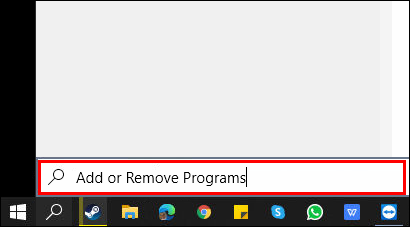
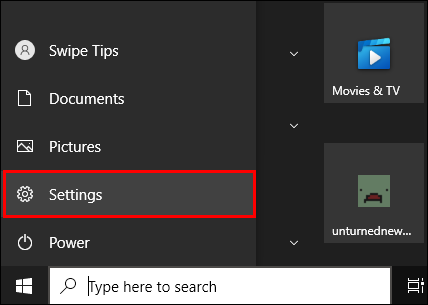
- Open the Start Menu.
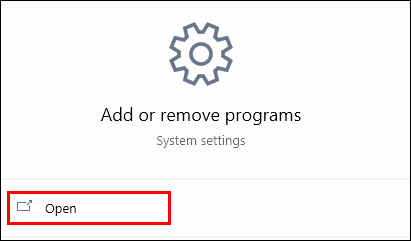
- Type “Add or remove programs” in the search bar.
- Once you find it, click on it to launch the program.
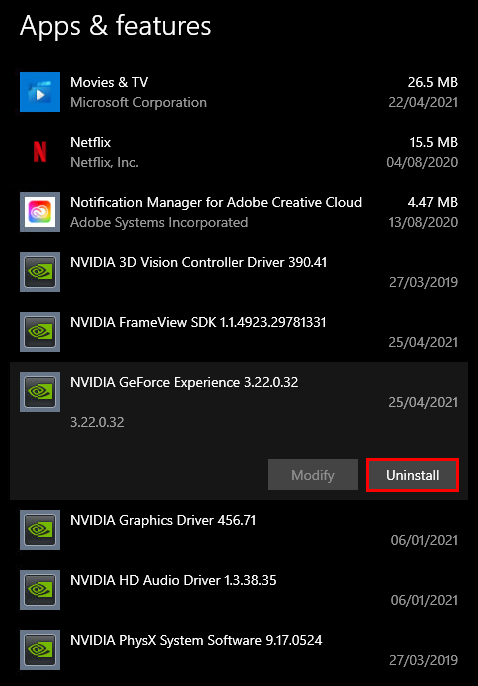
- Scroll down and find “NVIDIA GeForce Experience,” which is often followed by a version number.
- Click on it and select “Uninstall.”
- Follow all the necessary instructions of the uninstall wizard.

Another method also uses the Start menu. However, you’ll be taking a different path. The results are the same, so you can rest assured that this alternative method is safe.
- Select “Settings” from the Start Menu.
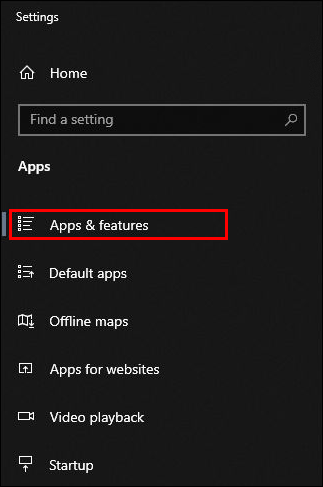
- Select “System” and then “Apps & Features.”
- Find “NVIDIA GeForce Experience” and then select uninstall.
- Follow the uninstall wizard’s instructions where necessary.
If the process fails for some reason, don’t panic. All you need to do is download GeForce Experience again. This occasionally happens but isn’t a serious issue.
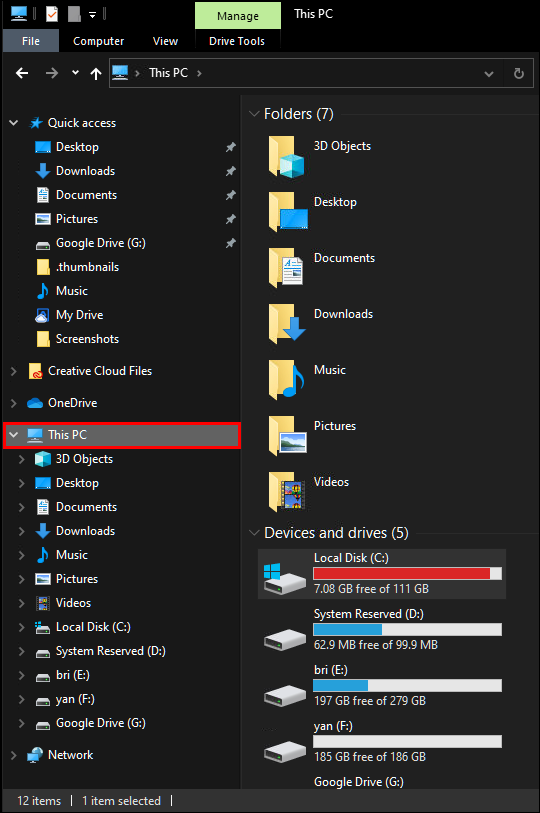
- Go to “My Computer.”
- Find the original location of the GeForce Experience files, which is either in Drive C or Drive D.
- Delete the entire GeForce Experience folder.
- Visit the NVIDIA official website.
- Download the latest version and install it.


This should help solve the problem. The newest version often comes with a proper uninstaller, replacing a potentially faulty one.
How to Disable GeForce Experience Using Alt+Z
Alt-Z is the shortcut for opening the GeForce Experience program. If you don’t have its shortcut nearby, simply input the command to bring up the window. From here, you can disable GeForce Experience as well.
- Input Alt+Z on your keyboard.
- Follow the instructions on any steps you want to take, as mentioned above.
That sounds remarkably simple, right? No need to move around and find the shortcut or original location. Just press two keys and the job’s done!
Additional Questions
How Do I Turn Off GeForce Share?
The instructions outlined above show you how to turn it off. Launch GeForce Experience, go to “General,” and toggle “Share” off. That’s it!
How Do I Cancel GeForce Now?
Unfortunately, there is no way to cancel it. You can switch to the free plan or completely delete your NVIDIA account. The first option is better if you still want to use NVIDIA’s services.
No More Performance Drops
Now that you know how to disable and uninstall NVIDIA GeForce Experience, you can stop those pesky popups from appearing. Gaming should be distraction-free for the ultimate experience. These methods will help you achieve that.
Have you experienced performance drops due to GeForce Experience? If so, did the advice in our article help? Let us know in the comment section below!
Disclaimer: Some pages on this site may include an affiliate link. This does not effect our editorial in any way.