One of the more contentious aspects of Windows 11 has been the inclusion of TPM 2.0 in the system requirements.
Overall, Windows 11’s minimum system requirements haven’t changed much from Windows 10. However, Microsoft has decided to stop supporting several CPUs and only allow PCs with TPM 2.0 (Trusted Platform Module version 2) to run Windows 11.
Fortunately, TPM 2.0 compatibility should be available on practically every piece of hardware released after 2015, and activating it isn’t difficult. In this article, we’ll walk you through the necessary steps to enable TMP 2.0 on your PC.
How to Enable TMP 2.0 in Windows 10
You must have a PC with TPM 2.0 to install Windows 11. However, if you can’t find your PC or motherboard guide, you may have to go elsewhere. A simple tool called PC Health Check supplied by Microsoft can help determine if your PC has TMP 2.0.

After downloading the app, click the “Check now!” button in the “Introducing Windows 11” part of the PC Health Check.
Your computer’s ability to run Windows 11 will be determined when the software completes its tests on your device. If all goes well, you will be notified that your PC has passed. Select the “See all results” button to see more information about your computer’s performance. An essential reference to TPM 2.0, which tells you if it is enabled on your device, is included in this list.
When it comes to TPM 2.0, it can be a little perplexing since even while your computer has the functionality, it may not be activated. To assist you in identifying if this is the case, Microsoft has offered advice on how to do so. It is possible to accomplish this by following these steps:
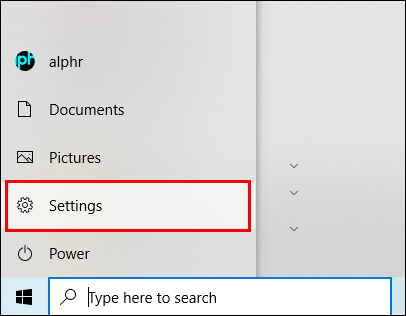
- Go to “Settings” in Windows 10.

- Click on “Update & Security.”
- Select “Windows Security.”

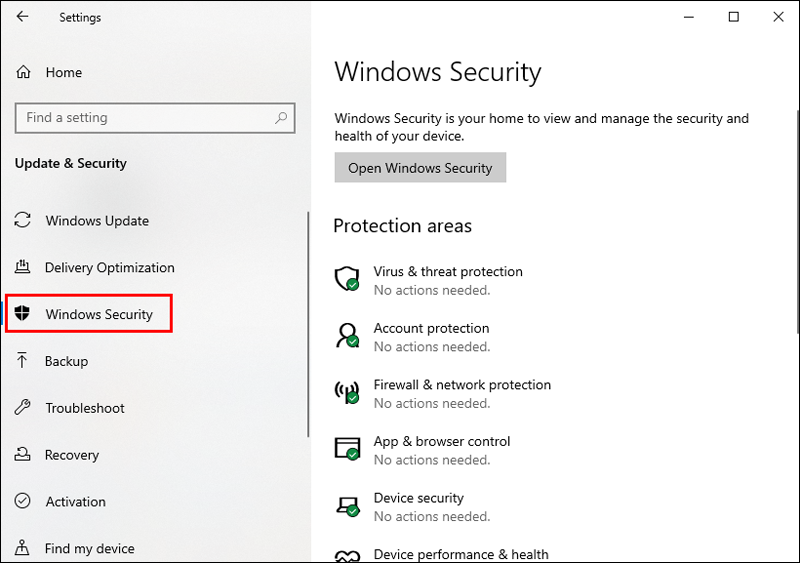
Ensure the “Specification version” is 2.0 in the “Security Processor” section. Your PC may be incompatible with Windows 11 if this number is different from what you see above. However, if you don’t have this function activated, it may just be a matter of enabling it.
The Microsoft Management Console may also be used to check TPM 2.0 availability. Here’s how:
- Open the Run window by holding down the Windows key and R simultaneously.
- Enter the command “tpm.msc” in the text field.

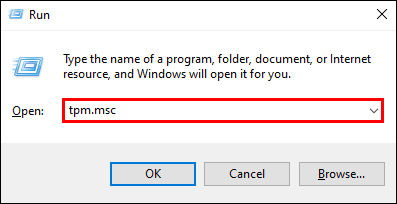
TPM isn’t going to work properly if the “Specification Version” in the “TPM Manufacturer Information” section is less than 2.0. Also, a compatible TPM may be deactivated on your PC if the warning “Compatible TPM cannot be detected” pops up.

How to Enable TPM 2.0 in BIOS
If you are lucky enough to have a suitable TPM installed but merely deactivated, the next step is to enable it. Accessing your computer’s UEFI BIOS is required to do these tasks, although the specific methods and layouts vary from one manufacturer to another.
The following steps are the basic idea of activating the TPM 2.0 in BIOS. However, since there are many different versions, we’ll look into BIOS Asus, MSI, and Aorus in more detail later. Also, keep in mind that the steps may vary depending on whether you have an Intel or AMD motherboard.
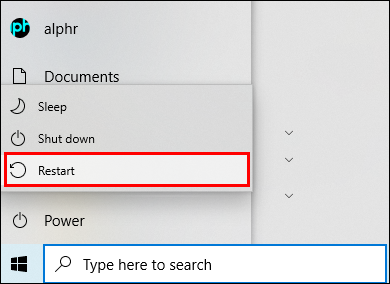
- Reboot your computer.
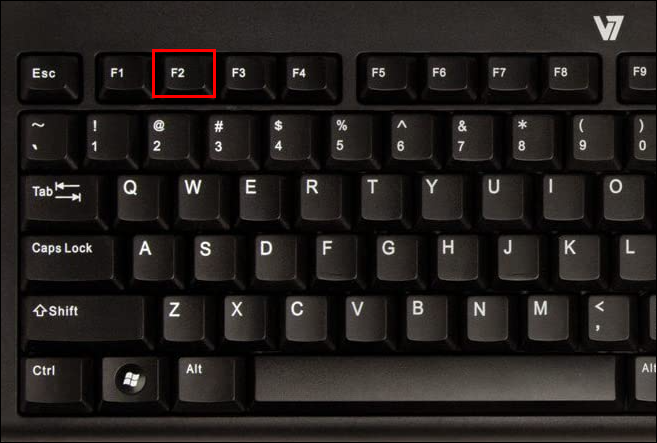
- Press F2 to enter the BIOS setup menu while your computer is booting.
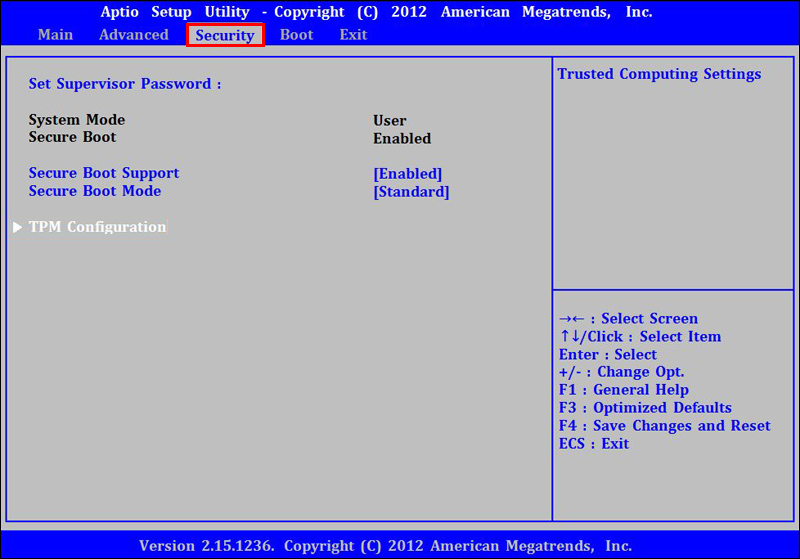
- Select the “Security” tab using the arrow keys.
- Search for TPM, Intel Platform Trust Technology (IPTT), or AMD CPU fTPM in the database.
- Set “Enabled” to “Yes.”
- Press F10 to exit BIOS and save your changes.


How to Enable TPM 2.0 in BIOS on an Asus
Here’s how to activate TMP 2.0 in Bios Asus on Intel and AMD motherboards.
Intel Motherboards
- Keep hitting the Del key as the computer boots up.
- Go to the “Advanced” options.
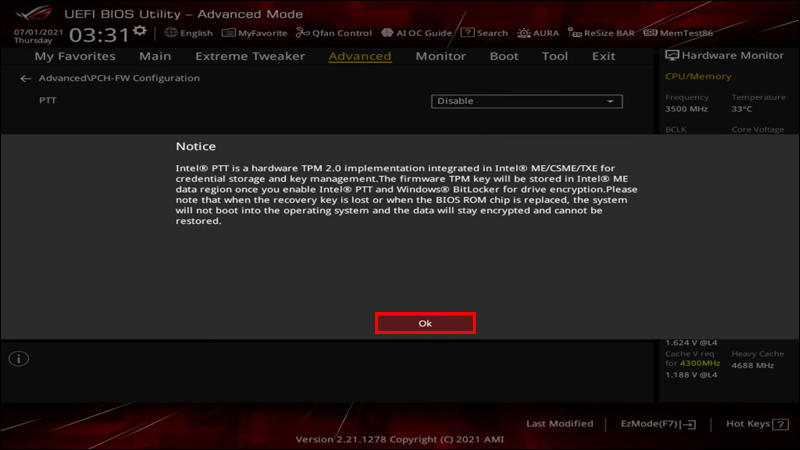
- Select “PCH-FW Configuration.”
- Find “PTT” and choose “Enable.”
- When the warning window displays, click “OK.”
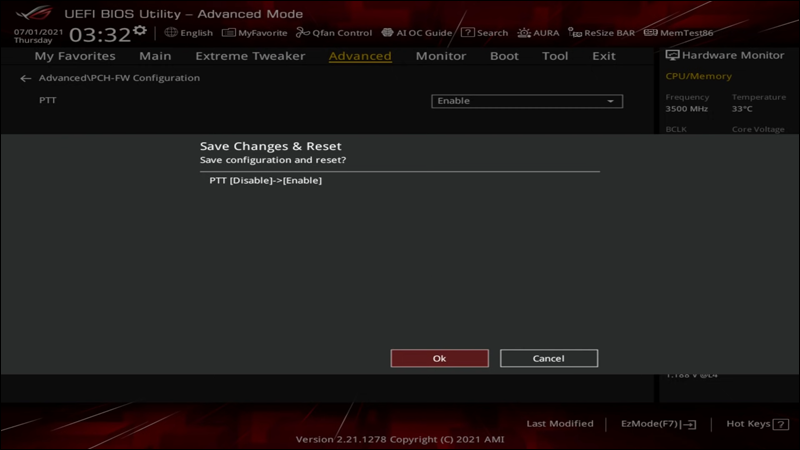
- To save the changes, press F10.
- Restart your computer.


AMD Motherboards
- While your computer is booting, keep hitting the Del key.
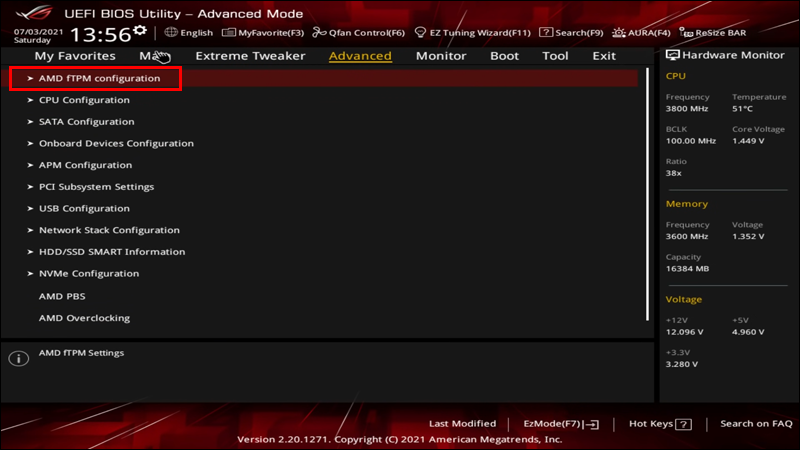
- Go to the “Advanced” tab in UEFI once you’re there.
- Navigate to the “AMD fTPM” configuration section.
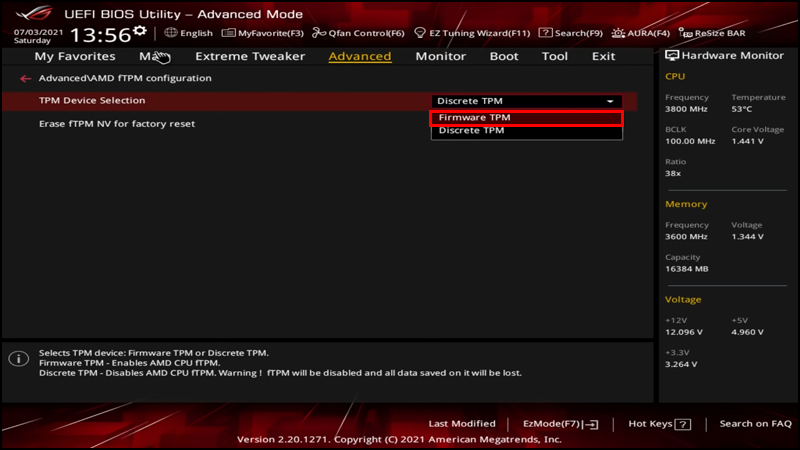
- Select “Firmware TPM” from the TPM Device Selection drop-down menu.
- To save your modifications, use the F10 key and restart your computer.

How to Enable TPM 2.0 in BIOS on MSI
Here you can find the steps to enable TPM 2.0 on both Intel and AMD motherboards.
AMD Motherboards
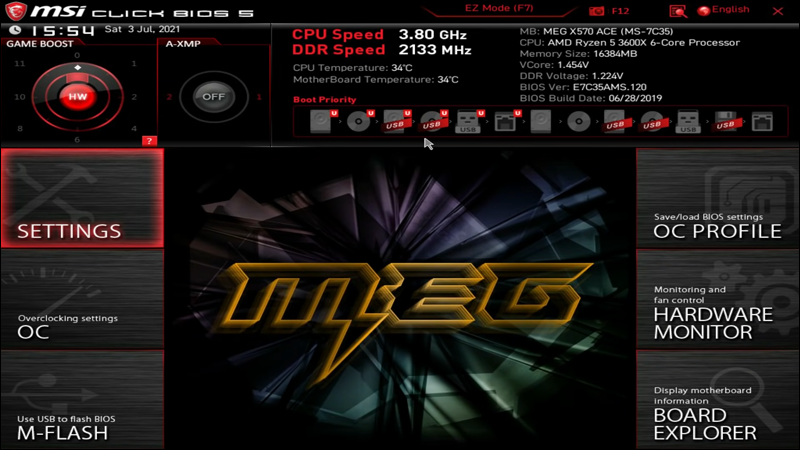
- Press the Del or F2 key repeatedly while the PC is booting to access the BIOS.
- Enter “Advanced mode” by using the F7 button.
- Select “Settings” from the drop-down menu.
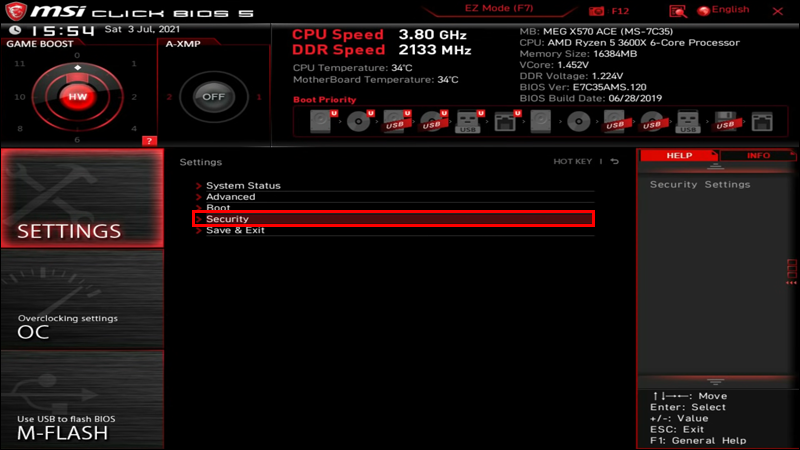
- Go to “Security.”
- To enable security device support, select “Security Device Support.”
- Switch AMD fTPM to [AMD fTPM] in the “AMD fTPM Switch” menu.


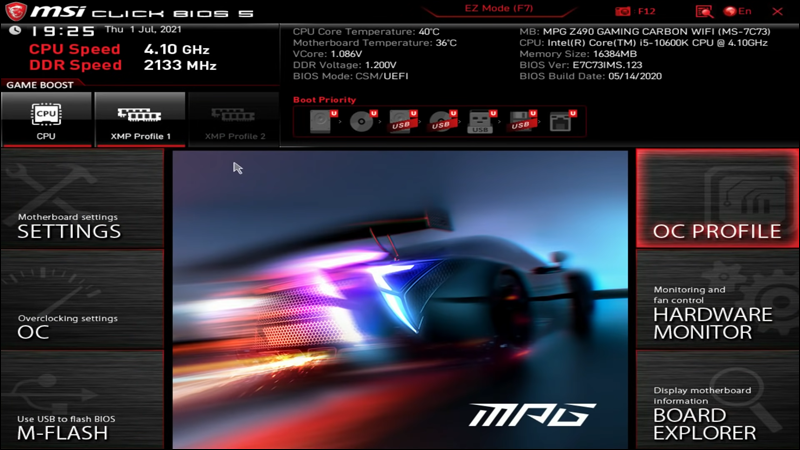
Intel Motherboards
- Press the Del or F2 key when the computer boots up to access the BIOS.
- Enter “Advanced mode” by using the F7 key.
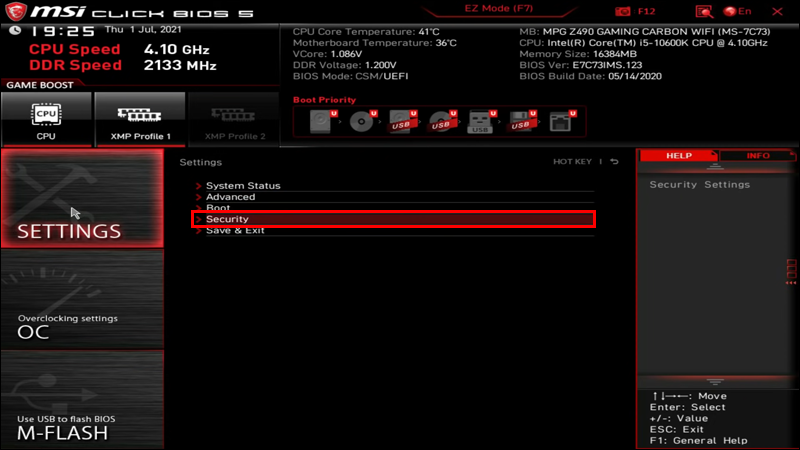
- Make your way to the “Settings” section.
- Choose “Security.”
- Access the “Trusted Computing” option by clicking it.
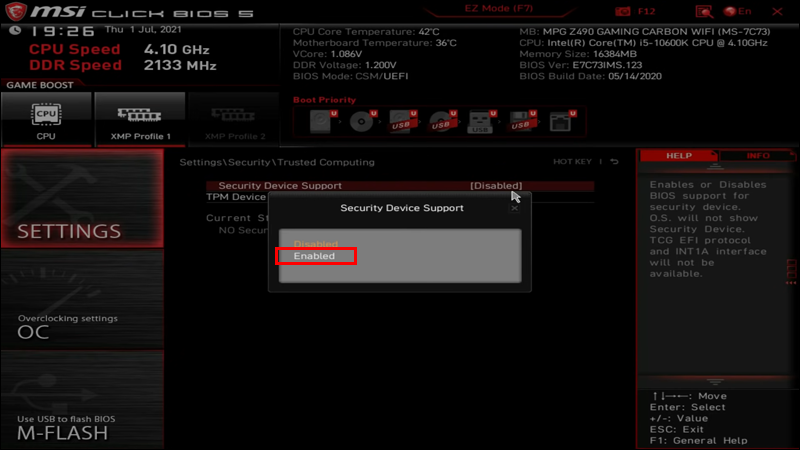
- Select the “Security Device Support” option and change it to “Enable.”
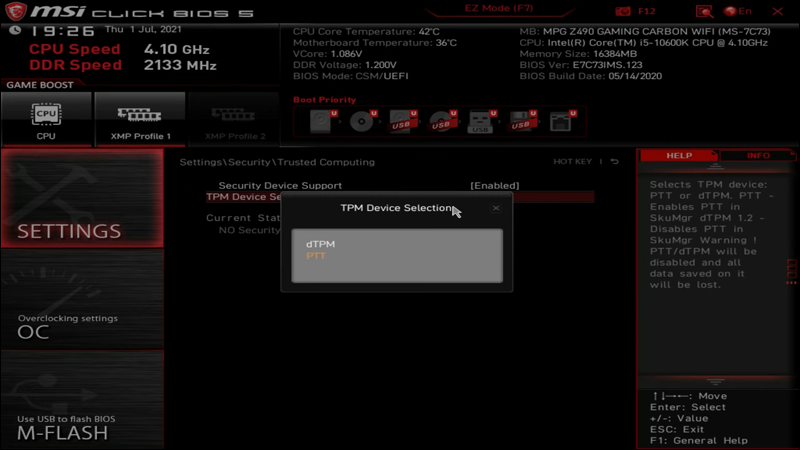
- Press “Security PTT Enable” in the “TPM Device selection” field.


How to Enable TPM 2.0 in BIOS Aorus?
BIOS Aorus is also called Gigabyte Bios. The steps to activate TPM 2.0 on AMD and Intel motherboards is similar to the steps above.
AMD Motherboards
- Turn on the PC or restart it if it’s already running.
- When the boot screen shows, press and hold the Delete key.
- Enter the “Advanced Mode” to enable TPM by pressing the F2 key.
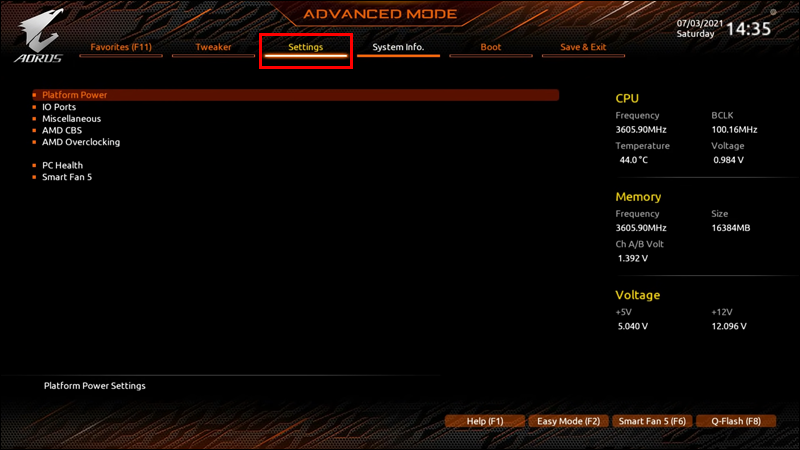
- Go to the “Settings” section.
- Select “Miscellaneous.”
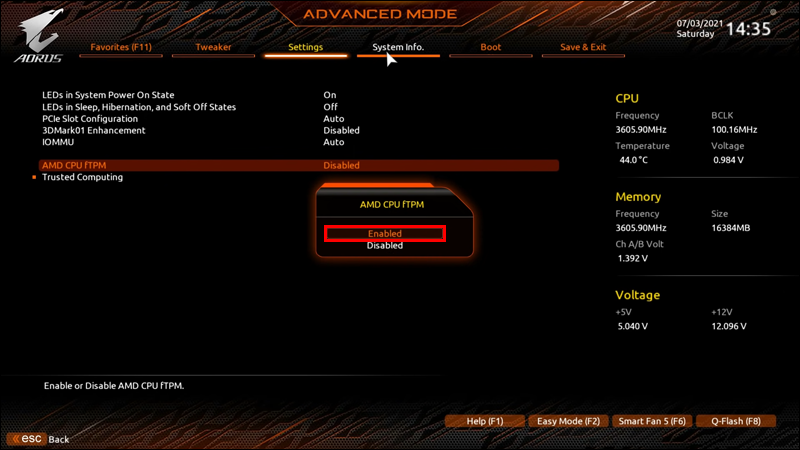
- Pick “AMD CPU fTPM” from the list of options.
- Choose “Enabled” to turn on TPM.
- Select “Save & Exit,” and then restart your computer to return to Windows.


Intel Motherboards
- Restart the computer.
- Hold down the Delete key until you hear a beep.
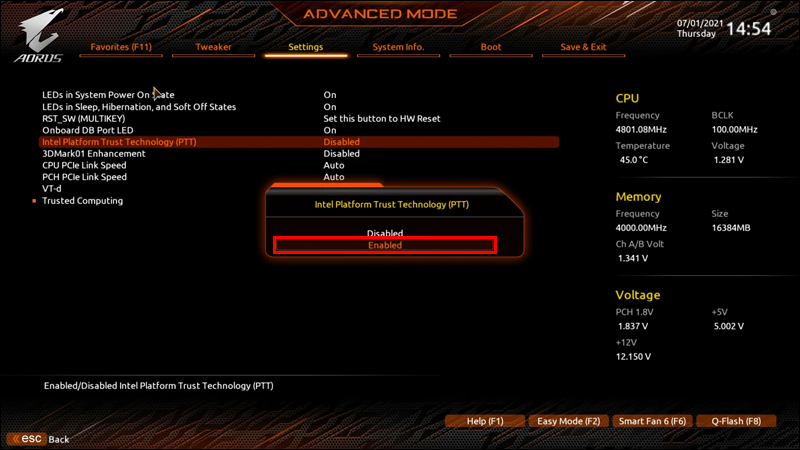
- After the BIOS has loaded, press “F2” to access the “Advanced” settings.
- Go to the PTT menu and choose “Enabled.”
- Exit and save your work.
- Return to the BIOS menu.


Upgrade to Windows 11 Easily
Since not all devices have the TPM capability, this has created a lot of debate amongst users, especially those who own older computers. However, if your device is compatible, you shouldn’t experience any issues when upgrading. It’s important to remember that various CPU manufacturers use different terms for TPM. So, double-check if you think that your device doesn’t have TPM 2.0.
Additionally, Windows 11 may be installed without the requisite TPM, but your computer may be vulnerable to malware assaults if you do so. It is best to stick to the official guidelines and software to avoid bigger issues in the future.
What do you think about the Windows 11 requirements? Do you believe that the TPM 2.0 is the right choice? Let us know in the comment section below!
Disclaimer: Some pages on this site may include an affiliate link. This does not effect our editorial in any way.


