Hibernate mode preserves battery life and enables users to save opened apps and documents. The feature is conveniently placed on the Start menu with older Windows operating systems. However, it’s conspicuously absent from the Windows 11 Start menu. Fortunately, activating Hibernate mode on Windows 11 computers is relatively straightforward.
Keep reading to learn more.
How to Enable Hibernate Mode in Windows 11
You can use the Command Prompt to activate the feature. The following steps will allow you to do so:
- Click on “Start” from your desktop.
- Type “Command Prompt” in the search bar, and select the top result.

- Choose “Run as administrator” from the list of options.
- Type “powercfg /availablesleepstates” in the Command Prompt window to check your computer’s hibernation status and tap “Enter.”
- Find the “Hibernate” option and see whether it’s deactivated.
- To activate the Hibernate feature, type “powercfg /hibernate on” in the Command Prompt window and hit “Enter.”


When you complete this task, your PC should go into Hibernate mode.
Note that this feature may not work on all system configurations.
If you’re struggling to activate Hibernate mode on your computer, it might not be available. The problem usually stems from your Windows 11 settings. For example, an outdated graphics card driver usually isn’t compatible with this power state. When you update the driver and install the latest version, you should have no difficulty enabling Hibernate mode on your Windows 11 PC.
Another issue users sometimes face is that their system supports hibernation, but the mode is disabled on the UEFI (Unified Extensible Firmware Interface). In this case, you’ll have to access your motherboard and reprogram the firmware following the manufacturer’s instructions.
Also, make sure that the hybrid sleep feature is disabled since it may prevent you from activating hibernation. If your hardware is the problem and can’t support Hibernate mode, consider upgrading to hardware compatible with more advanced Windows OS features.
How to Add Hibernate Mode to Power Menu in Windows 11
For quick access to this feature, you can add it to the windows Power menu. Follow the steps below to do so:
- Press “Start” from your desktop.
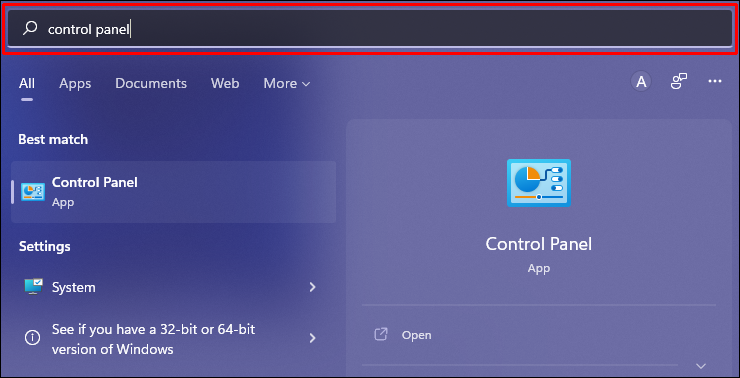
- Type “Control Panel” in the search box and tap the top result to launch the program.
- Select “Hardware and Sound” from the list of options and choose “Power Options.”
- Navigate to the left pane and click on “Choose what closing the lid does.” (The option sometimes appears as “Choose what the power buttons do” on desktop computers.)
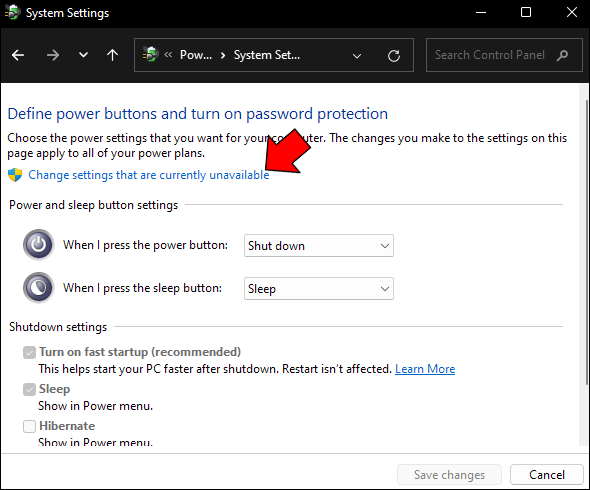
- Tap “Change settings that are currently unavailable” to adjust the Shutdown settings.
- Go to the Shutdown settings at the bottom of the window and select “Hibernate” from the list of options.
- Hit “Save changes.”


After you record these changes, the “Hibernate” option will appear when you pull up the Power menu.
How to Customize Hibernate Mode in Windows 11
There are two ways to customize the hibernate feature in Windows 11. The first involves activating Hibernate mode when you tap the power button on your computer or close your laptop lid. The second method allows the PC or laptop to activate the feature after a period of inactivity automatically.
Here’s how to allow your Windows 11 device to hibernate after you press the power button or close the lid:
- Click on “Start” and type “Control Panel” in the search menu.
- Press the top result and select the “Hardware and Sound” option.
- Tap “Power Options.”
- Head to the left-side pane and select “Choose what closing the lid does.”
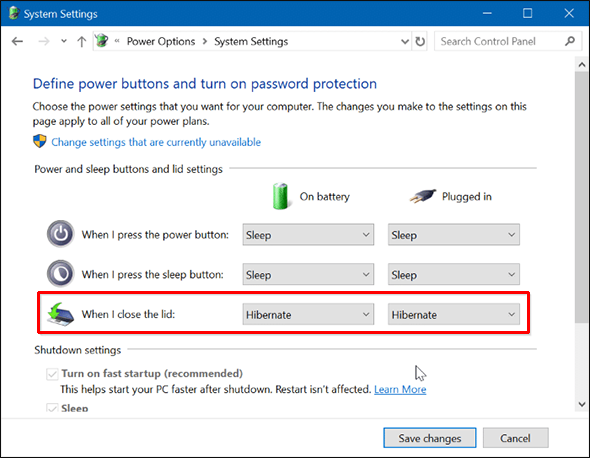
- Navigate to “Power and sleep buttons and lid settings,” find the “When I press the power button” setting.
- Select “Hibernate” from the drop-down menu.
- To activate Hibernate mode through the sleep button, go to the “When I press the sleep button” section and use it to “Hibernate.”
- Head to the “When I close the lid” section and tap “Hibernate” to activate hibernation by closing your laptop lid.


If your Windows 11 PC is powered on, it can automatically hibernate to prolong its battery life. Follow the steps below to enable this feature:
- Click on “Start,” search the “Control Panel” using the search box, and select the top result to launch the app.
- Choose “Hardware and Sound” from the list of options.
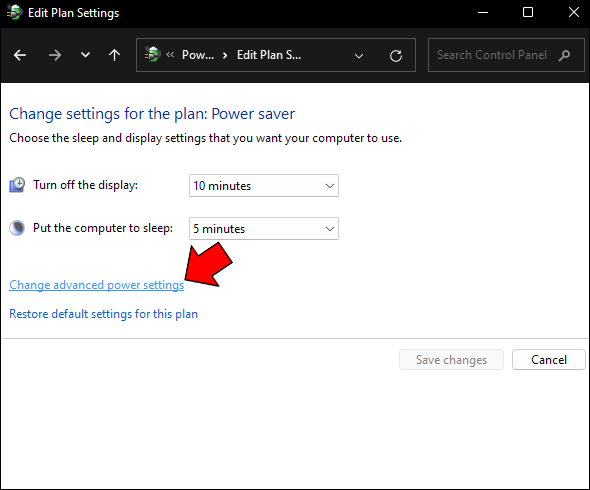
- Press the “Power Options” section and click on “Change plan settings.”
- Select “Change advanced power settings.”
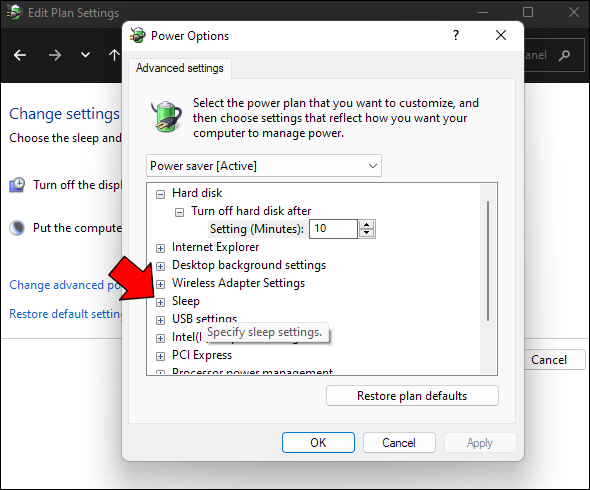
- Tap the “Sleep” settings to expand them.
- Press “Hibernate after” to expand the settings.
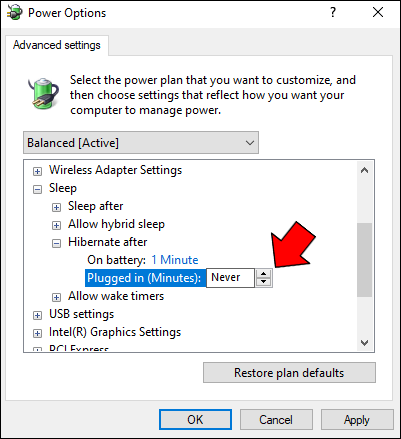
- Change the “On battery” option to determine when your device will enable hibernation when it’s running on battery.
- Modify the “Plugged in” section to determine when your device will go into hibernation when plugged into a power source.
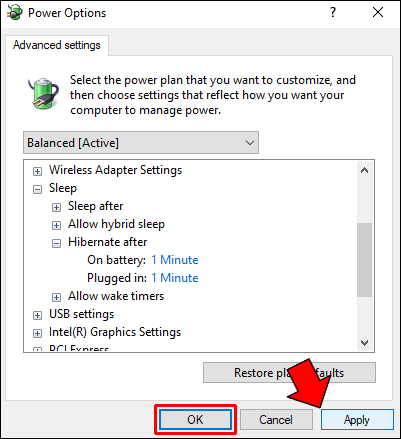
- Press “Apply” and click on the “OK” button.


After the selected time elapses, your computer or laptop will automatically activate Hibernate mode to preserve battery life.
Gain Quick Access to Hibernation in Windows 11
Although Windows 11 was designed to offer a more consistent performance than its predecessors, it’s not the most user-friendly operating system. Several features are challenging to find, and the hibernation feature is missing from the Start menu.
However, you can bypass this issue and enable Hibernate mode using the Command Prompt. You can also add the option to the Power menu or activate it by pressing the power button on your computer. Alternatively, laptop users can close the lid of their device to enable the feature and prevent unnecessary battery consumption. Have you used Hibernate mode on your Windows 11 device? If so, did you activate it on your computer or laptop? Let us know in the comments section below.
Disclaimer: Some pages on this site may include an affiliate link. This does not effect our editorial in any way.


